Table of Contents
Advertisement
Available languages
Available languages
Advertisement
Table of Contents

Related Manuals for JUKI DU-1181


Summary of Contents for JUKI DU-1181
-
Page 1: Instruction Manual
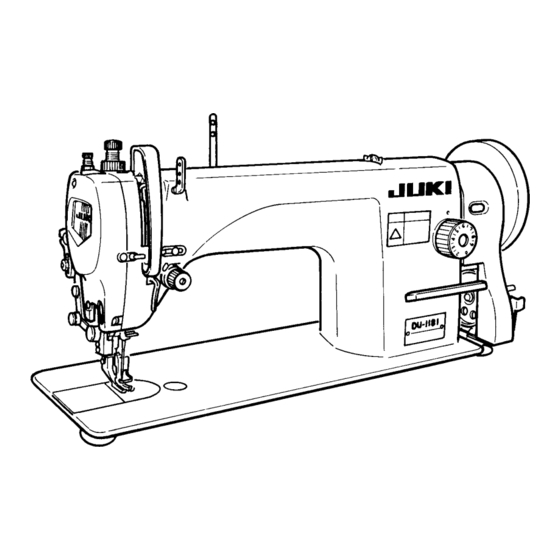
DU-1181 INSTRUCTION MANUAL NOTE : Read safety instructions carefully and understand them before using. Retain this Instruction Manual for future reference. 注意 : 為了安全地使用,請您在使用之前一定閱讀本使用說明書。 另外,請您注意保管本使用說明書,以便隨時查閱。 No.01 40021786... -
Page 7: Important Safety Instructions
17. The machine is only allowed to be used for the purpose intended. Other used are not allowed. 18. Remodel or modify the machine in accordance with the safety rules/standards while taking all the effective safety measures. JUKI assumes no responsibility for damage caused by remodeling or modification of the machine. -
Page 8: For Safe Operation
FOR SAFE OPERATION 1. To avoid electrical shock hazards, neither open the cover of the electrical box for the motor nor touch the components mounted inside the electrical box. 1. To avoid personal injury, never operate the machine with any of the belt cover, finger guard or safety devices removed. - Page 9 重要安全事項 此縫紉機在有的國家(設置場所)由於該國的安全規定而被禁止使用。 同時,技術服務也同樣被禁止。 1. 使用此縫紉機時,必須遵守包括如下項目的基本安全措施。 2. 使用此縫紉機之前,請閱讀本使用說明書在內的所有指示文件。 同時應將此使用說明書妥善保管,以便能夠隨時查閱。 3. 此縫紉機應與貴國的有關安全規定一起使用。 4. 使用此縫紉機和縫紉機動作中,所有的安全裝置應安裝到規定的位置。 沒有安裝規定的安全裝置的縫紉機禁止使用。 5. 此縫紉機應由接受過培訓的操作人員來操作。 6. 使用縫紉機時,建議戴安全防護眼鏡。 7. 發生下列情況時,應立即關掉電源開關,或拔下電源線插頭。 7-1 機針、彎針、分離器等穿線和更換旋梭時。 7-2 更換機針、壓腳、針板、彎針、分離器、送布牙、護針器、支架、布導向器等時。 7-3 修理時。 7-4 工作場所無人了或離開工作場所時。 7-5 使用離合馬達時,請等待馬達完全停止之後再進行。 8. 縫紉機以及附屬裝置使用的機油、潤滑脂等液體流入眼裡或沾到皮膚上時,或被誤飲時,應 立即清洗有關部份並去醫院治療。 9. 禁止用手觸摸打開了縫紉機開關通電的零件或裝置。 10. 有關縫紉機的修理、改造、調整應由受過專門訓練的技術人員或專家來進行。 11. 一般的維修保養應由受過訓練的人員來進行。 12. 有關縫紉機的電氣方面的修理、維修應由有資格的電氣技術人員或專家的監督和指導下進行。 13.
- Page 10 運轉縫紉機前的注意事項 為了防止發生觸電事故,請不要在打開電源的狀態下,打開電氣箱蓋以 及觸摸電氣箱內 的零件。 危險 為了防止人身事故的發生,請不要在卸下皮帶防護罩、手指防護器等安全裝置的狀態下運 轉縫紉機。 注意 為了防止被卷入機器的人身事故,縫紉機運轉中請不要將手指、頭髮、衣服靠近皮帶輪、 V形皮帶、馬達,也不要把東西放到機器上面。 為了防止人身事故的發生,打開電源時以及縫紉機運轉中,請不要把手指放到機針的附 近。 為了防止人身事故的發生,縫紉機運轉中請不要把手指放到挑線桿外罩內。 縫紉機操作中,旋梭高速地旋轉。為了防止手受到傷害,運轉中請絕對不要把手靠近旋 梭。 為了防止人身事故的發生,放倒縫紉機或返回原來位置時,要注意不要夾住手。 為了防止突然的起動造成人身事故,放倒縫紉機時,或卸皮帶罩和V形皮帶時,請一定關 掉電源。 使用伺服馬達時,縫紉機停止馬達無聲音。為了防止意外的起動造成人身事故,請注意不 要忘記關電源。 為了防止觸電事故,卸下電源地線的狀態,請不要運轉縫紉機。 為了防止觸電和損壞電氣零件,拔電源的插頭時,請先關掉機器電源開。 放倒縫紉機時,請一定確認機台上的機頭支撐桿是否安裝著。 運轉縫紉機前的注意事項 注意 為了防止機械的錯誤動作或損傷,請確認如下項目。 • 最初使用縫紉機之前,請把機器打掃干淨。 • 清除運送途中積存的灰塵,並加油。 • 請確認電壓設定是否正確。 • 請確認電源插頭是否正確連接。 • 電壓規格不同時,請絕對不要使用。 • 縫紉機的轉動方向是,站在飛輪側看為逆時針方向。請注意不要讓縫紉機反向轉轉。 • 最初的一個月裡應降低縫製速度,把轉速控制到1,800r.p.m.以下使用。...
-
Page 12: Table Of Contents
CONTENTS 1. SPECIFICATIONS ......................1 2. INSTALLATION ......................2 3. INSTALLING THE BELT COVER AND THE BOBBIN WINDER ........2 4. INSTALLING THE THREAD STAND ................3 5. LUBRICATION ....................... 4 6. ATTACHING THE NEEDLE .................... 6 7. WINDING A BOBBIN ..................... 7 8. - Page 13 目 錄 1. 規格 ................................. 1 2. 縫紉機的安裝 ............................2 3. 皮帶護罩、繞線裝置的安裝....................... 2 4. 線架裝置的安裝 ............................ 3 5. 加油 ................................. 4 6. 機針的安裝............................. 6 7. 底線的繞線方法 ............................ 7 8. 底線的穿線方法 ............................ 8 9. 踏板的調節............................. 9 10. 上線的穿線方法 ...........................10 11. 線張力 ..............................11 12.
-
Page 14: Specifications
(top feed : manual) Thread take-up lever Link-type thread take-up lever Motor to be used 400W clutch motor (4P) Needle bar stroke 36.5mm Oil be used JUKI Machine Oil No.7 縫製形式 單針平縫上下傳送縫紉機 使用機針 DP × 17(可以使用 DB × 1) 用途 中厚料、厚料 使用針號... -
Page 15: Installation
INSTALLATION 縫紉機的安裝 18.5 mm 22.5 mm (1) Installing the under cover 1) The under cover should rest on the four corners of the machine table groove. 2) Two rubber seats 1 for supporting the head portion on the operator side A are fixed on the extended portion of the table by hitting the nail 2 , and the other two rubber cushion seats 3 on the hinge side B are fixed by using a rubber-based adhesive. -
Page 16: Installing The Thread Stand
(mm) 63.5 75.5 (Installing procedure) 1) Put the V belt on the pulley of the sewing machine. 2) Attach belt cover support 1 on the arm. 3) Attach belt cover 2 on the arm and the support. 4) Place bobbin winder 3 in the belt cover, and position it so that it does not contact the machine arm or the belt cover before fixing it with wooden screws. -
Page 17: Lubrication
注意 為了防止突然啟動造成人身事故,請關掉電源,確認馬達確實停止轉動後再進行。 (1) Information on lubrication 1) Fill oil pan 1 with JUKI Machine Oil No. 7 up to HIGH mark A. 2) When the oil level lowers below LOW mark B, refill the oil pan with the specified oil. - Page 18 (2) Adjusting the amount of oil supplied to the face plate parts maximum minimum 1) Loosen setscrew 1 in the oil shield plate, and 最大 最小 remove oil shield plate 2. 2) Adjust the amount of oil supplied to the thread take- up and needle bar crank 3 by turning adjust pin 4.
-
Page 19: Attaching The Needle
Oil spots/ 飛濺油 Adequate amount (3) Adjusting the amount of oil in the hook (minimum) 1) Turning the oil amount adjustment screw attached 適量(最少) on the hook driving shaft front bushing in the “+” direction (in direction A) will increase the amount of oil (oil spots) in the hook, or in the “–”... -
Page 20: Winding A Bobbin
/ WINDING A BOBBIN / 底線的繞線方法 WARNING : To avoid possible personal injury due to abrupt start of the machine, turn off the power to the machine and check to be sure that the motor has totally stopped rotating in prior. 注意... -
Page 21: Threading The Bobbin Case
/ THREADING THE BOBBIN CASE / 底線的穿線方法 WARNING : To avoid possible personal injury due to abrupt start of the machine, turn off the power to the machine and check to be sure that the motor has totally stopped rotating in prior. 注意... -
Page 22: Adjust The Pedal
/ADJUST THE PEDAL / 踏板的調節 WARNING : To avoid possible personal injury due to abrupt start of the machine, turn off the power to the machine and check to be sure that the motor has totally stopped rotating in prior. 注意... -
Page 23: Thread The Machine Head
/ THREAD THE MACHINE HEAD / 上線的穿線方法 WARNING : To avoid possible personal injury due to abrupt start of the machine, turn off the power to the machine and check to be sure that the motor has totally stopped rotating in prior. 注意... -
Page 24: Thread Tension
/ THREAD TENSION / 線張力 1) Adjusting the needle thread tension Turn tension nut 1 toward A to increase the needle thread tension, or toward B to decrease it. 2) Adjusting the bobbin thread tension Turn thread tension screw 2 toward A to increase the bobbin thread tension, or toward B to decrease 上線張力的調節... -
Page 25: Presser Foot Pressure
/ PRESSER FOOT PRESSURE / 壓腳壓力的調整 Standard 25mm Standard 15mm Adjust the pressure applied to presser foot A (standard height of the presser foot pressure regulator : 25 mm) and walking foot B (standard height of the walking foot pressure regulator : 15 mm) according to the type of material to be sewn. -
Page 26: Tilt Of The Feed Dog
/ TILT OF THE FEED DOG / 送布牙的傾斜度 WARNING : To avoid possible personal injury due to abrupt start of the machine, turn off the power to the machine and check to be sure that the motor has totally stopped rotating in prior. 注意... -
Page 27: Needle-To-Hook Relationship
/ NEEDLE-TO-HOOK RELATIONSHIP / 機針和旋梭的關係 WARNING : To avoid possible personal injury due to abrupt start of the machine, turn off the power to the machine and check to be sure that the motor has totally stopped rotating in prior. 注意... -
Page 28: Adjusting The Walking Foot And The Presser Foot
2) Position the needle and the hook. (Fig.2) Adjust so that the specified marker line (third line C from the bottom for a DB x 1 needle, or line D at the bottom for a DP x 17 needle) on the ascending needle bar aligns with the bottom end of lower bushing 1. Further adjust to make hook point 4 nearly meet the center of needle 5, and adjust the clearance between needle 5 and hook point 4 to 0.02 to 0.05 mm. - Page 29 (2) Alternate vertical motions of the walking foot and the presser foot The alternate vertical strokes of the walking foot and the presser foot are normally equal. Depending on the type of material to be sewn, however, the alternate motions of the walking foot and the presser foot may be changed. 1) Loosen screw 4.
- Page 30 (3) 外壓腳和中壓腳的動作高度 根據縫製物變更了動作高度之後有效。 1) 擰鬆螺絲 5 ,變更凸輪凸起位置。 ™ 上位置(A)→動作量大(最大約 5mm) ™ 下位置(B)→動作量小(最小約 2mm) 1. 在最大的交替上下移動量附近縫製時,有可能縫製間距不一致。此時,請降低轉速縫製。 注 意 2. 變化交替上下移動量,縫製厚縫製物時,請確認外壓腳應不與針桿相碰。 ™ ™ (4) Adjusting the feeding amount of the walking foot The ration of the bottom feed amount to the top feed amount is factory-adjusted to 1 : 1.
-
Page 31: Relationship Between The Feed Timing And The Needle Position
RELATIONSHIP BETWEEN THE FEED TIMING AND THE NEEDLE POSITION / 送布和機針的關係 WARNING : To avoid possible personal injury due to abrupt start of the machine, turn off the power to the machine and check to be sure that the motor has totally stopped rotating in prior. 注意... -
Page 32: Relationship Between The Presser Foot And The Needle
RELATIONSHIP BETWEEN THE PRESSER FOOT AND THE NEEDLE / 中壓腳和機針的關係 WARNING : To avoid possible personal injury due to abrupt start of the machine, turn off the power to the machine and check to be sure that the motor has totally stopped rotating in prior. 注意... -
Page 33: Motor Pulley And V-Belt
1) When sewing heavy-weight materials, move thread guide 1 in direction A to increase the length of thread pulled out by the thread take-up. 2) When sewing light-weight materials, move thread guide 1 in direction B to decrease the length of thread pulled out by the thread take-up. -
Page 34: Troubles In Sewing And Corrective Measures
TROUBLES IN SEWING AND CORRECTIVE MEASURES / 縫製中發生的現象和原因、對策 ™ ™ ™ ™ ™ ™ ™ ™ ™ ™ ™ ™ ™ ™ ™ ™ ™ ™ ™... - Page 35 Trouble Cause Corrective measure 1 The machine head has not been ™ Refer to "10. Threading the machine 1. Stitch skipping heads". properly threaded. ™ Remove the scratches on the hook 2 The hook has scratches. point using a fine emery paper. ™...
- Page 36 現象 原因 對策 1 上線線路異常。 ™ 請參照「10. 上線的穿線方法」。 1. 跳針。 2 旋梭上有傷痕。 ™ 請用細砂紙或銼刀研磨旋梭尖的傷 痕。 ™ 請參照「17. 機針和旋梭的關係」。 3 機針和旋梭的同步時間過早或過 晚。 ™ 請參照「17. 機針和旋梭的關係」。 4 機針和旋梭尖的間隙過大。 ™ 請擰緊壓腳調節螺絲。 5 壓腳壓力弱。 ™ 請更換成粗 1 號的機針。 6 針號選擇不正確。 ™ 請用細砂紙或銼刀研磨旋梭尖的傷 2. 斷線(綻線或磨斷) 1 旋梭上有傷痕。 痕。 ™...