Brother MFC-J6510DW Quick Setup Manual
Quick setup guide - english
Hide thumbs
Also See for MFC-J6510DW:
- Service manual (394 pages) ,
- User manual (271 pages) ,
- Software user's manual (210 pages)
Table of Contents
Advertisement
Quick Setup Guide
Start Here
Please read Safety and Legal booklet first before you set up your machine. Then, please read this Quick Setup
Guide for the correct setup and installation.
WARNING
CAUTION
1
Unpack the machine and check the components
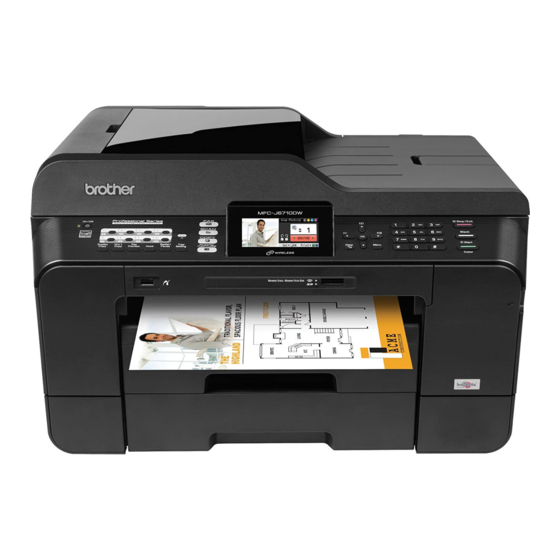
Most of the illustrations in this Quick Setup Guide show the MFC-J6710DW.
The components included in the box may differ depending on your country.
Basic User's Guide
Safety and Legal
WARNING
Plastic bags are used in the packing of your machine. Plastic bags are not toys. To avoid the danger
of suffocation, keep these bags away from babies and children and dispose of them properly.
CAUTION
(For MFC-J6710DW)
To prevent injuries when moving or lifting this machine, make sure to
use at least two people. Be careful not to pinch your fingers when you
set the machine back down.
a
Remove the protective tape and film covering the machine, and also from
the LCD.
b
Make sure you have all components.
WARNING indicates a potentially hazardous situation which, if not avoided, could result in death
or serious injuries.
CAUTION indicates a potentially hazardous situation which, if not avoided, may result in minor
or moderate injuries.
Starter Ink
Cartridges
Product Registration Sheet (USA only)
booklet
MFC-J6510DW
MFC-J6710DW
Black
Yellow
Cyan
Magenta
Documentation CD-ROM
Quick Setup Guide
Installation CD-ROM
Telephone Line Cord
USA/CAN Version 0
1
Advertisement
Table of Contents

Related Manuals for Brother MFC-J6510DW


Summary of Contents for Brother MFC-J6510DW
- Page 1 Quick Setup Guide Start Here MFC-J6510DW MFC-J6710DW Please read Safety and Legal booklet first before you set up your machine. Then, please read this Quick Setup Guide for the correct setup and installation. WARNING indicates a potentially hazardous situation which, if not avoided, could result in death WARNING or serious injuries.
- Page 2 Open the output paper tray cover a. Note • Save all packing materials and the box in case for any reason you must ship your machine. • You need to purchase the correct interface cable for the interface you want to use (for USB or network connection).
- Page 3 Fan the stack of paper well to avoid paper jams Slowly push the paper tray completely into the and misfeeds. machine. Gently put the paper into the paper tray (For MFC-J6710DW, tray #1) print side down and top edge first. Note DO NOT push the paper in too far.
- Page 4 Note Connect the power cord If you are sharing one telephone line with an and telephone line external telephone, connect it as shown below. Before you connect the external telephone, remove the protective cap a from the EXT. jack IMPORTANT on the machine.
-
Page 5: Install The Ink Cartridges
Store the orange protective part in the holder Install the ink cartridges inside the machine as shown. Make sure that the two projections on the bottom of the orange protective part fit in the two slots in the holder. Note Make sure you install the Starter Ink Cartridges included with your machine first. - Page 6 Unpack the ink cartridge. Gently push the back of the ink cartridge Turn the green release lever on the orange marked “PUSH” until it clicks. After all the ink protective packing a clockwise until it clicks to cartridges are installed close the ink cartridge release the vacuum seal.
-
Page 7: Check The Print Quality
CAUTION Check the print quality If ink gets in your eyes, wash it out with water at once and call a doctor if you are concerned. IMPORTANT Note • DO NOT take out ink cartridges if you do not Make sure you put paper in the paper tray (For need to replace them. -
Page 8: Paper Size
Set the paper settings Choose your language (if needed) For your machine to produce the best print quality and Press Menu. feed the correct paper size, the paper type and size Press a or b to choose Initial Setup. must be set to match the paper in the tray. Press OK. -
Page 9: Choose The Correct Receive Mode
Choose the correct Receive Mode The correct Receive Mode is determined by the external devices and telephone subscriber services (Voice Mail, Distinctive Ring, etc.) you have (or will be using) on the same line as the Brother machine. For details, see Using Receive Modes in chapter 5 of the Basic User’s Guide. Will you be using a Distinctive Ring number for receiving faxes? Brother uses the term “Distinctive Ring”... -
Page 10: Set The Date And Time
Set the date and time Set your Station ID The machine displays the date and time, and if you You should store your name and fax number to be set up the station ID, it will add it to each fax you send. printed on all fax pages that you send. -
Page 11: Automatic Daylight Savings Time
Note Set the telephone line (USA only) compatibility The Telephone Consumer Protection Act of 1991 makes it unlawful for any person to use a If you are connecting the machine to a VoIP service computer or electronic device to send any (over the Internet) you need to change the message via a telephone fax machine unless compatibility setting. -
Page 12: Manual Feed Slot
Send in the Product Press Black Start. Registration Sheet Note (USA only) You will receive a confirmation fax of your Product Registration. You can also register your product online using the On-Line Registration link from the installation CD-ROM or visit http://www.brother.com/registration/. -
Page 13: Choose Your Connection Type
Choose your connection type ® These installation instructions are for Windows 2000 Professional/XP Home/XP Professional (x32/x64 Edition), ® ® Windows Vista , Windows 7, and Mac OS X (versions 10.4.11, 10.5.x and 10.6.x). Note ® For Windows Server 2003 (x32/x64 Edition)/2003 R2 (x32/x64 Edition)/2008/2008 R2, visit your model page at http://solutions.brother.com/. -
Page 14: For Usb Interface Users
® Windows For USB interface users ® ® ® (Windows 2000 Professional/XP Home/XP Professional/Windows Vista /Windows The CD-ROM Top menu will appear. Click Before you install Initial Installation. Make sure that your computer is ON and you are logged on with Administrator rights. IMPORTANT •... -
Page 15: Connect The Usb Cable
® Windows Choose Local Connection, and then click Connect the USB cable to the USB socket Next. The installation continues. marked with a symbol. You will find the USB socket inside the machine on the right as shown below. When this screen appears, go to the next step. Carefully guide the USB cable into the cable channel and out the back of the machine. - Page 16 ® Windows Gently close the scanner cover using the finger Finish and restart holds on each side. Click Finish to restart your computer. After restarting the computer, you must be logged on with Administrator rights. WARNING Be careful not to trap your fingers under the Note scanner cover.
-
Page 17: Connect Usb Cable
Macintosh For USB interface users (Mac OS X 10.4.11, 10.5.x, 10.6.x) Connect the USB cable to the USB socket Before you install marked with a symbol. You will find the USB socket inside the machine on the right as shown below. Make sure your machine is connected to the power and your Macintosh is ON. - Page 18 Macintosh Gently close the scanner cover using the finger Choose the machine from the list, and then holds on each side. click OK. When this screen appears, click Next. WARNING Be careful not to trap your fingers under the scanner cover. When the Brother Support screen appears, click Close to finish the installation or go to Always use the finger holds provided on each...
-
Page 19: For Wired Network Interface Users
Wired Network ® Windows For wired network interface users ® ® ® (Windows 2000 Professional/XP Home/XP Professional/Windows Vista /Windows You will find the LAN socket marked with a Before you install symbol inside the machine on the left as shown below. - Page 20 Wired Network ® Windows Gently close the scanner cover using the finger The CD-ROM Top menu will appear. Click holds on each side. Initial Installation. Click Install MFL-Pro Suite and click Yes if you accept the license agreements. Follow the on-screen instructions.
- Page 21 Wired Network ® Windows When this screen appears, choose Change The installation of the Brother drivers will the Firewall port settings to enable network automatically start. The installation screens connection and continue with the appear one after another. installation. (Recommended) and click Next. ®...
- Page 22 Wired Network ® Windows Install MFL-Pro Suite on Finish and restart additional computers (if needed) Click Finish to restart your computer. After If you want to use your machine with multiple restarting the computer, you must be logged on computers on the network, install MFL-Pro Suite on each computer.
- Page 23 Wired Network Macintosh For wired network interface users (Mac OS X 10.4.11, 10.5.x, 10.6.x) Before you install Connect the network cable Make sure your machine is connected to the Lift the scanner cover into the open position. power and your Macintosh is ON. You must be logged on with Administrator rights.
- Page 24 Wired Network Macintosh Carefully guide the network cable into the cable Install MFL-Pro Suite channel and out the back of the machine. Connect the cable to your network. Put the supplied installation CD-ROM into your CD-ROM drive. Double-click the Start Here OSX icon to install. IMPORTANT Make sure that the cable does not restrict the cover from closing, or an error may occur.
- Page 25 Wired Network Macintosh If the machine is configured for your network, When the Brother Support screen appears, choose the machine from the list, and then click click Close to finish the installation or go to step 21. Download and install Note Presto! PageManager •...
-
Page 26: For Wireless Network Users
Ethernet for a faster data transfer or USB for the fastest throughput speed. Although the Brother MFC-J6510DW and MFC-J6710DW can be used in both a wired and wireless network, only one of the connection methods can be used at a time. - Page 27 For Wireless Network Users Confirm your network environment (Infrastructure Mode) The following instructions will offer two methods for installing your Brother machine in a wireless network environment. If your wireless access point/router does not support WPS (Wi-Fi Protected Setup) or AOSS™, write down the wireless network settings of your wireless access point/router in the area below.
-
Page 28: For Windows Users
For Wireless Network Users Configure the wireless Enter the Network Key you wrote down in step 19-a on page 27 using the dial pad to choose settings (typical Wireless each letter or number. Setup in infrastructure The letters appear in this order: lower case, mode) upper case and then numbers. - Page 29 For Wireless Network Users Configure the wireless A connection result message appears for 60 seconds on the LCD and a wireless LAN settings using the report will automatically be printed. automatic wireless (one- If the connection failed, check the error code on push) method the printed report and refer to Troubleshooting on page 30.
-
Page 30: Troubleshooting
For Wireless Network Users Troubleshooting Please do not contact Brother Customer Service for assistance without the wireless security information. We cannot assist you in locating your network security settings. How can I find the wireless security information (SSID and Network Key) 1) You should see the documentation provided with your wireless access point/router. - Page 31 For Wireless Network Users The Authentication/Encryption methods used by the selected wireless access point/router are not supported by your machine. For infrastructure mode, change the authentication and encryption methods of the wireless access point/router. Your machine supports the following authentication methods: authentication method encryption method TKIP...
-
Page 32: Wireless Network
Wireless Network ® Windows Install the drivers & software ® ® ® (Windows 2000 Professional/XP Home/XP Professional/Windows Vista /Windows The CD-ROM Top menu will appear. Click Before you install Initial Installation. Make sure that your computer is ON and you are logged on with Administrator rights. - Page 33 Wireless Network ® Windows Choose Wireless Network Connection, and Choose your machine from the list, and then then click Next. click Next. Note When this screen appears, choose Change the Firewall port settings to enable network • If your wireless settings fail, the Wireless connection and continue with the Device Setup Wizard will appear during the installation.
- Page 34 Wireless Network ® Windows The installation of the Brother drivers will Finish and restart automatically start. The installation screens appear one after another. IMPORTANT Click Finish to restart your computer. After DO NOT cancel any of the screens during the restarting the computer, you must be logged on installation.
- Page 35 Wireless Network ® Windows Install MFL-Pro Suite on additional computers (if needed) If you want to use your machine with multiple computers on the network, install MFL-Pro Suite on each computer. Go to step 21 on page 32. Note ® Network license (Windows This product includes a PC license for up to 2 Users.
- Page 36 Wireless Network Macintosh Install the drivers & software (Mac OS X 10.4.11, 10.5.x, 10.6.x) Choose Wireless Network Connection, and Before you install then click Next. Make sure your machine is connected to the power and your Macintosh is ON. You must be logged on with Administrator rights.
- Page 37 Wireless Network Macintosh Please wait for the software to install, it will take When the Brother Support screen appears, about 30 seconds. After the installation, this click Close to finish the installation or go to step 23. window will appear. Choose your machine from the list, and then click OK.
-
Page 38: Install Optional Applications
Install Optional Applications ® Windows Install FaceFilter Install FaceFilter Studio Studio/BookScan & Help Whiteboard Suite supported by Reallusion, To get instructions on how to use FaceFilter Studio, download and install FaceFilter Studio Help. FaceFilter Studio is an easy-to-use borderless photo printing application. -
Page 39: For Network Users
For Network Users Restore the network settings to factory default To restore all network settings of the internal Print/Scan server to factory default, please follow the steps below. Make sure the machine is not operating, then disconnect all the cables from the machine (except the power cord). -
Page 40: Replacement Consumables
Consumables Replacement consumables When the time comes to replace ink cartridges, an error message will be indicated on the LCD. For more information about the ink cartridges for your machine, visit http://www.brother.com/original/ or contact your local Brother re-seller. Ink cartridge Black Yellow Cyan...