Table of Contents
Advertisement
Quick Links
Advertisement
Table of Contents

Related Manuals for Epson dreamio EMP-TWD1


Summary of Contents for Epson dreamio EMP-TWD1
- Page 2 (3m) Notations used in this guide Caution: Indicates content which may cause projector damage or malfunction. Tip: Indicates additional information and points which may be useful to know regarding a topic. Indicates a page where useful information regarding a topic can be found.
-
Page 3: Table Of Contents
Contents Safety Instructions... Use and Storage... About Discs ... Part Names ... Preparing the Remote Control... 11 Quick Start Installation ... 13 Projection distance and screen size ... 13 Connecting the power cable and turning the main power switch ON... 13 Disc Playback ... -
Page 4: Safety Instructions
To reduce the risk of fire or electric shock, do not expose this apparatus to rain or moisture. Warning : Never look into the projector lens when the lamp is switched on as the bright light can damage your eyes. Never let children look into the lens when it is on. - Page 5 Do not block the slots and opening in the projector case. They provide ventilation and prevent the projector from overheating. Do not place the projector on a sofa, rug, or other soft surface, or in a closed-in cabinet unless proper ventilation is provided.
- Page 6 Clean the inside of the projector periodically. If the inside of the projector has not been cleaned for a long time, dust may build up and cause fire or electric shocks. Contact your dealer or the nearest address provided on page 65 to clean inside the projector at least once a year.
-
Page 7: Use And Storage
EPSON will not be held responsible for damage arising from projector or lamp failure outside the range of that which is covered in your warranty terms. - Page 8 When moving this unit Make sure the lens cover is securely in place. Remove the disc and close the disc tray. Move the projector, holding it as shown in the following illustration. Be careful not to damage the mesh covering the speaker with your hands.
-
Page 9: About Discs
About Discs Readable disc types The following discs can be played. DVD video Video CD/SVCD (Super Video CD) PBC (Playback control) equipped Video CD (version 2.0 compliant). CD-R/CD-RW Only discs recorded in the following formats can be reproduced. Audio format (finalized) Video CD format SVCD format MP3/WMA, JPEG discs recorded in accordance with... -
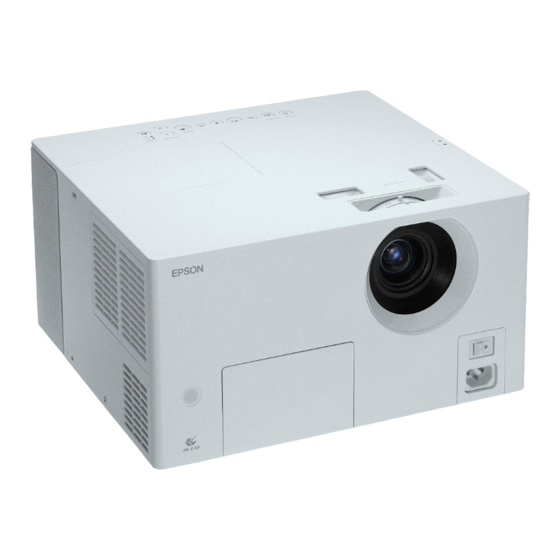
Page 10: Part Names
Part Names Front vSubwoofer output port s page 40 vS-Video input port s page 38 vAudio input port s page 37, 38 vRemote control light-receiving area s page 11 How to open the interface cover Press here to open vVideo input port s page 37 Rear vDisplay window s page 14... - Page 11 vFocus ring s page 15 vZoom ring s page 15 vVertical lens shift dial s page 15 vStatus display indicator s page 52 vSkip buttons s page 18 vSource button s page 38 vPower button s page 13, vHorizontal lens shift dial s page 15 vStop button s page 16 vPlay/Pause button...
- Page 12 Remote control vRemote control light-emitting area s page 16 Handy functions s page 34 s page 55 s page 20 s page 41 s page 48, 50 s page 30, 31 s page 36 Buttons used during playback s page 14, 16 s page 17, 18 s page 17 s page 18...
-
Page 13: Preparing The Remote Control
Preparing the Remote Control Inserting the batteries Remote control usage range Operable range (horizontal) Approx. 30° Approx. 30° Operable range (vertical) Approx. 15° Approx. 15° At the time of purchase, the batteries are not installed into the remote control. Insert the batteries provided with this unit, before use. Push in the catch on the rear of the remote control, then lift it upwards. -
Page 14: Quick Start
Quick Start Playback procedure No complicated connections are necessary.You don’t even need to select the television type or change the input. You can enjoy your DVD’s on the big screen by following these four easy steps. There is also a JVC original sound system compliant speaker built-in so you can appreciate natural, sweeter sounding audio. -
Page 15: Installation
Connecting the power cable and turning the main power switch ON Remove the lens cover. At the time of purchase, the lens cover is not attached to the projector. Connect the power cable. Position this unit so that it is parallel to the screen. -
Page 16: Disc Playback
Disc Playback Playing a disc and projecting Press to open the disc tray. A beep sounds and the power comes on. The same operation can be performed using on the remote control. Place the disc in the disc tray with the label facing upwards. -
Page 17: Adjusting The Projection Position And Volume
Adjusting the projection position and volume Adjust the volume and image being projected. Adjusting the size of the projected image (Zoom ring) To decrease the size, turn towards “T”. To increase the size, turn towards “W”. Adjusting the image position (lens shift) You can move the position of the projected image up, down, left and right, using the lens shift.The range of... -
Page 18: Stopping Playback
If you only press to turn off the power, electricity continues to be consumed. Replace the lamp cover. Keep the lens cover in place when the projector is not being used to protect the lens from dirt and damage. Tip:... -
Page 19: Basic Operations During Playback
Set to the [Function] position before performing operations Temporarily freezing playback (pause) Press during playback. For the projector unit, press To resume playback, press Selects play/pause each time you press Tip: Note the following points when pausing during a slideshow. -
Page 20: Reviewing Playback From A Position 10 Seconds Before
Set to the [Function] position before performing operations Reviewing playback from a position 10 seconds before Press during playback. Tip: Depending on the type of disc, this operation may not be possible. You cannot return to the previous title. Skip Press during playback. -
Page 21: Slow Motion Playback
When theater or theater black are selected, the EPSON cinema filter operates automatically and character's skin color takes on a more natural tone across the whole image. Temporarily stopping the... -
Page 22: Advanced Operations
Advanced Operations Becoming a playback expert Changing the brightness of the display window (Dimmer) Set to the [Function] position before performing operations Press Whenever you press the display window display changes as follows. The brightness of the display window and the brightness of the indicators on the main unit change accordingly. -
Page 23: Playback From A Dvd Menu
Playback from a DVD menu Some have the following kind of original menu saved onto them. Top menu: When multiple titles (image and audio) have been recorded, this integrated disc information is displayed. Menu: Title specific playback data (chapter, angle, audio, and subtitle menus) is displayed. -
Page 24: Pbc (Playback Control) Playback
PBC (playback control) playback If a Video CD with "PBC (playback control) enabled" specified on the disc or jacket is inserted in the disc tray, a menu screen is displayed. You can select the scene or information you wish to see interactively from this menu. When playing a Video CD that contains PBC, the following kind of menu is displayed. -
Page 25: Mp3/Wma, Jpeg Playback
MP3/WMA, JPEG playback Set to the [Function] position before performing operations When playing back a disc that contains both MP3/WMA files and JPEG files, the following kind of group/track (file) name list is displayed. Press and select the group. When you press the pointer moves to the track (file) name list. - Page 26 Set to the [Function] position before performing operations When you want to repeat playback Press during playback or when stopped. Each time you press , the repeat mode changes as shown in the following table. Press Disc Repeat Group 1 mode Track 1 Track 2...
-
Page 27: Playback By Selecting The Chapter Or Track Number
Playback by selecting the chapter or track number Specifications of files that can be played To playback a CD-R or CD-RW containing MP3/WMA or JPEG files with this unit, the contents of the disc must conform to the following criteria. MP3/WMA File system: ISO9660 level 1 or level 2 Discs that have been recorded in the packet write (UDF) format cannot be... -
Page 28: Designated Time Playback (Time Search)
Designated time playback (time search) Set to the [Function] position before performing operations You can playback from a specified time position. Depending on the disc, the start point position varies as follows. Time elapsed from the start of the title When executing from stopped: Time elapsed from the start of the disc When executing during playback: Elapsed time from the start of the current... -
Page 29: Looping Playback Of A Favorite Scene (A-B Repeat Playback)
Looping playback of a favorite scene (A-B repeat playback) Set to the [Function] position before performing operations “Looping playback of a favorite scene (A-B repeat playback)” Continued Press once and the menu bar disappears. Tip: If the elapsed time is not displayed in the display window during playback with , this function will not work. -
Page 30: Looping Playback (Repeat Play)
Looping playback (repeat play) Set to the [Function] position before performing operations Press once and the menu bar disappears. To cancel A to B playback To cancel A to B play back, do one of the following operations. Display the menu bar, select Press Turn off the power switch on the main unit. - Page 31 Repeat Track 1 Track 2 Track 3 mode Track repeat Repeat all tracks Repeat OFF Canceling repeat play Press repeatedly until " " is displayed on the screen. Turn off the power switch on the main unit. Tip: You cannot use the "Title repeat" function with some DVDs. To cancel repeat, press Display the menu bar and move the pointer to play.
-
Page 32: Playing In The Order Of Your Choice (Program Play)
Playing in the order of your choice (program play) Set to the [Function] position before performing operations You can set titles, chapters, and tracks to playback in the order of your preference. Press when stopped. Each time you press , the display window on the main unit changes as follows. -
Page 33: Playback At Random (Random Play)
Playback at random (random play) Set to the [Function] position before performing operations You can choose to play titles or chapters/tracks at random with this unit. The playback order always changes when using random play. Press when stopped. Whenever you press the display window display changes in the following way. -
Page 34: Changing The Audio Language
Changing the audio language When a disc has been recorded with multiple audio signals or languages, you can switch to the available audio signal or language of your preference. Press during playback. The current audio settings are displayed. While the audio settings are displayed, press repeatedly and select the desired setting. -
Page 35: Changing The Subtitles Display
Changing the subtitles display Changing the angle You can choose whether or not to display subtitles for discs that have been recorded with subtitles. When a disc has been recorded with multiple language subtitles, you can switch to the available language of your preference. Press during playback. -
Page 36: Making Operations From The Menu Bar
Making operations from the menu bar Set to the [Function] position before performing operations Press twice during playback. The following status bar and menu bar is projected. Press until the pointer reaches the item you wish to use. Press Press once and the menu bar disappears. -
Page 37: Auto-Standby, Goodnight Timer (Sleep Timer) Settings
Auto-standby, goodnight timer (Sleep timer) settings Set to the [Function] position before performing operations Auto stand-by: When playback has finished or been stopped, or an operation has not been performed for around 3 minutes, the power switches off automatically. Sleep timer: Once the set time has elapsed, the power switches off automatically. -
Page 38: For Better Image Quality (Progressive Mode)
For better image quality (Progressive mode) Set to the [Function] position before performing operations Tray lock To enjoy clearer images, enable Progressive mode. When stopped, or when there is no disc loaded in the disc tray, press Whenever you press the display window display changes in the following way. -
Page 39: Becoming A Projection Expert
Becoming a Projection Expert Connecting to other video equipment Aside from the built-in DVD player, this unit can project images by connecting to the following kind of equipment with a video output port. - Video recorcer - Game machine - Video camera and so on When the video equipment you are connecting conforms to both the S-Video format and the composite video format, you can enjoy higher quality images by... -
Page 40: Projecting Images From External Video Equipment
S-Video format Output Projecting images from external video equipment Functions available when in external video mode The functions available when in external video mode are as follows. vColor Mode s page 19 vSound Mode s page 41 vImage On/Off s page 23 vVolume s page 15 vSelect button s page 48, 50 RCAaudio cable... -
Page 41: Becoming An Audio Expert
Becoming an Audio Expert Listening with headphones Caution: When listening with headphones, make sure the volume is not too high. You may affect your hearing in an adverse way when listening to sounds at high volume over an extended period of time. Don’t set the volume too high from the outset. -
Page 42: Connecting To Audio Equipment With An Optical Digital Input
Connecting to audio equipment with an optical digital input You can connect to AV amplifiers and equipment capable of making digital recordings (MD recorders, and so-on) when they are equipped with a digital audio input port. When connecting, use a commercially available optical digital audio cable. -
Page 43: Selecting Sound Mode
Selecting Sound Mode Set to the [Function] position before performing operations Adjusting high pitched tones raises lowers You can obtain broader more natural audio from the speakers of this unit by activating the JVC original sound system function. Press Each time you press , the display window display changes as follows. -
Page 44: Adjusting The Audio Playback Level
Adjusting the audio playback level Set to the [Function] position before performing operations Adjusting the audio input level of external audio equipment Set to the [Function] position before performing operations The audio of a DVD video may be recorded at a level (volume) which is lower than other kinds of disc. -
Page 45: Settings And Adjustments
Settings and Adjustments Settings Menu Operation and Functions The settings of this unit can be adjusted to suit the environment in which it is used. Using the settings menu You can select your language from the "ON SCREEN LANGUAGE" list. When stopped, or when there is no disc loaded in the disc tray, press The following settings menu is displayed. -
Page 46: Settings Menu List
Settings menu list Boldface is the default. LANGUAGE settings menu Setting Item MENU LANGUAGE Select the language for the DVD video menu. AUDIO LANGUAGE Select the language for the DVD video soundtrack. SUBTITLE Select the language for the DVD video subtitles. - Page 47 AUDIO settings menu Setting Item DIGITAL AUDIO OUTPUT Select the kind of output signal according to the equipment connected to the Optical Audio-Out port. For detailed signal information s page 46 DOWN MIX Toggles the signal from the Optical Audio- Out port, between "DIGITAL AUDIO OUTPUT"...
-
Page 48: Language Code List
Language code list Code Language Afar Abkhazian Afrikaans Ameharic Arabic Assamese Aymara Azerbaijani Bashkir Byelorussian Bulgarian Bihari Bislama Bengali Bangla Tibetan Breton Catalan Corsican Czech Welsh Danish Bhutani Greek Esperanto Estonian Basque Persian Finnish Fijian Faroese Frisian Irish "DIGITAL AUDIO OUTPUT" settings and output signals Playback Disc 48 kHz, 16/20/24 bit Linear PCM DVD video... -
Page 49: Country (Area) Code List
Country (area) code list AD Andorra ET Ethiopia AE United Arab Emirates Finland AF Afghanistan FJ Fiji AG Antigua and Barbuda Falkland Islands AI Anguilla (Malvinas) AL Albania Micronesia (Federated States of) AM Armenia AN Netherlands Antilles FO Faroe Islands AO Angola FR France AQ Antarctica... -
Page 50: Picture Quality Menu Operations And Functions
Picture Quality Menu Operations and Functions You can perform adjustments on the brightness, contrast, and other values of the projected image. Using the Picture Quality menu Press during projection. The following menu is displayed. The menu item changes as follows whenever pressed. -
Page 51: Picture Quality Menu List
Picture Quality menu list Setting Item Brightness Adjusts the image brightness. Contrast Adjusts the difference between light and shade in the images. Color Saturation Adjusts the color saturation for the images. Tint Only displayed when an NTSC signal is being input. Adjusts the image tint. -
Page 52: Information Menu Operation And Functions
Information Menu Operation and Functions You can set the "Information" for checking the status of this unit, "Video Signal", "High Altitude Mode", and "Lamp- Hours Reset". Using the Information menu Press during projection. The following Information is displayed. The menu item changes as follows whenever pressed. -
Page 53: Information Menu List
Information menu list Setting Item Information Lamp Hours: Accumulated usage time of the lamp. 0H is displayed for 0-10 hours. Displayed in Displays the units of 1 hour for 10 hours and above. The display changes to yellow text when it current status. -
Page 54: Appendix
Appendix Troubleshooting Reading the indicators You can check the status of this unit using the indicators on the top panel. Check each condition in the following table and follow the steps to remedy the problem. * If all indicators are switched off, check that the power cable is connected correctly and whether or not the main power switch is turned on. - Page 55 When the indicators flash orange High-speed cooling in progress You can continue projecting in Orange this state. Projection stops Green automatically if subsequent high temperatures are registered. Lamp replacement notification Orange It is time to replace the lamp. Replace the lamp with a new one as soon as possible. If you continue use when in this state, it is possible that the lamp may explode.
-
Page 56: When The Indicators Provide No Help
If the unit fails to improve, it is possible that the power cable has been damaged. Stop using the projector, disconnect the power cable from the electrical outlet, and contact your dealer. - Page 57 When using external video modes At these times No images appear Is the power for the connected equipment turned on? Switch on the power to the connected equipment, or start playback depending on the playback method for the connected equipment. When signals have been connected to both the S-Video input port and the Video input port, only the S-Video signal is available.
-
Page 58: Maintenance
Maintenance This section describes maintenance tasks such as cleaning the projector and replacing consumable parts. Cleaning Cleaning the air filter When dust builds up on the air filter, or the message "The projector is overheating. Make sure nothing is blocking the air vents, and clean or replace the air filter"... -
Page 59: Consumables Replacement Period
Consumables replacement period Air filter replacement period When the air filter gets dirty or is broken Replace it with the optional air filter. s "Optional Accessories and Consumables" page 60 Lamp replacement period The message "Replace the lamp" appears on the screen when projection starts. The projected image gets darker or starts to deteriorate. -
Page 60: How To Replace Consumables
Resetting the lamp operating time After the lamp has been replaced, make sure you initialize the Lamp Hours setting. The projector has a built-in counter that keeps track of the lamp operating time and the lamp replacement message is displayed based on this counter. - Page 61 Take out the old air filter. Loosen the lamp attachment screws. CAUTION: Install the lamp and the lamp cover securely. For the safety of this unit, the lamp will not turn on if the lamp or the lamp cover is not installed correctly. The lamp contains mercury.
-
Page 62: Optional Accessories And Consumables
Optional Accessories and Consumables The following optional accessories and consumables are available for purchase if required. This list of optional accessories is current as of August, 2005. Details of accessories are subject to change without notice. Consumables Lamp unit ELPLP33 (Lamp x1) Use as a replacement for used lamps. -
Page 63: Specifications / Compliant Resolutions
Specifications / Compliant Resolutions Product name EMP-TWD1 Dimensions 340(W) x 180(H) x 310(D) mm (excluding feet) Panel size 0.55-inch wide Display method Polysilicon TFT active matrix Resolution 409,920 pixels (854 (W) x 480 (H)dots) x 3 Focus adjustment Manual Zoom adjustment Manual (approx. - Page 64 Safety UL60950 3rd Edition UL60065 7th Edition Canada CSA C22.2 No.60950 CSA C22.2 No.60065 European Community The Low Voltage Directive (73/23/EEC) IEC60950 3rd Edition IEC60065 7th Edition FCC Part 15B Class B (DoC) Canada ICES-003 Class B European Community The EMC Directive (89/336/EEC) EN55022 Class B EN55024...
-
Page 65: Glossary
Glossary JPEG A file format used for saving image files. Most photographs taken with digital cameras are saved in the JPEG format. The abbreviated form of "MPEG1 Audio Layer-3", a standard for audio compression. It enables the size of the data to be greatly reduced, whilst maintaining a high sound quality. -
Page 66: Index
Index A.STBY ... 35 Air exhaust vent ... 8 Air intake vent ... 8 Angle ... 33 Aspect ratio ... 55 Audio input level ... 42 AUDIO settings menu ... 45 Break ... 19 Brightness ... 49 Chapter ... 63 Cleaning the air filter ... -
Page 67: Address List
This address list is current as of the 6th of December 2004. A more up-to-date contact address can be obtained from the corresponding website listed here. If you do not find what you need on any of these pages, please visit the main EPSON home page at www.epson.com. < EUROPE >... - Page 68 PTYLIMITED 3, Talavera Road, N.Ryde NSW 2113, AUSTRALIA Tel: 1300 361 054 Web Address: http://www.epson.com.au SPAIN : EPSON IBERICA, S.A. Avda. Roma 18-26, 08290 Cerdanyola del Valles, Barcelona, SPAIN Tech. Help Desk: 902.404142 E-mail: soporte@epson.es Web Address: http://www.epson.es SWEDEN : Tech.
- Page 69 Neither SEIKO EPSON CORPORATION nor its affiliates shall be liable to the purchaser of this product or third parties for damages, losses, costs, or expenses incurred by purchaser or third parties as a result of: accident, misuse, or abuse of this product or unauthorised modifications, repairs, or alterations to this product, or (excluding the U.S.) failure to...