
Related Manuals for Yamaha AW16G Recording 101


Summary of Contents for Yamaha AW16G Recording 101
- Page 1 Recording 101 Yamaha Corporation of America 6600 Orangethorpe Ave. Buena Park, CA 90620 USA Customer Support: 714-522-9000...
-
Page 2: Table Of Contents
AW16G Recording 101 - Table of Contents Introduction AW16G Features Setting up the AW16G Connecting the Monitor System Connecting the Instruments and/or Microphones Turning the Equipment on Recording Creating a New Song Setting the Input Level Assigning the Input Signal to a Track Recording the First Track Punching In and Punching Out Overdubbing... - Page 3 Adjusting the Dynamic Processors Using the Dynamics Library Using the Internal Effects Recording the Stereo Track Creating an Audio CD Glossary...
-
Page 4: Introduction
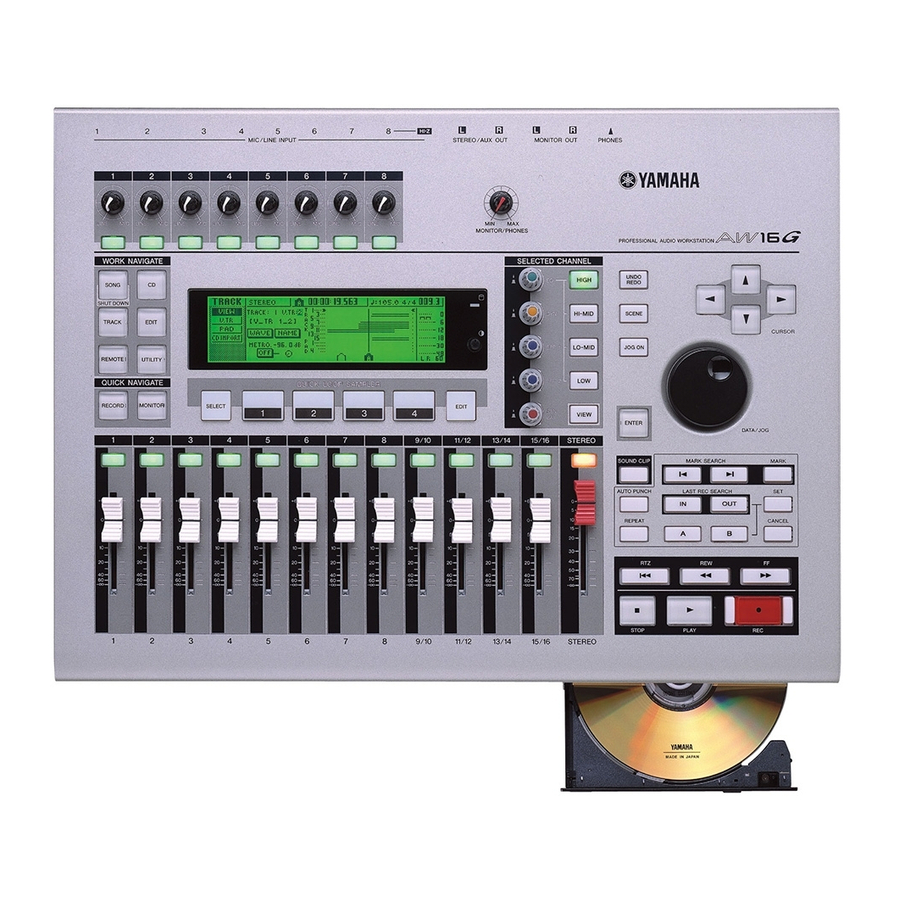
Introduction Congratulations on your purchase of the AW16G! The AW16G is a very powerful and easy to use digital audio workstation that will allow you to take your musical ideas from concept to completion. By combining all of the necessary tools into an affordable all-in-one unit, the AW16G makes it extremely easy for the home recording musician to achieve high-quality results. -
Page 5: Connect Monitoring System
Setting up the AW16G Before you begin recording it is necessary to connect the AW16G with the equipment that it is to be used with. Step 1: Connect the Monitoring System If powered monitors are to be used with the AW16G, connect the Monitor Outs of the AW16G to the inputs of the monitors using unbalanced instrument cable. -
Page 6: Connecting The Instruments And/Or Microphones
With Unpowered Monitors If no monitors are available, or if you prefer, headphones can be used for monitoring. The headphones would be connected to the PHONES jack of the AW16G. With Headphones Step 2: Connect the instruments or microphones. The next step would be to connect the instruments or the microphones to the AW16G that you will be recording. - Page 7 more comfortable recording other instruments first and then adding the drums later on this will work as long as you record with a metronome. This ensures that the drummer and other rhythm instruments can follow the tempo of the song. For more info on using the internal metronome of the AW16G see page 47 of the manual.
-
Page 8: Turning The Equipment On
If a condenser microphone is to be connected If a condenser microphone is to be connected to either input 1 or 2, the phantom power must be to either input 1 or 2, the phantom power must be turned on. turned on. -
Page 9: Recording
Recording Now that everything is set up and connected properly you can begin recording. The first step in the recording process is to create a new song. When you start the AW16G for the first time, an empty song will be loaded automatically. If you use this automatically loaded song, then there is no need to create a new song. -
Page 10: Setting The Input Level
Cursor to OK and press the [ENTER] key. The TITLE EDIT popup window will appear, allowing you to name your song. Assign a name to your song using the cursor arrows and the jog wheel. After naming the song cursor to OK and press the [ENTER] key. Setting the Input Level After creating a new song the next step is to set the input level for the instrument or other sound source that you will be recording. -
Page 11: Assigning The Input Signal To A Track
The Input Setting popup window will appear. While playing the instrument, turn the GAIN knob up to adjust the input level. The meter on the right hand side of the Input Setting screen should be around the –12 to -6 dB mark when the instrument is at its maximum level. -
Page 12: Punch In/Out
Press the [TRACK SEL] key of the track that you want to record on. The selected input channel will now be connected to the selected track. Both the selected [INPUT SEL] key and the selected [TRACK SEL] key will be blinking red and there will be a line connecting the two on the screen. -
Page 13: Overdubbing
If the mistake is only a short one and you just need to fix the mistake and not erase the rest of the track you can first punch-in at the point where the mistake was and then punch-out when you have fixed the mistake. To perform a punch-out, first punch-in at the point where the mistake was made then press the [PLAY] key by itself to ‘punch-out’... -
Page 14: Overdubbing Additional Tracks
Press the [INPUT SEL] key for the input channel that you are recorded from. Press the [TRACK SEL] key of the track that you recorded on. The line that connected the input channel to the track will now disappear and the [TRACK SEL] key will no longer be blinking red, indicating that it is no longer record- enabled. -
Page 15: Mixdown
The [INPUT SEL] keys and the [TRACK SEL] keys will now be red and blinking. Press the [INPUT SEL] key for the input channel that you are going to record from. The [INPUT SEL] that was pushed will now be solid red, and the remaining [INPUT SEL] keys will no longer be blinking. -
Page 16: Setting Basic Levels
Setting the Basic Levels A basic starting point in the mixdown process is to first set the levels for all of the individual tracks. Lower all of the faders to infinity (all of the way down). Raise the stereo fader to the 0 position (all of the way up). Press the [VIEW] key until the METER page is displayed. -
Page 17: Adjusting The Panning
There are many different approaches to setting the levels in the mixdown process. Some people prefer to start with the vocals and then work their way backward, while others may start with the guitar. Neither one of these approaches is wrong. The idea is to just get a good overall balance between all of the instruments and if starting with the vocal works for you, then start with the vocal. -
Page 18: Panning Guidelines
Turn the [PAN] knob to adjust the panning of the selected track. To adjust the panning for additional tracks first press the [TRACK SEL] key of the desired track and then turn the [PAN] knob to the desired pan position. Panning Guidelines There are no rules for setting the panning when doing a mixdown but here are some general guidelines. -
Page 19: Adjusting The Eq
harmony then it would usually be panned up the center also. If there are multiple background vocals they would normally be panned just a little off center to the left and the right. For a wider sound you may prefer to pan some of the background vocals all of the way to the left and the rest all of the way to the right. -
Page 20: Adjusting The Dynamic Processors
Use the [DATA/JOG] wheel to select the desired EQ preset. Cursor to the RECALL button in the LCD and press the [ENTER] key. This is for basic EQ adjustment. For complete control, use the cursor keys to select the various parameters within the EQ EDIT screen and then use the DATA/JOG wheel to adjust them. -
Page 21: Using The Internal Effects
Use the [DATA/JOG] Wheel to select a desired preset. Cursor to the Recall button and press the [ENTER] key. To adjust the dynamic processor, turn the yellow [DYN] knob. In the default settings of the AW16G turning the [DYN] knob will adjust all parameters of the dynamic processor simultaneously. -
Page 22: Recording The Stereo Track
Cursor to the RECALL button on the screen and press the [ENTER] key. Press the [EFF 1] knob once to access the EFFECTS SEND screen. While playing the song, cursor to the send knob of the track that you want to send to the first effects unit, and then use the jog wheel to adjust the send level for each of the tracks. -
Page 23: Creating An Audio Cd
After the song has finished, press the [STOP] key to end the recording of the Stereo Track. Tip: In order to have a loud CD, the Stereo Meter (L R Meters) of the AW16G should be as close as possible to 0 dB without going over. If the levels are significantly below the 0 dB mark you should readjust the levels closer to the 0 dB mark. - Page 24 NOTE: If an error message appears indicating that there is no stereo track you may need to save the song before the AW16G will recognize the stereo track. Cursor to the NEW button in the LCD display and press the [ENTER] key. Cursor to the song name and use the [JOG/DATA] wheel to select the desired song.
-
Page 25: Glossary
Glossary Note: Additional glossary words can be found online at the following web address: http://solutionsnetwork.yamaha.com A/D Converter: Analog to Digital converter — An electronic device for converting analog signals to digital signals. The analog signal is sampled every few milliseconds and its level is quantized into a digital word. The larger the digital word, the more accurate the representation of the analog value. - Page 26 Dynamics Processor: A signal processing device that is used to correct or control signal levels. They are able to compress, expand, compress-expand (compand), gate, or duck the signals passing through it. EQ: A signal processing device that increases or reduces specific frequencies of an audio signal.
- Page 27 TRS: Used to refer to a Tip, Ring, Sleeve cable, connector, or jack. Also known as balanced 1/4". Inputs 3-8 of the AW16G use TRS jacks. XLR: Used to refer to a three-prong canon cable, connector, or jack. Inputs 1-2 of the AW16G are XLR inputs.