Table of Contents
Advertisement
Available languages
Available languages
Operator's IVianual
®
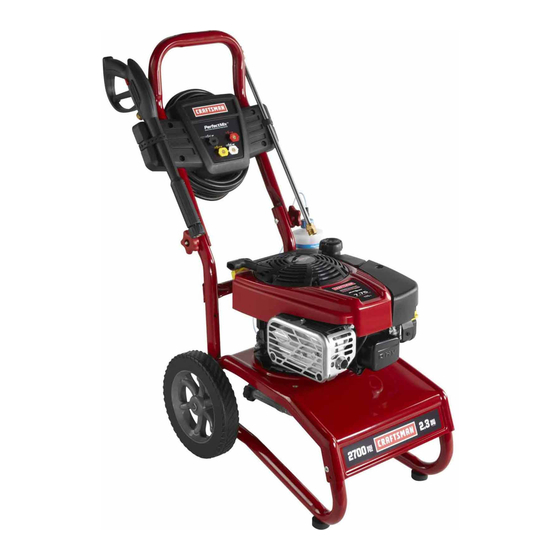
2700 PSi iVlAX*@ 2.1 GPiVi
2100 PSi @ 2.3 GPIVi M AX*
iViodelNo. 580.752870
HOURS: IVlon. - Fri. B a.m. to 5 p.m. (CT)
WARNING
Before using this product, read this
manual and follow all Safety Rules
and Operating instructions.
ADVERTENCIA
Antes de utilizar el producto, lea este
manual y siga todas las Reglas de
Seguridad e Instrucciones de Uso.
,, Safety
,, Assembly
,, Operation
,, Maintenance
,, Parts
,, Espafiol,p. 34
* This pressure washer is rated in accordance to the Pressure Washer Manufacturers Association
(PWMA) standard PW101-2010 (Testing and Rating Performance of Pressure Washers).
* Esta limpiadora a presiOnest_ clasificada conforme a la norma PW101-2010 (comprobaciOn y clasificaciOn de rendimiento de limpiadoras
a presiOn) de la AsociaciOn de fabricantes de bombas a presiOn(Pressure Washer Manufacturers Association, PWMA).
SearsBrands ManagementCorporation,HoffrnanEstates,IL 60179 U.S.A.
Visit our Craftsman website: www.craftsman.com
Part No. 316053GS Rev B (04/03/2012)
Advertisement
Table of Contents

Related Manuals for Craftsman 580.752870


Summary of Contents for Craftsman 580.752870
- Page 1 * Esta limpiadora a presiOnest_ clasificada conforme a la norma PW101-2010 (comprobaciOn y clasificaciOn de rendimiento de limpiadoras a presiOn) de la AsociaciOn de fabricantes de bombas a presiOn(Pressure Washer Manufacturers Association, PWMA). SearsBrands ManagementCorporation,HoffrnanEstates,IL 60179 U.S.A. Visit our Craftsman website: www.craftsman.com Part No. 316053GS Rev B (04/03/2012)
- Page 2 Defective product will receivefree repair or replacement if repair is unavailable. For warranty coverage details to obtain free repair or replacement, visit the web site: www.craftsman.com This warranty covers ONLY defects in material and workmanship. Warranty coverage does NOT include: •...
- Page 3 Read A. WARNING The engine exhaust from this product t his manual carefully and becomefamiliar with your pressurewasher. Knowits applications, contains chemicals known to the State of California to its limitations, and any hazards involved. cause cancer, birth defects, or other reproductive harm. importantSafetyinformation A.
- Page 4 _i_ WARNING Fuel and its vapors are extremely flammable ,& WARNING Starter cord kickback (rapid retraction) will and explosive which could cause burns, pull hand and arm toward engine faster than you fire or explosion resulting in death, ,_can let go which could cause broken bones, fractures, bruises, or sprains resulting in serious serious injury and/or property damage.
- Page 5 ,&. WARNING Use of pressure washer could create _i_ WARNING Risk of eye or bodily injury. puddles and slippery surfaces causing Spray could splash back or propel you to fall resulting in death or serious objects resulting in serious injury. injury.
-
Page 6: Features And Controls
KNOWYOURPRESSURE WASHER Read the Operator's Manual and safety rules before operating your pressure washer. Compare the illustrations with your pressure washer to familiarize yourself with the locations of various controls and adjustments. Save this manual for future reference. A - Spray Gun-- Controls the application of water onto cleaning N - Project Pro®... - Page 7 ASSEMBLINGPRESSURE WASHER Your pressure washer requires some assembly and is ready for use only after it has been properly serviced with the Your Craftsman pressure washer will need assembly before recommended oil and fuel. operation: If you have any problemswith the assembly of your Fill out and send in registration card.
- Page 8 Place accessory tray (A) over holes (B) on handle ProjectPro@PerfectlVlix TMSoap System (viewing from front of unit). Push the tree clips (C) into The pressure washer is equipped with a detergent siphoning the holes until they sit fiat against the accessory tray. hose.
- Page 9 Add EngineOil To protect the fuel system from gum formation, mix in a fuel stabilizer when adding fuel. See Storage. All fuel is not the Place pressure washer on a flat, level surface. same. If you experiencestarting or performance problems Cleanarea around oil fill and remove yellow oil fill after using fuel, switch to a different fuel provider or change cap/dipstick.
- Page 10 FreshStart@ Fuel Cap Lubricate O-Rings The Fresh Start@fuel cap (A) is designed to hold a Lubrication of o-rings is extremely important for installation cartridge (B) which contains fuel preserver. Adding fuel and operation. The use of a lubricant (petroleum or synthetic preserver helps keep fuel fresh and carburetors clean for grease) during assembly helps seat o-rings properly and easier starting aii season long.
- Page 11 ConnectHose and Water Supply to Pump Run water through garden hose for 30 seconds to flush it of debris. Turn off water. NOTICE DO NOTsiphon standing water for the water NOTICE DO NOT run the pump without the water supply supply.
-
Page 12: Starting
HOWTO USEYOURPRESSURE WASHER To Start Your Pressure Washer To start your engine-powered pressure washer for the first If you have any problems operating your pressure washer, time, follow these instructions step-by-step. This information please call the pressure washer helpline at 1-800-222-3136. also applies whenever you start the engine after you have let PressureWasher Location the pressure washer sit idle for at least a day. -
Page 13: Stoping
NOTICE Before starting the pressure washer, be sure you _i_ WARNING The high pressure stream of water that are wearing safety goggles as described below. and its underlying tissues, resulting in serious this equipment produces could cut through skin ,_. WARNING Risk of eye injury. injury and possible amputation. - Page 14 How to Use Accessory Tray Select desired spray tip: The unit is equipped with an accessory tray with places to Low Pressure store your spray gun, nozzle extension, high pressure hose and quick connect spray tips. Black Place spray gun in wide groove on accessory tray as Use to apply shown.
- Page 15 Cleaning andApplyingDetergent Make sure garden hose is connected to water inlet. Checkthat high pressure hose is connected to spray gun A WARNING Chemical Burn Hazard. and pump. Turn on water. Chemicals could cause burns resulting in death, serious injury, and/or property damage. NOTICE You must attach all hoses before you start the •...
- Page 16 Pressure Washer Rinsing Automatic Cool Down System(Thermal Relief) If you run the engine on your pressure washer for For Rinsing: 3-5 minutes without pressing the trigger on the spray gun, Remove black detergent spray tip from nozzle extension. circulating water in the pump can reach temperatures above 125°F.
-
Page 17: Specifications
ENGINE TECHNICAL iNFORMATiON PRODUCT SPECiFiCATiONS This is a single cylinder, overhead valve (OHV), air cooled PressureWasher Specifications engine, it is a low emissions engine. Max Outlet Pressure ...... 2,700 PSI* In the State of California, Model 110000 engines are certified Max Flow Rate...... -
Page 18: Maintenance
OWNER'SRESPONSiBiLiTiES EmissionsControl Maintenance, replacement, or repair of the emissions Follow the hourly or calendar intervals, whichever occurs control devices and systemsmay be performedby any non- first. More frequent service is required when operating in adverse conditions noted below. road engine repair establishment or individual. However, to obtain "no charge"... - Page 19 Check DetergentSiphoningTube Remove detergent siphoning hose from barbed fitting on pump. Examine the filter on detergent tube (if equipped) and clean if clogged. The tube should fit tightly on the barbed fitting. Using a firm, blunt object 7/64" in diameter or smaller, Examine the tube for leaks or tears.
- Page 20 Spray Tip Maintenance O-Ring Maintenance Purchasean O-Ring RepairKit, Searsitem 75116, at your local A pulsing sensation felt while squeezing the spray gun trigger Searsor by calling 1-800-4qVlY-HOIVlE ( 469-46fi3) or online at may be caused by excessive pump pressure. The principal cause of excessive pump pressure is a spray tip clogged or www.sears.com.
- Page 21 Checking Oil Level Tip your pressure washer to drain oil from oil fill into a suitable container making sure you tip your unit away Make sure pressure washer is on a level surface. from spark plug. When crankcase is empty, return Remove oil dipstick and wipe dipstick with clean cloth.
- Page 22 AFTEREACHUSE Checkelectrode gap with wire feeler gauge and reset spark plug gap to recommended gap if necessary (see Water should not remain in the unit for long periods of time. Specifications). Sediments or minerals can deposit on pump parts and "freeze"...
- Page 23 WINTERSTORAGE Change O il While engine is still warm, drain oil from crankcase. Refill with recommended grade. See ChangingEngine Oil. NOTICE You must protect your unit from freezing temperatures. ProtectPump • Failure to do so will permanently damage your pump and render To protect the pump from damage caused by mineral your unit inoperable.
-
Page 24: Troubleshooting
Problem Cause Correction Low pressure spray tip installed. Replacewith high pressure spray tip. Water inlet is blocked. Clear inlet. Inadequatewater supply. Provide adequate water flow. Inlet hose is kinked or leaking. Straighten inlet hose, patch leak. Pump has foJiowingprobJerns: Checkand clean inlet hose screen. Clogged inlet hose screen. - Page 26 CRAFTSMAN 2700 PSi PressureWasher 580.752870 Main Unit = Exploded View and Parts List PartsNot Illustrated Item Part # Description 317098GS BASE Part # Description 314787BNGS HANDLE 316053GS MANUAL-OPERATOR 316104GS BILLBOARD 23139GS B1797GS CLIP 192050GS E-RING 314075GS KiT-QCNOZZLE AB3061BGS 195983TGS NOZZLE-QC YELLOW...
-
Page 27: Pump Exploded View And Parts List
CRAFTSMAN 2700 PSI PressureWasher 580.752870 Pump = Exploded View and Parts List ® s ..@ ... A Part # Parts Not illustrated Item Description 200275GS SCREW Part # Description B2384GS FILTER-GARDEN HOSE 208673GS VALVE-THERMORELIEF 317897GS KIT-CHECKVALVE 200345GS KIT-WATERSEAL 0ptional Accessories Not illustrated... - Page 28 ENGINE,Briogs& $tratton, 111P02- ExplodedView 615 o 1376 32A_ 32_ 1264 1263 1023 883A 914 _ 1034 1029 1022...
-
Page 29: Engine, Briggs & Stratton Exploded View
ENGINE,8riogs& $tratton, 111P02- ExplodedView 564A o2,_ 633A 623 0... - Page 30 ENGINE,8riogs& $tratton, 111P02- ExplodedView 358 ENGINE GASKET SET 883A 1022 1430 1095 VALVE GASKET SET 623 O 1005 883A_ 1022 121 CARBURETOR OVERHAUL 104 _ 276 0 137 0...
- Page 31 ENGINE,Briggs& $tratton, 111P02- Parts List item Part# Description item Part # Description 796500 Armature-Magneto 798948 Cylinder Assembly 793454 Screw (Magneto Armature) 299819s Seal-Oil (Magneto Side) 334A 796537 Stud (Magneto Armature) 493279 Sump-Engine 692051 Plug-Spark 796471 Head-Cylinder Switch-Rocker 347 795333 796475 Gasket-Cylinder Head 798942 Wire-Stop...
- Page 32 California, U.S. EPA,and Sears Emissions Sears EmissionsControl Warranty Provisions ControlWarranty Statement The following are specific provisions relative to your Emissions Control Warranty Coverage. It is in addition to the YourWarranty Rights And 0bligations Searsengine warranty for non-regulated engines found in the Operator's Manual.
- Page 33 The warranty onemissions-related parts isasfollows: LookFor Relevant EmissionsDurability Period and Air Index information On Your Small Off-Road Engine • Any warranted part that is not scheduled for EmissionsLabel replacementas required maintenancein the owner's manual supplied, is warranted for the warranty period Enginesthat are certified to meet the California Air Resources stated above.
- Page 34 Una vez que adquiera ei contrato de protecciOn para reparaciones, solo tiene que hacer una sencilla IlamadateiefOnica para programar Su nuevo producto Craftsman® est_ dise_ado y fabricado para un servicio. Puede Ilamara cualquier hera dei dia o la noche, o funcionar de manera fiable durante muchos a_os.
- Page 35 ,A A[:IVERTENCIA El escape del motor de este producto Leaestemanualminuciosamente y conozca a fondo las partes y el funcionamiento desum_quina limpiadoraa contiene eiementos quimicos reconocidos en el Estado de presi6n.Conozca susaplicaciones, suslirnitacionesy los California por producir c_.ncer,defectos de nacimiento u peligros involucrados.
- Page 36 A ADVERTENCIA Elretroceso (repliegue r_.pido) del _i_ AI:IVERTENCIAEl combustible y sus vapores son cable d elarrancador impedir_, que eiusuario extremadamenteinflamablesy explosivos, _,_,_ sueite e icable atiempo y tirar_, desumano y _1,_ Io que podria provocar quemaduras, incendioso explosiones;asi como da_os brazo hacia ei motor, io que podria provocar materiales,lesiones graveso incluso la muerte.
- Page 37 A ABVERTENCIA Peligro de quemadura quimica. _i_ ADVERTENCIA Riesgo de lesiones en los ojos 0 el Las sustancias quimicas podrian provocar quemaduras, materiales, asi como da_os lesiones cuerpo. El agua rociada podria salpicar 0 graves o incluso la muerte. propulsar objetos, Io que puede •...
- Page 38 CONOZCA SU iViAQUINA SISTEIViA DE LIIViPIEZA Lea el IVlanuaidei Operario y ias regias de seguridadantes de porter en marcha su sistema de iimpieza. Compare las ilustraciones con su sistema de limpieza para familiarizarse con las ubicaciones de los diferentes controles y ajustes. Guarde este manual para referencias futuras.
- Page 39 Su sistema delimpieza requiere decierto e nsamble yestar_ lista iViONTAJE DELSISTEIViA DELIlViPIEZA para s er usado _nicamente despu_s dehaber depositado Usted deberA Ilevar a cabo los siguientes procedimientos antes de combustible yelaceite recomendado. poner en funcionamiento su sistema de limpieza: Sitiene problernas c onel ensarnbledesurn_quina lirnpiadoraa Llene y mande en tarjeta de matricula.
- Page 40 Coloque la bandeja de accesories (A) sobre los orificios (B) del ProjectPro@PerfectiVlix Jab6n sisterna manubrio (vista desde la parte dentr_s de la unidad). Presione La limpiadora a presi6n est_ equipada con uno manguera de las pinzas de _rbol (C) para introducir las en los orificios hasta inyecci6n de detergente.
- Page 41 Aoregueaceite de motor AVISO Evite el da_o del limpiadora a presiOn. El fracaso para seguir Manual de Operario para el Coloque la limpiadora a presi6n en una superficie plana y combustible reccomendations garantia de vacios. nivelada. • NO utilice gasolina no autorizada; por ejemplo, E85. Limpie la zona de alrededor del orificio de Ibnado de aceite y •...
- Page 42 Lubriquelas juntast6ricas Tap6n de combustible Fresh Start@ El tapdn de combustible FreshStart® (A) estA dise_ado para La lubricaciSn de las juntast6ricas es extremadamente importante albergar un cartucho (B) con aditivo para combustible. La adici6n para la instalaci6n y operaci6n. El use de un lubricante (petr61eoo de un aditivo para combustible ayuda a mantener el combustible en grasa sint_tica) durante el montaje es de utilidad para que las buen estado y loscarburadores limpios para facilitar el arranque...
- Page 43 Haga correr el agua a trav_s de la manguera de su jardin por Conectela manouera y el suministrode aoua a la bomba 30 segundos para limpiar cualquier escombro que se encuentre en ella. Desconecteel agua. ,zlif/$O Hace NO agua de parar de siphon para el abastecimiento de AIflSO NO haga funcionar la bomba si no tiene el agua.
- Page 44 COIViO USARSU SISTEIViA DELliViPIEZA Para poneren marchael sistema de limpieza Para darle arranque a su sistema de limpieza movido a motor por Si tiene problemas con el funcionamiento de su m_quina Nmpiadora primera vez, siga estas instrucciones paso a paso. Esta informaci6n a presi6n, por favor Namea la Nneade ayuda de la m_quina acerca de la puesta en marcha inicial tambi(in es v_Nda para cuando Nmpiadora a presi6n al 1-800-222-3136,...
- Page 45 AV/SO Antesdearrancarla limpiadoraa presi6n,aseg_rese de _i_ ADVERTENCIA El chorro de agua a alta presi6n que ponersegafasde seguridadcomose describe a continuaci6n. este equipo produce podria atravesar la piel y ,&, ADVERTENCIA Riesgo de iesiones oculares. provocar los tejidos subcut_.neos, podrian El agua rociada podria saipicar o propulsar lesiones graves y la posible amputaci6n de un miembro.
- Page 46 C6rnousar las puntasde rocio ,& ADVERTENCIA El chorro de agua a alta presiOnque este equipo produce podria atravesar la piel y La conexi6n r_.pida de la extensi6n para boquillas le permite provocar usar quatro puntas de rocio diferentes. Siempre que est6 acti- los tejidos subcut_.neos, podrian lesionesgraves y la posible amputaciOnde un...
- Page 47 Para un enjuagado de m_.ximapotencia (alta presi6n Limpieza y aplicaci6n del delergenle y bajo caudal), para superficies rebeideso de dificil _i_ ABVERTENCIA Peligro de quemadura quimica. acceso, como superficies de plantas altas, eliminaci6n de pintura, manchas de aceite, quemaduras,asi como da_os materiales,lesiones as sustanciasquimicaspodrian provocar eliminaci6n de 6xido u otras sustancias dificiles graves o incluso la muerte.
- Page 48 $isterfla de enfriarfliento autom_tico Enjuagede la mziquinalimpiadoraa presi6n (alivio t6rrnico) Despu_sde haber aplicado el detergente, refriegue la superficie El agua que circula dentro de la bomba puedeaicanzartemperaturas y enjuagela de la siguiente manera: entre los 125°-155°F si hace funcionar el motor de su m_quina Retire la punta de rocio negra para detergente de la extensi6n limpiadora a presi6n de 3 a 5 minutos sin oprimir el gatillo de la para boquillas o retire la cepillos de la pistola rociadora.
- Page 49 INFORMACION TECNICA SOBREEL ESPECIFiCACIONES DELPRODUCTO MOTOR Espe.cificaciones de la mziquina limpiadoraa presion El motor es de uno cilindros, de vAIvulasen cabeza (OHV), refrigerado por aire y de baja emisi6n. Presi6n de salida m_xima ......2,700 PSI* En el Estado de California, los motores de la serie 110000 han Caudalm_ximo ........
- Page 50 RECOIViENDACIONES GENERALES Recomendaciones oenerales El mantenimiento peri6dico mejorar_ el rendimiento y prolongar_ la Plan de rnantenimiento vida _til del limpiadora a presidn. Si necesita asistencb, consulte con un distribuidor de Sears o con otro distribuidor cualificado. Siga los intervalosde horas o de calendario, los que sucedan antes. Si opera en condiciones adversas (se_aladas m_s abajo) es La garantb de la m_quina limpiadora a presi6n NO cubre los necesario un mantenimiento m_s frecuente.
- Page 51 iVlANTENIiVllENTO DELA iViAQUINA 8ola de retenci6n de inyecci6nde detergente LIIViPIADORA A PRESION En ocasiones, la bola de retenci6n se atascaen el sistema de inyecci6n de detergente cuando ha pasadoalmacenado o por Limpie los residuos acumulaci6n de jab6n seco o minerales en el agua. La bola de retenci6n se puede desatascar mediante lossiguientes pasos: Limpie a diario, o antes de cada uso, los residuos acumulados en el limpiadora a presi6n.
- Page 52 Use un sujetapapeles peque_o para liberar cualquier material Revise la pistola extra_o que est(i tapando la punta de rocio (A). Examine la conexi6n de la manguera con la pistola rociadora y aseg_resede que es correcta. Pruebe el gatillo apretando el bot6n rojo para asegurarse de que ei gatillo vueive a su posici6n original cuando se suelta.
- Page 53 MANTENIMIENTO DELMOTOR Comprobaci6n dei nivel de aceite Compruebe el nivel de aceite antes de cada uso o cada 8 horas de _i_ ADVERTENCIA Las chispas involuntarias podrian funcionamiento, como minimo. Reiiene si es necesario. "_dh provocar incendios o electrocuci6n Coloque ei limpiadora a presi6n sobre una superficie niveiada. pueden provocar lesiones graves o la muerte.
- Page 54 Rempiacela bujia Cambie el aceite cuandoeJmotor siga estando caJientedespuHs de haber funcionado: Cambie la bujia ayudarA a su motor a arrancar mAs fAcilmente y Drene eltanque del combustible haciendofuncionar la funcionar mejor. mAquina limpiadora a presi6n hasta que el tanque est_ vacio. Limpie el Area alrededor de la bujb y retirela.
- Page 55 DESPUES DECADAUSO $isterna de refrioeraci6n de aire Con eltiempo, se pueden acumular residuos en las aletas de No deberb,haber agua en la unidad por largos periodos de tiempo. refrigeraci6n del cilindro y pasar inadvertidos mientras no se Los sedimentos de minerales se pueden depositar en partes de la desmonte parcialmente el motor.
- Page 56 ALlViACENAlVilENTO PARAINVlERNO si no se ha a_adido un estabilizador de combustible a la gasolina, deber_ vaciar completamente ei motor utilizando un contenedor homologado. Dejefuncionar el motor hasta que se agote el Ai/ISO Usted deber_, proteger su unidad de las combustible. Se recomienda utilizar un estabilizador de combustible temperaturas de congelamiento.
- Page 57 Problema Soluci6n Cagsa EstA usando la puntas de rodo de baja Cambie la puntas de rocio a una de las puntas presi6n (negra). de rocio de alta presi6n. La entrada de agua estA bloqueada. Limpie la entrada. Suministro de agua inadecuado. Proporcione fiujo de agua adecuado.
- Page 58 Garantiade controlde ernisionesde California, Disposicionesde la garantia contradefectos del sistema de control de emisiones de Sears U.S. EPAy Sears A continuaci6n se detaiian las disposiciones concretas Derechesy obligacienesde la garantia reiativas a la Cobertura de ia garantia contra defectos dei sistema de control de emisiones.
- Page 59 Lagarantia deloscomponentes relacionados conlas Sears.Sears no ser_.responsable de la cobertura de la emisiones eslasiguiente: garantia de fallos de componentes relacionados con el sistema de emisiones cubiertos por ia garantia • Los failos de todo componente cubierto por ia garantia provocados por el uso de componentes que no se deba sustituir como parte dei plan de complementarios o modificados.
- Page 60 Your Home For troubleshooting, product manuals and expert advice: managemyiife www.managemylife.com For repair - in your home - of all major brand appliances, lawn and garden equipment, or heating and cooling systems, no matter who made it, no matter sold it! For the replacement parts, accessories owner's manuals that you need to do-it-yourself.