Table of Contents
Advertisement
Available languages
Available languages
Operator's Manual
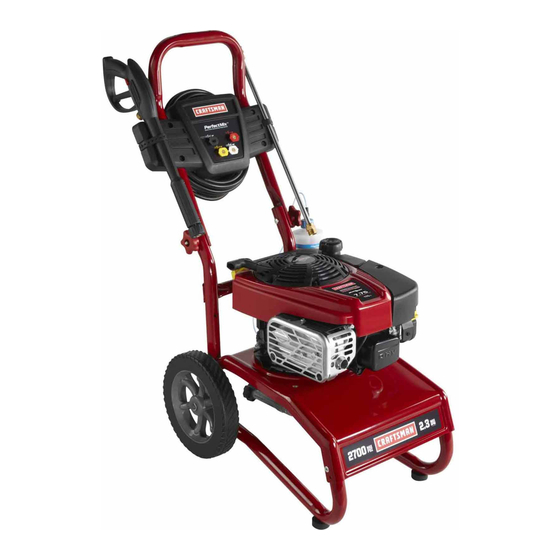
2700 PSI MAX* @ 2.1 GPM
2100 PSI @ 2.3 GPM MAX*
PRESSURE WASHER
Model No. 580.752870
PRESSURE WASHER
CUSTOMER HELPLINE
1-800-222-3136
HOURS: Mon. - Fri. 8 a.m. to 5 p.m. (CT)
WARNING
Before using this product, read this
manual and follow all Safety Rules
and Operating Instructions.
* This pressure washer is rated in accordance to the Pressure Washer Manufacturers Association
(PWMA) standard PW101-2010 (Testing and Rating Performance of Pressure Washers).
* Esta limpiadora a presión está clasificada conforme a la norma PW101-2010 (comprobación y clasificación de rendimiento de limpiadoras
a presión) de la Asociación de fabricantes de bombas a presión (Pressure Washer Manufacturers Association, PWMA).
Sears Brands Management Corporation, Hoffman Estates, IL 60179 U.S.A.
Visit our Craftsman website: www.craftsman.com
Part No. 316053 Rev G (04/10/2014)
ADVERTENCIA
Antes de utilizar el producto, lea este
manual y siga todas las Reglas de
Seguridad e Instrucciones de Uso.
• Safety
• Assembly
• Operation
• Maintenance
• Parts
• Español, p. 34
Advertisement
Chapters
Table of Contents

Related Manuals for Craftsman 580.752870


Summary of Contents for Craftsman 580.752870
- Page 1 * Esta limpiadora a presión está clasificada conforme a la norma PW101-2010 (comprobación y clasificación de rendimiento de limpiadoras a presión) de la Asociación de fabricantes de bombas a presión (Pressure Washer Manufacturers Association, PWMA). Sears Brands Management Corporation, Hoffman Estates, IL 60179 U.S.A. Visit our Craftsman website: www.craftsman.com Part No. 316053 Rev G (04/10/2014)
-
Page 2: Table Of Contents
Defective product will receive free repair or replacement if repair is unavailable. For warranty coverage details to obtain free repair or replacement, visit the web site: www.craftsman.com This warranty covers ONLY defects in material and workmanship. Warranty coverage does NOT include: •... -
Page 3: Safety Rules
SAFETY RULES Read this manual carefully and become familiar WARNING The engine exhaust from this product with your pressure washer. Know its applications, contains chemicals known to the State of California to its limitations, and any hazards involved. cause cancer, birth defects, or other reproductive harm. Important Safety Information WARNING This product contains lead and lead Safety Symbols and Meanings... - Page 4 WARNING Starter cord kickback (rapid retraction) will WARNING Fuel and its vapors are extremely flammable pull hand and arm toward engine faster than you and explosive which could cause burns, can let go which could cause broken bones, fire or explosion resulting in death or fractures, bruises, or sprains resulting in serious serious injury.
- Page 5 WARNING Use of pressure washer could create WARNING Risk of eye or bodily injury. puddles and slippery surfaces causing Spray could splash back or propel you to fall resulting in death or serious objects resulting in serious injury. injury. • Always wear indirect vented (chemical splash) safety goggles Kickback from spray gun could cause you to fall resulting marked to comply with ANSI Z87.1 when using or in vicinity of in death or serious injury.
-
Page 6: Features And Controls
FEATURES AND CONTROLS KNOW YOUR PRESSURE WASHER Read the Operator’s Manual and safety rules before operating your pressure washer. Compare the illustrations with your pressure washer to familiarize yourself with the locations of various controls and adjustments. Save this manual for future reference. A - Spray Gun —... -
Page 7: Assembly
ASSEMBLING PRESSURE WASHER Your pressure washer requires some assembly and is ready for use only after it has been properly serviced with the Your Craftsman pressure washer will need assembly before recommended oil and fuel. operation: If you have any problems with the assembly of your 1. - Page 8 Project Pro® PerfectMix™ Soap System Place accessory tray (A) over holes (B) on handle (viewing from front of unit). Push the tree clips (C) into The pressure washer is equipped with a detergent siphoning the holes until they sit flat against the accessory tray. hose.
- Page 9 Add Engine Oil To protect the fuel system from gum formation, mix in a fuel stabilizer when adding fuel. See Storage. All fuel is not the Place pressure washer on a flat, level surface. same. If you experience starting or performance problems Clean area around oil fill and remove yellow oil fill cap / after using fuel, switch to a different fuel provider or change brands.
- Page 10 Lubricate O-Rings Fresh Start® Fuel Cap The Fresh Start® fuel cap (A) is designed to hold a Lubrication of o-rings is extremely important for installation cartridge (B) which contains fuel preserver. Adding fuel and operation. The use of a lubricant (petroleum or synthetic preserver helps keep fuel fresh and carburetors clean for grease) during assembly helps seat o-rings properly and easier starting all season long.
- Page 11 Connect Hose and Water Supply to Pump 4. Run water through garden hose for 30 seconds to flush it of debris. Turn off water. NOTICE DO NOT siphon standing water for the water NOTICE DO NOT run the pump without the water supply supply.
-
Page 12: Operation
OPERATION HOW TO USE YOUR PRESSURE WASHER To Start Your Pressure Washer To start your engine-powered pressure washer for the first If you have any problems operating your pressure washer, time, follow these instructions step-by-step. This information please call the pressure washer helpline at 1-800-222-3136. also applies whenever you start the engine after you have let Pressure Washer Location the pressure washer sit idle for at least a day. - Page 13 NOTICE Before starting the pressure washer, be sure you WARNING The high pressure stream of water that are wearing safety goggles as described below. this equipment produces could cut through skin and its underlying tissues, resulting in serious WARNING Risk of eye injury. injury and possible amputation.
- Page 14 How to Use Accessory Tray 2. Select desired spray tip: The unit is equipped with an accessory tray with places to Low Pressure store your spray gun, nozzle extension, high pressure hose and quick connect spray tips. Black Place spray gun in wide groove on accessory tray as Use to apply shown.
- Page 15 Cleaning and Applying Detergent Make sure garden hose is connected to water inlet. Check that high pressure hose is connected to spray gun WARNING Chemical Burn Hazard. and pump. Turn on water. Chemicals could cause burns resulting in death or serious injury. NOTICE You must attach all hoses before you start the •...
- Page 16 Pressure Washer Rinsing Automatic Cool Down System (Thermal Relief) If you run the engine on your pressure washer for For Rinsing: 3-5 minutes without pressing the trigger on the spray gun, Remove black detergent spray tip from nozzle extension. circulating water in the pump can reach temperatures above 125°F.
-
Page 17: Specifications
SPECIFICATIONS ENGINE TECHNICAL INFORMATION PRODUCT SPECIFICATIONS This is a single cylinder, overhead valve (OHV), air cooled Pressure Washer Specifications engine. In the State of California, Model 110000 engines Max Outlet Pressure ..... . .2,700 PSI* are certified by the California Air Resources Board to meet Max Flow Rate . -
Page 18: Maintenance
MAINTENANCE OWNER’S RESPONSIBILITIES Emissions Control Maintenance, replacement, or repair of the emissions Follow the hourly or calendar intervals, whichever occurs control devices and systems may be performed by any non- first. More frequent service is required when operating in road engine repair establishment or individual. However, adverse conditions noted below. - Page 19 Check Detergent Siphoning Tube 3. Remove detergent siphoning hose from barbed fitting on pump. Examine the filter on detergent tube (if equipped) and clean if clogged. The tube should fit tightly on the barbed fitting. 4. Using a firm, blunt object 7/64” in diameter or smaller, Examine the tube for leaks or tears.
- Page 20 Spray Tip Maintenance O–Ring Maintenance A pulsing sensation felt while squeezing the spray gun trigger Purchase an O–Ring Repair Kit, Sears item 75116, at your local may be caused by excessive pump pressure. The principal Sears or by calling 1-888-331-4569 or online at www.sears. cause of excessive pump pressure is a spray tip clogged or com.
- Page 21 Checking Oil Level 4. Tip your pressure washer to drain oil from oil fill into a suitable container making sure you tip your unit away Make sure pressure washer is on a level surface. from spark plug. When crankcase is empty, return Remove oil dipstick and wipe dipstick with clean cloth.
- Page 22 Check electrode gap with wire feeler gauge and reset CAUTION Excessively high operating speeds could spark plug gap to recommended gap if necessary (see result in minor injury. Specifications). Excessively low speeds impose a heavy load. • DO NOT tamper with governor spring, links or other parts to increase engine speed.
-
Page 23: Storage
STORAGE WINTER STORAGE Change Oil While engine is still warm, drain oil from crankcase. Refill with recommended grade. See Changing Engine Oil. NOTICE You must protect your unit from freezing temperatures. Protect Pump • Failure to do so will permanently damage your pump and render To protect the pump from damage caused by mineral your unit inoperable. -
Page 24: Troubleshooting
TROUBLESHOOTING Problem Cause Correction 1. Low pressure spray tip installed. Replace with high pressure spray tip. 2. Water inlet is blocked. 2. Clear inlet. 3. Inadequate water supply. 3. Provide adequate water flow. 4. Inlet hose is kinked or leaking. 4. -
Page 25: Notes
NOTES... -
Page 26: Replacement Parts
PARTS CRAFTSMAN 2700 PSI Pressure Washer 580.752870 Main Unit — Exploded View and Parts List Item Part # Description Parts Not Illustrated 704064 BASE Part # Description 314787BNGS HANDLE 23139GS 319236GS BILLBOARD 704293 E-RING B1797GS CLIP 317999GS 314075GS KIT-QC NOZZLE... - Page 27 CRAFTSMAN 2700 PSI Pressure Washer 580.752870 Pump — Exploded View and Parts List Item Part # Description Optional Accessories Not Illustrated 33 200275GS SCREW Sears Item # Description 36 B2384GS FILTER-GARDEN HOSE 74403 Pump Saver 56 208673GS VALVE-THERMO RELIEF 75127...
- Page 28 ENGINE, Briggs & Stratton, 111P02 – Exploded View...
- Page 29 ENGINE, Briggs & Stratton, 111P02 – Exploded View...
- Page 30 ENGINE, Briggs & Stratton, 111P02 – Exploded View...
- Page 31 ENGINE, Briggs & Stratton, 111P02 – Parts List Item Part # Description Item Part # Description 798948 Cylinder Assembly 333 796500 Armature-Magneto 299819s Seal-Oil (Magneto Side) 334 793454 Screw (Magneto Armature) 493279 Sump-Engine 334A 796537 Stud (Magneto Armature) 796471 Head-Cylinder 337 692051 Plug-Spark 796475...
-
Page 32: Emission Control Warranty
The warranty repairs should be completed in a reasonable engine or product warranty statement, whichever is greater. amount of time, not to exceed 30 days. If you have any questions regarding your warranty rights and responsibilities, you should contact Sears at (800) 469-4663 (in USA) or www.craftsman.com/warranty. - Page 33 The warranty on emissions-related parts is as follows: Look For Relevant Emissions Durability Period and Air Index Information On Your Small Off-Road Engine • Any warranted part that is not scheduled for replacement as Emissions Label required maintenance in the Operator’s Manual supplied, is warranted for the warranty period stated above.
-
Page 34: Español
Una vez que adquiera el contrato de protección para reparaciones, sólo tiene que hacer una sencilla llamada telefónica para programar Su nuevo producto Craftsman® está diseñado y fabricado para un servicio. Puede llamar a cualquier hora del día o la noche, o funcionar de manera fiable durante muchos años. -
Page 35: Reglas De Seguridad
REGLAS DE SEGURIDAD Lea este manual minuciosamente y conozca a fondo las ADVERTENCIA El escape del motor de este producto partes y el funcionamiento de su máquina limpiadora a contiene elementos químicos reconocidos en el Estado de presión. Conozca sus aplicaciones, sus limitaciones y los California por producir cáncer, defectos de nacimiento u peligros involucrados. - Page 36 ADVERTENCIA El retroceso (repliegue rápido) del ADVERTENCIA El combustible y sus vapores son cable del arrancador impedirá que el usuario extremadamente inflamables y explosivos, suelte el cable a tiempo y tirará de su mano y lo que podría provocar quemaduras, brazo hacia el motor, lo que podría provocar incendios o explosiones;...
- Page 37 ADVERTENCIA Peligro de quemadura química. ADVERTENCIA Riesgo de lesiones en los ojos o el Las sustancias químicas podrían provocar cuerpo. quemaduras, así como lesiones graves o incluso la El agua rociada podría salpicar o muerte. propulsar objetos, lo que puede provocar lesiones graves.
-
Page 38: Características Y Controles
CARACTERÍSTICAS Y CONTROLES CONOZCA SU MAQUINA SISTEMA DE LIMPIEZA Lea el Manual del Operario y las reglas de seguridad antes de poner en marcha su sistema de limpieza. Compare las ilustraciones con su sistema de limpieza para familiarizarse con las ubicaciones de los diferentes controles y ajustes. Guarde este manual para referencias futuras. -
Page 39: Montaje
MONTAJE MONTAJE DEL SISTEMA DE LIMPIEZA Su sistema de limpieza requiere de cierto ensamble y estará lista para ser usado únicamente después de haber depositado el Usted deberá llevar a cabo los siguientes procedimientos antes de combustible y el aceite recomendado. poner en funcionamiento su sistema de limpieza: Si tiene problemas con el ensamble de su máquina limpiadora Llene y mande en tarjeta de matrícula. - Page 40 Project Pro® PerfectMix™ Jabón sistema Coloque la bandeja de accesories (A) sobre los orificios (B) del manubrio (vista desde la parte dentrás de la unidad). Presione La limpiadora a presión está equipada con uno manguera de las pinzas de árbol (C) para introducir las en los orificios hasta inyección de detergente.
- Page 41 Agregue aceite de motor AVISO El uso de combustibles no aprobados podría dañar el generador y anula la garantía. Coloque la limpiadora a presión en una superficie plana y • NO utilice gasolina no aprobada, como E15 y E85. nivelada. •...
- Page 42 Lubrique las juntas tóricas Tapón de combustible Fresh Start® El tapón de combustible Fresh Start® (A) está diseñado para La lubricación de las juntas tóricas es extremadamente importante albergar un cartucho (B) con aditivo para combustible. La adición para la instalación y operación. El uso de un lubricante (petróleo de un aditivo para combustible ayuda a mantener el combustible o grasa sintética) durante el montaje es de utilidad para que las en buen estado y los carburadores limpios para facilitar el arranque...
- Page 43 Conecte la manguera y el suministro de agua a Haga correr el agua a través de la manguera de su jardín la bomba por 30 segundos para limpiar cualquier escombro que se encuentre en ella. Desconecte el agua. AVISO Hace NO agua de parar de siphon para el abastecimiento de AVISO NO haga funcionar la bomba si no tiene el suministro agua.
-
Page 44: Operacion
OPERACION COMO USAR SU SISTEMA DE LIMPIEZA Para poner en marcha el sistema de limpieza Para darle arranque a su sistema de limpieza movido a motor por Si tiene problemas con el funcionamiento de su máquina limpiadora primera vez, siga estas instrucciones paso a paso. Esta información a presión, por favor llame a la línea de ayuda de la máquina acerca de la puesta en marcha inicial también es válida para limpiadora a presión al 1-800-222-3136. - Page 45 AVISO Antes de arrancar la limpiadora a presión, asegúrese de ADVERTENCIA El chorro de agua a alta presión que ponerse gafas de seguridad como se describe a continuación. este equipo produce podría atravesar la piel y ADVERTENCIA Riesgo de lesiones oculares. los tejidos subcutáneos, que podrían provocar lesiones graves y la posible amputación de un El agua rociada podría salpicar o propulsar...
- Page 46 Cómo usar las puntas de rocío ADVERTENCIA El chorro de agua a alta presión que este equipo produce podría atravesar la piel y La conexión rápida de la extensión para boquillas le permite los tejidos subcutáneos, que podrían provocar usar quatro puntas de rocío diferentes. Siempre que esté lesiones graves y la posible amputación de un activado el seguro del gatillo de la pistola rociadora, se pueden miembro.
- Page 47 Limpieza y aplicación del detergente • Para un enjuagado de máxima potencia (alta presión y bajo caudal), para superficies rebeldes o de difícil ADVERTENCIA Peligro de quemadura química. acceso, como superficies de plantas altas, eliminación Las sustancias químicas podrían provocar de pintura, manchas de aceite, eliminación de óxido u quemaduras, así...
- Page 48 Enjuage de la máquina limpiadora a presión Sistema de enfriamiento automático (alivio térmico) Después de haber aplicado el detergente, refriegue la superficie El agua que circula dentro de la bomba puede alcanzar temperaturas y enjuagela de la siguiente manera: entre los 125º-155ºF si hace funcionar el motor de su máquina limpiadora a presión de 3 a 5 minutos sin oprimir el gatillo de la Retire la punta de rocío negra para detergente de la extensión pistola de rociado.
-
Page 49: Especificaciones
ESPECIFICACIONES INFORMACIÓN TÉCNICA SOBRE EL ESPECIFICACIONES DEL PRODUCTO MOTOR Especificaciones de la máquina limpiadora a presión El motor es de uno cilindros, de válvulas en cabeza (OHV), refrigerado por aire. En el Estado de California, los motores de Presión de salida máxima ..... . . 2,700 PSI* la serie 110000 han obtenido la certificación del California Air Caudal máximo . -
Page 50: Mantenimiento
MANTENIMIENTO RECOMENDACIONES GENERALES Recomendaciones generales El mantenimiento periódico mejorará el rendimiento y prolongará Plan de mantenimiento la vida útil del limpiadora a presión. Si necesita asistencia, consulte Siga los intervalos de horas o de calendario, los que sucedan con un distribuidor de Sears o con otro distribuidor cualificado. antes. - Page 51 MANTENIMIENTO DE LA MAQUINA Bola de retención de inyección de detergente LIMPIADORA A PRESIÓN En ocasiones, la bola de retención se atasca en el sistema de inyección de detergente cuando ha pasado almacenado o por Limpie los residuos acumulación de jabón seco o minerales en el agua. La bola de retención se puede desatascar mediante los siguientes pasos: Limpie a diario, o antes de cada uso, los residuos acumulados en el limpiadora a presión.
- Page 52 Revise la pistola Use un sujetapapeles pequeño para liberar cualquier material extraño que esté tapando la punta de rocío (A). Examine la conexión de la manguera con la pistola rociadora y asegúrese de que es correcta. Pruebe el gatillo apretando el botón rojo para asegurarse de que el gatillo vuelve a su posición original cuando se suelta.
- Page 53 MANTENIMIENTO DEL MOTOR Comprobación del nivel de aceite Compruebe el nivel de aceite antes de cada uso o cada 8 horas de ADVERTENCIA Las chispas involuntarias podrían funcionamiento, como mínimo. Rellene si es necesario. provocar incendios o electrocución que Coloque el limpiadora a presión sobre una superficie nivelada. pueden provocar lesiones graves o la muerte.
- Page 54 Remplace la bujía Cambie el aceite cuando el motor siga estando caliente después de haber funcionado: Cambie la bujía ayudará a su motor a arrancar más fácilmente y Drene el tanque del combustible haciendo funcionar la máquina funcionar mejor. limpiadora a presión hasta que el tanque esté vacío. Limpie el área alrededor de la bujía y retírela.
- Page 55 DESPUES DE CADA USO Sistema de refrigeración de aire Con el tiempo, se pueden acumular residuos en las aletas de No deberá haber agua en la unidad por largos períodos de tiempo. refrigeración del cilindro y pasar inadvertidos mientras no se Los sedimentos de minerales se pueden depositar en partes de desmonte parcialmente el motor.
-
Page 56: Almacenamiento
ALMACENAMIENTO ALMACENAMIENTO PARA INVIERNO Si no se ha añadido un estabilizador de combustible a la gasolina, deberá vaciar completamente el motor utilizando un contenedor homologado. Deje funcionar el motor hasta que se agote el AVISO Usted deberá proteger su unidad de las combustible. -
Page 57: Reparacion De Daños Repuestos
REPARACION DE DAÑOS Problema Causa Solución Cambie la puntas de rocío a una de las puntas Está usando la puntas de rocío de baja de rocío de alta presión. presión (negra). Limpie la entrada. La entrada de agua está bloqueada. Proporcione flujo de agua adecuado. -
Page 58: Garantia Del Control De Emisiones
30 días. En caso de tener preguntas sobre los derechos y responsabilidades relativos a la garantía, póngase en contacto con Sears llamando al (800) 469-4663 (en los Estados Unidos) o visite www.craftsman.com/warranty. - Page 59 La garantía de las piezas relacionadas con las emisiones es la Consulte la información sobre el período de duración de las siguiente: emisiones y el índice de aire en la etiqueta sobre las emisiones del motor pequeño para máquinas de servicio •...