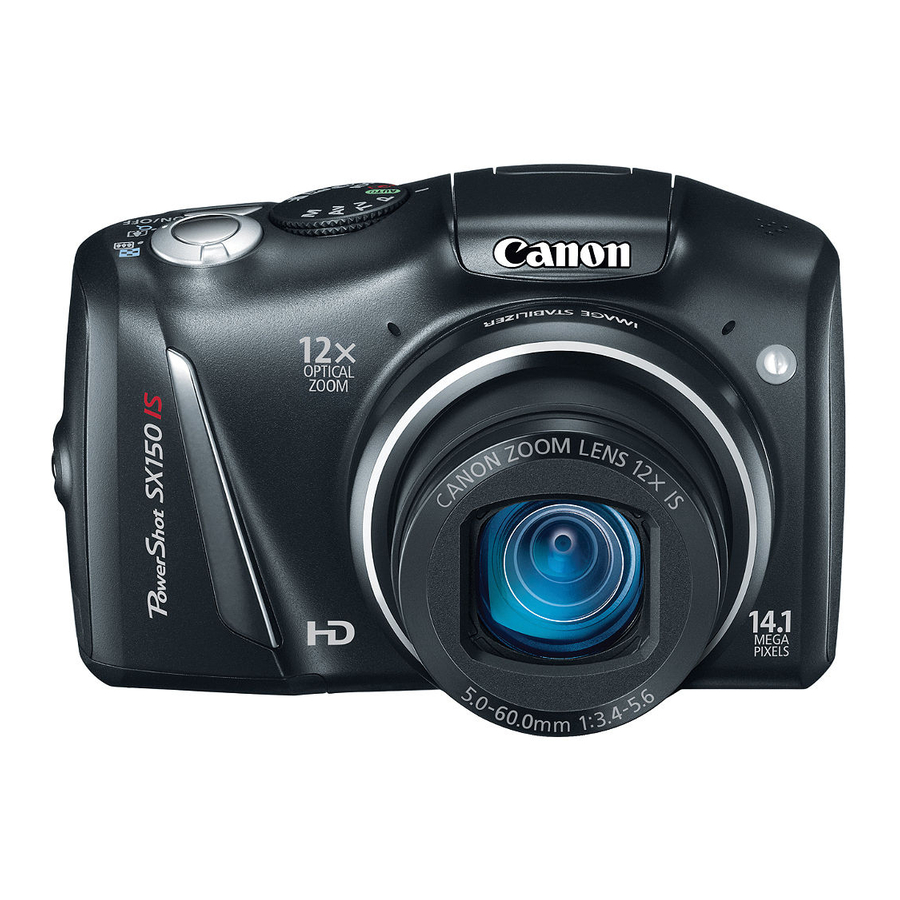
Canon POWERSHOT SX150 IS User Manual
Hide thumbs
Also See for POWERSHOT SX150 IS:
- Getting started (302 pages) ,
- User manual (200 pages) ,
- Technical specifications (2 pages)
Table of Contents
Advertisement
Quick Links
Download this manual
See also:
User Manual
CaHOH
7_owe,-Sho, S XI50
IS
Camera User Guide
Make sure
guide,
including
the "Safety
Precautions"
section
before using the camera.
use the camera
properly.
use it in the future.
Advertisement
Table of Contents

Related Manuals for Canon POWERSHOT SX150 IS


Summary of Contents for Canon POWERSHOT SX150 IS
- Page 1 CaHOH 7_owe,-Sho, S XI50 Camera User Guide Make sure guide, including the "Safety Precautions" section before using the camera. use the camera properly. use it in the future.
- Page 2 Using Various Functions Shooting Movies This chapter serves as a more advanced version of the "Shooting Movies" and "Viewing Movies" sections in Chapter 1, and explains to use various functions for shooting and viewing movies. This chapter assumes that you have set the mode dial to ",_,. However, even if the mode dial is set to a position other than _,_,, movies can be shot by pressing...
- Page 3 Enter',=,mode. Set the mode dial to _,@m,. Adjust the settings according ..........................your purposes (pp. 102 - 108). Shoot. Press the movie button. To stop shooting the movie, press the movie button again. You can choose among 2 different Movie modes. Choose a Movie mode.
- Page 4 Just as with still images, you can let the camera select the best settings the scene or add various effects while shooting movies. Choose a Shooting mode. Follow Steps 1 - 2 on p. 58, or Steps 1 - 2 on p.
- Page 5 You can shoot movies that look like moving miniature models. You create miniature model effect by choosing the upper and lower portions of the scene that will be blurred, and the playback speed, which makes people and objects in the scene move quickly during playback.
- Page 6 Shoot Movies That Look Like a Miniature Model (Miniature Effect) Playback Speeds and Estimated Playback Times (for 1 Min. Clips) ............5X....................Approx 12 sec........Approx. 6 sec. Approx. 3 sec.
- Page 7 You can choose among 2 different image quality settings..::: Choose the image quality setting. After pressing the @ button, press the buttons to choose Choose an option....Press the _ )' buttons or turn the _ii:i_: d ial to choose an option, then press the@...
- Page 8 You can lock the exposure or change it in 1/3 steps within a range of-2 to +2 before shooting. Lock the exposure. Press the A button to lock the exposure. The exposure shift bar appears. Press the ,_ button again to release lock.
- Page 9 The following functions can be used in the same way as for still images. However, depending on the Shooting mode, settings may not be available may not have any effect. Zooming in More Closely On Subjects The sound of zoom operations will be recorded.
- Page 10 You can trim the beginnings and ends of recorded movies. Choose _. Follow Steps 1 - 3 on p. 32 to choose _<, then press the @ button. The movie editing panel and the movie editing bar will appear. Movie Editing Panel Set the editing range.
- Page 11 Editing Save the edited movie. Press the Av buttons to choose ['__, then press the @ button. Press the Av4_ buttons or turn the _ii_ dial to choose [New File], then press the button. The movie will be saved as a new file.
- Page 12 Using Various Playback Editing Functions This chapter exp,ains various ways to p,ay back and edit images. Press the [] button to enter Playback mode before operating the camera.
- Page 13 Displaying multiple images at the same time lets you quickly find the image you want..:::::Move the zoom lever toward _. Images will display in an index. The number of images increases each ..................................time you move the lever toward _. The number of images decreases...
- Page 14 When there are many images on the memory card, you can filter and display them by a specified filter. You can also protect (p. 119) or erase (p. 123) images at once while filtered. ,Jump {o Favorites DisPlays {he images iagged as favoiiies iPl ]25) ,Jump Shoi Daie Displays the images shoi on a sPeciiied daie.
- Page 15 Viewing images in Filtered Playback Filters that do not have any corresponding images cannot be chosen. In filtered playback (Step 2), you can view filtered images with "Quickly Searching Images" (p. 112), "Viewing Slideshows" (p. 115), and "Magnifying Images" (p. 117). You can process all filtered images at once while performing operations in "Protecting Images"...
- Page 16 You can automatically play back images recorded to a memory card. Choose [Slideshow]. Press the MENU button to choose [Slideshow] in the [] tab, then press the @ button. : Choosesett O. Press the ._'v buttons or turn the !i'i_ dial to choose a menu item, then press the _ buttons...
- Page 17 You can magnify the area of a recorded image that was inside the AF Frame to check the focus. Press the D ISR button to switch to the focus check display (p. 40). A white frame will appear where the AF frame was when the focus was set.
- Page 18 Move the zoom lever toward 0,. The display will zoom in on the image. you continue to hold the zoom lever, it will zoom in up to a maximum factor of approximately 10x. If you press the .A.'v'_ buttons, you can move the location of the displayed area.
- Page 19 Changing image Transitions Choose an image. Press the Av _ _ buttons to choose image you want to view next. The chosen image will be displayed in the center, and the next 4 possibilities wi[[ appear. Press the @ button to display the center image at full size.
- Page 20 You can protect important images so that they cannot be accidentally erased with the camera (pp. 28, 123). Choose [Protect]..i:!ii iiii!iy Press the MENU button to choose [Protect] in the [] tab, then press the @ button, Choose a selection method.
-
Page 21: Table Of Contents
Protecting images ........Choose [Select]. Follow Step 2 on p. 119 to choose [Select], then press the @ button. Choose images....Press the { _ buttons or turn the _ii:i_dial to choose an image, then press the@ button. will appear on the screen. - Page 22 Protoct,°0,mo i!i!i Choose [Select Range]. Follow Step 2 on p. 119 to choose [Select Range], then press the @ button. Chooseastarting image. Press the @ button. Press the 4 _ buttons or turn the !i_ i_:dial to choose an image, then press the@- button.
- Page 23 Protecting images ..Protect images. Press the v button to choose [Protect], then press the @ button. You can also choose the first or last image by turning the :_ii_:; dial when the upper screen in Steps 2 and 3 is displayed. _ Choosing All images Choose...
-
Page 24: Choose [Select]
You can choose images and then erase them in groups. Since erased images cannot be recovered, exercise adequate caution before erasing. Protected images (p. 119) cannot be erased. Choose [Erase]. MENU Press the button to choose [Erase] in the [] tab, then press the @ button. - Page 25 Erasing images Erase. MENU If you press the button, a confirmation screen will appear. Press the 4 )' buttons or turn the i_i:_ dial to choose [OK], then press the @ button..::: Choose [Select Range]. Follow Step 2 on p. 123 to choose [Select Range], then press the @...
- Page 26 When you tag images as favorites, you can easily categorize just those images. You can also filter out just those images for viewing, protecting erasing (p. 113). i:!i:!ii!!i!!ii;' Choose [Favorites]. Press the MENU button to choose [Favorites] in the [] tab, then press the @ button, Choose an image.
- Page 27 You can organize images into categories. You can display the images in a category in filtered playback (p. 113) and process all images at once by using the functions below. "Viewing Slideshows" (p. 115), "Protecting Images" (p. 119), "Erasing Images" (p.
-
Page 28: Will Disappear
Organizing images by Category (My Category) Choose acategory. Press the Av buttons to choose category, then press the @ button. will appear on the screen. Press the @ button again to deselect image. will disappear. To choose additional images, repeat the above procedure. - Page 29 Rotating images You can change the orientation of an image and save Choose [Rotate]. MENU Press the button to choose [Rotate] in the [] tab, then press the @ button. Rotate the maae. Press the _ _ buttons or turn the _,!ii ii_ dial to choose an image.
- Page 30 You can resize images to a lower pixel setting and save the resized image as a separate file. Choose [Resize]. MENU Press the button to choose [Resize] in the [] tab, then press the @ button. ::: Choose an image. Press the _ buttonsorturn theii!_...
- Page 31 You can cut out a portion of a recorded image and save it as a new image file..Choose [Trimming]. Press the M EN U button to choose [Trimming] in the [] tab, then press the @ button. Choose an image. Press the buttons orturn the !:::dial to choose an image, then press the @ button.
- Page 32 You can change the color of an image and save it as a separate image. Refer to p. 78 for details on each menu item. Choose [My Colors]. MENU Press the button to choose Colors] in the [] tab, then press the @ button.
-
Page 33: Or Turn The _Ii:i_Dial To
The camera can detect areas in an image, such as faces or backgrounds, that are too dark and automatically adjust them to the optimum brightness. Also, when the overall image is lacking in contrast, the camera will automatically correct the image for a sharper impression. -
Page 34: Press The
You can automatically correct red eyes in images and save them as new files. Choose [Red=Eye Correction]. i:!i:!ii!!i!!ii;' MENU Press the button to choose [Red- Eye Correction] in the [] tab, then press the @ button. Choose an image. Press the _ _ buttons or turn the i!iiii_dial to choose an image. - Page 36 Canombrand PictBfidge compliant printer (sold separately). Canon=Brand PictBridge Compliant Printers This chapter uses Canon-brand SELPHY CP series printers in the explanations. The displayed screens and available functions will differ depending on the printer.
- Page 37 You can easily print the pictures you take by connecting the camera to a PictBridge compliant printer (sold separately) using the supplied interface cable (p. 2). Turn off the camera and printer. Connect the camera to the printer........Open the cover and insert the cable's small plug firmly into the camera...
- Page 38 Printing images Print images. Press the Av buttons or turn the i_i_ i _ dial to choose [Print], then press the @ button, Printing will start. If you want to print additional images, repeat Steps 5 and 6 after printing completed.
- Page 39 Printing images Making Pri"i Sei_:ingS ..............Connect the camera to the printer. Follow Steps 1 - 5 on p. 136 to display screen on the left. Choose a menu option. Press the Av buttons or turn the 'i_i_ dial to choose an option, Choose the option settings.
- Page 40 Printing images Trimming and Printing (Trimming) You can cut out a portion of an image for printing. Choose [Trimming]. ::!ii!ii!!ii!! Follow Steps 1 - 2 on p. 138 to choose [Trimming], then press the @ button, A frame will appear around the portion the image to be trimmed.
- Page 41 Printing images Choosing the Paper Size and Layout for Printing ..Choose [Paper Settings]. Follow Steps 1 - 2 on p. 138 to choose [Paper Settings], then press the @ button. Choose a paper size. Press the Av buttons or turn the _ i_.i d ial to choose an option, then press the@ button.
- Page 42 Printing images Available Layout Options Bordered Prints with a border. N-up Selects how many copies of an image are printed on a sheet. ID Photo Prints ID photos. Only images with a recording pixel setting of L can be chosen. Fixed Size Choose the print size.
- Page 43 Printing images ..Connect the camera to the printer. Follow Steps 1 - 5 on p. 136 to choose movie. Press the 4_ buttons to choose r[_, then press the @ button to display the screen on the left..Choose a printing method.
- Page 44 You can choose up to 998 images on a memory card for printing and specify settings such as the number of copies so that they can be printed as a batch (p. 146) or processed at a photo developer service. These selection methods...
- Page 45 Choosing images for Printing (DPOF) On ..Prints the shooting date Prints the file number. _ChOOSi,g the N.mber 0f c_;pies ........Choose [Select images & Qty.]. MENU Press the button to choose [Select Images & Qty.] in the r_ tab, then press the @ button.
- Page 46 Choosing images for Printing (DPOF) Choose an image. Press the _ )' buttons or turn the J!ii: _ dial to choose an image, then press the (_ button. You will be able to set the number of print copies. If you choose images in [Index], appears...
- Page 47 Choosing images for Printing (DPOF) ..Choose [Select All images]. Follow Step 1 on p. 144 to choose [Select All Images], then press the @ button. Make print settings. Press the 4 )' buttons or turn the ;::_ dial to choose [OK], then press the @...
- Page 48 When you choose images on a memory card to use in Photobooks (max.998 images) and use the included software to transfer them to a computer, chosen images will be copied into a dedicated folder. This function is useful for ordering Photobooks online and for printing Photobooks...
- Page 49 Choosing images for a Photobook Choose an image. Press the _t_ buttons or turn the _ii:i_dial to choose an image, then press the (_A button. v _ will appear on the screen. Press the @ button again to deselect image. V / will disappear. To choose additional images,...
- Page 50 Customizing Camera Settings You can customize various settings to suit your shooting preferences. The first part of this chapter explains convenient and commonly used functions. The latter part explains how to change shooting and playback settings to suit your purposes.
- Page 51 You can customize convenient and commonly used functions in the _1' tab (p. 43). You can change each of the camera's operation sounds. Choose [Sound Options], then press the button. Press the A'v" buttons or turn the _/:_;dial to choose a menu item.
- Page 52 Cho°.,o°CamoroSo i!i!i _LoW LeveeMem0_ care F0rmatte ,g ......Perform low level formatting when [Memory card error] appears, the camera does net operate properly, you think that the recording/reading speed of a memory card has dropped, the continuous shooting speed slows down, or recording suddenly stops while shooting...
- Page 53 Changing Camera Settings You can change the start-up screen that appears when you turn on the camera. Choose [Start-up Image], then press the button. Press the _ _ buttons or turn the dial to choose an option. No start-up image Preset images (cannot be modified} Preset images...
- Page 54 Changing Camera Settings The dedicated operation sounds and start-up images on the included software can be registered to the camera. Refer to the Software Guide for details. Changing Fiie Number Assignment Images you shoot are automatically assigned file numbers in the order they were taken, from 0001 - 9999, and saved to folders of up to 2,000 images.
- Page 55 Changing Camera Settings Creating Folders by Shooting Date Images are saved into folders created each month, however, you can also create folders by shooting date. Choose [Create Folder], then press the buttons to choose [Daily]. Images will be saved into folders created on each shooting date.
- Page 56 C.o°g,o0CamoroS i!i!i You can adjust the time the screen takes to shut off automatically (p. 48). This also works when [Auto Power Down] is set to [Off]. Choose [Power Saving], then press the @ button. Press the Av buttons or turn the _!_ dial to choose [Display Off], then press the 4_' buttons...
- Page 57 Changing Shooting Function Settings You can change the units that display in the MF indicator (p. 86) and zoom bar (p. 23) from m/cm to ft!in. Choose [Distance Units], then press the buttons to choose [ft!in]. If you set the mode dial to P, you can change the settings in the O (p.
- Page 58 uuuuu uuuuu uuuuu illllllll;_ C.a°g,ngS.oot,no °°ot,on i!i!i The [amp will automatically light to assist focusing in low light conditions when you press the shutter button halfway. You can turn off the lamp. Choose [AF-assist Beam], then press the buttons to choose [Off].
- Page 59 Changing Shooting Function Settings You can change the way the image displays right after shooting. Choose [Review Info], then press the _ buttons to choose an option. Detailed Displays detailed information (p. 176). The area inside the AF frame is magnified, allowing you to check Focus Check the focus.
- Page 60 Cha..,°.S.oot,°° o.ot,o°Se i!i!i Choose [IS Settings], then press the @ button. Press the Av buttons to choose Mode], then press the _, buttons choose an option. Continuous image stabilization for the scene (Intelligent IS) (p. 175). h_age stasiiizaiion is only active Shooting at the moment of shooting.
- Page 61 You can adjust the settings in the [] tab by pressing the [] button (p. 43). When you play back images on the camera, images shot in vertical orientation automatically rotate and display vertically. You can turn off this function. Select [Auto Rotate], then press the 4_...
- Page 62 Usefu| information THs chapter introduces how to use the accessories and Eye-F[ cards (both sold separately) (p. 192), troubleshooting tips, and contains Hsts of functions and items that appear on the screen.
- Page 63 Using the separately sold Stereo Video Cable STV-250N (p. 193), you can connect the camera to a TV to view images you have shot..Turn off the camera and TV. Connect the camera to the TV. Open the camera's terminal cover and fully insert the cable plug into the camera's terminal.
- Page 64 If you use AC Adapter Kit ACK8O0 and DC Coupler DR-DC10 (both sold separately), you can use the camera without worrying about how much charge is left in the batteries..Turn offthecamera. Open the cover. Follow Step 2 on p. 14 to open the memory card/battery cover.
- Page 65 Using Household Power Insert the adapter plug into the coupler cable terminal. co..oott.o powo oord. Connect the power cord to the compact power adapter, then plug the other end into a power outlet. Turn the camera on to use it. After you finish, turn off the camera unplug the power cord from the power...
- Page 66 Before using an Eye-Fi card, be sure to check whether Eye-Fi card use is authorized in the country or territory of use (p. 14). When you put a prepared Eye-Fi card into the camera, you can automatically transfer your images wirelessly to a computer, or upload them to a web...
- Page 67 Using an Eye=Fi Card checki.g c0n.eCt=0, unfermati0n ....... You can check the Eye-Fi card's access point SSID, or connection status. Choose [Connection info]. MENU Press the button to choose [Eye-Fi Settings] in the tl' tab, then press the @ button. Press the Av buttons or turn the '_i_ dial...
- Page 68 If you think there is a problem with the camera, first check the following. If the items below do not solve your problem, contact a Canon Customer Support Help Desk. Power You pressed the power button, but nothing happened. Confirm that the batteries are the correct type, and are not depleted (p. 17).
- Page 69 Troubleshooting Image is blurred. Press the shutter button halfway to focus on the subject, then press fully to shoot (p. 22). Shoot the subject within the focusing distance (p. 188). Set the [AF-assist Beam] to [On] (p. 157). Confirm that functions which you do not intend to use (macro, etc.) are not set. Shoot using the focus lock or AF lock (pp.
- Page 70 Troubleshooting Recording images to the memory card takes a mong time, or continuous shooting slows down. Perform a low-level format of the memory card in the camera (p. 151). Cannot make settings for shooting functions or FUNC. menu. The items in which settings can be made differ depending on the shooting mode. Refer to "Functions Available in Each Shooting Mode"...
- Page 71 (p 15) Memory card error (p. 151) If the same message appears even when a formatted memory card is inserted in the correct direction, contact a Canon Customer Support Help Desk (p 15) Insufficient space on card, cannot...
- Page 72 This error can occur if you hold the lens while it is in motion or when using it in a location with excessive dust or sand in the air. If this error message continues to appear, contact a Canon Customer Support Help Desk as there may be a problem with the lens.
- Page 73 If all error code appears directly after taking a picture, the shot may not have been recorded. Check the image in Playback mode. If this error code reappears, note the Error number (Exx) and contact a Canon Customer Support Help Desk as there may be a problem with the camera.
- Page 74 ®® ®@@ @®® ® AE Lock (p. 89), FE Lock Battery Charge Indicator @ Remaining Time (p. 106) (p. 89) Digital Zoom (p. 17) Exposure Shift Bar Magnification (p. 50) / (2_camera orientation _ ¢_ Shutter Speed (pp. 96, Digital Tele-converter White Balance (p.
- Page 75 information Displayed on the Screen In _ mode, the camera displays an icon for the scene it has determined and then automatically focuses and selects the optimum settings for subject brightness and color. Icon Background Color Gray Light Blue Orange Dark Blue * Appears when the scene is dark and the camera is attached...
- Page 76 ,n,ormat,ooO,sp,ayedo° i!i!i Automatically sets the optimal image stabilization for the scene (Intelligent and displays the following icons when in _ mode. Reduces camera shake when shooting movies, including Reduces camera shake when strong camera shake that occurs shooting stillimages. when shooting movies while walking (Dynamic Mode).
- Page 77 information Displayed on the Screen edi,for.,at o,B splay ....®@@@ ® ® ® ® ®o My Category (p. 126) Battery Charge Indicator _ Focusing Range (pp. 80, @ Shooting Mode (p. 178) (p. 17) (_ ]SO Speed (p. 75), Metering Method (p. 88) _ File Size (pp.
- Page 78 information Displayed on the Screen Summary of Movie Control Panel in "Viewing Movies" (p. 32) Exit Play speed. Sound will not play back.) Previous Frame (Rewind if you hold down the _ button.) i1_' Next Frame (Fast io_aid if you hoid down ihe O 5ution:) Skip Forward* (Continues to skip forward if you hold down the @ button.) Edit (p.
- Page 79 Exposure Compensation (p. 75) Speed (p. 75) __,_ o o o - Focusing Range (p. 80) Self-Timer (p. 52) Av/Tv Settings (pp. 96, 97) AE Lock (Movie)/Exposure Shift (p. 107) Screen Display (p. 40) .."1 Cannot be set, but switches to _ depending on the circumstances.
- Page 80 iiiiiiiii_ iiiiiiiii_ iiiiiiiii_ iiiiiiiii_ 00000 0000000 _i 0 00000 000000 000000 © © ..... 0000-- O00000---- ZZ_-- = ..o o 0 0 _5FE Lock not available when set to _. O Selectable or set automatically.- Not selectable.
- Page 81 Functions and Menu Lists White Balance (p. 76) Drive Mode (p. 77) Metering Method(p. 88) E3Eo3 M1 M2 Recording Pixels (p. 54) ..S................ o o 0 0 Compression Ratio (p. 54) "1 White balance is not selectaMe. *2 Contrast, sharpness, color saturation, red, green, blue, and skin tone...
- Page 82 Functions and Menu Lists --0000 0000000000000000000000 ----COO ------ OOOOOOOOOOOODOOOOOOOOO OOOOOODOOOOOOO OODO000000000000000000 OODOOO 000000000000000 OODOOO OOOO---- OOOOOO OOOO---- OODCO0 0000 0---- 0 Selectable or set automatically. - Not selectable.
- Page 83 Functions and Menu Lists Center #_ce6eiec_ ............Frame (p. 82) iStandard AF-Point Zoom (p. 85) Servo AF (p. 87) Continuous AF (p. 156) Safety MF (p. 86) iAuto Flash Mode Manuai Fiash6u{pui 6 m,m Flash Settings (pp. 90, 92, 99, 157) Red-Eye C..
- Page 84 Functions and Menu Lists 000000--000000000 OODOOOOOOO------DO0000000 0000------ 000000 000000--C00000000 0000 ----000000000 DCO0 0000 OODO000000000000000000 O0--CO0000©------ 000000---- 0000000000000000000000 o 0 o o---- o 0 o 0 00--00000000000000000---- o o-o 0 o 0-0 o o o o o o o o o o 0000000000000©...
- Page 85 Functions and Menu Lists 0 -- 2see. Review (p. 157) _0s_Aoi_ ..........Blink Detection (p. 93) Uisp. Overlay (p. 158) Grid Lines IS Settings (p. 159)
- Page 86 iiiiiiiii:: © © O Selectable, or set automatically. - Not selectable.
- Page 87 Functions and Menu Lists Mute On/Off* p. 44 Volume Set all operation sounds (5 levels), p. 45 Sound Options Set the sounds for each camera operation, p. 150 LCD Brightness Sets screen brightness (5 levels), p. 46 Start-up Image Add an image as a start-up image, p.
- Page 88 iiiiiiiii_ Functions Menu Lists Smart Shuffle Starts Smart Shuffle. p. 117 Slideshow Plays back images automatically, p. 115 Eiase Erasesimages(Se';;il seieci RangelAll pli23 Images). Protect Protects images (Select, Select Range, Ali p. 119 Images). Rotate Rotates images, p. 128 #avoriies ..........Fags or uniags images as favoriies ........
- Page 89 Image Sensor Camera Effective Pixels ....Approx. 14.1 million pixels Lens Focal Length ........5.0 (W) - 60.0 (T) mm (35mm film equivalent: 28 (W) - 336 (T) mm) Zoom Magnification ......Focusing Range ......1 cm (0.4 in.) - infinity (W), 1 m (3.3 ft.) - infinity (T) •...
- Page 90 Specifications Shooting Modes ........M, Av, Tv, P, Auto .1, Easy, SCN .2, Creative Filters .3, Discreet, Movie .4 • Shooting movies is possible with the movie button "1 Smart Auto also available for movies • 2 Portrait, Landscape, Kids&Pets, Smart Shutter .5, Low Light, Beach, Foliage, Snow, Fireworks •...
- Page 91 Weight (CIPA compliant) ..... Approx. 306 g (10.8 oz.) (Including the battery and memory card) Approx. 258 g (9.10 oz.) (camera body only) All data is based on tests by Canon. Camera specifications or appearance are subject to change without notice.
- Page 92 Supplied with Camera Wrist Strae WS-800 DtGITAL CAMERA Solution Disk AA Alkaline Batteries InterFace Cable (x2) ]FC400PCU* _Also available for purchase separately ÷ ..Windows/Macintosh iiiiiii iiiiiiii STV-250N...
- Page 93 The following camera accessories are sold separately. Some accessories not sold in some regions, or may no longer be available. Power Supp|ies AC Adapter Kit ACKS00 This kit lets you power the camera using household power. Recommended powering the camera for an extended period of time or when connecting to a...
- Page 94 This product is designed to achieve excellent performance when used with genuine Canon accessories. Canon shall not be liable for any damage to this product andlor accidents such as fire, etc. caused by the malfunction of non-genuine Canon accessories (e.g., a leakage and/or explosion of a battery pack). Please note that this warranty does not apply to repairs arising out of the malfunction of non-genuine Canon accessories, although you may request such repairs on a chargeable basis.
- Page 95 Numerics Date and Time -e Date/Time DC Coupler ........163, 192 3:2 Guide ..........Default Settings ......... DIGITAL CAMERA Solution Disk ....2 Digital Tele-Converter ....... AC Adapter Kit ......... 163, 192 Digital Zoom ..........Accessories ..........Discreet (Shooting Mode) ......AE Lock ..........
- Page 96 index Focus Check ..........Magnified Display ........Focusing Range Manual Focus (Focus Mode) ..... Macro ..........Memory Cards ........... Manual Focus ........Available Shots ......17, 55 Focus Lock ..........Formatting ........21, 151 Foliage (Shooting Mode) ......Shooting Time ......31, 106 Format -e Memory...
- Page 97 Index Travel Abroad ........155, 192 Trimming ..........SCN (Shooting Mode) ....... Troubleshooting ........Screen Tv (Shooting Mode) ........Display Language ....... Information Display ....173, 176 Menu _ FUNC. Menu, Menu Video -e Movies Switching the Display ......Viewing SD/SDHC/SDXC Memory Card -e Memory Filtered Playback...
- Page 98 Use a commercially available blower brush to remove dust from the lens. For stubborn dirt contact a Canon Customer Support Help Desk. When you move the camera rapidly from cold to hot temperatures, condensation may form on the internal...
- Page 99 Do not make any changes or modifications to the equipment unless otherwise specified in the manual. If such changes or modifications should be made, you could be required to stop operation of the equipment. Canon U.S.A., Inc. One Canon Plaza, Lake Success, NY 11042, U.S.A. Tel No. (516) 328-5600 Canadian Radio...
- Page 100 Canada only: Please call 1-80O-8-BATTERY for information on how to he Nickel-Metal Hydride battery is recyclable. recycle this battery. only Included lithium battery contains Perchlorate Material - special handling may apply. See www.dtsc.ca.gov/hazardouswaste/perchlorate/for details. Trademark Acknowledgments The SDXC logo is a trademark of SD-3C, LLC.