Table of Contents
Advertisement
Advertisement
Table of Contents

Related Manuals for Epson 2200


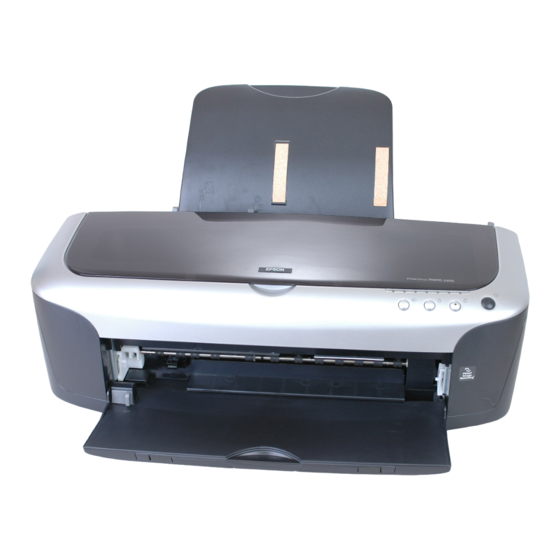
Summary of Contents for Epson 2200
-
Page 2: Copyright Notice
SEIKO EPSON CORPORATION. The information contained herein is designed only for use with this EPSON printer. EPSON is not responsible for any use of this information as applied to other printers. -
Page 3: Table Of Contents
PRINT Image Matching and Exif Print About PRINT Image Matching About Exif Print About Your Software About Your Documentation Using the EPSON Printer Information Center Launching the Movies Launching the Manual Printer Buttons and Lights Loading Paper Loading Paper in the Sheet Feeder... - Page 4 Printing a Custom Profile Test Target Creating Your Custom Profile Printing With Your Custom Profile Solving Color Management Problems Maintaining Your Printer Cleaning the Print Head Running the Head Cleaning Utility Examining the Nozzle Check Pattern Replacing an Ink Cartridge...
- Page 5 Technical Support for Other Photo Software Requirements and Notices Windows System Requirements Macintosh System Requirements Important Safety Instructions Ink Cartridge Safety Instructions Automatic Roll Paper Cutter Safety Instructions FCC Compliance Statement Declaration of Conformity Energy Star Compliance Epson America, Inc. Limited Warranty Index Contents...
- Page 6 Contents...
-
Page 7: Welcome
Photo 2200 is the ultimate desktop printer for professional and amateur photography. Your outstanding printouts result from these advanced features: EPSON’s 7-color inks let you print up to 2880 × 1440 dpi (dots per inch). Large gamut, pigment-based, EPSON lightfast papers deliver long-lasting, water-resistant prints. -
Page 8: Print Image Matching And Exif Print
PRINT Image Matching and Exif Print Your EPSON Stylus Photo 2200 printer supports these innovative digital image formats to give you the best photo prints possible: PRINT Image Matching Exif Print About PRINT Image Matching EPSON’s revolutionary PRINT Image Matching (P.I.M.) technology lets your digital camera and printer work together automatically to produce the best prints possible. -
Page 9: About Exif Print
Your printer driver runs your printer and lets you control how your documents look. You can’t print without it. Tip: It’s a good idea to check EPSON’s support web site periodically for free updates to your printer driver. Visit http://support.epson.com. Download instructions are posted for your convenience. -
Page 10: About Your Documentation
Monaco Systems accurate color between scanned, displayed, and printed images. About Your Documentation To set up your printer and install its software, see the Start Here sheet. This book contains system requirements, important safety information, your warranty, and instructions on:... -
Page 11: Using The Epson Printer Information Center
Using the EPSON Printer Information Center Need help loading roll paper or installing the cutter? Use the EPSON Printer Information Center to view printer movies and a manual that quickly tell you how. Follow the instructions on the Start Here sheet to install the EPSON Printer Information Center, if you haven’t already. -
Page 12: Launching The Manual
Note: If you see an icon for a graphic when viewing your Reference Guide in Netscape Navigator, click the Reload button to load the graphic. Welcome! EPSON Printer Information Center . You see this screen: to view subtopics, then click on a topic. -
Page 13: Printer Buttons And Lights
Printer Buttons and Lights The tables below summarize the functions of the printer buttons and lights. See the instructions in your documentation for details on using the buttons. To diagnose problems indicated by the printer lights, see page 74. Printer buttons... - Page 14 Welcome!
-
Page 15: Loading Paper
Loading Paper You can load a variety of paper types in your printer, as described in these sections: “Loading Paper in the Sheet Feeder” below “Loading Envelopes” on page 11 “Loading Roll Paper” on page 12 “Loading and Printing on Thick Paper” on page 17... -
Page 16: Loading Special Paper
EPSON Premium Glossy Photo Paper EPSON Velvet Fine Art Paper EPSON Premium Bright White Paper Load EPSON Velvet Fine Art Paper only in the manual feed slot, following the instructions on page 17. Check the paper package for additional handling instructions. -
Page 17: Loading Envelopes
1. Load envelopes as shown, with the flap side down and the flap edge against the right side of the sheet feeder. 2. Slide the left edge guide against the envelopes. 3. Set the adjust lever to the ^ position. 4. Choose these settings in your printer software: as the Type (Windows) or Plain Paper... -
Page 18: Loading Roll Paper
Avoid touching the printable surface of the roll paper. 4. Remove any paper that’s in the sheet feeder at the top of the printer. Then remove the paper support, lower the output tray, and turn on the printer. Loading Paper... - Page 19 5. Set the adjust lever to the m position. 6. Install the roll paper holders on the printer. Insert the left holder into the far left slot, then insert the other holder into the corresponding slot on the right. 7. Load the paper part of the way into the...
- Page 20 8. Push the paper into the feeder as far as it will go; the printer feeds the paper automatically. 9. To verify that the paper is loaded straight, open the printer cover and look into the printer. If the paper is crooked, press the z roll paper button for three seconds to back the paper all the way out.
-
Page 21: Installing The Roll Paper Cutter And Basket
Installing the Roll Paper Cutter and Basket 1. Turn off the printer. 2. Press the lever on the left side of the output tray, then gently guide the tray off its mounting tabs, left side first. 3. Insert the cutter into the top of the... -
Page 22: Adjusting The Cutting Position
This adjustment affects roll paper only. 1. Windows and Mac OS 8.6 to 9.x: Access the printer settings window (see page 20 for Windows or page 26 for Macintosh OS 8.6 to 9.x). Then click the... -
Page 23: Loading And Printing On Thick Paper
Loading and Printing on Thick Paper You can load thick paper, such as EPSON Velvet Fine Art Paper, in the manual feed slot. Make sure your paper is white, up to 0.05-inch (1.3 mm) thick, and is flat and smooth, with no folded edges. - Page 24 8. Before printing, select setting (Windows) or Paper Source setting (Macintosh) in your printer software (see page 20 for Windows or page 26 for Macintosh). 9. When you’re finished printing on thick paper, return the adjust lever to the m position.
-
Page 25: Printing From Start To Finish
Printing From Start to Finish Follow the steps in these sections to print using all your printer’s special features: “Basic Printing in Windows” on page 20 “Basic Printing With Macintosh OS X” on page 22 “Basic Printing With Macintosh OS 8.6 to 9.x” on page 26 “Customizing Your Windows Print Settings”... -
Page 26: Basic Printing In Windows
After you create a document in a software program, follow these steps to print it using the basic printer settings: 1. From the File menu, click Check for your printer name here 2. Make sure EPSON Stylus Photo 2200 3. Click the Properties button, click it. Then click Options screen.) - Page 27 4. Select the following settings on the Main tab in your printer settings window: 2 Select your paper source 3 Select your paper type (see page 32) 4 Select your paper size 5 Select your document or image orientation 6 Click OK Note: For more information about printer settings, click the ? or Help button.
-
Page 28: Selecting The Settings You Use Most Often
(If you’re using a Macintosh Classic mode application, follow the steps on page 26 instead.) Make sure you added your printer to Print Center, as described on the Start Here sheet. 1. From the File menu, select 2. - Page 29 Caution: When printing non-borderless print jobs using a custom paper size, make sure the selected size matches the paper you loaded and is within the printable area for your printer. For example, never choose a paper size wider than your printer’s sheet feeder or longer than your paper length.
- Page 30 7. Select the following Print Settings: Note: For more information about printer settings, click Help. The OS X printer driver contains a subset of the settings available with the OS 8.6 to 9.x Macintosh printer driver described in this book.
- Page 31 If multiple print jobs are listed, click a print job, then click the as necessary to reorder the jobs 12. When you’re finished, close Print Center. Print Center Stylus Photo 2200 to delete the job Delete to pause printing Hold...
-
Page 32: Basic Printing With Macintosh Os 8.6 To 9.X
Basic Printing With Macintosh OS 8.6 to 9.x Before you begin, make sure you selected your printer in the Chooser as described on the Start Here sheet. 1. From the File menu, select 2. Click to close the Page Setup window. - Page 33 Note: If you’re not using background printing and you need to cancel printing, hold down the J key and press the to preview your printout. Preview EPSON Monitor3 (period) key. from the Click to check ink levels Printing From Start to Finish...
-
Page 34: Customizing Your Windows Print Settings
For more information on advanced settings, or instructions on saving them as a group so you can reuse them later, click the Help or ? button. If you want to use the Advanced screen each time you access your printer settings, select the Show this screen first checkbox. - Page 35 4. Select the following page layout settings as necessary: Select image or document position options here Select image or document resizing options here; these affect only your printed image Add a watermark to your printed page here Note: For more information on page layout settings, click the Help or ? button. 5.
-
Page 36: Customizing Macintosh Print Settings
Customizing Macintosh Print Settings 1. Open the printer settings window. 2. OS X: Go to step 4 to access the advanced settings. OS 8.6 to 9.x: Click Macintosh OS 8.6 to 9.x Note: For more information on custom settings, click ?. - Page 37 5. Select these advanced settings as necessary: Click here to select a different print quality for your paper type Select various print options here To select color management settings, select Color Management from the Print Settings pull-down menu Click here to select a different print quality for your paper type Select various print...
-
Page 38: Selecting The Correct Media Type
Plain paper sheets and envelopes EPSON Premium Bright White Paper EPSON Enhanced Matte Paper EPSON Premium Semigloss Photo Paper EPSON Watercolor Paper - Radiant White EPSON Premium Luster Photo Paper EPSON Premium Glossy Photo Paper EPSON Velvet Fine Art Paper... -
Page 39: Selecting Roll Paper Print Settings
Windows 1. Start your print application, open your photo file, and resize it as necessary. 2. Access the printer settings window (see page 20). 3. Select the type of roll paper you loaded as the Type option: Premium Semigloss Photo Paper... - Page 40 5. Choose as the Source setting. The Roll Paper Options dialog box pops up: Roll 6. Select the roll paper settings based on the type of printing you’re doing, then click Type of printing Print and cut borderless photos Print borderless photos and cut them yourself Print photos,...
-
Page 41: Macintosh Os X
3. Select one of the following as the Format for setting: Stylus Photo 2200(Roll Paper) Stylus Photo 2200(Roll Paper - Borderless) Stylus Photo 2200(Roll Paper - Borderless Banner) 4. Select the photo size as the Paper Size setting. Caution: When printing borderless photos, select one of the supported paper sizes listed on page 43;... - Page 42 Page Setup window in step 3. Note: Always select the same setting as the Format for option in the Page Setup window and the Printer option in the Print window. If the settings are different, you may get unexpected results.
- Page 43 11. Select the settings based on the type of printing you’re doing: Borderless Type of printing option Print and cut Selected borderless photos Print borderless Selected photos and cut them yourself Print photos, panoramics, or selected banners with borders 12. When you’re finished, click 13.
- Page 44 Checked Manual Cut Unchecked Manual Cut or Paper-Saving Cut (may leave a small margin) to open the printer settings dialog box. Roll Paper Options Cut Sheet (don’t select Banner) Cut Sheet or Banner Banner (if you selected...
-
Page 45: Removing Your Printed Photos
1. If you’re using the roll paper cutter, wait for printing and cutting to finish. Caution: Remove each sheet of EPSON Premium Semigloss Photo Paper as it falls into the basket so it doesn’t get smeared by the next sheet. -
Page 46: Removing And Storing Roll Paper
3. To remove the basket and automatic roll paper cutter, first turn off the printer. Pull the basket off the cutter, then press the gray buttons on top of the cutter and pull it off the printer. -
Page 47: Using Print Image Matching
4. If you removed the output tray, replace it on its right mounting tab, then press in the lever and insert the left side of the tray. Release the lever into the left mounting hole. 5. Pull the roll paper holder out of its mounting slots and remove the roll paper from the holder. -
Page 48: Using Film Factory
P.I.M. or Exif Print image. Instead, it converts that information in the file and embeds a color space called EPSON RGB 2001. This profile supports all the P.I.M. color advantages and enhancements. -
Page 49: Printing Borderless Cut Sheets
Note: When you select a profile for the Stylus Photo 2200, make sure you select the profile that matches the black ink cartridge you’re using. Choose a profile labelled PK if you’re using the Photo Black ink cartridge. If you’re using the optional Matte Black cartridge, select a profile labelled MK. -
Page 50: Windows
Follow the steps for your operating system below to print BorderFree photos on cut sheet paper. Windows 1. Start your printing application and open your photo file. 2. Access the printer settings window (see page 20). 3. Select Photo Quality Type setting. -
Page 51: Macintosh Os X
2. Click File > Page Setup 3. Select Stylus Photo 2200(Sheet Feeder - Borderless) setting. 4. Select the size of the paper you loaded as the Paper Size setting. Caution: When printing borderless photos, select one of the supported paper sizes listed on page 43;... - Page 52 8. As the Printer setting, select the same setting that you chose on the Page Setup window in step 3, Note: Always select the same setting as the Format for option in the Page Setup window and the Printer option in the Print window. If the settings are different, you may get unexpected results.
-
Page 53: Macintosh 8.6 To 9.X
Macintosh 8.6 to 9.x 1. Start your printing application and open your photo file. 2. Click File > Page Setup 3. Select the size of the paper you loaded as the Paper Size setting. 4. Select Auto Sheet Feeder 5. Click the Borderless 6. -
Page 54: Managing Color With Custom Profiles
(If you need help, contact the software manufacturer for instructions.) 2. When you’re ready to print the test target, select 3. Macintosh OS X: Select your printer from the Printer menu, then select from the pull-down menu. Settings Windows: Click the button. - Page 55 4. Select the Type or Media Type setting for the profile you’re printing. 5. Macintosh OS X: Click the Macintosh 8.6 to 9.x: Click 6. We recommend that you select though you can select a lower or higher quality setting. 7.
-
Page 56: Creating Your Custom Profile
Then follow the steps in the appropriate sections below. Printing From Start to Finish from the pull-down menu. Then Color Management No Color Adjustment button, then select No Color Adjustment to return to the printer settings window. (Macintosh) to print your test target. Print ®... - Page 57 (such as SP2200 EMatte) Print Space - Intent: Select Perceptual or Relative Colorimetric 4. Under Print Space, select the printer profile you created for your printer and paper in the list. Profile . You see this window: button to change the page size and orientation...
- Page 58 6. Select the Use Black Point Compensation Note: Loading the printer profile tells Photoshop to convert the data sent to the printer from the document source profile to your printer profile, leaving your source document untouched. This lets you print the same document to different printers and papers by simply changing the profile in the print space.
- Page 59 No Color Adjustment IMPORTANT! Select No Color Adjustment Note: Make sure that you select No Color Adjustment. If you don’t, the printer driver will apply additional correction to the image data, producing inaccurate results. 12. Click to print your photo.
- Page 60 (such as SP2200 EMatte) Print Space - Intent: Select Perceptual or Relative Colorimetric Check Use Black Point Compensation 4. Under Print Space, select the printer profile you created for your printer and paper in the Profile 5. As the Intent setting, select Note: Most images look best using Relative Colorimetric as the Intent setting, since it preserves the saturation of colors in an image.
- Page 61 Note: Loading the printer profile tells Photoshop to convert the data sent to the printer from the document source profile to your printer profile, leaving your source document untouched. This lets you print the same document to different printers and papers by simply changing the profile in the print space.
-
Page 62: Solving Color Management Problems
Try these solutions: If your printed image is darker than expected and has a strong green cast, you probably turned off color management in both Photoshop and the EPSON printer driver. Return to the Print Preview instructions for Adobe Photoshop on page 50. Make... -
Page 63: Maintaining Your Printer
Maintaining Your Printer Follow the instructions in this chapter to keep your printer working at its best and to prepare it for moving, if necessary: “Cleaning the Print Head” below “Replacing an Ink Cartridge” on page 59 “Swapping the Interchangeable Ink Cartridge” on page 63 “Aligning the Print Head”... -
Page 64: Running The Head Cleaning Utility
Running the Head Cleaning Utility 1. Make sure the printer is turned on but not printing, and all the red are off. (If an ink light is flashing or on, you need to replace a cartridge; see page 59 for details.) 2. -
Page 65: Examining The Nozzle Check Pattern
You can also swap the Photo Black ink cartridge for the optional Matte Black cartridge when you print on certain papers. Before and after swapping the cartridges, see page 63 for guidelines and additional instructions. Red ink lights ink lights are off. Maintaining Your Printer... -
Page 66: Checking The Ink Supply
You see a window like this: Click a cartridge image to display information about the cartridge. Purchasing Ink Cartridges Use these EPSON ink cartridges within six months of installing them and before the expiration date on the package: Ink cartridge Photo Black (Standard) -
Page 67: Ink Cartridge Precautions
When you need new ink cartridges, contact your dealer, or call the EPSON Store at (800) 873-7766 or visit www.epsonstore.com (U.S. sales only). In Canada, please call (800) 463-7766 for dealer referral. Ink Cartridge Precautions Warning: Keep ink cartridges out of the reach of children. - Page 68 Caution: Never turn off the printer while the green unless the printer hasn’t moved or made noise for more than 5 minutes. Maintaining Your Printer Close cartridge cover and printer cover, then . . .
-
Page 69: Swapping The Interchangeable Ink Cartridge
Follow the steps in “Removing and Installing Ink Cartridges” on page 61 to swap the cartridge in the far left slot. Confirm that the new cartridge is selected in your printer software, as described on the next page. Photo Black—... -
Page 70: Confirming The Swapped Cartridge In The Software
You may see a message telling you that your paper Type and/or Quality Type settings are not compatible with your cartridge. If so, exit the printer software and restart it, selecting compatible settings as listed in the table on page 63. -
Page 71: Aligning The Print Head
3. Open the Print Center again and add the features as described on your Start Here sheet. 4. Open an application program, open a file, and access your printer settings. 5. Check your available Media Type settings. The settings should match the Media Types that are compatible with the swapped cartridge as listed on page 63. - Page 72 This adjustment affects only high-speed printing on plain paper. Maintaining Your Printer printer icon on your taskbar (in the lower right Print Head Alignment > File Page Setup Print Head Alignment...
- Page 73 7 and 8. Realignment 9. You see this window: Remove the plain paper loaded in the printer and load one sheet of Enhanced Matte Paper. 10. Click to print the first pattern on the Print next test page.
-
Page 74: Cleaning The Automatic Roll Paper Cutter
Cleaning the Printer To keep your printer working at its best, you should clean it several times a year. Cleaning the Exterior 1. Turn off the printer, unplug the power cord, and disconnect the interface cable. -
Page 75: Cleaning The Interior
Cleaning the Interior 1. Turn on the printer. 2. Load a cleaning sheet (packed with your printer) in the sheet feeder, long edge first. 3. Press the m paper button to feed the sheet. If there is ink on the back of the sheet, repeat this step until the paper feeds cleanly. -
Page 76: Transporting The Printer
Follow these steps: 1. Turn on the printer, then press the H ink button to move the print head into a position where you can remove the ink cartridges. - Page 77 15. After transporting the printer, remove all the tape and replace your ink cartridges, as described on page 59. 16. Test your printer. If you notice a decline in print quality, clean the print head (see page 57); if output is misaligned, align the print head (see page 65).
- Page 78 Maintaining Your Printer...
-
Page 79: Solving Problems
“Uninstalling and Reinstalling Printer Software” on page 82 “Where To Get Help” on page 83 Tip: It’s a good idea to check EPSON’s support web site periodically for free updates to your printer driver. Visit http://support.epson.com. Download instructions are posted for your convenience. -
Page 80: Diagnosing Printer Problems
First, check the printer’s lights (see below) or run a printer check (see page 75). Lights Green P power light flashes The printer is receiving a print job, replacing an ink cartridge, Green P power light flashes paper light on... -
Page 81: Running A Printer Check
If the check page doesn’t print, you may have a problem with your printer. Try the suggestions in “Problems and Solutions” beginning on page 76. If nothing works, contact your dealer or EPSON as described on page 83. 5. Turn off the printer, reconnect the interface cable, then turn on your printer and computer. -
Page 82: Problems And Solutions
Solving Problems If the icon doesn’t SP 2200 appear in the Macintosh Chooser, you may have too many items in the Chooser. Delete any unused items. If you see an error message with... -
Page 83: Printer Problems
If you’re printing on a network, make sure you set up your printer for network printing, as described in your on-screen Reference Guide. The printer sounds as though it is printing, but nothing prints. The print head may need cleaning; see page 57 for instructions. -
Page 84: Quality Problems
Make sure your paper meets the specifications listed in the on-screen Reference Guide. Use EPSON papers for proper saturation and absorption of genuine EPSON inks. Check the adjust lever. Set it to m for most papers. For roll paper, see page 12;... - Page 85 (Macintosh); see page 32. Make sure your paper isn’t damaged, old, dirty, or loaded face down. For best results, use genuine EPSON paper. Your printout is grainy. Use a higher quality paper or select a higher Quality Type (Windows; page 28) or Print Quality (Macintosh;...
-
Page 86: Paper Problems
Source Roll (Windows), as the Roll Paper Paper Source (Mac 8.6 to 9.x), Stylus Photo 2200(Roll as the Format for and Paper) Printer option (Mac OS X). Other settings will feed too much paper. If extra paper feeds, press the... -
Page 87: Miscellaneous Problems
Turn off (Windows) Mirror Image (Macintosh) in Flip Horizontal the printer software, or the mirror setting in your program. See page 28 (Windows) or page 30 (Macintosh) for instructions. The printer prints blank pages. Make sure your printer is... -
Page 88: Uninstalling And Reinstalling Printer Software
Uninstalling and Reinstalling Printer Software You may need to uninstall and then reinstall your printer driver and utilities if, for example, you upgrade your Windows operating system. You don’t need to uninstall your other photo software or the EPSON Printer Information Center. -
Page 89: Where To Get Help
Photoshop, see the information below. See page 84 for help with the other software that came on your printer CD-ROM. EPSON provides technical assistance 24 hours a day through the electronic support services and automated telephone services listed below: Service... -
Page 90: Technical Support For Other Photo Software
Computer configuration and operating system version Description of the problem You can purchase ink cartridges, paper, manuals, and accessories from the EPSON Store at (800) 873-7766 or visit www.epsonstore.com (U.S. sales only). In Canada, please call (800) 463-7766 for dealer referral. -
Page 91: Requirements And Notices
Requirements and Notices Windows System Requirements To use your printer and its software, we recommend that your system has: Microsoft Windows compatible PC with a Pentium 350 MHz (Windows 2000 or XP) or better processor (Pentium III 500 MHz recommended) -
Page 92: Important Safety Instructions
Unplug the printer and refer servicing to qualified service personnel under the following conditions: If the power cord or plug is damaged; if liquid has entered the printer; if the printer has been dropped or the case damaged; if the printer does not operate normally or exhibits a distinct change in performance. -
Page 93: Ink Cartridge Safety Instructions
If you remove an ink cartridge for later use, protect the ink supply area from dirt and dust and store it in the same environment as the printer. Note that there is a valve in the ink supply port, making covers or plugs unnecessary, but care is needed to prevent the ink from staining items that the cartridge touches. -
Page 94: Fcc Compliance Statement
FCC Compliance Statement For United States Users This equipment has been tested and found to comply with the limits for a Class B digital device, pursuant to Part 15 of the FCC Rules. These limits are designed to provide reasonable protection against harmful interference in a residential installation. -
Page 95: Declaration Of Conformity
Type of Product: Ink Jet Printer Model: B141A Compliance NERGY As an E Partner, EPSON has determined that this product NERGY meets the E guidelines for energy efficiency. The EPA NERGY office equipment program is a voluntary partnership with NERGY... -
Page 96: Epson America, Inc. Limited Warranty
EPSON requires a debit or a credit card number to secure the cost of the replacement printer in the event that you fail to return the defective one. If your printer is being repaired, EPSON will direct you to send your printer to EPSON or its authorized service center, where the printer will be fixed and sent back to you. - Page 97 BE LIABLE FOR ANY LOSS, INCONVENIENCE, OR DAMAGE, INCLUDING DIRECT, SPECIAL, INCIDENTAL OR CONSEQUENTIAL DAMAGES, RESULTING FROM THE USE OR INABILITY TO USE THE EPSON PRODUCT, WHETHER RESULTING FROM BREACH OF WARRANTY OR ANY OTHER LEGAL THEORY. In Canada, warranties include both warranties and conditions.
- Page 98 Requirements and Notices...
-
Page 99: Index
Checking printer, 75 Chooser, Macintosh, 76, 81 Cleaning cutter, 68 pad, 69 print head, 57 to 59 printer, 68 to 69 sheets, 69 Color management menu, OS X, 24 settings, 28 to 31, 48 to 56 with custom profiles, 48 to 56... - Page 100 Flip Horizontal setting, 81 Gamma setting, 79 Grainy prints, 79 Index Head Cleaning utility, 57 to 59 Help EPSON, 83 to 84 see also Printer Information Center and Troubleshooting High Speed setting, 77 to 78 ICM (Image Color Matching) setting, 56, 79 Incorrect...
- Page 101 Monitoring ink level Macintosh, 27, 60 Windows, 21, 60 Movies, Print Show, 3 to 5 Moving printer, 70 to 71 Natural Color setting, EPSON, 79 Network printing, 76 Noise, printer, 77 Nozzle Check, 58 to 59 Orientation setting, 11, 21, 22, 26...
- Page 102 57 to 69 noise, 77 parts, 73 problems, 74 to 75, 77 transporting, 70 to 71 Printer and Option Information utility, 16, 64, Printer Information Center, 5 to 6 Printing advanced, 28 to 31 controlling, 21, 25, 27 Macintosh, basic OS 8.6 to 9.x, 26 to 27...
- Page 103 Print Head Alignment, 65 to 67 Printer and Option Information, 16, 64, 68 Velvet Fine Art Paper, 10, 17 to 18, 32 Vivid Color setting, EPSON, 79 Warranty, 90 to 91 Watercolor Paper - Radiant White, 10, 32 Watermark, 27, 29...
- Page 104 Index...
-
Page 105: Epson Ink Jet Papers And Ink Cartridges
EPSON’s printers all of their awards! EPSON papers are specially coated to work with EPSON UltraChrome Here are details about just a few of EPSON’s papers, your printer’s ink cartridges, and EPSON project ideas:... -
Page 106: How To Order Epson Ink And Paper
How To Order EPSON Ink and Paper To order EPSON ink cartridges, paper, and other accessories, contact your dealer or call the EPSON Store at (800) 873-7766 or visit www.epsonstore.com (U.S. sales only). In Canada, please call (800) 463-7766 for dealer referral.