Table of Contents
Advertisement
Advertisement
Table of Contents

Related Manuals for Teka TKW 1070


Summary of Contents for Teka TKW 1070
- Page 1 AUTOMATIC DRUM WASHING MACHINE USER MANUAL TKW 1070 Delay...
-
Page 2: Table Of Contents
03 - 09 10 - 15 16- 20 TABLE OF CONTENTS BEFORE USE USING THE APPLIANCE MAINTENANCE COMPONENTS ....... 03 DISPLAY CODES ......18 > PROGRAM SELECTION ..... 10 > > PREPARATION ........ 04 TROUBLESHOOTING ......19 > CONSUMPTION AND TECHNICAL DATA .. -
Page 3: Before Use
BEFORE USE COMPONENTS THANKS FOR PURCHASING A TEKA PRODUCT Please read these instructions carefully before using this appliance. The instructions contain important information which will help you get the best out of the appliance and ensure safe and proper installation, use and maintenance. -
Page 4: Preparation
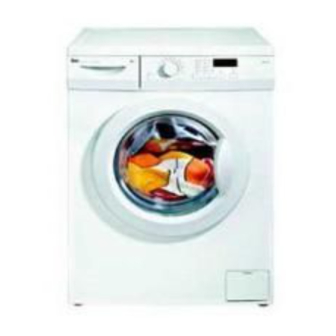
BEFORE USE PREPARATION PREPARING THE MACHINE Remove all the packing materials to prevent unsteadiness, including the polystyrene base. Upon opening the package, water drops may be seen on the plastic bag and the porthole. This is normal phenomenon resulting from water tests in the factory. DESCRIPTION This diagram may be slightly different from the layout of the washing machine you have just purchased due to technical improvements. -
Page 5: Safety Instructions
BEFORE USE SAFETY INSTRUCTIONS BEFORE SWITCHING THE APPLIANCE ON FOR THE FIRST TIME DO ... DO NOT ..Make sure that the transport bolt are removed..Touch or use the appliance when barefoot or with wet or ... Use a separate earthed socket for the power supply. damp hands or feet. -
Page 6: Installation
BEFORE USE INSTALLATION DISMANTLE THE TRANSPORTATION BOLTS The transportation bolts are designed for clamping anti-vibration components inside of the washing machine during the transportation process. Remove the back cover. Remove the four bolts on the rear side and take out the synthetic stabilisers from within the machine. - Page 7 BEFORE USE INLET HOSE 1. Connect the nut on the inlet hose to the connector on the water valve. 2. Apply inlet hose to a water tap with cold, fresh water. Note: Use the hose-set supplied with the appliance. Old hose-sets should not be reused.
-
Page 8: Control Panel
BEFORE USE CONTROL PANEL Program knob Detergent distribution drawer Power Switch Display Start/Pause button Spinning Speed Setting button Intense button Washing temperature button Extra rinse button Delay Button OPERATIONAL FUNCTIONS ¬ Program knob _By turning the knob clockwise/counterclockwise, the required program can be selected. There are 11 programs available. - Page 9 BEFORE USE ¬Delay Button Touch this button lightly, the washing machine will start operation after a period of time and the corresponding indicator will go on. The range is 0.5-24 hours; each touch of this button increases a half hour. After the button is set, press the Start/Pause button to start countdown of the set time (the time is displayed on the screen until the program ends).
-
Page 10: Program Selection
USING THE APPLIANCE PROGRAM SELECTION PROGRAM MODES 1 Detergent compartment for prewash mode 2 Detergent compartment 3 Compartment for softener and other additives Temperature Program Maximum Preset Recommended Laundry TKW 1070 - - to 40 °C 30°C Woolen fabrics 400 rpm ¬... -
Page 11: Consumption And Technical Data
USING THE APPLIANCE CONSUMPTION AND TECHNICAL DATA CONSUMPTION TABLE The wash cycle times are intended as a guide only. The actual time used may vary due to different water pressure, initial water temperature, etc. MAX. ENERGY WATER TEMPERATURE WASHING PROGRAM LOAD CONSUMPTION CONSUMPTION... -
Page 12: Washing Methods
USING THE APPLIANCE WASHING METHODS PLEASE NOTE This washing machine is for domestic use only. If the machine is use for commercial purpose the guarantee will not be valid anymore.Do not use it for purposes other than that for which it was designed. Follow the instructions given on the label of each garment and wash only machine-washable garments. -
Page 13: Selecting Detergent/Detergent
USING THE APPLIANCE LOADING THE MACHINE Delay Open the washer door, put in the laundry piece by piece. Close the door tightly. ¬ When fi rst using the washing machine, let it run unloaded for one program to prevent the laundry from being tainted by oil or dirty water from the washing machine. - Page 14 USING THE APPLIANCE SETTING WASHING TEMPERATURE Press and hold down the temperature button until the desired temperature is selected . Delay SETTING SPIN SPEED Press and hold down the speed button until the desired speed is selected.See "Operational functions" on the "Control panel" pages (08 and 09) for selecting Delay temperature and spin speed.
- Page 15 USING THE APPLIANCE CARE CHART Resistant material Bleachable in cold water Don't dry clean Delicate fabric Do not bleach Dry fl at Washable at 95 °C Iron at 200 °C Hung to dry Washable at 60 °C Iron at 150 °C Dry on clothes hanger Washable at 40 °C Iron at 100 °C...
-
Page 16: Cleaning & Care
MAINTENANCE CLEANING & CARE AFTER WASHING Turn off the water supply and pull out electricity plug after each wash. Open the washer door to prevent formation of moisture and odours. If the washing machine is left idle for a long period, drain the water in the machine and replace the drain hose. - Page 17 WATER INLET VALVE AND INLET VALVE FILTER To prevent blockage to the water supply by ingress of foreign substances, clean the water inlet valve and inlet valve fi lter regularly. MOVING THE MACHINE If the machine is to be moved to a distant location, replace the transportation bolts removed before installation to prevent damage as shown below.
-
Page 18: Maintenance
MAINTENANCE DISPLAY CODES DISPLAY CODES AND SPECIAL FUNCTIONS CODES CAUSES SOLUTIONS Err1 ¬ Door is not properly shut. _ Shut the door properly. Err2 ¬ Drainage error, water not emptied within 6 _ Clean the fi lter and check the drain hose for blockage. If error minutes. -
Page 19: Troubleshooting
MAINTENANCE TROUBLESHOOTING TROUBLESHOOTING The following circumstances do not constitute problems. Do not contact the Service Center until the problem has been confi rmed. PROBLEM CAUSES SOLUTIONS Washing machine fails to ¬ Poor connection to the power supply. _ Check connection to the power supply. operate. -
Page 20: Wiring Circuit
WIRING CIRCUIT WIRING CIRCUIT PA14 FUSE J3-5 J3-4 J4-3 J2-1 J2-2 MOTOR J1-6 J1-5 J1-7 J4-4 J1-1 J4-1 J1-4 J1-2 J1-3 J3-1 J3-2 J3-3 J2-9 J2-7 J2-4 FUSE Motor--------------Motor PCB----------------Printed Circuit Board MR------------------Door Lock R---------------------Heating Element PS-------------------Drainage Pump EVF,EVP-----------Water Inlet Magnetic Valve P----------------------Pressure Switch FA---------------------Interference Suppresser NTC------------------Temperature Sensor...