Advertisement
BissEII"
We're glad you purchased a
BISSELL
Powerlifler<_'
deep cleaner. Everything we know about floor care went into
the design and construction of this complete, high-tech home
cleaning system.
Your Powerlifler is well made, and we back it with a
flfll one-year warranty. We also stand behind it with a
knowledgeable, dedicated Consumer Services department,
so, should you ever have a problem, you'll receive
fast, considerate assistance.
My
great-grandfather invented the floor sweeper
in 1876. Today,BISSELLis a global leader in the design,
manufacture, and service of high quality
homecare products like
your Powerlifier.
Thank you once again,
from all of us at BISSELL.
MarkJ. Bissell
Presidentand ChiefExecutiveOfficer
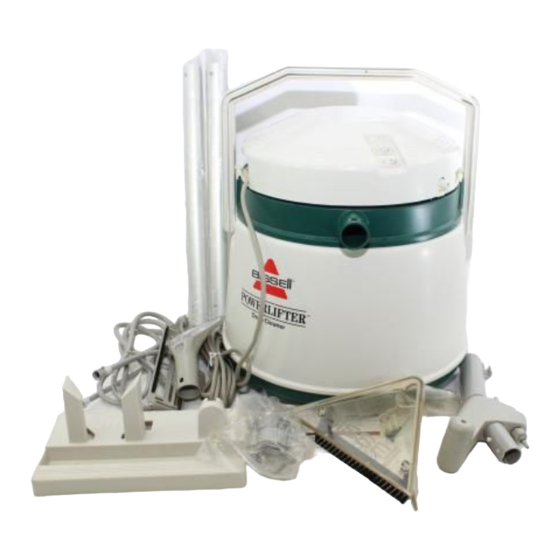
Powerlifter _
Powerlifter®Plus Series
• Assembly
• Operation
• Safety
• Storage
• More powerful suction than
upright deep cleaners
• Lightweight wand easily
maneuvers under and around
furniture
Advertisement
Table of Contents

Related Manuals for Bissell Powerlifter Series


Summary of Contents for Bissell Powerlifter Series
- Page 1 1876. Today,BISSELLis a global leader in the design, manufacture, and service of high quality homecare products like your Powerlifier. Thank you once again, from all of us at BISSELL. MarkJ. Bissell Presidentand ChiefExecutiveOfficer • More powerful suction than upright deep cleaners •...
- Page 3 Large V acuum Flex Hose Clips Grip/Trigger Hose with Threaded Connectors Vacuum Flex Hose Wand Solution T ube/_ Power Unit _mi;_l Wand M_oto r Filte_r___ _ lau_n_nUm Measurin Ball Ca w© Ball Tank Unit Tank Siphon Tube Floor Nozzle Casters...
-
Page 4: How To Put It Together
This User's Guide h asbeen d esigned tohelp you Pay particularattentionto the assembly diagram, get t heutmost satisfaction from yourPowerlifler assembly instructions, a nd partnames.Locateand Deep C leaner. You'll f indassembly instructions forall organizeall partsbeforeassembly. F amiliarize cleaning tasks, safety precautions, pre-cleaning tips, yourselfwiththe partsand wheretheygo. - Page 5 Grip/TriggerUnit. Fitgrip/trigger unit intotopwandlockwithlatch Wand Solution Tube button. Vacnum Flex Hose WandSolutionTube. Connect Safetyinstmctions ..wandsolutiontubeto spraytip Hose with Threaded Connectors onfloornozzleand towand Productview ....solutiontip ongrip/triggerunit. Howto put it together ..SmallWandClips. Securetube to wandwithtwosmall Specialattachments ..Cap v_A aluminumwandclips.
- Page 6 3. If possible, c heckupholstery stuffing. C olored stuffingmay furniture. bleedthroughfabricwhenwet. ThePowerlifler is not recommended for cleaningwoodfloors. UseonlyBissell F loorCleansingFormula F,'' on no-waxfloors. Neverusea Bissell F iberCleansing Formula'"or othercarpet cleanersonbarefloors. Sweep beforestarting. Remove oldwaxbeforecleaning. Leavean exitpath. Allow at least1/2hour dryingtime.
-
Page 7: Deep Cleaning
Getting ready 1. Remove formula measuring cup from filling cavity on side of tank unit. 2. Pour two gallons of hot tap water (temperature should not exceed 120° F/48 ° C) into filling cavity until level reaches bottom of three vertical lines in tank unit. 3. -
Page 8: How To Clean Upholstery
How to clean upholstery and small areas/ 1. Disconnect wand solution tube and aluminum wands fl'om grip/trigger unit. ..k_._._%_ll_ > 2. Moisten O-ring at base of cap valve with soapy water. Align small area cleaning nozzle with cap valve and vacuum tube on grip/trigger unit. - Page 9 Getting ready Note: The bare floor attachment is included with the PLUSSeries only. It may be ordered as an additional accessory by contacting Consumer Services. 1. Attach bare floor attachment to bottom of floor nozzle with rubber and brush strips facing out. Align fl'ont edges and _r Nozzle snap together.
- Page 10 Getting ready 1. Remove dry filter bag fl'om ball cage. 2. Place ball on raised area on bottom of tank unit. 3. Position ball cage over ball and press firmly onto raised area. 4. Insert tank siphon tube in tank unit. 5.
-
Page 11: Putting It Away
Putting it away After deep cleaning/wet vacuuming 1. Rinse filling cavitywith clean water. Leaveabout 1/2 gallon of clean water in filling cavity. 2. Holdfloor nozzle overbucket or sink. 3. Presson pump/spray switch, pull trigger for 30seconds, and empty powerunit. 4. Emptyfilling cavityof excesswater: 5. - Page 12 Weak or no suction/Motor suddenly runs louder/Motor runs hot Possible Causes Remedies Vacuum is not operating Check electrical plug Vacuum/switch on? Call BISSELLConsumer Services (see page 14) I!XWARNING: Collection tank unit is full To reduce the risk Empty collection tank of fire, electric Dirty filter (s) See PUTTING IT AWAY (see page 11)
- Page 13 Item Part No. Part Name 010-4706 Vacuumflexhose 013-2477 Largevacuum flex hoseclips (3) 010-4697 Hosewiththreaded connectors 016-4181 Grip/triggerunit 603-1659 Capvalveassembly 010-9464 Wandsolutiontube 013-2453 Small wandclips (2) 015-9151 Small area cleaningnozzle 010-9654 Aluminumwands (2, interchangeable) 603-2922 Toppowerunit 017-3533 Motorfilter 013-1525 Ballcage 013-3004 Measuringcup 013-0330 Ball...
-
Page 14: About Your Warranty
If the deep cleaner cannot be repaired, BISSELL Inc. will replace the product or refund the full price, at youroption.