Table of Contents
Advertisement
Advertisement
Table of Contents

Related Manuals for Emotiva miniX A-100


Summary of Contents for Emotiva miniX A-100
- Page 1 a-100 Stereo Flex Amp User Manual...
-
Page 3: Important Safety Precautions And Explanation Of Symbols
Important Safety Precautions and Explanation of Symbols The exclamation point within an equilateral triangle is intended to alert the user to the presence of important installation, operation, and service instructions in this manual. The lightning flash with arrowhead symbol within an equilateral triangle is intended to alert the user to the presence of uninsulated dangerous voltages within the enclosure that may be of sufficient magnitude to constitute a risk of electrical shock to the user. -
Page 4: Fcc Interference Statement
Connect the equipment into an outlet on a circuit different from that of the receiver. Consult the dealer or an experienced radio/TV technician for help. For questions regarding service, please contact: Emotiva Audio Corporation 135 SE Parkway Court Franklin, Tennessee... -
Page 5: Table Of Contents
The A-100 ...................7 Quick Start ..................8 Connections..................9 Configuration and Operation ............10 Application Suggestions / Examples ..........11 Care and Maintenance ..............12 Specifications ...................13 Troubleshooting ................14 Emotiva Audio Corporation Limited Warranty ........15 Contact Information ................16 Accessories ..................17 Notes ....................18 Page 1... - Page 6 Page 2...
-
Page 7: Introduction
It also includes our intelligent protection circuitry, which protects the unit and your speakers from most common fault conditions. The A-100 is a great choice wherever two channels of great sounding, reliable, audio power is needed. Happy listening! The Emotiva Team Page 3... -
Page 8: About This Manual
About This Manual This manual will provide you with all the information you need to achieve great performance, accurate sound, and many years of reliable service from your A-100 amplifier. We suggest that you read through the entire manual; we kept things as short and concise as possible. -
Page 9: Features
Power and Fault status, while the rotational position of the knob is highlighted by a pinpoint light on the knob itself. • User selectable AC line voltage; 115 VAC or 230 VAC. You can find more information about the Emotiva Mini-X A-100 on our Web site at http://www.emotiva.com Page 5... -
Page 10: Unpacking
Unpacking Your Mini-X A-100 was carefully packed and should reach you in perfect condition. If you notice any shipping damage or other issues when you unpack the unit, please contact us immediately. Gently remove your A-100 from the packing carton and remove all wrappings and shipping material. -
Page 11: Trigger Input
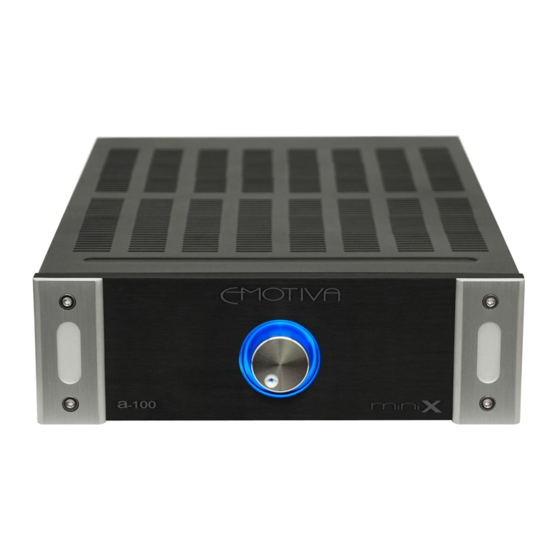
The Emotiva Mini-X A-100 FRONT PANEL Volume Illuminated Position LED Control Status Ring REAR PANEL Line-level AC Power Line-level Speaker (loop) Switch Input Outputs Output Input Output Speaker Outputs Left Right Left Right Left Right Auto Trigger Line Voltage Power... -
Page 12: Quick Start
Quick Start In order to get the most from your Mini-X A-100 amplifier, we urge you to read the entire manual. If you just want to connect it to a source and a pair of speakers and don’t need to know about all the triggering options and other features right away, this section will cover the basics you will need to get started. -
Page 13: Connections
• Emotiva offers very high quality pre-made speaker cables at reasonable prices (you will find them in the Interconnects section on our website at www.emotiva.com) Connecting an input source to the Mini-X A-100 The A-100 expects a line level analog input source via unbalanced (RCA) type connectors. -
Page 14: Configuration And Operation
Configuration and Operation Line Voltage Verify that the Line Voltage switch (protected slide switch on the rear panel) is set for the proper supply voltage for your area. Status ring The ring around the front panel Volume control illuminates to show status. •... -
Page 15: Application Suggestions Examples
Application Suggestions Examples Simple trigger control The Mini-X A-100 is connected to a pair of speakers and receives its input from a stereo preamp. The preamp has a trigger output, which is connected to the Trigger Input on the A-100. The AC Power switch on the A-100 is set to On, and the Power Mode switch is set to Off. -
Page 16: Care And Maintenance
Care and Maintenance Periodic Maintenance Your Mini-X A-100 amplifier requires no periodic maintenance or calibration. Cleaning the Emotiva Mini-X A-100 • If necessary, the A-100 should be cleaned gently with a soft rag. • If something sticky gets on the front panel or case of the A-100, it should be cleaned with a mild cleaning solution applied to a soft rag, followed by wiping with a clean rag dampened with plain water and drying with a soft dry rag or cloth. -
Page 17: Specifications
Specifications Analog inputs: Unbalanced (RCA); one stereo pair Analog outputs (loop): Unbalanced (RCA); one stereo pair Input sensitivity (for full output): 600 mV (8 ohm load) Speaker outputs: 5-way binding posts; one stereo set Minimum recommended load impedance: 4 ohms (which equals one 4 ohm load or two paralleled 8 ohm loads per channel) Power output: 50 watts / channel RMS;... -
Page 18: Troubleshooting
Troubleshooting The Mini-X A-100 amplifier is carefully designed and manufactured from high quality precision components to ensure years of trouble free operation. We really doubt you’ll ever have any problems with your A-100, but if you do, here are a few things you could try. First verify that the Line Voltage selector on the rear panel is set to the correct voltage. - Page 19 NOT APPLY TO YOU. A claim under this warranty must be made by you within the Term. A claim shall not be valid (and Emotiva has no obligation related to the claim) if it is not made within the Term and if it is not made in strict compliance with the requirements of the “How do you get service?”...
- Page 20 The CSR will provide you with a returned material authorization number (“RMA”). Ship the product to Emotiva at the following address, with the RMA written in large, bold letters on the outside of the box, and with the letters “RMA” written before the number.
-
Page 21: Contact Information
Attn: Customer Service 135 Southeast Parkway Court Franklin, TN 37064 Note: In order to return items purchased through Emotiva for repair, warranty work, or refund you MUST call us at 1-877-EMO-TECH to obtain a Returned Merchandise Authorization (RMA) number. Our Shipping Department will NOT accept packages unless they have a valid RMA number clearly indicated on the outside of the package. -
Page 22: Accessories
Using high quality speaker cables will ensure that you achieve the best sound quality and maximum reliability from your Mini-X A-100 amplifier and the speakers connected to it. Emotiva Audio offers high quality speaker cables that feature solid engineering, boast premium build quality, excellent performance, and reasonable cost (you will find them in the Interconnects section of our Web site at (www.emotiva.com) -
Page 23: Notes
Notes Page 19...