Table of Contents
Advertisement
Advertisement
Table of Contents
Troubleshooting

Related Manuals for eMachines 13


Summary of Contents for eMachines 13
- Page 1 Desktop PC User’s Guide...
-
Page 3: Table Of Contents
........ - Page 4 ......... . . 37 www.eMachines.com...
- Page 5 Before calling eMachines Customer Care ........73...
- Page 6 www.eMachines.com...
-
Page 7: Getting Help
Chapter 1 Getting Help • Using the eMachines Web site • Using Help and Support • Using BigFix • Using online help • Contacting eMachines... -
Page 8: Thank You For Purchasing Our Computer
Chapter 1: Getting Help Thank you for purchasing our computer! You have made an excellent decision choosing eMachines. We are sure that you will be pleased with the outstanding quality, reliability, and performance of your new computer. Each and every eMachines computer uses the latest technology and passes through the most stringent quality control tests to ensure that you are provided with the best product possible. -
Page 9: Emachines Web Site
Web site eMachines' online support is available 24 hours per day, 7 days per week and provides the most current drivers, product specifications, and information about your computer. Visit the eMachines Customer Care Web site at emachines.com/support/. Help and Support Your computer includes Help and Support, an easily accessible collection of help information, troubleshooters, and automated support. -
Page 10: Searching For A Topic
To learn more about using BigFix: ■ From the BigFix program, click box. Search box. You must be connected to the Search Search Results , then click Accessories System Tools , then click Help Tutorial www.eMachines.com Search button. list. BigFix... -
Page 11: Online Help
Help Help You can search for information by viewing the help contents, checking the index, searching for a topic or keyword, or browsing through the online help. www.eMachines.com... -
Page 12: Emachines Contact Information
Chapter 1: Getting Help eMachines contact information To help you locate eMachines contact information, you can find the eMachines Web site, Online Support, and technical support contact information on the label located on the front of your computer case. www.eMachines.com... -
Page 13: Checking Out Your Emachines Computer
Chapter 2 Checking Out Your eMachines Computer • Identifying features • Locating your computer model and serial number • Locating the Microsoft Certificate of Authenticity • Locating the specifications for your computer • Purchasing accessories... -
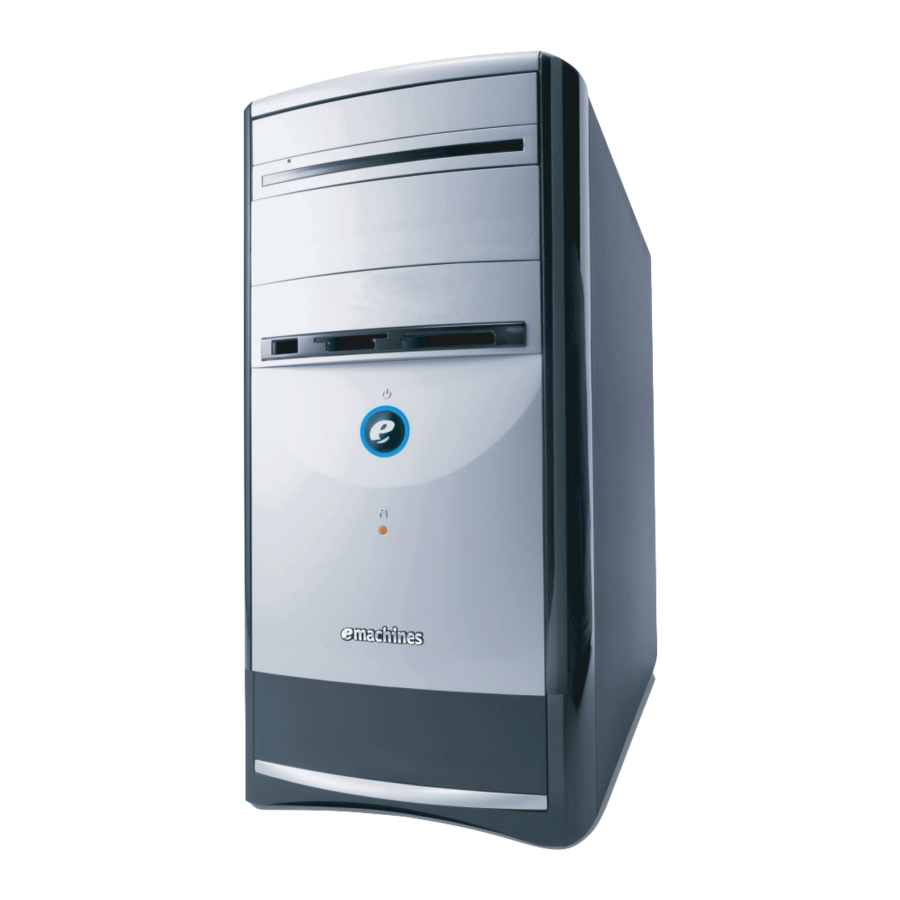
Page 14: Desktop Pc Front
Chapter 2: Checking Out Your eMachines Computer Desktop PC Front Your computer includes the following components. Your computer hardware options and port locations may vary from Important the illustration below. DVD/CD drive DVD/CD drive (optional) Diskette drive (optional) USB port... - Page 15 Plug a microphone into this jack. This jack is color-coded red or pink. Plug powered, analog front speakers, an external amplifier, or headphones into this jack. This jack is color-coded orange. Contains information about how to access eMachines’ Web site and eMachines Customer Care. Contains your model and serial number.
-
Page 16: Desktop Pc Back
Chapter 2: Checking Out Your eMachines Computer Desktop PC Back Your computer includes the following components. Your computer hardware options and port locations may vary from Important the illustration below. Voltage switch Power connector PS/2 mouse port PS/2 keyboard Serial port... - Page 17 Telephone jack (optional) Case cover thumbscrews www.eMachines.com Description Before turning on your computer, make sure that this switch is in the correct position for the correct power available. The switch is preset at the factory with the correct voltage for your area.
- Page 18 Chapter 2: Checking Out Your eMachines Computer Component IEEE 1394 ports (optional) Ethernet (network) jack Modem jack Icon Description Plug an IEEE 1394 (also known as Firewire (such as a digital camcorder) into one of these 6-pin IEEE 1394 ports. For more information, see or other peripheral device”...
-
Page 19: Identifying Your Model
The label on the front of your computer case contains information that identifies your computer model and serial number. eMachines Customer Care will need this information if you call for assistance. Microsoft Certificate of Authenticity The Microsoft Certificate of Authenticity label found on the back or side of your computer includes the product key code for your operating system. - Page 20 Chapter 2: Checking Out Your eMachines Computer www.eMachines.com...
-
Page 21: Getting Started
Chapter 3 Getting Started • Using your computer safely • Protecting your computer from power source problems • Turning your computer on and off • Adjusting the volume • Using the keyboard and the mouse • Using the computer display •... -
Page 22: Working Safely
■ Select a flat surface for your computer desk. Top of screen is not higher than eye level Feet are flat on the floor www.eMachines.com Screen is perpendicular to your line of sight... -
Page 23: Setting Up Your Computer And Computer Accessories
■ Vary your activities to avoid excessive repetition. ■ Take breaks to change your position, stretch your muscles, and relieve your eyes. ■ Find ways to break up the work day, and schedule a variety of tasks. www.eMachines.com Working safely... -
Page 24: Protecting From Power Source Problems
United States. In other areas of the world, such as Europe, the utility power is supplied at 230 volts at 50 Hz. If your computer is operating in an environment such as this, the voltage switch should be moved to 230. www.eMachines.com... -
Page 25: Starting Your Computer
If you are starting your computer for the first time, follow the on-screen instructions to set up your computer. Turn on any peripheral devices, such as printers or scanners, and see the documentation that came with the device for setup instructions. Voltage selection switch www.eMachines.com Starting your computer... -
Page 26: Waking Up Your Computer
If for some reason you cannot use the Turn Off Computer option in Important Windows to turn off your computer, press and hold the power button for about five seconds, then release it. . The Turn Off Computer dialog box opens. Turn Off Computer www.eMachines.com... -
Page 27: Restarting (Rebooting) Your Computer
Help and Support. Type the keyword adjusting volume in the Search box . The Task Manager window opens. tab, then click the program that is not responding. , then click the arrow. www.eMachines.com Restarting (rebooting) your computer “Enhanced keyboard” on... -
Page 28: Using The Keyboard
Using the keyboard Enhanced keyboard Editing buttons Function keys Windows keys Standard keyboard Function keys Windows keys Audio playback buttons Internet buttons Application Indicators Application www.eMachines.com Navigation keys Indicators Directional keys Numeric keypad Navigation keys Internet buttons Directional keys Numeric keypad... -
Page 29: Keyboard Features
(Run utility), and Access shortcut menus and help assistants in Windows. Move the cursor up, down, right, or left. Use these keys to type numbers when the numeric keypad ) is turned on. www.eMachines.com Using the keyboard , or keys are CROLL... -
Page 30: Using The Mouse
You can use the left and right buttons on the mouse to select objects on the display. You can use the scroll wheel on the mouse to move through a document. This feature is not available in all programs. Right button Left button Scroll wheel www.eMachines.com... - Page 31 Press the left mouse button and hold it down. Move (drag) the object to the appropriate part of the computer display. Release the button to drop the object and drag and drag where you want it. “Cleaning the mouse” on page www.eMachines.com Using the mouse...
-
Page 32: Connecting The Modem
Insert one end of the modem cable into the modem jack computer. Insert the other end of the modem cable into a telephone wall jack. The modem will not work with digital or PBX telephone lines. Start your computer, then start your communications program. www.eMachines.com on the back of your... -
Page 33: Connecting To A Wired Ethernet Network
You can use your computer’s Ethernet jack for more than just Tips & Tricks networking. Many broadband Internet connections, such as cable modems and DSL modems, connect to your computer’s Ethernet jack. Connecting to a wired Ethernet network www.eMachines.com on the back of your... -
Page 34: Installing A Printer, Scanner, Or Other Peripheral Device
For more information about installing peripheral devices, click Start, Help and Support then click Help and Support. Type the keyword installing devices in the Search box “Checking Out Your eMachines Computer” on , then click the arrow. www.eMachines.com ®... -
Page 35: Using Drives And Ports
Chapter 4 Using Drives and Ports • Using the diskette drive • Using the memory card reader • Using CD or DVD drives... -
Page 36: Using The Diskette Drive
(for example, the A: drive), then double-click the file name. To remove the diskette, make sure that the drive activity light is off, then press the diskette eject button. Diskette slot Drive activity light Eject button , then click Start www.eMachines.com . Double-click the My Computer... -
Page 37: Using The Memory Card Reader
Label facing up ™ left Label facing down (gold contact area facing up) ® left Label facing up ™ left Label facing up ® right Label facing up ™ right Label facing up www.eMachines.com Using the memory card reader... -
Page 38: Inserting A Memory Card
Important the memory card. If you use the remove hardware icon, your computer will not recognize your memory card reader until you restart your computer. , then click Start My Computer icon in the taskbar to remove www.eMachines.com . Double-click... -
Page 39: Using The Cd Or Dvd Drive
Note: To use the double layer capability of the double layer recordable DVD drive, the blank DVDs you purchase must state Double Layer, Dual Layer, or DL. Using other types of blank media will result in less capacity. www.eMachines.com Using the CD or DVD drive... -
Page 40: Inserting A Cd Or Dvd
If the disc has two playable sides, place the disc so the name of the side you want to play is facing up. Press the eject button to close the tray. Manual eject hole (location varies) www.eMachines.com Eject button... -
Page 41: Playing A Cd
You can use the CD or DVD burning program on your computer to copy tracks from a music CD to your hard drive, copy or create data CDs and DVDs, create music CDs, create video DVDs, and more. www.eMachines.com Using the CD or DVD drive... - Page 42 Chapter 4: Using Drives and Ports www.eMachines.com...
-
Page 43: Maintaining Your Computer
Chapter 5 Maintaining Your Computer • Caring for your computer • Updating Windows • Protecting your computer from viruses • Cleaning your computer • Restoring your system • Opening the computer case • Adding memory and replacing the battery... -
Page 44: Caring For Your Computer
Scan for Available Updates For more information about Windows Update, click Start, then click Help and Support Help and Support. Type the keyword Windows Update in the HelpSpot Search box , then click Windows Update , then click the arrow. www.eMachines.com... -
Page 45: Protecting Your Computer From Viruses
To scan for viruses: Click Start All Programs AntiVirus opens. Scan for viruses Protecting your computer from viruses AntiVirus program to check files and programs that are on , then click Norton AntiVirus www.eMachines.com . Norton Norton AntiVirus 2004... - Page 46 To remove a virus: If Norton AntiVirus finds a virus, follow all on-screen instructions to remove the virus. Turn off your computer and leave it off for at least 30 seconds. Turn on your computer and rescan for the virus. Scan www.eMachines.com...
-
Page 47: Cleaning Your Computer
Use a damp, lint-free cloth to clean your computer and other parts of your system. Do not use abrasive or solvent cleaners because they can damage the finish on components. , then click Norton AntiVirus Finish www.eMachines.com Cleaning your computer . The LiveUpdate - Norton AntiVirus... -
Page 48: Cleaning The Keyboard
If the mouse pointer begins moving erratically across the computer screen or becomes difficult to control precisely, cleaning the mouse will likely improve its accuracy. To clean your optical mouse: ■ Wipe the bottom of the mouse with a damp lint-free cloth www.eMachines.com... - Page 49 Remove any dust, lint, or dirt from the mouse ball with a soft cloth. Clean the mouse rollers with a cotton swab dipped in isopropyl alcohol. Mouse rollers Replace the mouse ball and lock the retaining ring into place. www.eMachines.com Cleaning your computer...
-
Page 50: Cleaning Cds Or Dvds
The instructions for using the restore discs or hard drive backup files are included in the instruction booklet that came with your restore discs. www.eMachines.com... -
Page 51: Preventing Static Electricity Discharge
■ Always hold expansion cards by their edges or their metal mounting brackets. Avoid touching the edge connectors and components on the cards. Never slide expansion cards or components over any surface. Preventing static electricity discharge www.eMachines.com... -
Page 52: Opening The Case
Press the power button to drain any residual power from your computer. Remove the two thumbscrews from the side panel cover, slide the side panel cover toward the back of the computer, then lift the panel away from the computer. “First steps” on page www.eMachines.com... -
Page 53: Removing The Front Bezel
Carefully set the bezel to the side of the case with the cables attached. - OR - Disconnect the cables from the system board so you can remove the front bezel and cables away from the computer. www.eMachines.com Opening the case... -
Page 54: Closing The Case
Make sure that all of the internal cables are arranged inside the case so they will not be pinched when you close the case. Align the side panel, then slide the side panel toward the front of the computer to secure it into place. Replace the side panel thumbscrews. Reconnect the cables and power cord. www.eMachines.com... -
Page 55: Replacing The Front Bezel
Replacing the front bezel To replace the front bezel: Align the latch pins with the computer latch holes. Press the bezel firmly into place. www.eMachines.com Closing the case... -
Page 56: Installing Memory
For more stability, place your computer on its side. To avoid scratching the case, place it on a towel or other non-abrasive surface. Find the memory module banks on your system board. Your computer’s memory location may vary from the illustration below. Important “Removing the side panel” www.eMachines.com... - Page 57 System Properties dialog box in the General tab. , then click Performance and Maintenance . The amount of memory in your computer is shown at the www.eMachines.com Installing memory “Replacing the side panel” on (if in Category view).
-
Page 58: Replacing The System Battery
Locate the old battery on the system board and note its orientation. You will need to install the new battery the same way. Your computer’s battery location may vary from the illustration below. Important Push the battery release tab. The battery pops out of the socket. “Removing the side panel” www.eMachines.com... - Page 59 Turn on your computer. Open the BIOS Setup utility. In the BIOS Setup utility, restore any settings that you wrote down in Save all your settings and exit the BIOS Setup utility. Replacing the system battery “Replacing the side panel” on www.eMachines.com Step...
- Page 60 Chapter 5: Maintaining Your Computer www.eMachines.com...
-
Page 61: Troubleshooting
Chapter 6 Troubleshooting • Troubleshooting typical hardware and software problems • Getting telephone support • Using automated troubleshooting systems • Getting tutoring and training... -
Page 62: Safety Guidelines
Help and Support Help and Support. Type the keyword troubleshooting in the Search box Power cords or plugs are damaged Liquid has been spilled into your computer Your computer was dropped The case was damaged , then click the arrow. www.eMachines.com... -
Page 63: Troubleshooting
CDs on your computer. ■ Clean the disc. For more information, see ■ Make sure that the drive is configured correctly by following the instructions in the drive documentation. ■ Reinstall the device driver. “Cleaning CDs or DVDs” on page www.eMachines.com Troubleshooting... - Page 64 The regional code for the disc is on the disc, disc documentation, or disc packaging. If the DVD movie does not play, the disc’s regional code and your DVD drive’s regional code may not match. “Cleaning CDs or DVDs” on page “Cleaning CDs or DVDs” on page www.eMachines.com “Adjusting “Identifying...
-
Page 65: Computer
You see a “Disk is full” error message ■ Delete unnecessary files on the diskette. ■ Try a different diskette. Occasionally diskettes are flawed and cannot be read by the diskette drive. ■ Run Error checking on the diskette. www.eMachines.com Troubleshooting... -
Page 66: Dvd Drives
Help and Support click Help and Support. Type the keyword System Restore in the Search box key, the file cannot be restored. HIFT icon. Recycle Bin , then click the arrow. www.eMachines.com NTER . The file is restored to Restore... -
Page 67: Hard Drive
You see a “Non-system disk” or “disk error” error message ■ Eject the diskette from the diskette drive, then press E Recycle Bin , then click the arrow. to restart your computer. www.eMachines.com Troubleshooting icon, then clicking Empty NTER... -
Page 68: Internet
The complexity of graphics and multimedia on Web pages ■ Having multiple Web browsers open, performing multiple downloads, and having multiple programs open on your computer “Desktop PC Back” on page 10 , then click the arrow. www.eMachines.com “Desktop PC Back” on... -
Page 69: Keyboard
If you spilled liquid in the keyboard, turn off your computer and unplug the keyboard. Clean the keyboard and turn it upside down to drain it. Let the keyboard dry before using it again. If the keyboard does not work after it dries, you may need to replace it. www.eMachines.com Troubleshooting... -
Page 70: Memory
Contact your telephone service to get the correct code to temporarily disable the service. Also make sure that the modem dialing properties are set correctly. , then click the arrow. to make sure that the connections www.eMachines.com... - Page 71 The telephone line may be too noisy. . The Control Panel window opens. If your Control Panel Printers and Other Hardware icon, then click the Phone and Modem Options www.eMachines.com Troubleshooting Dialing Rules Edit...
- Page 72 Click/Double-click the “Internet” on page 62 “Desktop PC Back” on page 10 . The Control Panel window opens. If your Control Panel Printers and Other Hardware icon, then click the Phone and Modem Options www.eMachines.com to make sure tab. Modems...
- Page 73 , then click the arrow. . The Control Panel window opens. If your Control Panel Printers and Other Hardware Phone and Modem Options tab, then adjust the Speaker volume www.eMachines.com Troubleshooting . If information about the modem icon, then click the Modems Properties control.
-
Page 74: Monitor
The damper wire is a critical part of the overall monitor design and does not negatively affect the monitor's function. The text on the display is dim or difficult to read ■ Adjust the brightness and contrast controls. , then click the arrow. www.eMachines.com... -
Page 75: Mouse
If you have an optical mouse, clean the mouse by wiping the bottom with a clean, damp cloth. Make sure that the optical sensor is clean and free of debris. If you have a trackball mouse, see “Cleaning the mouse” on page www.eMachines.com Troubleshooting... -
Page 76: Networks
Make sure that the printer is online. Many printers have an online/offline button that you may need to press so the printer can start printing. Press the button to put the printer online. , then click the arrow. is turned off, then retype the password. www.eMachines.com... - Page 77 . The Control Panel window opens. If your Control Panel Printers and Other Hardware icon. The Printers and Faxes window Printers and Faxes , click Use Printer Offline , then click the arrow. www.eMachines.com Troubleshooting to clear the check mark.
-
Page 78: Sound
If you are using external speakers, see the speaker setup poster to check your speaker connections. For more information about sound troubleshooting, click Start, then Help and Support click Help and Support. Type the keyword sound troubleshooter in the Search box , then click the arrow. www.eMachines.com “Adjusting... -
Page 79: Telephone Support
If you have recently installed hardware or software, make sure that you have installed it according to the instructions provided with it. If you did not purchase the hardware or software from eMachines, see the manufacturer’s documentation and technical support resources. -
Page 80: Telephone Numbers
(See Customer Care” on page 73 calling) Self-help If you have how-to questions about using your eMachines-supplied hardware or software, see the following resources: ■ The printed or online documentation that came with your hardware or software. In many cases, additional product information and online documentation for eMachines-supplied hardware can be found in our Web site's Documentation Library. -
Page 81: A Safety, Regulatory, And Legal Information
Appendix A Safety, Regulatory, and Legal Information • Safety information • Regulatory statements • Notices... -
Page 82: Important Safety Information
Appendix A: Important safety information Your eMachines system is designed and tested to meet the latest standards for safety of information technology equipment. However, to ensure safe use of this product, it is important that the safety instructions marked on the product and in the documentation are followed. -
Page 83: Regulatory Compliance Statements
California Proposition 65 Warning Warning Do not use eMachines products in areas classified as hazardous locations. Such areas include patient care areas of medical and dental facilities, oxygen-laden environments, or industrial facilities. To reduce the risk of fire, use only No. 26 AWG or larger telecommunications line cord. - Page 84 In some cases, the inside wiring associated with a single-line individual service may be extended by means of a certified connector assembly. The customer should be aware that compliance with the above conditions may not prevent degradation of service in some situations. www.eMachines.com...
-
Page 85: Laser Safety Statement
Lightning protection For added protection of any eMachines product during a lightning storm or when it is left unattended or unused for long periods of time, unplug the product from the wall outlet and disconnect the antenna or cable system. - Page 86 Contact with them could be fatal. Reference Grounding component Electric service equipment Power service grounding electrode system (NEC Art 250, Part H) Ground clamps Grounding conductors (NEC Section 810-21) Antenna discharge unit (NEC Section 810-20) Ground clamp Antenna lead-in wire Antenna and satellite grounding www.eMachines.com...
-
Page 87: Macrovision Statement
© 2004 eMachines, Inc. All rights reserved. eMachines, stylized “e” and fi gure logo are trademarks or regiestered trademarks of eMachines, Inc, in the United States and/or other countries. All other product and brand names are trademarks of their respective owners. - Page 88 Appendix A: www.eMachines.com...
-
Page 89: Index
LCD panel mouse screen clicking closing computer case front bezel unresponsive program connecting modem PS/2 keyboard PS/2 mouse to Ethernet to Ethernet network to Internet to network connections audio in digital camera www.eMachines.com... - Page 90 See memory directional keys diskette drive troubleshooting diskette drive identifying locating drive troubleshooting using display troubleshooting documentation eMachines Web site help Help and Support online help double-clicking dragging drives diskette identifying drive types recordable CD recordable DVD troubleshooting types DSL modem...
- Page 91 See connections keyboard buttons cleaning features PS/2 port troubleshooting USB port keys and buttons application arrow audio playback directional editing function Internet mouse navigation numeric power Windows label Microsoft Certificate of Authenticity model number www.eMachines.com...
- Page 92 DVD using DVD drive using Windows Media Player muting sound navigation keys network jack troubleshooting network jack Norton Antivirus numeric keypad indicator online help opening computer case files folders front bezel programs shortcut menu Pad Lock indicator parallel port www.eMachines.com...
- Page 93 Scroll Lock indicator scroll wheel searching in Help and Support serial number serial port setting up safety precautions shortcut menus accessing shortcuts opening menu shutting down computer side panel removing replacing sound adjusting controls www.eMachines.com...
- Page 94 USB port video playing virus protecting against removing with Norton AntiVirus voltage switch volume adjusting adjusting modem controls muting troubleshooting Web site eMachines Windows Product Key Code Windows key Windows Media Player Windows Update working safely Zip drive port www.eMachines.com...
- Page 96 MAN EM NG3 DT USR GDE R0 08/04...