Advertisement
Table of Contents
- 1 Cafe Latte
- 2 Table of Contents
- 3 Sunbeam's Safety Precautions
- 4 About Espresso Coffee
- 5 Features of Your Sunbeam Café Latte
- 6 Using the Control Panel
- 7 Reference Guide to Using Your Espresso Machine
- 8 Preparing Your Espresso Machine before Use
- 9 Guide to the Perfect Espresso
- 10 Guide to Milk Texturing
- 11 Using the Hot Water Function
- 12 Espresso Recipes
- 13 Care and Cleaning
- 14 Descaling
- 15 Trouble Shooting Guide
- Download this manual
Advertisement
Table of Contents

Related Manuals for Sunbeam EM5600 Cafe Latte


Summary of Contents for Sunbeam EM5600 Cafe Latte
-
Page 1: Cafe Latte
Cafe Latte Pump espresso machine with temperature status LCD Instruction Booklet EM5600 Please read these instructions carefully and retain for future reference. - Page 2 Sub Heading Body copy with not indent applied. • Bullet copy Bullet copy Bullet copy Bullet copy Bullet copy Bullet copy Bullet copy Bullet copy...
-
Page 3: Table Of Contents
Contents Sunbeam’s Safety Precautions About espresso coffee Features of your Sunbeam Café Latte Using the control panel Reference guide to using your espresso machine Preparing your espresso machine before use 14 Guide to the perfect espresso Guide to milk texturing... -
Page 4: Sunbeam's Safety Precautions
• Never leave an appliance unattended while in use. If you have any concerns regarding the performance and use of your appliance, please visit www.sunbeam.com.au or contact the Sunbeam Consumer Service Line. Ensure the above safety precautions are understood. -
Page 5: About Espresso Coffee
Drinking authentic café quality coffee at home is guaranteed with the Sunbeam Café Latte The Sunbeam Café Latte makes producing espresso machine. cafe-quality coffee at home easier than ever before. -
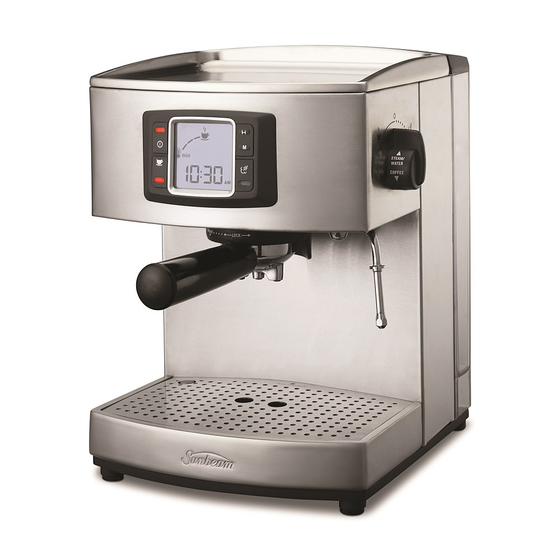
Page 6: Features Of Your Sunbeam Café Latte
Features of your Sunbeam Café Latte Warming plate Effectively pre-warms up to 9 espresso cups. Control panel with LCD Easy to use control panel with an LCD showing the status of the water temperature. Group head Brass and phenolic filter handle... - Page 7 2.1L water reservoir Removable water reservoir for easy filling, simply lift in any direction. Operating dial Easy to operate – turn to the left for espresso/ hot water, or to the right for steam. Steam wand Extra cup height clearance Additional clearance between the filter handle and the drip tray is designed to suit taller cups.
- Page 8 Features of your Sunbeam Café Latte 15 Bar Pump Crema System Italian designed and manufactured, the Italian designed the cream system consists machine is fitted with a 15 BAR pump of a dual-floor filter creating additional back delivering the pressure required for a...
-
Page 9: Using The Control Panel
Using the control panel Power Note: Remember that if 'READY' is not displayed on the LCD the espresso machine Press the ‘POWER’ button once to turn the is adjusting the temperature of the heating espresso machine on. The light located on system. - Page 10 Using the control panel (continued) Note: Should the espresso machine not Once the espresso machine is heated to the correct temperature, the temperature be in steam mode, so the orange light on indicator line will stop flashing and steam button is not on, the coffee 'READY' will appear on the LCD, the coffee maker needs to press the steam button...
-
Page 11: Reference Guide To Using Your Espresso Machine
Reference guide to using your espresso machine The diagrams below and on the following pages are to assist you in operating your Café Latte espresso machine. Each of the diagrams is numbered. Throughout this instruction booklet reference will be made to these diagrams so each of them has been numbered for convenience and ease of use. - Page 12 Reference guide to using your espresso machine (continued) Place filter handle onto Turn filter handle to the Place large container under group head. right, as far as it will go. both pouring spouts. Making the espresso Turn the operating dial to the Select appropriate filter and Hold filter handle and purge espresso setting and allow...
- Page 13 Reference guide to using your espresso machine (continued) Place filter handle onto Turn filter handle to the Place glasses/cups below group head. right, as far as it will go. pouring spouts. Turn the operating dial to Remove filter handle by Discard the used coffee start and stop the espresso turning to the left.
- Page 14 Reference guide to using your espresso machine (continued) Place steam wand into milk, Angle jug to rest steam wand Raise the jug until nozzle is approx. 1cm below surface on spout and place nozzle in the centre of milk. and activate the steam just below surface of the function.
- Page 15 Reference guide to using your espresso machine (continued) Remove drip tray. Ensure plastic lining is Remove water reservoir. clipped back into position in the drip tray. Remove the GREY cleaning Insert the cleaning pin into Wrap steam wand with damp pin from the base of the the single hole in the base of cloth and turn steam on for...
-
Page 16: Preparing Your Espresso Machine Before Use
Preparing your espresso machine before use 1. Place the espresso machine onto a dry, 5. Place glasses and cups on the warming stable benchtop. plate (8). 2. Ensure the drip tray and grill are in place. Important: For first time use or if the machine has not been used for some time, it is 3. -
Page 17: Guide To The Perfect Espresso
Guide to the perfect espresso Before starting to prepare for making 7. Brush any excess coffee grounds from espresso, ensure the espresso machine is in around the edge of the filter basket (18). espresso/hot water mode, so the red light on Important: Be sure not to over dose the filter power button and the orange light on basket with coffee. - Page 18 Guide to the perfect espresso (continued) Tip: After each use of the espresso machine To tell you that the espresso machine is in we recommend that a small amount of water standy mode, 'STANDBY' will be displayed on is cycled through the group head as this will the LCD and nothing else.
-
Page 19: Guide To Milk Texturing
Guide to milk texturing Milk texturing is the steaming of milk. The below the surface and activate the steam steam does two things, firstly it heats the function by turning the operating dial to milk and secondly the steam mixes air setting (28). -
Page 20: Using The Hot Water Function
Guide to milk texturing (continued) 11. With the jug in hand tap the jug on the milk and froth combine for an even the bench top to release the trapped consistency. By swirling the milk you can air bubbles and then swirl the jug in a see the foam in the jug swirling with your circular motion until the milk becomes movement this will enable you to judge... -
Page 21: Espresso Recipes
Espresso Recipes ESPRESSO (SHORT BLACK) MACCHIATO Espresso is a concentrated, full bodied coffee Macchiato, Italian for ‘to stain or mark’. with a stable layer of cream on top – known Traditionally served as a standard espresso as ‘crema’. An espresso is the foundation of with a dash of milk and a small dollop of all café... - Page 22 Espresso Recipes (continued) CAFFE LATTE CAFFE MOCHA An espresso with steamed milk, typically Made in a similar way to a cappuccino but served in a glass. The layer of frothed milk on with the addition of drinking chocolate. top should be 10mm to seal the coffee. Simply stir the chocolate into the espresso prior to adding the steamed milk and froth.
-
Page 23: Care And Cleaning
Over time it is normal for the inside of the the espresso pour. drip tray to be stained by the oils in the Note: Contact Sunbeam on 1300 881 861 coffee. should you think that the group head seal Note: Ensure that when you are replacing the needs replacing. - Page 24 Care and Cleaning (continued) Steam wand Important: Never clean the steam wand with an abrasive pad as this will damage the Keeping the steam arm clean is essential steam wand. to ensure maximum efficiency of the steam function. A build up of caramelised/dried Should the steam wand become blocked, milk on the steam wand will impair the supplied with the espresso machine is a...
-
Page 25: Descaling
1.5 litres of water, add 1 capful of Important: Do not run descaling solution Sunbeam Liquid Descaler and replace the through the steam wand. reservoir. Note: Depending on the size of the container C. - Page 26 Descaling (continued) 10. Leave the machine off for 10-15 minutes 14. Turn the operating dial to the espresso to allow the descaler solution to take setting and allow the entire water affect. reservoir to cycle through the group head. 11. Press the power button once to turn Note: Depending on the size of the container the espresso machine on.
-
Page 27: Trouble Shooting Guide
The group head is dirty. Wipe group head with a damp cloth. The group head is defective. Contact a Sunbeam Service Centre. Group head rubber seal is damaged, Contact a Sunbeam Service Centre. or warn. No coffee runs through. - Page 28 The group head is dirty. Wipe group head with a damp cloth. The group head is defective. Contact a Sunbeam Service Centre. Group head rubber seal is warn or Contact a Sunbeam Service Centre. damaged.
- Page 29 See "Care & Cleaning" pg 21. Machine blocked by scale See “Descaling ” pg23. build up. Please contact Sunbeam directly on Freecall 1300 881 861, if this guide does not solve your query. We have experienced staff on hand to assist, Monday to Friday.
- Page 30 Notes...
- Page 31 You are also Alternatively, you can send a written claim entitled to have the goods repaired or to Sunbeam at the address listed below. replaced if the goods fail to be of acceptable On receipt of your claim, Sunbeam will...
- Page 32 Sunbeam Corporation Limited 2010. ABN 45 000 006 771 Units 5 & 6, 13 Lord Street Botany NSW 2019 Australia Unit 3, Building D 26 Vestey Drive Mt Wellington Auckland New Zealand Sunbeam Corporation is a division of GUD Holdings Ltd. 8/11...