Electrolux EW 880F Instruction Booklet
Electrolux home products front load washer instruction booklet ew 880f
Hide thumbs
Also See for EW 880F:
- Instruction booklet (21 pages) ,
- Instruction booklet (21 pages) ,
- Instruction booklet (23 pages)
Table of Contents
Advertisement
Advertisement
Table of Contents

Related Manuals for Electrolux EW 880F


Summary of Contents for Electrolux EW 880F
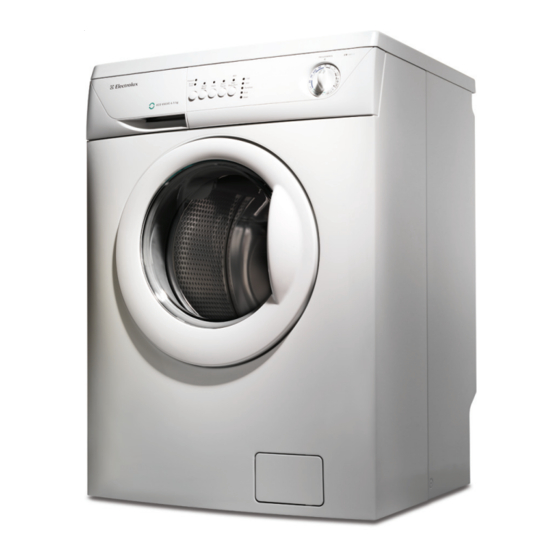
- Page 1 Front Load Washer Instruction Booklet EW 880F 132990430...
-
Page 2: Table Of Contents
Door seal Cabinet Detergent dispenser drawer Drain pump Water inlet filter Emergency emptying out The dangers of freezing Trouble-Shooting Guide Electrolux Warranty New Zealand Electrolux Warranty Australia Our contribution to the protection of the environment: we use environmentally friendly paper. 12-13... -
Page 3: Warnings
Dear customer, Please read these operating instructions carefully and pay particular attention to the safety notes indicated below. We recommend that you keep this instruction manual for future reference and pass it on to any future owners. Warnings The following warnings are provided in the interests of overall safety. You must read them carefully before installing or using the appliance. -
Page 4: Disposal
• Make sure that children or pets do not climb into the drum. To avoid this the machine incorporates a special feature. To activate this device, rotate the button (without pressing it) inside the door clockwise until the groove is horizontal. If necessary use a coin. -
Page 5: Installation
Installation Unpacking All transit bolts and packing must be removed before using the appliance. You are advised to keep all transit devices so that they can be refitted if the machine ever has to be transported again. 1. Using a spanner, unscrew and remove the two rear bottom screws. -
Page 6: Water Drainage
The inlet hose must not be lengthened. If it is too short and you do not wish to move the tap, you will have to purchase a new, longer hose specially designed for this type of use. Important! Before connecting up the machine to new pipework or to pipework that has not been used for some time, run off a reasonable amount of water to flush out any debris that may have been collected in the pipes. -
Page 7: Your New Washing Machine
Your new washing machine This new washing machine meets all modern needs for effective treatment of laundry with low water, energy and detergent consumption. • The programme selector dial combines the function of programme and temperature selection, making it easier to set the programme. •... -
Page 8: Use
Control panel 1 Detergent dispenser drawer Programme Option buttons Depending on the programme, different functions can be combined. These must be selected after choosing the desired programme and before depressing the START/PAUSE button. When these buttons are pressed, the corresponding pilot lights come on. - Page 9 6 “Spin reduction” button By depressing this button you can reduce the max. spin speed proposed by the machine. The relevant light illuminates. The maximum speeds are: for cotton, synthetics, hand wash and wool: 800 r.p.m. for delicate fabrics: 700 r.p.m. 7 Programme display When you select the programme, the light corresponding to the maximum spin speed provided...
-
Page 10: Washing Hints
Washing hints Sorting the laundry Follow the wash code symbols on each garment label and the manufacturer’s washing instructions. Sort the laundry as follows: whites, coloureds, synthetics, delicates, woollens. Temperatures 90°-95° for normally soiled white cottons and linen (e.g. tea cloths, towels, tablecloths, sheets...) 60°... -
Page 11: Detergents And Additives
Rust: oxalic acid dissolved in hot water or a rust removing product used cold. Be careful with rust stains which are not recent since the cellulose structure will already have been damaged and the fabric tends to hole. Mould stains: treat with bleach, rinse well (whites and fast coloureds only). -
Page 12: Operating Sequence
Operating sequence Before the first wash we recommend that you pour 2 litres of water into the main wash compartment of the detergent drawer in order to activate the ECO valve. Then run a cotton cycle at 60°C, with the machine empty, in order to remove any manufacturing residue from the drum and tub. - Page 13 7. Start the programme To start the selected programme, press the Start/Pause button; the corresponding light stops flashing. The “Function”and “Door” lights illuminate. The machine starts operating. 8. Altering a programme You can alter the programme before it starts. When the programme has started, you can only reset it by turning the programme selector dial to O and then you can select the new programme.
-
Page 14: Washing Programmes
Washing Programmes Type of laundry and degree of soil WHITE COTTONS Sheets, household linen, towels, tablecloths WHITE COTTONS ECONOMY Hand towels, sheets, underwear, tablecloths COLOURED COTTON Fast coloured cottons e.g. hand towels, sheets Non-fast coloured items, for example underwear, shirts, blouses SYNTHETICS Shirts, blouses, easy to iron... -
Page 15: Washing Programmes
Washing Programmes Special programmes Programme selector dial Programme position For rinsing hand washed items Rinses For emptying out the water of the last rinse of programmes Drain with RINSE HOLD option Separate spin for all fabrics Spin For cancelling the programme which is running Reset/Off or to switch the machine off... -
Page 16: International Wash Code Symbols
International wash code symbols These symbols appear on fabric labels, in order to help you choose the best way to treat your laundry. Energetic wash Max. wash Max. wash Max. wash Max. wash temperature temperature temperature temperature 95°C 60°C 40°C 30°C Hand wash Do not... -
Page 17: Maintenance
Maintenance Before any maintenance or cleaning is carried out you must DISCONNECT the appliance from the electricity supply. After each wash Leave the door open for a while. This helps to prevent mould and stagnant smells forming inside the appliance. Keeping the door open after a wash will also help to preserve the door seal. -
Page 18: Drain Pump
Drain pump Important! Every time you drain the water through the emergency emptying hose you must pour 2 litres of water into the main wash compartment of the detergent drawer and then run the drain programme. This will activate the ECO valve avoiding that part of the detergent remains unused with your next washing. -
Page 19: The Dangers Of Freezing
Emergency emptying out If the water is not discharged, proceed as follows to empty out the machine: • pull out the plug from the power socket; • close the water tap; • if necessary, wait until the water has cooled down; •... -
Page 20: Trouble-Shooting Guide
Trouble-Shooting Guide Certain problems are due to lack of simple maintenance or oversights, which can be solved easily without calling out a service technician. Before contacting your local Service Centre, please carry out the checks listed below. During machine’s operation it is possible that the “End” light flashes: •... -
Page 21: The Door Will Not Open
Problem • The door will not open: • Spinning starts late or the laundry is not spun enough: • No water is visible in the drum • The machine makes an unusual noise If you are unable to identify or solve the problem, contact your nearest service centre. -
Page 22: Electrolux Warranty New Zealand
ELECTROLUX APPLIANCE WARRANTY – NEW ZEALAND This appliance is warranted by Electrolux Home Products (NZ) Ltd (“the Company”) from the date of purchase. The following terms and conditions apply: The Company or its Authorised Service Centre will pay the cost of repairing or replacing all parts of the appliance which the Company or its Authorised Service Centre find defective for a period of 24 months following the date of purchase (the “Warranty Period”). -
Page 23: Electrolux Warranty Australia
Commonwealth or State legislation. Such rights cannot be changed by the conditions in this warranty. Subject to the conditions below, this appliance is warranted by Electrolux Home Products Pty. Ltd. A.B.N. 51 004 762 341, (the “Company”), to be free from defects in materials and workmanship for a period of 24 months following the date of purchase (the “Warranty Period”).