Table of Contents
Advertisement
Quick Links
Advertisement
Table of Contents

Related Manuals for Electrolux EW8F1168MS


Summary of Contents for Electrolux EW8F1168MS
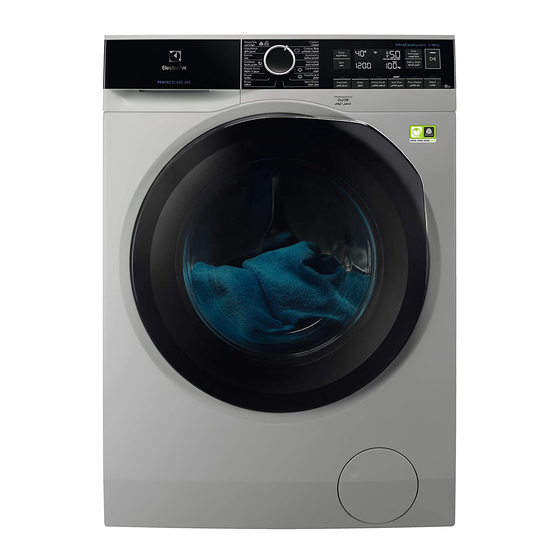
- Page 1 EW8F1168MS Washing Machine User Manual...
-
Page 2: Table Of Contents
17. QUICK GUIDE....................38 WE’RE THINKING OF YOU Thank you for purchasing an Electrolux appliance. You’ve chosen a product that brings with it decades of professional experience and innovation. Ingenious and stylish, it has been designed with you in mind. So whenever you use it, you can be safe in the knowledge that you’ll get great results every time. -
Page 3: Safety Information
ENGLISH SAFETY INFORMATION Before the installation and use of the appliance, carefully read the supplied instructions. The manufacturer is not responsible for any injuries or damages that are the result of incorrect installation or usage. Always keep the instructions in a safe and accessible location for future reference. -
Page 4: Safety Instructions
The appliance must be connected to the water mains • using the new supplied hose sets, or other new hose sets supplied by the Authorised Service Centre. Old hose sets must not be reused. • If the mains power supply cable is damaged, it must •... - Page 5 ENGLISH 2.2 Electrical connection testing of the appliance with the use of water in the factory. WARNING! • You can extend the drain hose to Risk of fire and electric maximum 400 cm. Contact the shock. service centre for the other drain hose and the extension.
-
Page 6: Installation
3. INSTALLATION WARNING! Refer to Safety chapters. 3.1 Unpacking 1. Remove the external film. If necessary, 2. Remove the cardboard top and the use a cutter. polystyrene packaging materials. 3. Open the door. Remove all the items 4. Put the front polystyrene packaging from the drum . - Page 7 ENGLISH 7. Remove the three transit bolts and pull 8. Put the plastic caps, that you find in the out the plastic spacers. user manual bag, in the holes. 3.2 Information for installation 1. Connect the water inlet hose to the back of the appliance.
- Page 8 It is possible to connect the drain hose in Refer to the illustration. different ways: 1. Make a U shape with the drain hose and put it around the plastic hose guide. 2. On the edge of a sink - Fasten the The end of the drain hose guide to the water tap or to the wall.
-
Page 9: Product Description
Use the delicate fragrance exclusively • The Stain option pre-treats stubborn developed by ELECTROLUX to add a stains optimizing the effectiveness of pleasant feeling of "just-washed" the stain remover. garment to the removing odours and •... - Page 10 The washing programme is tailored to the fabric fibres favouring a perfect the laundry load and the type of fabric softness. without consuming more time, energy • The SensiCare System detects the and water than necessary.
- Page 11 ENGLISH 5.3 Display The Temperature area: Temperature indicator . Cold water indicator. Child safety lock indicator. Door locked indicator. Delay start indicator. The digital indicator can show: • Programme duration (e. g. • Delay time (e. g. • Cycle end ( •...
-
Page 12: Dial And Buttons
Rinse Hold indicator. Add garments indicator. it lights at the beginning of the wash‐ ing phase, when it is still possible to pause the appliance and add more laundry. Maximum load indicator (refer to "The SensiCare System load detection " paragraph). - Page 13 ENGLISH Use this option for people with allergies If you touch the Start/Pause to detergent residues and with sensitive button, the appliance performs the skin. spinning phase and drains the water. This option increases the The appliance empties programme duration. the water out automatically after 18 The corresponding indicator above the...
- Page 14 6.10 Silent suitable for a full load of normally soiled garments. Touch this button to activate-deactivate the option Silent . a quick cycle for a full load of lightly soiled garments. The intermediate and the final spinning phases are suppressed and the very quick cycle for a smaller lightly programme ends with water in the drum.
-
Page 15: Programmes
ENGLISH 6.13 Start/Pause Touch the Start/Pause button to start, pause the appliance or interrupt a running programme. 7. PROGRAMMES 7.1 Programme Chart Programme Maximum Maxi‐ Programme description Default tem‐ spin (Type of load and soil level) perature speed load Temperature Spin range speed... - Page 16 • Items that are not suitable for tumble drying. • All items with plastic, metal, wooden parts or alike. ELECTROLUX fragrance. If you use this special gentle fragrance, your laundry will scent as just washed: pour a single dose bottle in the compartment and simply start a steam programme.
- Page 17 ENGLISH Programme Maximum Maxi‐ Programme description Default tem‐ spin (Type of load and soil level) perature speed load Temperature Spin range speed range 1 kg Cottons, Synthetics, Delicates. Short and gentle steam programme to refresh even your FreshScent very delicate garments, including very delicate garments with sequins, lace etc.
- Page 18 Programme Maximum Maxi‐ Programme description Default tem‐ spin (Type of load and soil level) perature speed load Temperature Spin range speed range 1200 rpm Do not use fabric softener and (1200- 400 Outdoor make sure that there is no soften‐...
- Page 19 ENGLISH Programme Maximum Maxi‐ Programme description Default tem‐ spin (Type of load and soil level) perature speed load Temperature Spin range speed range 1200 rpm 2 kg Machine washable wool, hand washable (1200 - wool and other fabrics with «hand washing» Wool/Silk 400 rpm) care symbol...
-
Page 20: Settings
Programme Wool/Silk ■ ■ ■ ■ 1) Prewash and Stain cannot be selected together. 2) This option is not available with temperature lower than 40 °C. 3) If you set the No Spin option, the appliance performs draining only. -
Page 21: Before First Use
ENGLISH 9. BEFORE FIRST USE 1. Make sure that the electrical power is 4. Set and start a programme for cotton available and the water tap is open. at the highest temperature without 2. Pour 2 litres of water into the any laundry in the drum. - Page 22 - Compartment for fabric softener and other liquid treatments(fabric condi‐ tioner, starch). - Maximum level for quantity of liquid additives. - Flap for powder or liquid deter‐ gent. Always follow the With the flap in the position DOWN: instructions that you find on •...
- Page 23 ENGLISH display and the given information 2. Touch the Start/Pause button to changes accordingly. pause the appliance. The related indicator flashes. If a selection is not possible an acoustic signal sounds 3. Touch the Delay Start button and the display shows repeatedly until the display shows and the indicator goes off.
- Page 24 Once removed the exceeding garments, If the SensiCare System has completed and the water touch the Start/Pause button to start filling has already started, the programme again. The SensiCare the new programme starts phase can be repeated up to three times without repeating the (see point 1).
-
Page 25: Hints And Tips
ENGLISH 10.12 Draining water out after 3. When the programme is completed end of cycle and the door locked indicator goes off, you can open the door. If you have chosen a programme or an 4. Press the On/Off button for a few option that does not empty out the water seconds to deactivate the appliance. -
Page 26: Care And Cleaning
• A very small load can cause balance • To help the environment, do not use problems with the spin phase leading more than the recommended quantity to excessive vibration. If this occurs: of detergent. a. interrupt the programme and •... - Page 27 ENGLISH 12.2 Descaling Regularly examine the seal and remove all objects from the inner part. Coins, If the water hardness in your buttons, other small items forgotten in area is high or moderate, we the pockets of your clothes are deposited recommend that you use a during the washing cycle in the special water descaling product for...
- Page 28 2. Remove the top part of the additive 12.7 Cleaning the drain pump compartment to aid cleaning and flush it out under running warm WARNING! water, to remove any traces of Disconnect the mains plug accumulated detergent. After from the mains socket.
- Page 29 ENGLISH 6. Repeat the steps 4 and 5 until the water stops to flow out. 7. Turn the filter anti-clockwise to remove it. 2. Place a suitable bowl below the drain pump access to collect the water that flows out. 3.
- Page 30 When you drain the water with the emergency drain procedure, you must activate the drain system again: a. Put 2 litres of water in the main wash compartment of the detergent dispenser. b. Start the programme to drain the water.
-
Page 31: Troubleshooting
ENGLISH 12.9 Emergency drain remaining water from the inlet hose and the drain pump. If the appliance cannot drain the water, 1. Disconnect the mains plug from the carry out the same procedure, described mains socket. in 'Cleaning the drain pump' paragraph. If 2. - Page 32 If the appliance is overloaded, remove some items from the drum and/or hold the door shut while touching the Start/Pause button until the indicator stops flashing (see the picture below). 13.2 Possible failures Problem Possible solution • Make sure that the mains plug is connected to the mains socket.
- Page 33 ENGLISH Problem Possible solution • Make sure that the sink spigot is not clogged. • Make sure that the drain hose has no kinks or bends. • Make sure that the drain filter is not clogged. Clean the filter, if necessary. Refer to "Care and cleaning". The appliance does not •...
- Page 34 Problem Possible solution • Increase the detergent quantity or use a different deter‐ gent. The washing results are • Use special products to remove the stubborn stains be‐ not satisfactory. fore you wash the laundry. • Make sure that you set the correct temperature.
-
Page 35: Consumption Values
ENGLISH 5. Take out the laundry and then close the appliance door. 6. Close the filter flap. 14. CONSUMPTION VALUES Stated values are obtained in laboratory conditions with relevant stand‐ ards. Different causes can change the data: the quantity and type of laundry and ambient temperature. -
Page 36: Technical Data
1) Connect the water inlet hose to a water tap with a 3/4'' thread. 16. ACCESSORIES 16.1 Available in www.electrolux.com/shop or from authorised dealer Only appropriate accessories approved by ELECTROLUX ensure the safety standards of the appliance. If unapproved parts are used, any claims will be invalidated. - Page 37 To raise your appliance and make using the correct stacking kit loading and unloading laundry easier. manufactured and approved by The drawer can be used for laundry ELECTROLUX. storage e.g.: towels, cleaning products and more. Verify the compatible stacking kit by checking the Read carefully the instructions supplied depth of your appliances.
-
Page 38: Quick Guide
17. QUICK GUIDE 17.1 Daily use Connect the mains plug to the mains 3. Set the desired options by means of socket. the corresponding touch buttons. 4. To start the programme, touch the Open the water tap. Start/Pause button. - Page 39 ENGLISH 17.3 Programmes Programmes Load Product description Cotton 10 kg White cotton and coloured cotton. White cotton and coloured cotton. Standard 10 kg programmes for the Energy Label con‐ Cotton Eco sumption values. Synthetics 4 kg Synthetic items or mixed fabric items. Delicate fabrics such as acrylics, viscose, Delicates 4 kg...
- Page 40 www.electrolux.com/shop...