NETGEAR ProSafe WNAP320 Reference Manual
Prosafe wireless-n access point
Hide thumbs
Also See for ProSafe WNAP320:
- Installation manual (2 pages) ,
- Specifications (3 pages) ,
- Reference manual (93 pages)

Related Manuals for NETGEAR ProSafe WNAP320


Summary of Contents for NETGEAR ProSafe WNAP320
- Page 1 ProSafe Wireless-N Access Point WNAP320 Reference M anua l 350 East Plumeria Drive San Jose, CA 95134 January 26, 2011 202-10724-01 v1.0...
-
Page 2: Technical Support
NETGEAR, Inc. Technical Support Thank you for choosing NETGEAR. To register your product, get the latest product updates, or get support online, visit us at http://support.netgear.com. -
Page 3: Table Of Contents
Chapter 1 Introduction About the ProSafe Wireless-N Access Point WNAP320 ....6 What Is In the Box? ......... . . 7 System Requirements . - Page 4 ProSafe Wireless-N Access Point WNAP320 Reference Manual Schedule the Wireless Radio ........52 Configure Basic Wireless Quality of Service .
- Page 5 ProSafe Wireless-N Access Point WNAP320 Reference Manual Testing the LAN Path to Your Wireless Access Point ... . . 101 Testing the Path from Your Computer to a Remote Device ..102 Problems with Date and Time .
-
Page 6: Chapter 1 Introduction
(NIC) through an antenna. Typically, an individual in-building wireless access point provides a maximum connectivity area of about a 500-foot radius. The ProSafe Wireless-N Access Point WNAP320 can support up to 64 users simultaneously in a range of several hundred feet. -
Page 7: What Is In The Box
An 802.11b/g- or 802.11n/g-compliant device, such as the NETGEAR WNDA3100 wireless adapter Key Features and Standards The ProSafe Wireless-N Access Point WNAP320 is easy to use and provides solid wireless and networking support. It also offers a wide range of security options. Chapter 1. Introduction... -
Page 8: Supported Standards And Conventions
ProSafe Wireless-N Access Point WNAP320 Reference Manual Supported Standards and Conventions The ProSafe Wireless-N Access Point WNAP320 supports the following standards and conventions: • Standards compliance. The wireless access point complies with the IEEE 802.11 b/g standards for wireless LANs, and is Wi-Fi certified for 802.11n standard. - Page 9 ProSafe Wireless-N Access Point WNAP320 Reference Manual send all traffic to this master, and do not communicate directly with each other. Network authentication should be used to protect this traffic. Wireless repeater. In this mode, the wireless access point does not function as an access point but communicates only with wireless stations that function in repeater mode, point-to-point bridge mode, and point-to-multipoint-bridge mode.
-
Page 10: 802.11B/G/N Standards-Based Wireless Networking
ProSafe Wireless-N Access Point WNAP320 Reference Manual 802.11b/g/n Standards–Based Wireless Networking The ProSafe Wireless-N Access Point WNAP320 provides a bridge between wired Ethernet LANs and 802.11b/g- and 802.11n-compatible wireless LAN networks. It provides connectivity between wired Ethernet networks and radio-equipped wireless notebook systems, desktop systems, print servers, and other devices. -
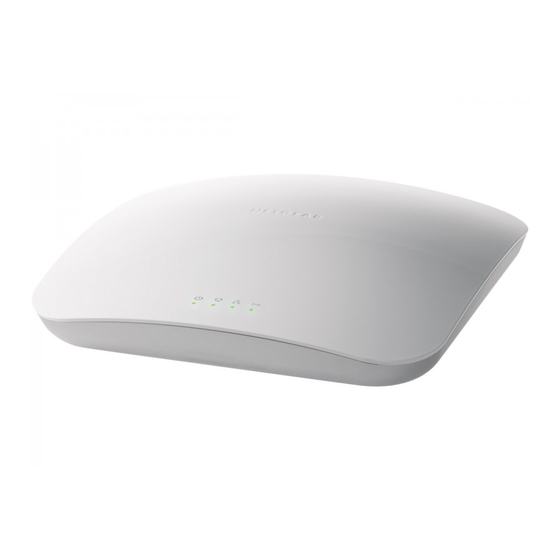
Page 11: Top Panel
ProSafe Wireless-N Access Point WNAP320 Reference Manual Top Panel The ProSafe Wireless-N Access Point WNAP320 LEDs are described in the following figure and table: Figure 1. Table 1. Top Panel LEDs Item Description Power/Test Off Power is off. On (green) Power is on. -
Page 12: Rear Panel
ProSafe Wireless-N Access Point WNAP320 Reference Manual Rear Panel Figure 2. The rear panel functions of the ProSafe Wireless-N Access Point WNAP320 are described in the following list: Reverse SMA connector for an optional 2.4-GHz antenna. Factory default Reset button. Using a sharp object, press and hold this button for about 5 seconds to reset the wireless access point to factory defaults settings. -
Page 13: Bottom Panel With Product Label
ProSafe Wireless-N Access Point WNAP320 Reference Manual Bottom Panel with Product Label The product label on the bottom of the wireless access point’s enclosure displays factory default settings, regulatory compliance, and other information: Figure 3. Chapter 1. Introduction | 13... -
Page 14: Chapter 2 Installation And Basic Configuration
Mount the Wireless Access Point on page 28 Note: In this chapter and in all further chapters, the WNAP320 is referred to as the wireless access point. What You Need before You Begin You need to consider the following guidelines and requirements before you can set up your wireless access point. -
Page 15: Ethernet Cabling Requirements
• Placing an external antenna in a vertical position provides best side-to-side coverage. Placing an external antenna in a horizontal position provides best up-and-down coverage. (An external antenna does not come standard with the WNAP320 wireless access point.) • If you are using multiple wireless access points, it is better if adjacent wireless access points use different radio frequency channels to reduce interference. -
Page 16: Install And Configure The Wireless Access Point
ProSafe Wireless-N Access Point WNAP320 Reference Manual Install and Configure the Wireless Access Point Before installing the wireless access point, make sure that your Ethernet network is up and working. You will be connecting the wireless access point to the Ethernet network. Then computers with 802.11b/g or 802.11n wireless adapters will be able to communicate with the... - Page 17 ProSafe Wireless-N Access Point WNAP320 Reference Manual Ethernet cable Ethernet port WNAP320 Figure 4. Turn on your computer. Connect the power adapter to the wireless access point. Tip: The wireless access point supports Power over Ethernet (PoE). If you have a switch that provides PoE, you will not need to use the power adapter to power the wireless access point.
-
Page 18: Log In To The Wireless Access Point
ProSafe Wireless-N Access Point WNAP320 Reference Manual Log In to the Wireless Access Point The default IP address of your wireless access point is http://192.168.0.100. The wireless access point is set, by default, for the DHCP client to be disabled. -
Page 19: Configure Basic General System Settings And Time Settings
ProSafe Wireless-N Access Point WNAP320 Reference Manual The bottom right corner of all screens that allow you to make configuration changes show the Apply and Cancel buttons, and on several screens the Edit button. Figure 7. These buttons have the following functions: •... - Page 20 ProSafe Wireless-N Access Point WNAP320 Reference Manual Specify the fields as explained in the following table: Table 2. Basic General System Settings Field Description Access Point Name This unique name is the wireless access point NetBIOS name. The name is printed on the rear label of the wireless access point.
-
Page 21: Configure Ip Settings And Optional Dhcp Server Settings
ProSafe Wireless-N Access Point WNAP320 Reference Manual Table 3. Time System Settings (Continued) Field Description Use Custom NTP Server Select this check box to If you want to use a custom NTP server. Note: You must have an Internet connection to use an NTP server that is not on your local network. - Page 22 A DNS server is a host on the Internet that translates Internet names (such as www.netgear.com) to numeric IP addresses. Typically your ISP transfers the IP address of one or two DNS servers to your wireless access point during login. If...
-
Page 23: Configure Basic Wireless Settings
ProSafe Wireless-N Access Point WNAP320 Reference Manual Specify the fields as explained in the following table: Table 5. LAN Settings Field Description DHCP Server Select the DHCP Server check box to enable the DHCP server. Use the default settings or specify the pool of IP addresses to be assigned by setting the starting IP address and ending IP address. - Page 24 ProSafe Wireless-N Access Point WNAP320 Reference Manual WARNING! If you configure the wireless access point from a wireless computer and you change the wireless access point’s SSID, channel, or wireless security settings, you will lose your wireless connection when you click Apply. You must then change the wireless settings of your computer to match the wireless access point’s new settings.
- Page 25 ProSafe Wireless-N Access Point WNAP320 Reference Manual Specify the fields as explained the following table: Table 6. Basic Wireless Settings Field Descriptions Wireless Mode Select the wireless operating mode that you want to use by selecting one of the following radio buttons: •...
- Page 26 If more than one wireless access point can be used, the one with the strongest signal is used. This can happen only when the wireless access points use the same SSID. The WNAP320 wireless access point functions in infrastructure mode by default.
-
Page 27: Test Basic Wireless Connectivity
ProSafe Wireless-N Access Point WNAP320 Reference Manual Note: For more information about wireless channels, see the article “Wireless Networking Basics” available on the NETGEAR website. A link to this article and other articles of interest can be found in Related Documents in Appendix A. -
Page 28: Mount The Wireless Access Point
ProSafe Wireless-N Access Point WNAP320 Reference Manual After you have completed the configuration of the wireless access point, you can reconfigure the computer that you used for this process back to its original TCP/IP settings. Mount the Wireless Access Point This section includes the following subsections: •... - Page 29 ProSafe Wireless-N Access Point WNAP320 Reference Manual Attach the clamp to the ceiling rail. Attach the mounting plate to the clamp. Connect the cables to the wireless access point. Chapter 2. Installation and Basic Configuration | 29...
-
Page 30: Wall Installation
ProSafe Wireless-N Access Point WNAP320 Reference Manual Attach the wireless access point to the mounting plate. Attach the cover to the wireless access point. Wall Installation To install the wireless access point using the wall installation kit: Verify the package content of the wall installation kit. - Page 31 ProSafe Wireless-N Access Point WNAP320 Reference Manual Detach the mounting plate from the wireless access point. Attach the mounting plate to the wall. Connect the cables to the wireless access point. Chapter 2. Installation and Basic Configuration | 31...
- Page 32 ProSafe Wireless-N Access Point WNAP320 Reference Manual Attach the wireless access point to the mounting plate. Attach the cover to the wireless access point. 32 | Chapter 2. Installation and Basic Configuration...
-
Page 33: Desk Installation
ProSafe Wireless-N Access Point WNAP320 Reference Manual Desk Installation To install the wireless access point on a desk, attach the rubber feet to the holes in the bottom of the wireless access point. Rubber feet Chapter 2. Installation and Basic Configuration... -
Page 34: Chapter 3 Wireless Configuration And Security
Wireless Configuration and Security This chapter describes how to configure the wireless features of your ProSafe Wireless-N Access Point WNAP320. The chapter includes the following sections: • Wireless Data Security Options on this page • Security Profiles on page 36 •... - Page 35 ProSafe Wireless-N Access Point WNAP320 Reference Manual Unlike wired network data, your wireless data transmissions can extend beyond your walls and can be received by anyone with a compatible adapter. For this reason, use the security features of your wireless equipment. The wireless access point provides highly effective security features that are covered in detail in this chapter.
-
Page 36: Security Profiles
ProSafe Wireless-N Access Point WNAP320 Reference Manual • WPA and WPA-PSK (TKIP). Wi-Fi Protected Access (WPA) data encryption provides strong data security with Temporal Key Integrity Protocol (TKIP) encryption. The very strong authentication along with dynamic per frame rekeying of WPA make it virtually impossible to compromise. - Page 37 ProSafe Wireless-N Access Point WNAP320 Reference Manual To set up a security profile you select its network authentication type, data encryption, wireless client security separation, and VLAN ID: • Network authentication The wireless access point is set by default as an open system with no authentication.
-
Page 38: Before You Change The Ssid, Wep, And Wpa Settings
ProSafe Wireless-N Access Point WNAP320 Reference Manual Before You Change the SSID, WEP , and WPA Settings For a new wireless network, print or copy this form and fill in the settings. For an existing wireless network, the network administrator can provide this information. Be sure to set the Country/Region correctly as the first step. -
Page 39: Configure And Enable Security Profiles
ProSafe Wireless-N Access Point WNAP320 Reference Manual Configure and Enable Security Profiles To configure and enable a security profile: Select Configuration > Security > Profile Settings. The Profile Settings screen displays, showing eight wireless security profiles: Figure 14. The following table explains the fields of the Profile Settings screen: Table 7. - Page 40 Enter a unique name of the wireless security profile that makes it easy to recognize the profile. The default names are NETGEAR, NETGEAR-1, NETGEAR-2, and so on through NETGEAR-7. You can enter a value of up to 32 alphanumeric characters.
- Page 41 ProSafe Wireless-N Access Point WNAP320 Reference Manual The wireless access point is set by default as an open system with no authentication. When you configure network authentication, bear in mind the following: • If you are using access point mode (which is the default mode if you did not enable wireless bridging), then all options are available.
- Page 42 ProSafe Wireless-N Access Point WNAP320 Reference Manual Table 9. Authentication Settings of the Edit Security Profile Screen (Continued) Field Description Network Authentication WPA2-PSK Select this only if all clients support WPA2. If selected, you must use AES and TKIP + AES encryption and enter a WPA passphrase (network key).
- Page 43 ProSafe Wireless-N Access Point WNAP320 Reference Manual Table 9. Authentication Settings of the Edit Security Profile Screen (Continued) Field Description Note: Access control functions only when static VLANs are enabled, that is, you Access Control select Disable from the Dynamic VLAN drop-down list.
- Page 44 ProSafe Wireless-N Access Point WNAP320 Reference Manual When you select Open System from the Network Authentication drop-down list and any selection other than None from the Data Encryption drop-down list, the screen expands to display the WEP fields: Figure 16.
- Page 45 ProSafe Wireless-N Access Point WNAP320 Reference Manual Table 10. WEP Encryption Settings (Continued) Field Descriptions Encryption Key Either manually enter a key or allow the key to be automatically generated by clicking (Key1–Key4) Generate Key. • For ASCII format, depending on the key size selected, the manually entered encryption key must have a length of 5 (64-bit WEP), 13 (128-bit WEP), or 16 (152-bit WEP) characters.
- Page 46 AES encryption if you want to use the 11n rates and speed. Advanced Encryption Standard (AES) is the standard encryption method used with WPA2. Note: Although some wireless clients might support AES with WPA, the WNAP320 wireless access point does not support WPA with AES. TKIP + AES The TKIP + AES encryption method is supported both for WPA and WPA2.
- Page 47 Note: Although some wireless clients might support AES with WPA, the WNAP320 wireless access point does not support WPA with AES. TKIP + AES TKIP + AES supports both WPA and WPA2. Broadcast packets use TKIP. For unicast (point-to-point) transmissions, WPA clients use TKIP, and WPA2 clients use AES.
-
Page 48: Configure Radius Server Settings
ProSafe Wireless-N Access Point WNAP320 Reference Manual Table 12. WPA-PSK, WPA2-PSK, and WPA-PSK & WPA2-PSK Settings (Continued) Field Descriptions Passphrase Enter a passphrase. The passphrase length must be between 8 and 63 characters (inclusive). The default passphrase is sharedsecret. You can display the actual passphrase by selecting the Show Passphrase in Clear Text radio button. - Page 49 ProSafe Wireless-N Access Point WNAP320 Reference Manual Specify the settings as explained in the following table: Table 13. RADIUS Server Settings Field Descriptions RADIUS Server Settings Primary IP Address Enter the IP address of the primary RADIUS server for Authentication Server authentication.
-
Page 50: Restrict Wireless Access By Mac Address
ProSafe Wireless-N Access Point WNAP320 Reference Manual Restrict Wireless Access by MAC Address For increased security, you can restrict access to an SSID by allowing access to only specific computers or wireless stations based on their MAC addresses. You can restrict access to only trusted computers so that unknown computers cannot wirelessly connect to the wireless access point. - Page 51 ProSafe Wireless-N Access Point WNAP320 Reference Manual Click Refresh to refresh the Available Wireless Stations table. The wireless access point places the MAC addresses of the attached wireless stations in this table. Populate the Trusted Wireless Stations table by one of the following methods: •...
-
Page 52: Schedule The Wireless Radio
ProSafe Wireless-N Access Point WNAP320 Reference Manual Schedule the Wireless Radio Scheduled Wireless On/Off is a green feature that allows you to turn off the wireless radio during scheduled vacations, office shutdowns, on evenings, or on weekends. To schedule the radio: Select Configuration >... - Page 53 ProSafe Wireless-N Access Point WNAP320 Reference Manual as video or audio, has a higher priority than normal traffic. For WMM to function correctly, wireless clients must also support WMM. By enabling WMM, you allow Quality of Service (QoS) control for upstream traffic flowing from a wireless station to the wireless access point and for downstream traffic flowing from the wireless access point to a wireless station.
- Page 54 ProSafe Wireless-N Access Point WNAP320 Reference Manual Enable or disable the WMM features: • Enable Wi-Fi Multimedia (WMM). To enable this feature, select the Enable radio button, which is the default setting. Select the Disable button to disable the feature.
-
Page 55: Chapter 4 Management
Management This chapter describes how to use the management and monitoring features of your ProSafe Wireless-N Access Point WNAP320. This chapter includes the following sections: • Enable Remote Management on this page • Upgrade the Wireless Access Point Software on page 58 •... -
Page 56: Snmp Management
ProSafe Wireless-N Access Point WNAP320 Reference Manual SNMP Management To set up an SNMP management interface: Select Maintenance > Remote Management > SNMP. The SNMP screen displays: Figure 29. Specify the settings as explained in the following table: Table 15. SNMP Settings... -
Page 57: Secure Shell And Telnet Management
ProSafe Wireless-N Access Point WNAP320 Reference Manual Secure Shell and Telnet Management To configure remote console features: Select Maintenance > Remote Management > Remote Console. The Remote Console screen displays: Figure 30. Enable or disable the remote console features: •... -
Page 58: Upgrade The Wireless Access Point Software
The software of the wireless access point is stored in flash memory and can be upgraded as NETGEAR releases new software. You can download upgrade files from the NETGEAR website. If the upgrade file is compressed (.zip file), you must first extract the image (.rmt) file before sending it to the wireless access point. - Page 59 ProSafe Wireless-N Access Point WNAP320 Reference Manual Web Browser Upgrade Procedure To use a Web browser to upgrade the wireless access point firmware: Download the new software file from the NETGEAR website and save it to your hard disk. If necessary, unzip the new software file.
-
Page 60: Manage The Configuration File Or Reset To Factory Defaults
ProSafe Wireless-N Access Point WNAP320 Reference Manual Select Maintenance > Upgrade > Firmware Upgrade TFTP. The Firmware Upgrade TFTP screen displays: Figure 33. Specify the following information: • Firmware File Name. The name of the unzipped software file. • TFTP Server IP. The IP address of your TFTP server. -
Page 61: Restore The Configuration
ProSafe Wireless-N Access Point WNAP320 Reference Manual Figure 34. Restore the Configuration IMPORTANT: During the restoration process, do not try to go online, turn off the wireless access point, shut down the computer, or do anything else to the wireless access point until it finishes restarting! To restore your settings from a saved configuration file: Select Maintenance >... -
Page 62: Restore The Wireless Access Point To The Factory Default Settings
ProSafe Wireless-N Access Point WNAP320 Reference Manual Restore the Wireless Access Point to the Factory Default Settings You can restore the wireless access point to the factory default settings by two methods that are described in the following sections: •... -
Page 63: Reboot The Wireless Access Point Without Restoring The Default Configuration
ProSafe Wireless-N Access Point WNAP320 Reference Manual Figure 36. Use the Reset Button to Restore Factory Default Settings To restore the factory default settings when you do not know the login user name, login password, or IP address, you must use the Reset button on the rear panel of the wireless... -
Page 64: Change The Administrator Password
ProSafe Wireless-N Access Point WNAP320 Reference Manual To reboot the wireless access point: Select Maintenance > Reset > Reboot AP. The Reboot AP screen displays: Figure 37. Select the Yes radio button. (By default, the No radio button is selected.) Click Apply to reboot the wireless access point. -
Page 65: Enable The Syslog Server
ProSafe Wireless-N Access Point WNAP320 Reference Manual Take one of the following actions: • Enter a new password twice: once in the New Password field and again in the Repeat New Password field. • Next to Restore Default Password, select the Yes radio button to restore the default password. -
Page 66: Monitor The Wireless Access Point
ProSafe Wireless-N Access Point WNAP320 Reference Manual Monitor the Wireless Access Point The wireless access point provides a variety of status and usage information that is discussed in the following sections: • View System Information on page 66 • Monitor Wireless Stations on page 68 •... - Page 67 ProSafe Wireless-N Access Point WNAP320 Reference Manual The following table explains the fields of the System screen: Table 17. System Screen Fields Field Description Access Point Information Access Point Name The NetBIOS name. For information about how to change the default name, see...
-
Page 68: Monitor Wireless Stations
ProSafe Wireless-N Access Point WNAP320 Reference Manual Monitor Wireless Stations The Wireless Stations screen contains the Available Wireless Stations table. This table shows all IP devices that are associated with the wireless access point in the wireless network that is defined by the wireless network name (SSID). The table heading indicates the wireless mode (802.11b, 802.11bg, or 802.11ng). - Page 69 ProSafe Wireless-N Access Point WNAP320 Reference Manual To view details of a wireless station, select the corresponding radio button, and then click Details. The Wireless Stations Details screen displays: Figure 42. The following table explains the fields of the Wireless Stations Details screen: Table 18.
-
Page 70: View The Activity Log
ProSafe Wireless-N Access Point WNAP320 Reference Manual Table 18. Wireless Stations Details Fields (Continued) Field Description Status The wireless status of the wireless station (Associated). RSSI The received signal strength indicator (RSSI) of the wireless station. Idle Time The time since the last frame was received from the wireless station. -
Page 71: Traffic Statistics
ProSafe Wireless-N Access Point WNAP320 Reference Manual Click Save As to save the log contents to a file on your computer or to a disk drive. To update the display on screen, click Refresh; to clear the log content, click Clear. -
Page 72: Enable Rogue Ap Detection And Monitor Access Points
ProSafe Wireless-N Access Point WNAP320 Reference Manual Table 19. Statistics Fields (Continued) Field Description Wireless 802.11b, Wireless 802.11bg, or Wireless 801.11ng The section heading depends on the configured wireless mode. Unicast Packets The number of unicast packets received and transmitted over the wireless connection since the wireless access point was restarted. - Page 73 ProSafe Wireless-N Access Point WNAP320 Reference Manual To enable and configure rogue AP detection: Select Configuration > Security > Advanced > Rogue AP. The Rogue AP screen displays. (The following figure shows examples in the Known AP List and Unknown AP List.)
-
Page 74: View And Save Access Point Lists
ProSafe Wireless-N Access Point WNAP320 Reference Manual Select the file, and click Open. Click Apply to upload the list with access points to the Known AP List. View and Save Access Point Lists The wireless access point detects nearby APs and wireless stations and maintains them in a list. - Page 75 ProSafe Wireless-N Access Point WNAP320 Reference Manual Click Save to export the list of unknown or known APs to a file. A window opens so you can browse to the location where you want to save the file. The default file name is macList.txt.
-
Page 76: Chapter 5 Advanced Configuration
Advanced Configuration This chapter describes how to configure the advanced features of your ProSafe Wireless-N Access Point WNAP320. The chapter includes the following sections: • Spanning Tree Protocol and 802.1Q VLAN on this page • Hotspot Settings on page 78 •... - Page 77 ProSafe Wireless-N Access Point WNAP320 Reference Manual • Tagged VLAN. When you clear the Untagged VLAN check box, the wireless access point tags all frames that are sent from its Ethernet interface. Only incoming frames that are tagged with known VLAN IDs are accepted.
-
Page 78: Hotspot Settings
ProSafe Wireless-N Access Point WNAP320 Reference Manual Table 22. STP and VLAN Settings (Continued) Field Description Management VLAN Specify an ID for the VLAN from which the wireless access point can be managed. The default VLAN ID is 1. Note:... -
Page 79: Configure Advanced Wireless Settings
ProSafe Wireless-N Access Point WNAP320 Reference Manual Click Apply to save your settings. All HTTP requests are now redirected to the specified URL. Configure Advanced Wireless Settings You use the advanced Wireless Settings screen to configure and enable various WLAN settings for 802.11b, 802.11bg, or 802.11ng wireless mode. - Page 80 ProSafe Wireless-N Access Point WNAP320 Reference Manual Specify the settings as explained in the following table: Table 23. Advanced Wireless Settings Field Description RTS Threshold (0–2347) Enter the Request to Send (RTS) threshold. The default setting is 2347. If the packet size is equal to or less than the RTS threshold, the...
-
Page 81: Configure Advanced Qos Settings
ProSafe Wireless-N Access Point WNAP320 Reference Manual Table 23. Advanced Wireless Settings (Continued) Field Description Antenna Select one of the following radio buttons to specify the antenna: • Internal. Enables the internal antenna. This is the default setting. • External. Enables an optional external antenna. - Page 82 ProSafe Wireless-N Access Point WNAP320 Reference Manual The queues defined for different types of data transmitted from AP-to-station and station-to-AP are: Data 0 (Best Effort). Medium priority queue, medium throughput and delay. Most • traditional IP data is sent to this queue.
- Page 83 ProSafe Wireless-N Access Point WNAP320 Reference Manual Specify the settings as explained in the following table: Table 24. EDCA Settings Field Description AP EDCA parameters AIFS Enter the Arbitration Inter-Frame Spacing (AIFS) interval that specifies the wait time (in milliseconds) between data frames. A higher AIFS value means a higher priority for a queue.
-
Page 84: Configure Wireless Bridging
ProSafe Wireless-N Access Point WNAP320 Reference Manual Table 24. EDCA Settings (Continued) Field Description cwMax Enter the Maximum Contention Window (cwMax) value that specifies the upper limit (in milliseconds) for the doubling of the random back-off value. Decreasing this value increases the priority of the queue. -
Page 85: Configure A Point-To-Point Wireless Network
ProSafe Wireless-N Access Point WNAP320 Reference Manual • Client mode. In this mode, the wireless access point operates as a client bridge only, and sends all traffic to the remote wireless access point or peer device. You can enable MAC cloning in client mode. - Page 86 ProSafe Wireless-N Access Point WNAP320 Reference Manual Figure 52. e. Click Edit to configure the security profile settings. The Edit Security Profile screen displays: Figure 53. f. Specify the settings as explained in the following table: Table 25. Point-to-Point Bridge Profile and Authentication Settings...
- Page 87 ProSafe Wireless-N Access Point WNAP320 Reference Manual Table 25. Point-to-Point Bridge Profile and Authentication Settings (Continued) Field Description Authentication Settings Network Authentication From the Network Authentication drop-down list, select Open System, WPA-PSK, or WPA2-PSK. Your selection determines the options that the...
-
Page 88: Configure A Point-To-Multipoint Wireless Network
For each wireless access point that you want the master to be able to connect to, you need to configure a security profile with a unique name and the MAC address of the wireless access point. You can configure up to four such security profiles (NETGEAR-WDS-1, NETGEAR-WDS-2, and so on). - Page 89 ProSafe Wireless-N Access Point WNAP320 Reference Manual To configure a point-to-multipoint wireless network: Configure the security profiles on the wireless access point (AP1 on LAN Segment 1 in the previous figure): a. Select Configuration > Wireless Bridge. The Bridging screen displays: Figure 55.
- Page 90 ProSafe Wireless-N Access Point WNAP320 Reference Manual f. Specify the settings as explained in the following table: Table 26. Point-to-Multipoint Bridge Profile and Authentication Settings Field Description Profile Definition Profile Name Enter a profile name that is easy to remember. The default names for the four security profiles are NETGEAR-WDS-1, NETGEAR-WDS-2, NETGEAR-WDS-3, and NETGEAR-WDS-4.
- Page 91 ProSafe Wireless-N Access Point WNAP320 Reference Manual For example, first configure security profile NETGEAR-WDS-1 with the MAC address of AP2, and then configure security profile NETGEAR-WDS-2 with the MAC address of AP3 (see Figure 54 on page 88). Activate the wireless access point (AP1 on LAN Segment 1 in...
-
Page 92: Configure The Wireless Access Point For Repeater Mode
Each security profile requires a unique name and must include the MAC address of the remote wireless access point. You can configure up to four such security profiles (NETGEAR-WDS-1, NETGEAR-WDS-2, and so on). - Page 93 ProSafe Wireless-N Access Point WNAP320 Reference Manual To configure the wireless access point as a wireless repeater: Configure the security profiles on the wireless access point (AP2 in the previous figure): a. Select Configuration > Wireless Bridge. The Bridging screen displays: Figure 58.
- Page 94 ProSafe Wireless-N Access Point WNAP320 Reference Manual f. Specify the settings as explained in the following table: Table 27. Repeater Profile and Authentication Settings Field Description Profile Definition Profile Name Enter a profile name that is easy to remember. The default names for the four security profiles are NETGEAR-WDS-1, NETGEAR-WDS-2, NETGEAR-WDS-3, and NETGEAR-WDS-4.
- Page 95 ProSafe Wireless-N Access Point WNAP320 Reference Manual For example, first configure security profile NETGEAR-WDS-1 with the MAC address of AP1, and then configure security profile NETGEAR-WDS-2 with the MAC address of AP3 (see Figure 57 on page 92). Activate repeater mode on the wireless access point (AP2 in...
-
Page 96: Configure The Wireless Access Point For Client Mode
ProSafe Wireless-N Access Point WNAP320 Reference Manual Configure the Wireless Access Point for Client Mode In client mode, the wireless access point operates as a client bridge only and sends all traffic to the selected remote wireless access point or peer device. -
Page 97: Chapter 6 Troubleshooting
Troubleshooting This chapter provides information about troubleshooting your ProSafe Wireless-N Access Point WNAP320. After each problem description, instructions are given to help you diagnose and solve the problem. For the common problems listed, go to the section indicated. • Is the wireless access point on? -
Page 98: Basic Functioning
If it is plugged directly into the wall, verify that it is not a switched outlet. • Make sure that you are using the correct NETGEAR power adapter that is supplied with your wireless access point. 98 |... -
Page 99: The Active Led Or The Lan Led Is Not Lit
• Make sure that optional external antennas are tightly connected to the wireless access point. Contact NETGEAR technical support if the WLAN LED remains off. You Cannot Access the Internet or the LAN from a Wireless-Capable Computer There is a configuration problem. -
Page 100: You Cannot Configure The Wireless Access Point From A Browser
ProSafe Wireless-N Access Point WNAP320 Reference Manual • Ping the IP address of the wireless access point to verify that there is a wireless connection between the computer with the wireless adapter and the wireless access point. If the ping fails, check the network configuration (for the wireless access point, see Configure IP Settings and Optional DHCP Server Settings on page 21). -
Page 101: When You Enter A Url Or Ip Address A Time-Out Error Occurs
ProSafe Wireless-N Access Point WNAP320 Reference Manual When You Enter a URL or IP Address a Time-Out Error Occurs A number of things could be causing this. Try the following troubleshooting steps: • Check whether other computers on the LAN work correctly. If they do, ensure that your computer’s TCP/IP settings are correct. -
Page 102: Testing The Path From Your Computer To A Remote Device
ProSafe Wireless-N Access Point WNAP320 Reference Manual If the path is not working, you see this message: Request timed out If the path is not functioning correctly, you could have one of the following problems: • Wrong physical connections: Make sure that the Active LED and LAN LED are on. If one or both of these LEDs... -
Page 103: Problems With Date And Time
ProSafe Wireless-N Access Point WNAP320 Reference Manual Problems with Date and Time The Time Settings screen that is accessible through the Configuration > System > Basic > Time menu choices displays the current date and time of day. The wireless access point uses... - Page 104 ProSafe Wireless-N Access Point WNAP320 Reference Manual If any previously captured packets exist, you are prompted to delete them, and only then can you capture new packets. Click Stop to stop capturing packets. Click Save as to save the pacture.pcap file on your computer or to a disk drive.
-
Page 105: Appendix A Supplemental Information
Supplemental Information This appendix provides related documentation, factory default settings, and technical specifications for the ProSafe Wireless-N Access Point WNAP320. • Related Documents on this page • Technical Specifications on page 106 • Factory Default Settings on page 107 Related Documents This appendix provides links to reference documents you can use to gain a more complete understanding of the technologies used in your NETGEAR product. -
Page 106: Technical Specifications
ProSafe Wireless-N Access Point WNAP320 Reference Manual Technical Specifications Table 29. ProSafe Wireless-N Access Point WNAP320 Technical Specifications Feature Description 802.11g data rates 1, 2, 5.5, and 11 Mbps (auto-rate capable) 802.11bg data rates 1, 2, 5.5, 6, 9, 11, 12, 18, 24, 36, 48, and 54 Mbps (auto-rate capable) 802.11ng MCS index and... -
Page 107: Factory Default Settings
Note: Pressing the Reset button for a shorter period of time simply causes the wireless access point to reboot. Table 30. ProSafe Wireless-N Access Point WNAP320 Default Configuration Settings Feature Description Login User login URL 192.168.0.100... - Page 108 ProSafe Wireless-N Access Point WNAP320 Reference Manual Table 30. ProSafe Wireless-N Access Point WNAP320 Default Configuration Settings Feature Description Local Network (LAN) LAN IP address 192.168.0.100 Subnet mask 255.255.255.0 Gateway address 0.0.0.0 DHCP server Disabled DHCP client Disabled Time zone...
-
Page 109: Appendix B Command-Line Reference
Command-Line Reference The ProSafe Wireless-N Access Point WNAP320 can be configured through either the command-line interface (CLI), a Web browser, or a MIB browser. The CLI allows viewing and modification of the configuration from a terminal or computer through a Telnet connection. - Page 110 ProSafe Wireless-N Access Point WNAP320 Reference Manual | | | | |-macacl-add --add wireless access control (ACL) | | | | |-macacl-database --delete wireless access control (ACL) database | | | | |-macacl-del --delete wireless access control (ACL) | | | | |-mcsrate...
- Page 111 ProSafe Wireless-N Access Point WNAP320 Reference Manual | | | | | | |-status --profile status | | | | | | |-vlan-id --VLAN id | | | | | | |-wep-pass-phrase --wireless wep passphrase key | | | | | | |-wepkeytype...
- Page 112 ProSafe Wireless-N Access Point WNAP320 Reference Manual | | | | | | |-key3 --wireless wep key 3 | | | | | | |-key4 --wireless wep key 4 | | | | | | |-keyno --key number | | | | | | |-name...
- Page 113 ProSafe Wireless-N Access Point WNAP320 Reference Manual | | | | | | |-wepkeytype --wireless wep key type | | | | | | | | | | | |-8> --8th security profile | | | | | | |-authentication...
- Page 114 ProSafe Wireless-N Access Point WNAP320 Reference Manual | | | | | | | |-encryption --data encryption | | | | | | | |-name --profile name | | | | | | | |-presharedkey --preshared key | | | | | | | |-remote-mac...
- Page 115 ProSafe Wireless-N Access Point WNAP320 Reference Manual | |-radius> | | |-accounting-server-primary --primary accounting server | | |-accounting-server-primary-port --primary accounting server port | | |-accounting-server-primary-sharedsecret --primary accounting server shared secret | | |-accounting-server-secondary --secondary accounting server | | |-accounting-server-secondary-port --secondary accounting server port...
- Page 116 ProSafe Wireless-N Access Point WNAP320 Reference Manual |-restore-default-password --restore default system password |-show> --show system settings | |-configuration --show system configuration | |-interface> --show wireless lan interface | | |-eth> --ethernet interface | | | |-statistics --show ethernet statistics | | | | | |-wlan>...
-
Page 117: Appendix C Notification Of Compliance
This transmitter must not be co-located or operating in conjunction with any other antenna or transmitter. FCC Declaration of Conformity We, NETGEAR, Inc., 350 East Plumeria Drive, San Jose, CA 95134, declare under our sole responsibility that the ProSafe Wireless-N Access Point WNAP320 complies with Part 15 Subpart B of FCC CFR47 Rules. Operation is subject to the following two conditions: •... -
Page 118: Fcc Radiation Exposure Statement
Canadian Department of Communications Radio Interference Regulations This digital apparatus, ProSafe Wireless-N Access Point WNAP320, does not exceed the Class B limits for radio-noise emissions from digital apparatus as set out in the Radio Interference Regulations of the Canadian Department of Communications. - Page 119 Hereby, NETGEAR Inc., declares that this Radiolan is in compliance with the essential requirements and other relevant provisions of Directive 1999/5/EC. Español [Spanish] Por medio de la presente NETGEAR Inc. declara que el Radiolan cumple con los requisitos esenciales y cualesquiera otras disposiciones aplicables o exigibles de la Directiva 1999/5/CE.
- Page 120 övriga relevanta bestämmelser som framgår av direktiv 1999/5/EG. Íslenska [Icelandic] Hér með lýsir NETGEAR Inc. yfir því að Radiolan er í samræmi við grunnkröfur og aðrar kröfur, sem gerðar eru í tilskipun 1999/5/EC. Norsk [Norwegian] NETGEAR Inc. erklærer herved at utstyret Radiolan er i samsvar med de grunnleggende krav og øvrige relevante krav i direktiv 1999/5/EF.
-
Page 121: Index
Index Numerics basic service set (BSS) basic service set identifier (BSSID) 11b, 11bg, 11ng (wireless modes) combining with VLANs 2.4-GHz antenna, connector for number supported 802.11d support beacon interval 802.1Q VLAN beacons, unknown access points best effort traffic advanced QoS WMM QoS access control, wireless stations bridging, wireless... - Page 122 ProSafe Wireless-N Access Point WNAP320 Reference Manual clients WPA and WPA2 associations Enhanced Distributed Channel Access (EDCA) DHCP parameters isolation environmental specifications maximum number Ethernet cabling requirements Europe, channels/frequency wireless separation Extended Service Set (ESS) compliance external antenna, enabling electromagnetic...
- Page 123 ProSafe Wireless-N Access Point WNAP320 Reference Manual interference losing, wireless connection channels reducing sources of internal antenna, disabling MAC addresses Ethernet port Internet browsing, troubleshooting known access points IP addresses restricting access by default unknown access points DHCP DNS servers...
- Page 124 ProSafe Wireless-N Access Point WNAP320 Reference Manual password rear panel changing or restoring reauthentication time, RADIUS servers default rebooting, from Web Management Interface login received signal strength indicator (RSSI) physical connections redirecting, HTTP requests physical specifications Reduced Interframe Space (RIFS) transmission...
- Page 125 ProSafe Wireless-N Access Point WNAP320 Reference Manual SNMP traffic defaults advanced QoS manager, IP address patterns, analyzing statistics software WMM QoS backing up factory defaults Transmission Opportunity (TXOP) limit restoring transmission output power upgrading trap community name version traps, SNMP...
- Page 126 ProSafe Wireless-N Access Point WNAP320 Reference Manual WPA2 adapter restrictions web browsers, recommended Web Management Interface configuring with PSK description configuring with RADIUS troubleshooting encryption passphrase types of encryption configuring with a shared key configuring with RADIUS data encryption, key size legacy 802.1X...