Table of Contents
Advertisement
Quick Links
Advertisement
Table of Contents

Related Manuals for AWA LTD-1920


Summary of Contents for AWA LTD-1920
- Page 1 - 1 -...
-
Page 2: Table Of Contents
Table Of Contents Important Safety Instructions--------------------------------------------------- Characteristic Features----------------------------------------------------------- Accessory List------------------------------------------------------------------------ Front Panel---------------------------------------------------------------------------- Rear Panel----------------------------------------------------------------------------- Remote Control---------------------------------------------------------------------- System Connections--------------------------------------------------------------- Connecting to Power Supply------------------------------------------------------- Connecting to External AV Input Device (AV Output) ----------------------- Connecting to External AV Signal Source-------------------------------------- Connecting to External AV Signal Source (YPbPr) -------------------------- Connecting to Earphone ----------------------------------------------------------- Connecting to PC -------------------------------------------------------------------- Connecting to TV Antenna---------------------------------------------------------... -
Page 3: Important Safety Instructions
Important Safety Instructions Install according to the manufacturer This symbol indicates that instructions. Do not install near any heat dangerous voltage instituting a risk sources such as radiators, heat registers, of electric shock is present within this unit. stoves or other apparatus (including amplifiers) that produce heat. -
Page 4: Characteristic Features
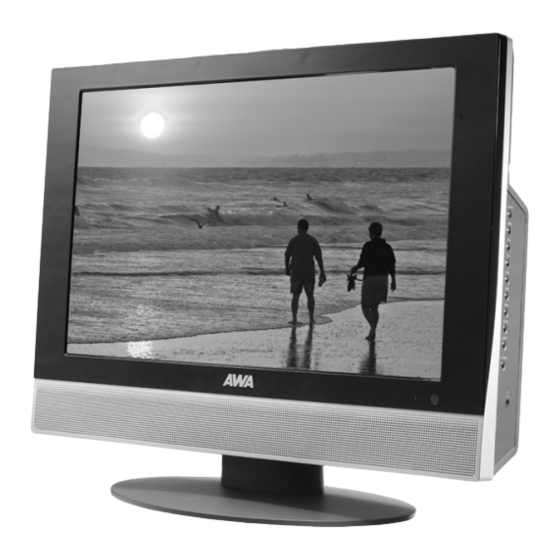
Characteristic Features This product incorporates LCD display and TV receiver in one system. Multiple Mode TV mode CVBS mode S-VIDEO mode COMPONENT mode VGA mode High Quality Property LCD (Liquid Crystal Display) Designed with 19" color TFT liquid crystal display clearly shows the data. Stereo amplifier Built-in 2x5W speakers provide high quality sound. -
Page 5: Accessory List
Accessory List ITEM NAME Remote Control (with batteries) Power Adaptor Power Supply Cord Audio/Video Cable Operation Manual NOTE Accessories and their parts numbers are subject to modification without prior notice due to improvements. The accessory images are supplied for reference only. - 3 -... -
Page 6: Front Panel
Front Panel 1. 19" color TFT screen In setup menu, the same function as 19" color TFT screen clearly show the ◄/►direction buttons. data. 6. Power button 2. SOURCE button Press to enter or exit the standby mode. Press to select mode among TV, CVBS, 7. -
Page 7: Rear Panel
Rear Panel 1. Y/Pb/Pr Input Jack 5. TV Signal Input Jack Connected Y/Pb/Pr input Connected for the external TV signal input. COMPONENT mode. 6. DC 12V Input Jack 2. Y/Pb/Pr L/R Audio Input Jack Connect the power adaptor or the car Connected to the L/R audio input in adaptor. -
Page 8: Remote Control
Remote Control Remote Control Drawing 1. POWER button Press to turn on or off this unit. 2. TV button Press to shift to TV mode. 3. COMPOSITE button Press to shift to CVBS mode. 4. P.M. button Press to shift the screen picture modes among User, Standard, Soft, Brightness and Shine. - Page 9 Remote Control button 29. SLEEP button Under teletext mode, press to disable This feature allows you to set up sleep time teletext display and press again to when in TV mode. Press the button and resume. then press the ENTER button to activate button this function.
-
Page 10: Preparation Of Remote Control
Remote Control Preparation of Remote Control Using of Remote control Softly push the back cover to open the battery Point the remote control unit from no more than compartment. about 7m from the remote control sensor and within about 60 degrees of the front of the unit. Insert two batteries (1.5V, size AAA), please make sure the polarity matches the marks inside the compartment. -
Page 11: System Connections
System Connections • Do not connect the power cord until all other connections have been made. • Ensure that you observe the color cord when connecting audio and video cables. Connecting to Power Supply Power is supplied through the provided appropriative power adapter, one end is connected to the DC 12V IN jack on the side panel of the unit, the other end to the wall AC outlet. -
Page 12: Connecting To External Av Signal Source
System Connections Connecting to External AV Signal Source Use the audio and video cable to connect the AV input jacks on the rear panel of the unit to the external AV signal source. Use the S-VIDEO cable to connect the S-VIDEO input jack on the rear panel of the unit to the external AV signal source. -
Page 13: Connecting To Earphone
System Connections Connecting to Earphones This unit can be connected to an earphone for listening music privately. See the below figure for derails: ¡ ô when the headphone is connected, the speakers will turn off automatically. NOTE: Excessively loud volume could damage your hearing. So turn down the volume before you connect the headphones, and then raise the volume to comfortable level. -
Page 14: Connecting To Pc
System Connections Connecting to PC The unit can be connected to PC (person computer) via the VGA cable. Follow the steps and the figure below to connect: 1. Connect one end of the VGA cable to the VGA input jack on the rear panel of the unit. 2. -
Page 15: Connecting To Tv Antenna
System Connections Connecting to TV Antenna This unit can be connected to the TV signal input source via the TV jack on the rear panel. After connection, turn on the power of the unit. Then press the SOURCE button to shift to TV mode. After connecting to the antenna, turn on the unit, and go on with program searching, you can follow the below steps to select channels: 1. -
Page 16: Tv Function
TV Function Preparations 1. After connection, press the POWER button to turn on the power. (If it is turned on, the power indicator is blue.) 2. Press the SOURCE button to shift to TV mode. You can go on with the following operations: Image Setting Note: This item is only available when there is signal input. - Page 17 TV Function Brightness Setup Press the ▲▼ button to select Brightness and press the ◄► button to adjust the value. Press the MENU button to return to the previous menu. Contrast Setup Press the ▲▼ button to select Contrast and press the ◄► button to adjust the value. Press the MENU button to return to the previous menu.
-
Page 18: Audio Setting
TV Function Audio Setting Press the MENU button once to enter the setup menu. Press the ▲▼ button to select Audio and press the ENTER button to enter the menu shown on the right. In the Audio setup menu, press the ▲▼ button to select the desired item. -
Page 19: Timer Setting
TV Function Timer Setting Press the MENU button once to enter the setup menu. Press the ▲▼ button to select Timer and press the ENTER button to enter the menu shown on the right. In the Timer setup menu, press the ▲▼ button to select Off, 15Min, 30Min, 45Min, 60Min, 75Min, 90Min, 105Min or 120Min. - Page 20 TV Function Country Press the ▲▼ button to select the Country and press the ENTER button to enter the menu shown on the right. Press the ▲▼ button to select the desired item. Press the MENU button to return to the previous menu. Auto Scan Press the ▲▼...
- Page 21 TV Function Channel Name Press the ▲▼ button to select the Channel Name and press the ENTER button to enter. Then press the ▲▼ button to select letters or press the number button to input numbers. Press the MENU button to return to the previous menu. Skip Press the ▲▼...
- Page 22 TV Function CH NO Press the ▲▼ button to select CH NO and press the ENTER button to enter. Press the number buttons to enter the channel number. Press the MENU button to return to the previous menu. Store Press the ▲▼ button to select Store and press the ENTER button to store the above operations. Note: The “CH NO”...
-
Page 23: Nicam Function
NICAM Function The unit support NICAM function under TV mode. Under NICAM TV broadcast: 1. When receiving stereo audio signals, press the STEREO/AUDIO button on the remote control repeatedly to shift the sound tracks between Nicam Stereo and Mono and the screen will appear corresponding display as shown below: 2. -
Page 24: Other Functions
Other Functions External AV Input Function The unit has external AV input function. It supports CVBS, S-VIDEO and Component modes. Use the audio, video and S-Video cable to connect the unit to the external AV signal source such as recorder, vidicon, satellite receiver or game player etc. Then turn on the unit and the external AV signal source. -
Page 25: Troubleshooting
Troubleshooting SYMPTOM CHECK ITEM Make sure system connection is correct. There is no sound. Make sure the speakers are not muted. In TV mode, set the correct sound mode. Make sure the unit is turned on and the connections are LCD is no display correct. -
Page 26: Specifications
Specifications TFT-LCD Resolution 1440 x 900 TFT-LCD Screen Size 19 inches AC100¡ « 240V£ ¬ 50/60Hz Power DC 12V Power Consumption < 60W Dimension 494mm × 184mm × 412mm£ ¨ LXWXD£ © Weight About 7.8 Kg Ambient Temperature 10~45¡ æ DESIGN AND SPECIFICATIONS ARE SUBJECT TO CHANGE WITHOUT NOTICE - 24 -... - Page 27 - 1 -...