Table of Contents
Advertisement
Advertisement
Table of Contents

Related Manuals for Monitor Audio apex 10


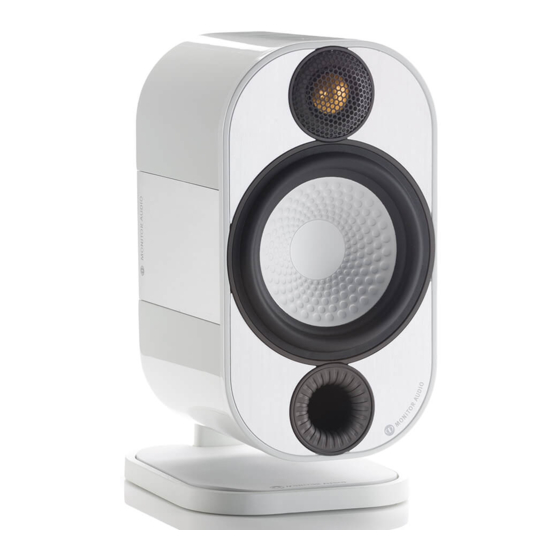
Summary of Contents for Monitor Audio apex 10
- Page 1 Apex O w n e r s M a n u a l Apex Apex Apex...
-
Page 3: Table Of Contents
COntents Contents Important Safety Instructions Re-cycling RoHS Declaration of Conformity Unpacking Introduction Setting up and Positioning Optimum Positioning Fitting the Apex 10 to a Wall or Ceiling Apex 10 Fixing Configurations Adjusting the Apex 10 Bracket Assembly 13 Fitting the Apex 40 to a Wall or Ceiling Apex 40 Fixing Configurations Grille Badge Fixing Specifications... -
Page 4: Important Safety Instructions
IMpOrtant safety InstruCtIOns Read these instructions. Keep these instructions. Heed all warnings. Follow all instructions. Do not use this apparatus with water. Clean only with a dry cloth. Great care and attention has gone into the materials chosen to produce the Apex Series. A gentle wipe with a dry, clean cloth is all that is required to remove any dust. -
Page 5: Re-Cycling
safety InstruCtIOns fOr fIxIng yOur apex LOudspeakers tO a WaLL WARNING: For safety reasons do not attempt to fix these speakers to your wall if you are unsure of your ability to provide a secure and safe fixing. You will need to determine where to fit the bracket and the structure of the wall. -
Page 6: Unpacking
unpaCkIng Due to the shape and the polished finish of the product, care must be taken when handling your new Apex Series Loudspeaker. Care must be taken when handling the table top stand/ wall plate. This, the accessories and the grille should be removed from the packaging before removing and unpacking the loudspeaker. -
Page 7: Introduction
IntrOduCtIOn Congratulations and thank you for your purchase of the loudspeaker from the Apex Series. We are confident they will provide years of enjoyment and pleasure as only high quality components have been used throughout. The sophisticated new Apex Series introduces revolutionary new technologies, honed to produce the highest standards of performance and build quality. -
Page 8: Setting Up And Positioning
settIng up and pOsItIOnIng Although position and suitability will have been considered prior to purchasing the Apex speakers, this section will guide you through optimising their positioning and set up. An illustration is provided on page 7 to show optimum positions. For instructions on assembling the brackets and securing them to a wall or ceiling, please refer to pages 8-15. -
Page 9: Optimum Positioning
OptIMuM pOsItIOnIng Left Right Centre 0° 22° 30° 90° Surround Surround 110° Left Right 135° 150° Rear Rear Surround Surround Left Right Apex... -
Page 10: Fitting The Apex 10 To A Wall Or Ceiling
fIttIng tHe apex 10 tO a WaLL/ CeILIng To fix the Apex 10 to a wall or ceiling, follow the step by step instructions below. The Apex 10 can be wall mounted horizontally (for use as a centre channel), the template just needs to be rotated. -
Page 11: Apex 10 Fixing Configurations
apex 10 fIxIng COnfIguratIOns Wall Mounting - exploded Cabinet Clamp Arms Clamp Pivot Screw Rubber Pad with Through Hole Table Top Stand/ Short Wall Plate Screws Wall Mounting - fixed Apex... - Page 12 Ceiling Mounting - exploded Long Screws Table Top Stand/ Wall Plate Rubber Pad with Through Hole Bracket Extension Pole Pivot Clamp Arms Clamp Screw Ceiling Mounting - fixed monitoraudio.co.uk...
- Page 13 table Mounting - exploded Cabinet Clamp Arms Clamp Screw Pivot Bracket Extension Pole Solid Rubber Table Top Stand/ Wall Plate Rubber Pad with Through Hole Long Screws table Mounting - assembled Apex...
- Page 14 apex 10 Horizontally on a table/ shelf - exploded Self Adhesive Feet adhesive feet fixed (Cabinet needs to be rotated for use) If using the Apex 10 horizontally on a table or shelf, attached the self adhesive feet as shown above to prevent movement. The badge can also be rotated. monitoraudio.co.uk...
-
Page 15: Adjusting The Apex 10 Bracket Assembly
adjustIng tHe apex 10 BraCket asseMBLy The clamping mechanism can be adjusted horizontally and vertically. This is achieved by taking the weight of the cabinet and loosening the clamp screw (Hex Key included). The cabinet can now be adjusted at both pivot points 1 and 2 (as shown in the illustration below). -
Page 16: Fitting The Apex 40 To A Wall Or Ceiling
fIttIng tHe apex 40 tO a WaLL To fix the Apex 40 to a wall (horizontally or vertically), follow the step by step instructions below: • We do not supply fixing screws or wall plugs with these products so please purchase these separately choosing appropriate length screws (40mm (1 3/4”) minimum) and the correct plugs for the wall/ ceiling your loudspeaker will be fixed to. -
Page 17: Apex 40 Fixing Configurations
apex 40 fIxIng COnfIguratIOns Wall Mounting - exploded Fig. 1 Cabinet Bracket Grub Screw Fig. 3 Fig. 2 Angled Fully Angled Fully Right/ Up Left/ Down Fig. 5 Fig. 4 Press the Cabinet ...For Pointing Fully Back... Straight ahead Apex... -
Page 18: Grille Badge Fixing
grILLe Badge fIxIng (Apex 40 only) The Apex grille is not supplied with the badge attached. There are two potenetial positions for the badge depending on orientation, therefore the decision is left to the end user by providing the badge loose. If the cabinet will be positioned vertically, use the badge location on the narrow edge of the grille (illustrated below). -
Page 19: Specifications
speCIfICatIOns Model Apex 10 Apex 40 Frequency 60Hz – 35kHz 50Hz – 35kHz Response Sensitivity (1W@1M) 87dB 90dB Nominal Impedance 8 Ohms 8 Ohms Power Handling 100W 200W Single (RMS) Recommended Amp 25-100 W 50-200 W Requirements Maximum SPL (dBA) 110.8 116.8 Bass Reflex - Single,... -
Page 20: Guarantee And Service
guarantee and servICe To validate your warranty please visit www.monitoraudio.co.uk within 30 days of purchase. When you register here you’ll gain free entry to our monthly prize draw! What’s more you’ll be the first to hear about the great things happening at Monitor Audio, including new products and events! This equipment has been fully tested prior to dispatch from the factory. -
Page 21: Ec Declaration Of Conformity
eC deCLaratIOn Of COnfOrMIty EC Declaration of Conformity We, Monitor Audio Ltd. Unit 2,24 Brook Road Rayleigh Essex SS6 7XJ England Declare in own responsibility, that the Apex Series product described in this manual is in compliance with Technical Standards/Council Directives: (LVD) 73/23/EEC Low Voltage Directive EN60065: 09.93+ A11:09.97 Safety requirements for mains operated electronic and related apparatus for household and similar use. -
Page 22: Data Protection
data prOteCtIOn We at Monitor Audio are committed to respecting the wishes and privacy of our customers. Any information you provide will be held in the strictest confidence and only used within the Monitor Audio organisation for the provision of services such as warranty claims or spare parts. - Page 24 m o n i t o r a u d i o . c o . u k Monitor Audio Ltd. Unit 2, 24 Brook Road Rayleigh, Essex SS6 7XJ England Tel: 01268 740580 Fax: 01268 740589 Email: info@monitoraudio.co.uk monitoraudio.co.uk Designed in the United Kingdom version 1...