Table of Contents
Advertisement
Advertisement
Table of Contents

Related Manuals for AEG LAVAMAT 86810


Summary of Contents for AEG LAVAMAT 86810
- Page 1 LAVAMAT 86810 Washing Machine User information...
- Page 2 Dear Customer, Please read this user information carefully and keep it to refer to later. Please pass the user information on to any future owner of the appli- ance. The following symbols are used in the text: Safety instructions Warning! Information that affects your personal safety. Important! Information that prevents damage to the appliance.
-
Page 3: Table Of Contents
Contents Operating Instructions ........Safety . - Page 4 What to do if........... . 27 Remedying small malfunctions .
-
Page 5: Operating Instructions
Operating Instructions 1 Safety Prior to using the appliance for the first time • Follow the “Installation and connection instructions”. • If the appliance is delivered in the winter months when there are mi- nus temperatures: store the washing machine at room temperature for 24 hours before using for the first time. - Page 6 • Switch off the washing machine prior to cleaning it and carrying out maintenance. In addition, remove the power plug from the power point or – if the appliance has been hard-wired – switch off the cut- out in the fuse box or completely remove the fuse. •...
-
Page 7: Description Of The Appliance
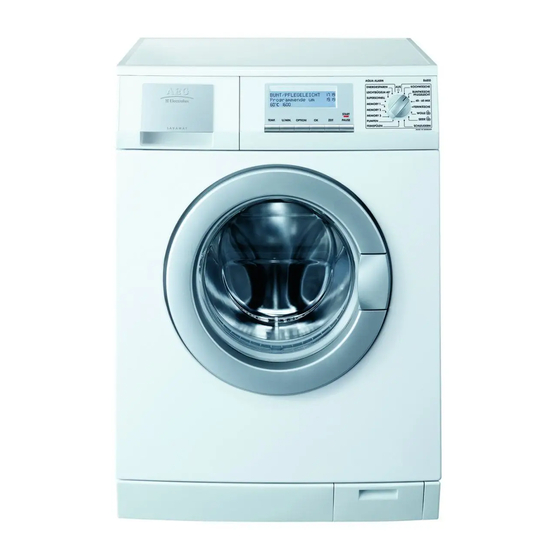
Description of the appliance Detergent dispenser Control panel drawer Rating plate (behind door) Three screw feet (height adjustable); Plinth flap/ rear left: Drain pump Automatic foot Control panel Programme knob and Display On/Off switch Function keys START/PAUSE key What is shown in the display Information field, shows the current settings 12.45 COTTON... -
Page 8: Program Overview
Program overview Options Times Spin speed Program ENERGY SAVING • • • • • • • • • COTTON • • • • • • • • • • • LINEN/EASY-CARES • • • • • • • • • •... - Page 9 Care Use/Features symbols Energy-saving program at 60 °C for lightly to normally soiled whites/coloureds made of cotton/linen. Energy-saving program at 95 °C for normally to heavily soiled whites/coloureds made of cotton/linen. General program for whites/coloureds made of cotton/linen as well as for easy-care I K N mixed fibres and synthetics.
-
Page 10: Prior To Using For The First Time
Prior to using for the first time Switching on the appliance for the first time - setting the language The display is set to English as standard in the factory. Important: If the display does not show the menu for setting the lan- guage when the appliance is switched on, the appliance has been switched on before. -
Page 11: Setting The Time
Setting the time So that the time and the end of the program are correctly displayed, please check the display and set the current time if necessary. To do this, please see the section “Setup/Clock”. Carrying out a wash programme prior to first use In order to remove any residues from the drum and water container which may have been left during manufacturing, perform the first wash cycle without any washing in the machine. -
Page 12: Running A Wash Cycle
Running a wash cycle Opening the door/Loading the washing 1. To open the door: pull the handle on the door. 2. Unfold washing and load it loosely into the machine. Mix large and small items. Attention! Do not get any washing caught between the door and the rubber seal. -
Page 13: Switching On The Appliance/Selecting A Programme
Stain removal agent/ Washing powder/tablets stain removal tablets for the main wash cycle Washing powder/tablets Conditioner/Wash-care for the pre wash cycle products to preserve the or water softener shape of garments/Starch Washing powder/tablets for the main wash cycle If you are using water softener and require the right compartment for detergent for the pre-wash cycle, add the water softener on top of the detergent for the main wash cycle in the left compartment. -
Page 14: Changing The Temperature
Changing the temperature Press the TEMP. key repeat- 12.45 LINEN/EASY CARE edly until the desired tem- 14.37 Cycle end at perature is 50C1600 aýýýýýaýaýaýaýaýaýaýaýa displayed. TEMP. OPTIONS TIME Changing spin speed/selecting rinse hold Press the RPM key repeated- 12.45 LINEN/EASY CARE ly, until the desired spin 14.37 Cycle end at... -
Page 15: Setting Options
Setting options Options can be added to a wash cycle that has already been selected. Press the OPTIONS key. The display shows the symbols for the options. PREWASH Pre-washes at about 30 °C before the main wash cycle, which follows automatically. SENSITIVE Enhanced rinse action through an additional rinse cycle togeth- er with decreased drum movement (improved fabric care). -
Page 16: Prewash, Sensitive, Stain, Night Cycle
Prewash, Sensitive, Stain, Night Cycle 1. Press the OPTIONS key re- 12.45 LINEN/EASY CARE peatedly until the desired 14.37 Prewashing symbol flashes, e. g., aýýýýýVýSýFýLýBýaýaýaýa PREWASH. (With each press of the key, the next symbol TEMP. OPTIONS TIME flashes – moving from left to right.) 2. -
Page 17: Setting Times
Setting times Shortened cycles and the delay of the start time can be set for a wash cycle that has already been selected. Press the TIME key. The display shows the symbols for Time Saving and Delay Start. Time Saving: SHORT or VERY SHORT Shortened wash cycle for lightly soiled washing. -
Page 18: Delay Start
Delay Start 1. Press the TIME key repeatedly, until the DELAY START symbol flashes. 2. Press the OK key. “Start in 0 min” is shown in the display. 3. Press the TIME key repeated- 12.45 Delay Start ly, until the display shows 18.37 Start in 4h the desired period by which... -
Page 19: Starting A Programme
Starting a programme 1. Check that the water tap is open. 2. Press the START/PAUSE key. The programme is started or it starts after the time delay set has elapsed. If after pressing the START/PAUSE key the display shows “Door not Closed”, the door has not been shut properly. -
Page 20: Washing Cycle Complete/Removing The Washing
Washing cycle complete/Removing the washing At the end of the cycle a long acoustic signal sounds 3 times (when the SOUND setting is NORMAL or LOW) and the messages “Cycle ended” and “Door openable” appear alternately in the display. 1. Open the door and remove the washing. 2. -
Page 21: Memory 1, 2, 3
Memory 1, 2, 3 Programme combinations can be stored at programme knob positions MEMORY 1, 2, 3 and can then be selected using the programme knob. To do this the desired programme combination is first put together and then stored. Setting the Memory Example: Programme posi- 12.45... -
Page 22: Sound
4. Using the OPTIONS key select the memory position to be changed, e. g. MEMORY 1. 5. Store the new programme combination using the OK key. SOUND The volume of the acoustic signal can be selected. 1. Turn the programme knob to any programme and press the OPTIONS key repeatedly until the SETUP symbol flashes. -
Page 23: Language
Language 1. Turn the programme knob to any programme and press the OPTIONS key repeatedly until the symbol SETUP flashes. 2. Press the OK key. 3. Press the OPTIONS key re- Sprache peatedly, until the display DEUTSCH shows LANGUAGE. aýýýýýaýaýaýaýBýaýaýaýa 4. -
Page 24: Contrast And Brightness
Contrast and brightness 1. Turn the programme knob to any programme and press the OPTIONS key repeatedly until the SETUP symbol flashes. 2. Press the OK key. 3. Press the OPTIONS key repeatedly, until the display shows CONTRAST or or BRIGHTNESS. 4. -
Page 25: Cleaning And Maintenance
Warning! The knob must not be de- pressed after being set, otherwise the child safety device is not acti- vated. The knob must stand out as shown in the illustration. Deactivating the child safety device: Turn the knob in an anti-clockwise direction as far as it will go. Cleaning and maintenance Important! Do not use furniture care products or aggressive cleaners to clean the appliance. -
Page 26: Washing Drum
5. Clean all parts of the washing ma- chine, especially the nozzles in the top of the washing-in chamber, with a brush. 6. Insert the detergent dispenser draw- er in the guide rails and push it in. Washing drum Rust deposits in the drum may occur due to rusting foreign bodies in the washing or tap water containing iron. -
Page 27: What To Do If
What to do if... Remedying small malfunctions If while the appliance is operating a short acoustic signal sounds 3 times and one of the following messages appears in the display: – “No incoming water/Check tap & Hose”, – “No drain - check/drain hose/filter” or “Pump Blocked”, –... - Page 28 Problem Possible cause Remedy Transit packaging has Remove transit packaging. not been removed. Washing machine vibrates Adjust feet according to the when operating or is noisy. Screw feet not correctly Installation and Connection adjusted. instructions. Always load the drum as full Washing has not been Only a few large items of as possible.
-
Page 29: If The Wash Result Is Not Satisfactory
Problem Possible cause Remedy Wait until the display alternate- Door locked. ly shows “Door openable” and “Cycle ended”. The programme will continue The door cannot be opened There has been a power when the power cut is over. when the appliance is cut. -
Page 30: Carrying Out An Emergency Drain
Carrying out an emergency drain Warning! Prior to carrying out an emergency drain, switch off the washing machine and remove the power plug from the power point. Warning! The water that comes out of the emergency drain hose may be hot. There is a risk of scalding. Let the water cool before performing an emergency drain! 1. -
Page 31: Drain Pump
Drain pump The drain pump is maintenance-free. It is only necessary to open the pump cover if there is a malfunction and water is no longer being pumped out, e.g. if the pump wheel is blocked. Before loading the machine, please always ensure that there are no for- eign bodies present in the pockets or in between the items to be washed. -
Page 32: Disposal
Disposal Packaging material The packaging materials are environmentally friendly and can be recy- cled. The plastic components are identified by markings, e.g. >PE<, >PS<, etc. Please dispose of the packaging materials in the appropriate container at your local waste disposal facilities. Old appliance The symbol on the product or on its packaging indicates that this... -
Page 33: Technical Data
Technical data This appliance conforms with the following EU Directives: – 73/23/EEC dated 19.02.1973 Low Voltage Directive – 89/336/EEC dated 03.05.1989 EMC Directive inclusive of Amending Directive 92/31/EEC – 93/68/EEC dated 22.07.1993 CE Marking Directive Height x Width x Depth 850 x 598 x 640 mm Depth when door is open 1017 mm... -
Page 34: Installation And Connection Instructions
Installation and connection instructions 1 Safety information concerning installation • This washing machine cannot be built-in. • Before using for the first time, check the appliance for damage sus- tained while it was being transported. Do not under any circumstanc- es connect an appliance that is damaged to the mains. -
Page 35: Unpacking
• Do not lay the washing machine on its front nor on its right side (as seen from the front). Electrical components may get wet. • Never transport the appliance without using the transport lock. Only remove the transport lock when the appliance is in its place of instal- lation. - Page 36 3. With a suitable spanner unscrew and remove the central rear bolt A. Slide out the relevant plastic spacer. 4. Unscrew and remove the two large rear bolts B and the six smaller bolts 5. Remove the bracket D. 6. Tighten up the six smaller bolts C.
-
Page 37: Where To Install
7. Open the porthole and remove the polystyrene block fitted with the ad- hesive tape on the door seal. 8. Fill the smaller upper hole and the two large ones with the correspond- ing plastic plug caps supplied in the bag containing the instruction booklet. -
Page 38: Making The Appliance Level
Making the appliance level Automatic foot: The rear foot on the left-hand side of your washing machine is built as a shock absorbing foot, which is why the appliance gives in the back left-hand corner if put under load. The automatic foot guarantees that the appliance does not move even at high spin speeds. -
Page 39: Permanent Connection
Should the plug need to be replaced for any reason, proceed as described below. The wires in the mains lead are coloured in accordance with the following code: Green and Yellow: Earth Blue: Neutral Brown: Live • The wire coloured green and yellow must be connected to the terminal marked with the letter “E“... -
Page 40: Connecting To The Water Supply
WARNING! Repairs to electrical appliances must only be carried out by trained personnel. Improper repairs may lead to serious risks for the us- Connecting to the water supply Permitted water pressure The water pressure must be at least 1 bar (=10N/cm =0.1MPa), and may be a maximum of 10bar (=100N/cm =1MPa). -
Page 41: Water Drainage
4. Connect the hose to a tap with a 3/4” thread. Always use the hose supplied with the appliance. Water Drainage The appliance drain hose should hook into a standpipe, the hook in the drain hose is formed using the plastic “U-Piece“ supplied. The standpipe should have an internal diameter of approximately 38 mm (see dia- gram) thus ensuring there is an air break between the drain hose and standpipe. - Page 42 For drainage into an outlet spigot: If the outlet spigot has not been used before, remove any blank- ing plug that may be in place. Push the drain hose onto the spigot and secure with a clip if required. Ensure the drain hose is looped upwards to prevent waste water from the sink entering the washing machine.
-
Page 43: Guarantee/Customer Service
Great Britain Standard guarantee conditions We, AEG, undertake that if within 12 months of the date of the purchase this AEG appliance or any part thereof is proved to be defective by reason only of faulty workmanship or materials, we... -
Page 44: European Guarantee
European Guarantee This appliance is guaranteed by Electrolux in each of the countries listed at the back of this user manual, for the period specified in the appliance guarantee or otherwise by law. If you move from one of these countries to another of the countries listed below the appliance guarantee will move with you subject to the following qualifications:- •... - Page 45 www.electrolux.com Albania +35 5 4 261 450 Rr. Pjeter Bogdani Nr. 7 Tirane Belgique/België/ +32 2 363 04 44 Bergensesteenweg 719, 1502 Lembeek Belgien Èeská republika +420 2 61 12 61 12 Budìjovická 3, Praha 4, 140 21 Danmark +45 70 11 74 00 Sjællandsgade 2, 7000 Fredericia Deutschland +49 180 32 26 622...
- Page 46 Electrolux Ljubljana, d.o.o. Slovenija +38 61 24 25 731 Tržaška 132, 1000 Ljubljana Electrolux Slovakia s.r.o., Electrolux Slovensko +421 2 43 33 43 22 Domáce spotrebièe SK, Seberíniho 1, 821 03 Bratislava Suomi +35 8 26 22 33 00 Konepajanranta 4, 28100 Pori Electrolux Service, S:t Göransgatan 143, Sverige +46 (0)771 76 76 76...
-
Page 47: Service And Spare Parts
AEG appliance, or for further information on AEG products please contact our Customer Care Depart- ment by letter or telephone at the address below or visit our website at www.aeg.co.uk. Customer Care Department For Customer Service in the Republic Major Appliances... - Page 48 132 977 180-00-310806-01 Subject to change without notice...