Table of Contents
Advertisement
Quick Links
Advertisement
Table of Contents

Related Manuals for Acesonic DGX-109


Summary of Contents for Acesonic DGX-109
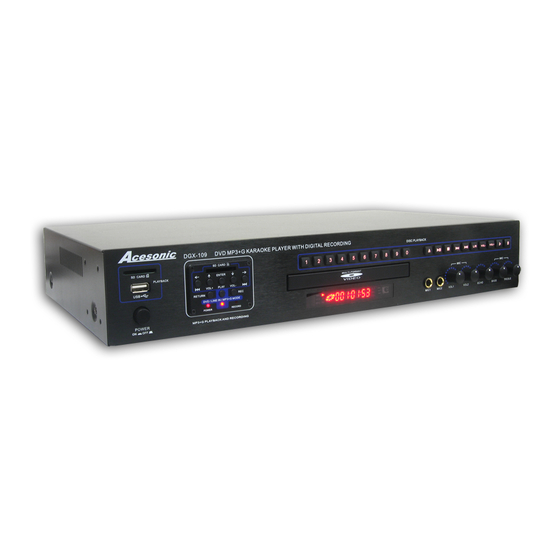
- Page 1 DGX-109 Multi-Function Karaoke Player With MP3+G Playback & Recording USER’S MANUAL www.acesonic.com CAUTION: To assure this player will work at its best, please read this user’s manual carefully before operation and keep for future reference.
- Page 2 Warnings, Cautions and Others Warnings, Cautions and Others Mises en garde, precautions et indications diverses Mises en garde, precautions et indications diverses For Canada/Pour le Canada For Canada/Pour le Canada CAUTION CAUTION: TO PREVENT ELECTRIC SHOCK, CAUTION: TO PREVENT ELECTRIC SHOCK, RISK OF ELECTRIC SHOCK RISK OF ELECTRIC SHOCK DO NOT OPEN...
- Page 3 Important Safety instructions Important Safety instructions Overloading Overloading Do not overload wall outlets, extension cords, or integral Do not overload wall outlets, extension cords, or integral Read Read These Instructions. These Instructions. convenience receptacles as this can result in a risk of fire convenience receptacles as this can result in a risk of fire or electric shock.
-
Page 4: Table Of Contents
cesonic DGX-109 Table of Contents Before Operation Included Accessories Please check that you have all of the following Playable Media........2 accessories supplied to you. If anything is missing, Handling and Cleaning......2 please contact your dealer immediately. Front Panel Functions......3 Back Panel Functions......3 *2 Wired Microphone with 1/4”... -
Page 5: Before Operation
Before Operation Playable Media Handling and Cleaning of Discs This Disc player supports the following disc formats: *DVD, MPEG-4, Video CD, Video CD 2.0 Handling *CD+Graphics, Audio CD, HDCD *At anytime, when handling discs, always hold them from *MP3, WMA, JPEG, Kodak, MPEG their edges and/or by the circle in the center. -
Page 6: Front Panel Functions
FRONT PANEL FUNCTIONS AND OPERATION: 6&7 11 12 13 14 15 16 1. POWER - Turns the power on and off(AC110V / AC240V), When the 1. POWER - Turns the power on and off(AC110V / AC240V), When the STOP - Stops/ends playback. STOP - Stops/ends playback. -
Page 7: Remote Functions
1. CUE BUTTON - Switching between karaoke mode 1. CUE BUTTON - Switching between karaoke mode Remote Functions and DVD Mode In Karaoke mode,Player will pause and DVD Mode In Karaoke mode,Player will pause after one track finished In DVD Mode, all tracks will be after one track finished In DVD Mode, all tracks will be played continually.*Karaoke mode = Cue ON. -
Page 8: Remote Functions
26. A-B BUTTON - A-B REPEAT allows you to repeat a 26. A-B BUTTON - A-B REPEAT allows you to repeat a Remote Functions segment of a track until stopped. To use this function: segment of a track until stopped. To use this function: 1.Set a starting point A. -
Page 9: Player Connections
Player Connections Make sure all power is disconnected from each component before connecting. Plug all cords securely to prevent unwanted noise. You cannot connect this player to a TV that does not contain a video input jack. The player must be connected to a TV or amplifier that is connected to a TV or monitor. -
Page 10: Basic Operation
Basic Operation To Advance Or Reverse Playback While Viewing During playback on DVDs and VCDs, press FAST FORWARD >> or FAST BACKWARD << on the remote Basic Playback unit. You can select from 2 times, 4 times, 8 times, 20 times the normal playback speed. -
Page 11: Usb Port And Operation
Basic Operation USB port and operation INFORMATION: You can play your own video and audio files(supports Pressing DISPLAY button can display playback time MP3,WMA, MPG, AVI, JPEG and VCD formats) stored and disc information on the screen. Press DISPLAY in external memory devices(e.g., flash drive, card button repetitively can change the display mode including count up, count down and cancel. -
Page 12: More Basic Operation
Basic Operation FRAME-BY-FRAME PLAY: VOLUME ADJUSTMENT: Every time when STEP button is pressed a frame of Use VOL+/- to adjust volume, and the range is 0-15 video will be displayed. Press PLAY button to switch the level. The screen will display 0-15. player to normal play mode.*Does not work on CDG MUTE: Press MUTE button to mute the sound. -
Page 13: A Cesonic Dgx
About 1.5MB. WAV format is open audio format which is suitable for network transmission. Its high sound quality is comparable to MP3. ACESONIC DGX-109 applies WAV format as recording format in order for the recorded files to be played and... -
Page 14: Mp3+G Mode/ Mp3+Lyrics
MP3 G Operation Operation Instructions-- FUNCTION SELECTION IN SONG FOLDER Operation Instructions-- BLUE IS SELECTED AS THE BACKGROUND This function only works in In song folder, press arrow keys MP3+Lyrics mode. When you to select songs, and press EDIT select this funtcion in MP3+G to select different functions. - Page 15 MP3 G Operation Operation Instructions--DELETE SONGS Operation Instructions-- FUNCTIONS AVAILABLE WHEN PLAYING Some MP3+G music have vocal in NOTE: left or right channel, if users want when user is using the to cancel original vocals, select DELETE function, song files cannot be Left to cancel the vocal in right channel, select Right to cancel the recovered when deletion is confirmed.
- Page 16 MP3 G Operation Operation Instructions-- FUNCTIONAL INTRODUCTION IN THE INTERFACE Operation Instructions-- NO MUSIC FILES IN FOLDER Pause Recording Information This screen will shows up if there is no MP3+G or Music Volume MP3+Lyric files found in any Playing folder on the SD card. The Remaining Time Key Control + Key Control -...
-
Page 17: Basic Operation-System Setup
Basic Operation-System Setup 4. Select a desired Video Output: Select an Video Output according to your equipment setup. Turning on/off the player Press POWER button on the front panel of the unit to turn on the player. There is no POWER button on the remote control. -
Page 18: Language Setup
3. Menu Language : Press SETUP then select 8.Default: Change back to manufacture setting. LANGUAGE SETUP and go to the MENU LANG. Move to the language of your choice and press ENTER. 9 Resume Basic Operation-Audio Setup 1. Select a desired Audio Output: Select an Audio Output according to your audio connection. -
Page 19: Speaker Setup
4. Rear Delay: You can adjust the rear speaker delay 3. Hue Set the Hue of the video +color to increase red according the position of your rear speaker. color, -color to increase green color 4.Saturation- Set the degree of the saturation of the video. 5. -
Page 20: Advanced Operations
Programing Tracks Advanced Operations By programing tracks, you can play up to 99 tracks in any order. You may also repeat tracks. 1. To program track Press PROGRAM. Playing From A Specific Position Using the NUMERIC KEYS 0-9 , enter the desired track numbe Locating a desired scene from the DVD menu 3. -
Page 21: Language & Sound Adjustment
Advanced Operations Audio & Video Playback How to adjust Language And Sound. Audio and Video File Playback This unit can play MP3, JPEG, MPEG, MPEG-4 and WMA Selecting Subtitle Language files that are recorded onto CD-R/RW, DVD±R, and Some DVD Video discs contain more than one subtitle DVD±RW. -
Page 22: Troubleshooting 17
Sometimes, the troubles lie within another component. Remember to try inspecting other component and electrical appliances in use. If the trouble cannot be rectified even after exercising the steps listed below, call our Acesonic service center +1(626)-820-0670 to inquire about repairs. - Page 23 Trouble Shooting Karaoke Operations Karaoke Operations 11. There is no sound from the 11. There is no sound from the *You need to connect the amplifier to the Karaoke Output *You need to connect the amplifier to the Karaoke Output microphone.
-
Page 24: Specification & Contact Info
Two Microphone Input with Individual Volume Control Professional Karaoke Sound Effect Support 5.1 Digital Channel NTSC/PAL Worldwide Compatible Universal Power Supply: AC100~260V Auto Switch Rack amount able Player Dimension: 2”x10”x17” Shipping Weight: 8Lbs Designed In U.S.A Acesonic Corp. City of Industry CA,U.S Sale:(626)820-0608 Technicals:(626)820-0605 www.acesonic.com... - Page 25 TO VALIDATE YOUR WARRANTY: Fill out the attached warranty card, be sure to include the model and serial number of the unit since this is how warranties are tracked. If your Acesonic product was purchased in the U.S. mail the completed...
- Page 26 Acesonic does not, however, warrant its products against any and all defects: 1) arising out of material or workmanship not provided or furnished by Acesonic, or 2) resulting from abnormal use of the product or use in violation of instructions, or 3) in products repaired or serviced by other than authorized Acesonic repair facilities, or 4) in products with removed or defaced serial numbers, or 5) in components or parts or products expressly warranted by another manufacturer.