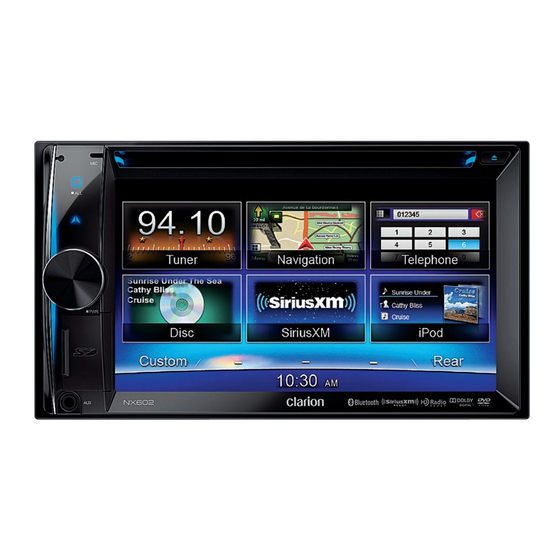
Clarion NX602 Owner's Manual
Dvd multimedia station with built-in navigation & 6.2" touch panel control
Hide thumbs
Also See for NX602:
- Quick start manual & installation manual (178 pages) ,
- Owner's manual (101 pages) ,
- Owner's manual & installation manual (46 pages)

Related Manuals for Clarion NX602


Summary of Contents for Clarion NX602
- Page 1 Owner's manual NX602 DVD MULTIMEDIA STATION WITH BUILT-IN NAVIGATION & 6.2" TOUCH PANEL CONTROL...
- Page 2 NX602...
-
Page 3: Table Of Contents
Contents Thank you for purchasing this Clarion product. • Please fully read this owner’s manual before operating this equipment. • Check the contents of the enclosed warranty card and store it in a safe place with this manual. 1. FEATURES ........................3 Expanding Systems ...................... -
Page 4: Features
1. FEATURES • 6.2” Wide-VGA color LCD TOUCH PANEL ® ® ® • Compatible with iPod / iPhone with PANDORA internet radio App ® • SiriusXM-Ready™ and HD Radio Ready™ with iTunes Tagging • Latest Map Guarantee Expanding Systems Expanding visual features Expanding audio features Rear Rear Vision Monitor Camera 6 Channel Amplifier USB Memory iPod / iPhone (Connect via CCA-750) Portable Player (Connect via AUX IN Jack) HD Radio™ Tuner (THD301) ® Bluetooth cellular phone SiriusXM-Connect Vehicle Tuner... -
Page 5: Precautions
Use of this product by the customer is restricted to play program materials to which the Rovi copyright protection process has been applied. The Bluetooth word mark and logos are registered trademarks owned by Bluetooth SIG, ® Inc. and any use of such marks by Clarion Co.,Ltd, is under license. NX602... - Page 6 APPLICABLE AT DATE OF MANUFACTURE. This product includes technology owned by Microsoft Corporation and cannot be used or distributed without a license from MSLGP. CLARION CO.,LTD. 7-2,SHINTOSHIN,CHUO-KU,SAITAMA-SHI,SAITAMA-KEN,JAPAN HD Radio™, HD Radio Ready™, and the HD Radio Ready logo are proprietary trademarks of iBiquity Digital Corporation.
-
Page 7: Cautions On Handling
• The USB memory sticks must be recognized as “USB mass storage class“ to work properly. Some models may not operate correctly. W hen the memorized data is lost or damaged by any chance, Clarion shall not be liable for any damage. When using an USB memory stick, we recommend that you backup your data stored on it before using a personal computer etc. -
Page 8: Handling Discs
Handling Discs Handling Cleaning • New discs may have some roughness • To remove fingermarks and dust, use a soft around the edges. If such discs are used, cloth and wipe in a straight line from the the player may not work or the sound may center of the disc to the circumference. -
Page 9: Controls
4. CONTROLS Operational Panel ALL ] ALL MENU ] EJECT [MIC] Disc Slot RESET ] NAvI/Av [POWER/vOL] SD Card Slot AUX Jack Micro SD card slot Only navigation map card is available and don't remove it when unit is power on. Names of Buttons [POWER/VOL] Knob •... -
Page 10: Remote Control
Remote Control [TITLE] Button • DVD TITLE MENU [RPT] Button • Repeat playback [ENT] Button • Enter [RDM] Button • Random playback [ROOT] Button • DVD ROOT MENU ], [ ] Buttons • Manual tune • Fast backward/forward playback [SUB.T] Button •... - Page 11 Remote Control / STOP] Button CAUTION • Play/Pause • Keep the battery out of the reach of • Stop (long press) children. Should the battery be swallowed, consult ], [ ] Buttons a doctor immediately. • RADIO / HD RADIO / DAB mode •...
-
Page 12: Main Menu Operation
5. MAIN MENU OPERATION Long press [ ALL ] button on the PANEL to Touch the icons on the screen to enter show main source menu. corresponding work mode, such as Disc mode, USB mode, iPod mode, etc. Short press [ ALL ] button to show Short Touch [2ZoneOff] to turn off the rear zone cut menu. -
Page 13: System Setup
6. SYSTEM SETUP At all mode, long press [ ALL ] button to Wallpaper enter main source menu. Touch [Custom] Touch [Set] to the right of “Wallpaper” to on the bottom left of the screen, then select show Wallpaper setting menu. [Settings] on the screen to enter Setting Touch [ ] or [... - Page 14 Sound Setup Beat EQ Touch [Setup] on the right of screen to Touch the button to the right of “Beat EQ” to spread the setting list. then touch the button show EQ setting menu. You can select : “Bass to the right of desired option to adjust or Boost”, “Impact”, “Excite”, “Custom”...
- Page 15 • Parental Control Touch the button to the right of “Parental Control” to show parental control menu. Enter password, then select a parental level. Touch [OK] to confirm or [Back] to exit. Navigation • Navigation Interrupt Select navigation interrupt On, Pop-Up or Off.
-
Page 16: Disc Operation
7. DISC OPERATION DVD System Multi-story function DVD video is a high-quality digital video When a DVD video contains more than one source that provides crisp and clear images. story for a film, you can select the story you One 12 cm disc contains either one film or wish to enjoy. - Page 17 sessions recorded cannot be played on this of numbers that also incorporate a “1”. DVD video player. The DVD video region number is marked on the disc jacket as shown below. Note: • W hen you have a CD Extra disc, only the first session will be recognized. About playing a CD-R/CD-RW disc (MP3, WMA) This player can play CD-R/CD-RW discs...
-
Page 18: Accessing A Disc
Accessing a Disc CAUTION For your safety, the driver should not insert or eject a disc while driving. Eject function Just pressing the [ ] button, ejects the disc even if the power to the unit was not turned Notes: • I f you force a disc into before auto reloading, this can damage the disc. -
Page 19: Dvd Player Operation
DVD Player Operation Playback menu 14. Show previous page 15. Turn on Widescreen mode Touch the bottom half of screen to show 16. Direct search operation bar. 17. Adjust picture effect 18. Show playback information 19. Mute indicator Pausing play 1. - Page 20 DVD subtitle select During playback, touch [ ], [Subtitle] buttons to select the subtitle language if the DVD has multiple language subtitles. Playback information During playback, touch [ ], [ Information ] buttons to view playback information. Adjust picture ], [ Adjust During playback, touch [ Picture ] button, then use [-], [+] buttons to adjust Dimmer/Brightness/Contrast/Color.
-
Page 21: Cd Player Operation
CD Player Operation Playback menu Fast forward/Fast reverse Fast forward Touch the bottom half of screen to show Touch and hold the [ ] button . operation bar. Fast reverse Touch and hold the [ ] button . * For MP3/WMA discs, it takes some time until the start of searching and between tracks. -
Page 22: Mp3/Wma Playback
MP3/WMA Playback Logical format (File system) This unit is an ID3 Tag compatible model. This unit supports the ID3 TAGs of the When writing MP3/WMA file on a CD-R disc Version 2.4, 2.3, 1.1 and 1.0. or CD-RW disc, please select “ISO9660 level In displaying, this unit gives priority to the 1, 2 or Joliet or Romeo”... - Page 23 ♪ ♪ ♪ ♪ ♪ ♪ 10. Scan play 11. Rotate the album image ♪ ♪ 12. Back to main operation bar ○ Root Folder ? Folder Folder Select ♪ ♪ File This function allows you to select a folder containing MP3/WMA files and start playing Layer1 Layer 2 Layer 3 Layer 4 Layer5 from the first track in the folder.
-
Page 24: Mp4 Playback
MP4 Playback Playback menu Selecting a file File-up When playing, touch the bottom half of screen to show operation bar. Touch the [ ] button to move to the beginning of the next file. File-down Touch the [ ] button to move back to the beginning of the current or previous file. -
Page 25: Sd/Usb Operation
8. SD/USB OPERATION Accessing an USB 1. Insert an USB device into the USB cable. When connecting an USB device, the unit will read the files automatically. 2. To remove the USB device, you should first select another source or turn off the power, in order to avoid damaging the USB device. -
Page 26: Sd/Usb Audio Operation
SD/USB Audio Operation Select SD/USB Audio mode This system can play audio files ( MP3/WMA) stored in a SD card or USB memory. You can Touch top left corner of the screen until SD use it as an audio device by simply copying Audio or USB Audio appears. -
Page 27: Bluetooth Operation
9. BLUETOOTH OPERATION The Bluetooth allows you to utilize your car’s built-in audio system for wireless mobile phone or music handsfree communication. Some Bluetooth mobile phones have the audio features, and some portable audio players support Bluetooth feature. This system can play audio data stored in a Bluetooth audio device. -
Page 28: Making A Call
• D ialed/Received/Missed Call History You can search any Dialled/Missed/Received Call History. 1. Show history categories 1. Touch [ ] button to show following history 2. Backspace categories: Dialed, Received, Missed and 3. Paired device information Contacts. 4. Number pad Touch [Dialer] to dial number manually. 5. -
Page 29: Bluetooth Audio Operation
Track-up tracks through the car’s speakers. Please consult your nearest Clarion dealer for more 1. Touch the [ ] button to move to the information on the product of wireless audio beginning of the next track. -
Page 30: Radio Operation
10. RADIO OPERATION Select tuner for listening to the radio Select one radio band ALL ] button to enter main Long press [ Touch the top left corner of the screen to source menu, then select [Tuner] to enter select one radio band among FM1, FM2, FM3 Tuner mode. - Page 31 Manual store When one expected radio station has been detected, touch [ ] button on the right edge of the screen to show the preset station list, hold one of the six preset stations for more than 2 seconds to store it in the memory.
-
Page 32: Siriusxm Satellite Radio Operation
11. SiriusXM Satellite Radio OPERATION Everything worth listening to is on SiriusXM, getting over 130 channels, including the most commercial-free music, plus the best sports, news, talk and entertainment. A SiriusXM Vehicle Tuner (sold separately) and Subscription are required. For more information, visit www.siriusxm.com. - Page 33 Select Preset channel Activate the SiriusXM Vehicle Tuner using one of the two methods below: 1. Select a band (if needed). • O n l i n e : G o t o “ w w w . s i r i u s x m . c o m / 2.
- Page 34 Parental Lock / Unlock Artist & Song Alerts The SiriusXM Parental Control feature allows While listening to SiriusXM Satellite Radio, you to control access to channels that you you can be alerted when your favorite songs consider inappropriate for younger listener. or artists are playing on other channels.
- Page 35 Traffic/Weather Jump This feature allows you to tune to the channel broadcasting the traffic and weather report for the city you selected. Operation is described below. Touch [ ] button on the operation bar, then long touch [Traffic/Weather Jump] and [Edit] to select state and City on the list menu for desired city.
-
Page 36: Hd Radio Operation
12. HD Radio OPERATION About HD Radio™ Technology 10. Manual tune forward Auto tune forward (long press) HD Radio Technology allows CD-quality 11. Select next multicast digital broadcasting of your local AM and 12. Show other options FM radio stations. HD Radio broadcasts can include multiple channels on the same frequency, which is called multicasting. - Page 37 Preset stations Up to six stations on each band can be stored as presets, which can then be instantly recalled by pressing the associated preset button. NOTE: Multicast stations can be stored as presets, but the unit must be in Digital or Auto reception mode to receive them.
-
Page 38: Itunes Tagging
For detailed information on the playable iPod models, see our home page: www.clarion. Note: When transferring Tags to an iPod, the unit must remain in HD Radio mode. To purchase... -
Page 39: Ipod & Iphone Operation
14. iPod & iPhone OPERATION Connect an iPod or iPhone to the USB connector via CCA-750 cable. When connecting a device, the unit will read the files automatically. The track information display on the screen once playback start. 11. Turn on / off Simple Control 12. -
Page 40: Ipod Video Playback
Fast reverse 1. Play/Pause Touch and hold the [ ] button . 2. Repeat play 3. Previous file Repeat play Fast reverse (long press) 4. Progress bar This function allows you to play the track 5. Next file repeatedly. Fast forward (long press) Touch the [ ] button to select Repeat one 6. -
Page 41: Pandora Operation
15. PANDORA OPERATION PANDORA , the leading internet radio 11. Back to main operation bar ® service, gives people music they love Add bookmark anytime, anywhere, through personalized radio stations available on a wide variety of Touch [ ] button, then select [Track] or connected devices. -
Page 42: Navigation Operation
16. NAVIGATION OPERATION Access navigation mode Control buttons 1. Slide the cover of the card slot located on 1. Touch top left corner of the screen to show the bottom left of the panel to the right. GPS informations. Touch [Back] to return. Insert a map card into the mini card slot. -
Page 43: Trouble Shooting
18. TROUBLE SHOOTING GENERAL Problem Cause Measure Unit fuse blown. Replace with new fuse of correct rating. Unit can not power on. Car battery fuse blown. Replace with new fuse of correct rating. Turn off the power and press the [RESET] Unit can not button with a thin rod. - Page 44 DISC Player Problem Cause Measure Another disc is already loaded. Eject the disc before loading the new one. Disc cannot be There is an object installed inside loaded. Remove the object inside the unit. the unit. Disc is dirty. Clean the compact disc with a soft cloth. Sound skips or is Replace with a compact disc with no noisy.
- Page 45 SiriusXM Advisory Messages Message Description Check the SiriusXM tuner connection on the back of the unit to ensure that its Check Tuner correctly connected. Ensure the SiriusXM antenna cable is connected to the SiriusXM tuner correctly. Check the SiriusXM antenna wire for breaks or sharp bends. Replace the Check Antenna antenna if necessary.
-
Page 46: Error Displays
19. ERROR DISPLAYS If an error occurs, one of the following displays is displayed. Take the measures described below to solve the problem. Display Cause Measure Please wait, it may take several minutes Disc loading Disc is being read for some disc or storage device. Disc is dirty Clean disc with soft cloth Disc is upside down... -
Page 47: Specifications
20. SPECIFICATIONS FM Tuner Bluetooth Frequency range: 87.9-107.9MHz Specification: Bluetooth Ver. 2.0+EDR Usable sensitivity: 13dBf Profile: HFP (Hands-free Profile) Frequency response: 30Hz-15kHz A2DP (Advanced Audio Distribution Stereo separation: 30dB(1kHz) Profile) Signal/noise ratio: >55dB AVRCP (AV Remote Control Profile) PBAP (Phone Book Access Profile) AM Tuner Send/Receive Sensitivity: Class 2 Frequency range: 530-1710kHz... - Page 48 178mm 100mm 7" 4" Note: • S pecifications and design are subject to change without notice for fur ther improvement. Power Output: 18W RMS x 4 Channels at 4Ω and ≤1% THD+N Signal to Noise Ratio: 93 dBA (reference: 1 W into 4 Ω) NX602...
-
Page 49: Wiring And Connections
21. WIRING AND CONNECTIONS NX602 GPS Antenna GPS Antenna (Black) (Black) • Be sure to connect SiriusXM External Microphone External Microphone cable and HD Radio cable properly. Connection Connection Black (Black) (Black) Black Mistakenly connect to SiriusXM cable and HD Radio cable may cause damage to your unit or the connected device. - Page 50 18-Pin Connector Extension Lead (attached to the source unit) Gray Front Right Brown wire (Phone mute lead) Gray/Black Connect to cellular phone mute lead. White Front Left White/Black Yellow wire (Memory back-up lead) Purple Connect directly to battery Rear Right Purple/Black Green Red wire (Power lead)
- Page 51 Clarion Co., Ltd. All Rights Reserved. Copyright © 2012: Clarion Co., Ltd. Printed in China...