Table of Contents
Advertisement
Quick Links
Advertisement
Table of Contents

Related Manuals for RocketFish RF-GUV1201


Summary of Contents for RocketFish RF-GUV1201
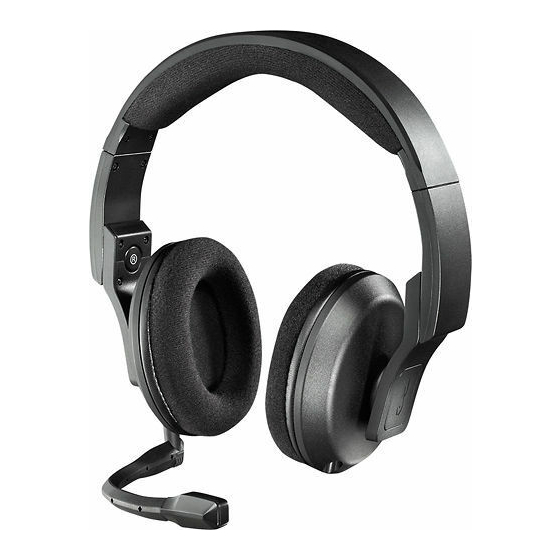
- Page 1 Gaming Headset with 3D Sound RF-GUV1201 User Guide...
-
Page 2: Table Of Contents
Gaming Headset with 3D Sound Contents Important safety instructions ..................3 Features..........................4 Package contents..................... 5 Headset jacks and controls................... 6 In-line control unit ....................7 Connecting to a PlayStation 3 (PS3) ................ 8 Using a headphone jack or AV cable..............8 Using an HDMI connection ................12 Connecting to an Xbox 360 ..................16 Using a headphone jack or AV cable...............16... -
Page 3: Important Safety Instructions
RF-GUV1201 Important safety instructions 1 Read these instructions. 2 Keep these instructions. 3 Heed all warnings. 4 Follow all instructions. 5 Do not use this apparatus near water. 6 Clean only with dry cloth. 7 Do not store near any heat sources such as radiators, heat registers, stoves, or other apparatus (including amplifiers) that produce heat. -
Page 4: Features
Features • Compatible with: • PlayStation®3 (PS3™) • Xbox 360® and Xbox LIVE® • PC running Windows® 7, Windows Vista®, or Windows® XP • Mac® computer running OS X v10.2.8 and above • Stereo audio devices • Incorporates SRS WOW® with SRS® TruBass®, and FOCUS® technologies to create 3D sound for the exciting, lifelike sound that gamers crave •... -
Page 5: Package Contents
RF-GUV1201 Package contents Black 3.5mm Microphone audio cable Gaming Headset with 3D sound In-line headset control unit with 2.5mm Xbox chat 10 ft. (3 m) RCA piggyback green 3.5mm audio cable and cable to 3.5mm audio cable USB cable connectors... -
Page 6: Headset Jacks And Controls
Headset jacks and controls Right side Left side Component Description Right microphone Plug the microphone into this jack. jack (MIC) Left microphone Plug the microphone into this jack. jack (MIC) Line In jack Plug the black 3.5mm cable into this jack and into the 3.5mm jack on the in-line control unit, TV headphone jack, or other audio device. -
Page 7: In-Line Control Unit
RF-GUV1201 In-line control unit Component Description 3.5mm cable jack Plug the black 3.5mm cable into this jack and into the LINE IN jack on your headset. Mute indicator Lights red when all audio and chat is muted. (The ALL MUTE button is on the headset.) Lights yellow when the microphone is muted. -
Page 8: Connecting To A Playstation 3 (Ps3)
Connecting to a PlayStation 3 (PS3) You can connect your headset to your PS3 in a variety of ways to receive PS3 audio: • TV headphone jack or AV cable (see “Using a headphone jack or AV cable” on page 8) •... - Page 9 RF-GUV1201 2 Choose your connection method. If you want to connect the audio using a headphone jack on a TV, monitor, or receiver, complete the instructions in “Option A: Headphone jack connection method. ” If you want to connect the audio using the PS3 AV cable, complete the instructions in “Option B: AV cable connection...
- Page 10 Option B: AV cable connection method Step 3 (continued) Make the connections shown in the following illustration. Yellow (video) Red (audio right) White (audio left) SOURCE Black 3.5mm cable RCA piggyback cable In-line control unit green 3.5mm cable connector In-line control unit In-line control...
- Page 11 RF-GUV1201 6 Select Audio Input Connector / SCART / AV Multi to send the audio to your headset. 7 Press X to save the setting. 8 Complete the Steps in the following section “Setting up the Chat function. ” Setting up the Chat function To set up the Chat function: 1 Turn on your PS3, then open the PS3 Settings menu.
-
Page 12: Using An Hdmi Connection
Using an HDMI connection Note: Connecting to a headphone jack is the easiest connection method. When your PS3 is connected to a TV, monitor, or receiver using HDMI, you can connect the audio using the TV’s headphone jack (if available) or using the AV cable that came with your PS3. To connect to a PS3 using an HDMI connection: 1 Plug the microphone into the left or right MIC jack on your headset. - Page 13 RF-GUV1201 2 Choose your connection method. If you want to connect the audio using a headphone jack on a TV, monitor, or receiver, complete the instructions in “Option A: Headphone jack connection method. ” If you want to connect the audio using the PS3 AV cable, complete the instructions in “Option B: AV cable connection...
- Page 14 Option B: AV cable connection method Step 3 (continued) Make the connections shown in the following illustration. Yellow (not used) Red (audio right) White (audio left) SOURCE Black 3.5mm cable RCA piggyback cable In-line control unit green 3.5mm cable connector In-line control unit...
- Page 15 RF-GUV1201 6 Select Settings, Sound Settings, Audio Multi Output. This setting lets you use the standard PS3 AV cable that came with your PS3 simultaneously with an HDMI or digital (optical) audio output. 7 Complete the Steps in the following section “Setting up the Chat function.
-
Page 16: Connecting To An Xbox 360
Connecting to an Xbox 360 You can connect to an Xbox 360 using: • TV headphone jack or AV cable (see “Using a headphone jack or AV cable” on page 16) • HDMI connection (see “Using an HDMI connection with a headphone jack or audio adapter”... - Page 17 RF-GUV1201 2 Choose your connection method. If you want to connect the audio using a headphone jack on a TV, monitor, or receiver, complete the instructions in “Option A: Headphone jack connection method. ” If you want to connect the audio using the PS3 AV cable, complete the instructions in “Option B: AV cable connection...
- Page 18 Option B: AV cable connection method Step 3 (continued) Make the connections shown in the following illustration. Your headset is ready to use. Yellow (video) Red (audio) White (audio) SOURCE Black 3.5mm These connectors cable are not used for your headset. RCA piggyback cable In-line...
-
Page 19: Using An Hdmi Connection With A Headphone Jack Or Audio Adapter19
RF-GUV1201 Using an HDMI connection with a headphone jack or audio adapter Note: Connecting to a headphone jack is the easiest connection method. When your Xbox 360 is connected to a TV, monitor, or receiver using HDMI, you can connect the audio using the TV’s headphone jack (if available) or using the AV cable jack on your Xbox 360 to connect the sound. - Page 20 2 Choose your connection method. If you want to connect the audio using a headphone jack on a TV, monitor, or receiver, complete the instructions in “Option A: Headphone jack connection method. ” If you want to connect the audio using an HDMI audio adapter (sold separately), complete the instructions in “Option B: HDMI audio adapter connection method”...
- Page 21 RF-GUV1201 Option B: HDMI audio adapter connection method Make the connections shown in the following illustration. Your headset is ready to use. SOURCE Black 3.5mm cable Xbox 360 HDMI RCA piggyback audio adapter cable (sold separately) In-line control unit In-line 2.5mm...
-
Page 22: Connecting To A Computer
Connecting to a computer If your computer has a Windows operating system, go to “Windows 7, Windows Vista, or Windows XP” on page 22. If your computer has a Mac operating system, go to “Mac OS X v10.2.8 and above” on page 25. Windows 7, Windows Vista, or Windows XP To connect to a Windows-based computer: 1 Plug the microphone into the left or right MIC jack on your... - Page 23 Windows sounds, you can reset the default devices to their original settings. 6 In the Sound Playback list, select Rocketfish Headset, then click the Volume button. The Master Volume dialog box opens.
- Page 24 11 Click the X in the upper right corner of the dialog box to close the box. 12 Open the Sounds and Audio Devices Properties box again. 13 In the Sound Recording list, select Rocketfish Headset, then click the Volume button. The Master Volume dialog box opens.
-
Page 25: Mac Os X V10.2.8 And Above
RF-GUV1201 17 If you do not want the headset to be the default device for Window sounds, go back to the Sounds and Audio Devices dialog box and set the default audio devices for playback and recording back to their original settings 18 Close the open dialog boxes. - Page 26 3 Click the Apple® menu icon and go to System Preferences/Sound. 4 Select the Output tab and make sure that the default audio device is set to Rocketfish Headset. If not, select Rocketfish Headset. 5 Set the Output volume slider on the bottom of the screen to the maximum.
-
Page 27: Connecting To A Portable Audio Device
RF-GUV1201 Connecting to a portable audio device To connect to a portable audio device: 1 Plug the black 3.5mm cable into the Line In jack on the left side of your headset and into the 3.5mm jack on any portable audio device. -
Page 28: Troubleshooting
Troubleshooting Problem Solution No audio • Make sure that the volume is not turned down or muted. • Make sure that the All-Mute feature is not turned on. When All-Mute is turned on, the mute indicator on the in-line control unit lights red. -
Page 29: Specifications
RF-GUV1201 Specifications Speakers 40mm neodymium Frequency response Headphones: 20 Hz to 20,000 Hz Microphone: 100 Hz to 8,000 Hz Impedance 32 ohms Legal notices FCC Part 15 This device complies with Part 15 of the FCC Rules. Operation of this product is... -
Page 30: One-Year Limited Warranty
Products and parts replaced under this warranty become the property of Rocketfish and are not returned to you. If service of Products and parts are required after the Warranty Period expires, you must pay all labor and parts charges. - Page 31 • Damage due to incorrect operation or maintenance • Connection to an incorrect voltage supply • Attempted repair by anyone other than a facility authorized by Rocketfish to service the Product • Products sold as is or with all faults •...
- Page 32 Distributed by Best Buy Purchasing, LLC 7601 Penn Avenue South, Richfield, MN 55423-3645 USA © 2011 BBY Solutions, Inc. All rights reserved. ROCKETFISH is a trademark of BBY Solutions, Inc. All other products and brand names are trademarks of their respective owners. 11-0957...