Table of Contents
Advertisement
Quick Links
Advertisement
Table of Contents
Troubleshooting

Related Manuals for Fujitsu PA03360-B615


Summary of Contents for Fujitsu PA03360-B615
- Page 1 P3PC-1942-01ENZ0 Color Image Scanner S510M for Macintosh Operator’s Guide...
- Page 3 Introduction Thank you for purchasing the Color Image Scanner ScanSnap S510M. ScanSnap S510M is a feature-rich, office-ready color image scanner. It is designed to help you improve productivity and solve problems in scanning. The ScanSnap scanner has the following features: ■...
-
Page 4: Table Of Contents
CONTENTS ■ Regulatory Information ............iv ■ Note, Liability ............... vii ■ Preface ................. vii ■ Safety Precautions ..............x Chapter 1 Before You Start Using Your Scanner....1 1.1 Names and Functions of Parts .......... 2 Chapter 2 Connecting ScanSnap ..........5 2.1 Installing ScanSnap............ - Page 5 Chapter 4 Uninstalling ScanSnap ........113 4.1 Uninstalling Supplied Programs ........114 Chapter 5 Troubleshooting ..........117 5.1 Clearing Document Jams..........118 5.2 Troubleshooting Checklist ..........120 Chapter 6 Daily Care ............125 6.1 Cleaning Materials ............126 6.2 Cleaning the Scanner Exterior & Stacker..... 127 6.3 Cleaning the Inside of the Scanner.......
-
Page 6: Regulatory Information
■ Regulatory Information FCC declaration This equipment has been tested and found to comply with the limits for a Class B digital device, pursuant to Part 15 of the FCC Rules. These limits are designed to provide reasonable protection against harmful interference in a residential installation. This equipment generates, uses, and can radiate radio frequency energy and, if not installed and used in accordance with the instruction manual, may cause harmful interference to radio communications. - Page 7 Bescheinigung des Herstellers / Importeurs Für den S510M wid folgendes bescheinigt: • In Übereinsstimmung mit den Bestimmungen der EN45014(CE) funkentstört • Maschinenlärminformationsverordnung 3. GPSGV: Der höchste Schalldruckpegel beträgt 70 dB (A) oder weniger, gemäß EN ISO 7779. ® International E Program NERGY ®...
- Page 8 Trademarks Mac, and Mac OS are trademarks of Apple Computer, Inc., registered in the United States and other countries. Adobe, the Adobe logo, and Acrobat are either registered trademarks of Adobe Systems Incorporated in the United States and/or other countries. Other product names are the trademarks or registered trademarks of the respective companies.
-
Page 9: Note, Liability
■ Note, Liability READ ALL OF THIS MANUAL CAREFULLY BEFORE USING THIS PRODUCT. IF THIS PRODUCT IS NOT USED CORRECTLY, UNEXPECTED INJURY MAY BE CAUSED TO USERS OR BYSTANDERS. While all efforts have been made to ensure the accuracy of all information in this manual, PFU assumes no liability to any party for any damage caused by errors or omissions or by statements of any kind in this manual, its updates or supplements, whether such errors are omissions or statements resulting from negligence, accidents, or any other cause. - Page 10 This symbol alerts operators to helpful advice regarding operation. HINT This symbol shows operation with your computer. Operation This symbol shows operation with your scanner. Operation A TRIANGLE symbol indicates that special care and attention is required. The drawing inside the triangle shows the specific caution. A CIRCLE with a diagonal line inside shows action which users may not perform.
-
Page 11: Screen Examples In This Manual
Furthermore, the screenshots in this manual are for ScanSnap Manager. About Maintenance The user must not perform repairs on this scanner. Contact the store where you purchased the scanner or an authorized FUJITSU Image Scanner service provider to make repairs to this product. ScanSnap S510M Operator's Guide... -
Page 12: Safety Precautions
■ Safety Precautions WARNING The following describes important warnings described in this manual. Do not touch the AC cable with wet hands. Do not touch the power plug with wet hands. Doing so might cause electric shock. Do not damage the AC cable. A damaged AC cable may cause fire or electric shock. - Page 13 Make sure that the smoking has stopped, and then contact the store where you purchased the scanner or an authorized FUJITSU scanner service provider. Turn the scanner OFF if it is damaged. If the scanner is damaged for any reason, turn off the scanner and unplug the power cable before contacting the store where you purchased the scanner.
- Page 14 CAUTION The following describes important cautions described in this manual. Do not install the scanner on unstable surfaces. Install the scanner on a desk so that none of its parts protrude outside of the desktop. Also, make sure that the scanner is installed on a flat, level surface. Do not install the scanner on unstable surfaces.
- Page 15 Protect the scanner from static electricity. Install the scanner away from strong magnetic fields and other sources of electronic noise. Also, protect the scanner from static electricity as this might cause the scanner to malfunction. Do not use aerosol sprays near the scanner. Do not use aerosol sprays to clean the scanner.
-
Page 17: Before You Start Using Your Scanner
Chapter 1 Before You Start Using Your Scanner This chapter describes the necessary preparations for using ScanSnap. 1.1 Names and Functions of Parts ................2 ScanSnap S510M Operator's Guide... -
Page 18: Names And Functions Of Parts
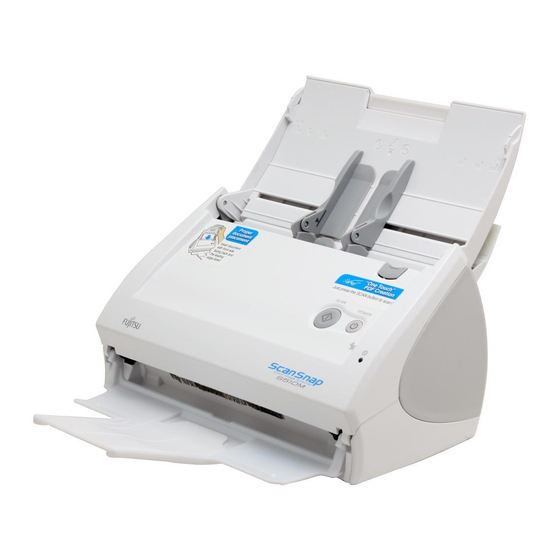
Names and Functions of Parts This section describes the name and function of each part. ■ Front Side Paper chute Open the cover to use the scanner. ⇒ Opening the cover turns on the scanner. (ADF stands for Automatic Document Feeder) Paper chute Open the paper chute and load the documents to scan. -
Page 19: Operation Button
1.1 Names and Functions of Parts ■ Operation Button [SCAN] button Press this button to start scanning. [POWER] button Hold down 1 sec. to turn on/off the power supply. SCAN Power lamp POWER Indicates the scanner status. Blue; Lighted: Ready Blue;... -
Page 21: Chapter 2 Connecting Scansnap
Chapter 2 Connecting ScanSnap This chapter describes how to connect ScanSnap to your computer. Install ScanSnap Manager on your computer before connecting the ScanSnap scanner. More than one ScanSnap scanner cannot be connected to one computer. ATTENTION For details about the specifications of the scanner such as the installation area, refer to the Appen- dix, "Installation Specifications"... -
Page 22: Installing Scansnap
Installing ScanSnap "Installation" is the operation to copy the supplied program file or ScanSnap Manager to the hard disk of your computer and create the environment for using ScanSnap on the computer. ■ Before Installing ScanSnap Manager 1. Before installing ScanSnap Manager, check the following system requirements. ■... - Page 23 2.1 Installing ScanSnap ■ Free disk space • ScanSnap Manager 20 MB • Adobe Acrobat 8 1000 MB 2. Make sure that ScanSnap is not connected to your computer yet. 3. Start up your computer. Login as a user with Administrator rights. 4.
-
Page 24: Installing Adobe Acrobat
■ Installing Adobe Acrobat Install Adobe Acrobat from the "Adobe Acrobat 8 DVD-ROM" supplied with the scanner, following the procedures below. System requirements for "Adobe Acrobat 8 Professional": ATTENTION • OS: Mac OS X v10.4.3. • Screen Resolution: 1024 x 768 or higher * For further details, please visit Adobe Web Site at: http://www.adobe.com Adobe Acrobat can also interact with ScanSnap so that scanned images are... - Page 25 2.1 Installing ScanSnap 2. Click the Finder icon in the Dock menu. ⇒ The Finder window appears. 3. Select the [Applications] folder in the Finder window. 4. Select and drag and drop the [Adobe Acrobat 8 Professional] folder icon to the [Appli- cations] folder in which the software is to be installed.
-
Page 26: Installing Scansnap Manager
■ Installing ScanSnap Manager follow the procedure below to install ScanSnap Manager. Operation 1. Insert the "ScanSnap Setup CD-ROM" into the CD-ROM drive. ⇒ The "ScanSnap" window appears. To open the CD tray or to eject a CD, press the button on the keyboard. - Page 27 2.1 Installing ScanSnap 2) With Mac OS X v10.3 or v10.4 ⇒ The "This Installer package needs to run a program to determine if it can be installed. Do you want to continue?" dialog appears. ⇒ Click the [Continue] button. 3.
- Page 28 ⇒ The "Important Information" window appears. When you have finished reading, click the [Continue] button. ⇒ The "Software License Agreement" window appears. 4. Check the contents of the "Software License Agreement," and click the [Continue] button. When you have finished reading, click the [Continue] button.
- Page 29 2.1 Installing ScanSnap ⇒ The agreement confirmation window appears. To accept the agreement, click the [Agree] button. If you click the [Disagree] button, the installation would be aborted, and the "Software License Agreement" window returns. ⇒ If you click the [Agree] button, the "Select a Destination" window appears. 5.
- Page 30 6. In the 'Easy Install on "<selected destination name>" 'window, click the [Install] button. ⇒ The message "Installing this software requires you to restart your computer when the installation is done. Are you sure you want to install the software now?" appears. Click the "Continue Installation"...
- Page 31 2.1 Installing ScanSnap ⇒ The "Startup item registration" window appears before the installation is complete. ⇒ Clicking the [OK] button in the "Startup item registration" window closes the window. Even if you do nothing, the window closes automatically in 10 seconds. 7.
-
Page 32: Connecting Scansnap To Your Computer
Connecting ScanSnap to your Computer Follow the procedure below to connect ScanSnap to your computer. 1. Connect ScanSnap to a power outlet with the AC cable. 2. Connect ScanSnap to your computer with the USB cable. • Be sure to connect the AC cable before connecting the USB cable. ATTENTION •... -
Page 33: Connecting The Usb Cable
2.2 Connecting ScanSnap to your Computer Outlet AC adapter connector ■ Connecting the USB Cable Connect the USB cable as shown below. • Use only the USB cable supplied with the scanner. Operation with a ATTENTION commercially available USB cable is not guaranteed to work. •... -
Page 34: Usb Cable
USB cable 3. Open the paper chute of ScanSnap. Paper chute [POWER] button Power lamp ⇒ ScanSnap is automatically turned on and detected by your computer. If the scanner is not automatically turned on (Blue Power lamp is ON), push the ATTENTION [POWER] button on the scanner. - Page 35 2.2 Connecting ScanSnap to your Computer When you turn off/on the scanner, press the [POWER] button for longer than HINT one second. *To prevent an accidental shut down, the [POWER] button does not work unless it is pressed for longer than one second. The scanner can be turned on/off by performing the following actions: HINT •...
-
Page 37: Basic Scanner Operations
Chapter 3 Basic Scanner Operations This chapter describes the basic operations of ScanSnap. 3.1 Flow of Operations ....................22 3.2 Scanning Different Document Types ..............30 3.3 Loading Documents ..................... 33 3.4 Changing Scan Settings..................36 3.5 Various settings according to your needs ............60 3.6 Saving Data in the Specified Folder.............. -
Page 38: Flow Of Operations
Flow of Operations This section describes the flow of operations from scanning documents with ScanSnap to saving scanned images to PDF files. ■ Preparation Operation 1. Make sure that the AC cable is firmly connected to the scanner. 2. Make sure that the scanner is correctly connected to your computer. Connecting the scanner to the computer that is already turned on presents no HINT problem. - Page 39 3.1 Flow of Operations ⇒ The scanner is turned on and the status of the "ScanSnap Manager" icon will change from If the scanner is not automatically turned on (Power lamp illuminates blue) even HINT when the paper chute is opened, press the [POWER] button on the scanner. ScanSnap S510M Operator's Guide...
-
Page 40: Scanning Documents
■ Scanning documents Operation 1. Make sure that the "ScanSnap Manager" icon is displayed in the Dock menu. If the "ScanSnap Manager" icon is not displayed, from Finder, select the desti- HINT nation in which "ScanSnap" is installed (generally, you select "Applications," and then "ScanSnap"), and select "ScanSnap Manager"... - Page 41 3.1 Flow of Operations • If [Use Quick Menu] is checked, you can select the application after scanning HINT the documents. This may be convenient if you want to specify the application after scanning. • If [Use Quick Menu] is not checked, you can process the scanned document with the application specified in "Scan and Save Settings"...
- Page 42 Select an application, and follow the procedure desctrbed in the section, "Scan2Folder": Refer to "3.5 Various settings according to your needs" (page 60). "Scan2E-mail": Refer to "3.5 Various settings according to your needs" (page 60). "Scan2Print": Refer to "3.5 Various settings according to your needs" (page 60). "iPhoto": Refer to "3.5 Various settings according to your needs"...
- Page 43 3.1 Flow of Operations For details about information such as the scanning settings, file name and destination folder to save data, refer to "3.4 Changing Scan Settings" (page 36). • Default settings for scanning are as follows: HINT SCAN button: "Duplex scan" Image quality: "Normal (Fastest)"...
- Page 44 ■ Turning the Scanner ON/OFF ScanSnap can be turned on/off by: • Turning on/off the computer, • Opening/closing the paper chute of the scanner. You do not have to turn on/off the scanner when it is connected to your computer. Turning off your computer or closing the paper chute.
-
Page 45: End Of Operation
3.1 Flow of Operations ■ End of Operation Exiting "ScanSnap Manager" Operation Click and hold the mouse button on the "ScanSnap Manager" icon in the Dock menu, and select "Quit" from the menu. To operate ScanSnap, "ScanSnap Manager" must be active (stay resident). HINT When you want to resurrect "ScanSnap Manager,"... -
Page 46: Scanning Different Document Types
Scanning Different Document Types The table below shows the types of documents that you can scan with ScanSnap. Without Using the Carrier Sheet Standard office paper Type Post cards, Business cards Weight 52 g/m to 127 g/m (14 lb to 34 lb) Letter (8.5 x 11 in. - Page 47 3.2 Scanning Different Document Types • Documents hand-written with a pencil may be smeared during a scan. ATTENTION It is recommended that the Carrier Sheet be used. If such documents are scanned without using the Carrier Sheet, the rollers of the ScanSnap get dirty and multi-feeding may be caused.
- Page 48 In addition, keep in mind the following points when you use the Carrier Sheet. • Use the Carrier Sheet only for the ScanSnap. ATTENTION • Avoid writing letters on, coloring, staining, or cutting the portion striped in black and white on the Carrier Sheet. Otherwise, the ScanSnap cannot scan the document with the Carrier Sheet correctly.
-
Page 49: Loading Documents
3.3 Loading Documents Loading Documents This section describes how to load documents onto the scanner. ■ How to load documents 1. Align the edges of the document. How to align the edges of the document is as follows: 1) Align both edges of the document, and you can scan the document correctly. 2) Check the number of sheets in the stack. - Page 50 4) Repeat steps 1) to 3) a few times. 5) Turn the batch 90 degrees to hold the other two sides of it, and then perform steps 1 to 4 again. 2. Load the document onto the paper chute. Load the batch so that the front side of the document (the first page when the number of sheets is more than one) faces down (to the paper chute).
- Page 51 3.3 Loading Documents 3. Adjust the side guides to the document width. Move the side guides so that they are touching the document edge. If there is clearance between the document edge and the guide, the scanned images may be skewed. Side guide Document If you use the stacker, it will be easy to gather scanned documents.
-
Page 52: Changing Scan Settings
Changing Scan Settings All the settings on ScanSnap are configured with "ScanSnap Manager." The ScanSnap icon is added to the Dock menu at the middle- bottom of the Mac OS X screen. The following menu appears when you press and hold the mouse button on the icon. From this menu, you can start scanning, configure settings for scanning, and check the consumable status. - Page 53 3.4 Changing Scan Settings The following describes how to change the settings. Operation 1. Click and hold down the mouse button on the ScanSnap icon in the Dock menu, and select "Settings" from the menu. ⇒ The "Scan and Save Settings" window appears. You can also open the "Scan and Save Settings"...
- Page 54 The following describes the setting items of each tab.
-
Page 55: Application Tab
3.4 Changing Scan Settings [Application] tab ■ Application: Specify the application to interact with ScanSnap. The specified application starts run- ning after the document is scanned with ScanSnap. Click to select the application. You can select one of the following applications: •... - Page 56 • The "Application" tab is available only when the Quick Menu is not used. HINT • The above applications will be added automatically into the selection list if installed. Uninstalled applications will be removed from the list automatically. • Adobe Acrobat Standard (for Macintosh) is supplied with this product. •...
- Page 57 3.4 Changing Scan Settings 3) When you have finished the above setting, click the [OK] button. ⇒ The "Add or remove application" window appears and you will see the new application is added. 4) Click the [Close] button to close the window. When adding an application, select one that supports either JPEG (*.jpg) or HINT PDF (*.pdf) format, and that can open when a file is dragged-and-dropped onto...
- Page 58 [Save] tab ■ Folder path to save images: Specify the folder to save the scanned images. When you click the [Browse] button, the "Browse for Folder" window is displayed. Select the folder to save the scanned images, and click the [Choose] button.
- Page 59 3.4 Changing Scan Settings ■ [Filename format] button Set the filename format used for files to save the scanned images. When you click the [File name format] button, the following window appears. One of three settings can be specified. • "Use Operating System Setting."...
-
Page 60: Image Quality
[Scanning] tab ■ Image quality: Specify whether to scan documents quickly or at higher quality. Select one of the following modes: • Normal (Fastest) Select this mode when you wish to scan documents quickly. • Better (Faster) Select this mode when you wish to scan documents at a high quality. •... -
Page 61: Color Mode
3.4 Changing Scan Settings ■ Color mode: Specify whether to scan documents in color mode or in black-and-white mode. By clicking , you can select one of the following modes: • Auto Color Detection (Automatically recognizes the document color) ScanSnap automatically recognizes whether the document to be scanned is color or black-and-white, and switches the scan mode accordingly. - Page 62 To continue scanning, load a document onto the ScanSnap, and then click the [Con- tinue Scanning] button. To finish scanning, click the [Finish Scanning] button. After the [Finish Scanning] button is clicked, the scanned images are saved into one file. * It is possible to continue scanning up to 1000 pages for one file.
- Page 63 3.4 Changing Scan Settings * No scanned images are generated if all the sheets in the document are recognized as blank pages. The following types of documents may be accidentally recognized as ATTENTION blank pages: • Almost blank documents containing only a few characters •...
- Page 64 • Allow automatic image rotation This setting automatically detects the orientation of a text on the document, and changes the orientation of the image. This function detects the orientation based on characters on the ATTENTION document. Therefore, it does not work properly for the following kinds of document: •...
-
Page 65: File Option Tab
3.4 Changing Scan Settings [File option] tab ■ Selecting the file option Specify the file format of the scanned image. Click to select the file format. You can select either of the following file formats: • PDF (*.pdf) • JPEG (*.jpg) •... - Page 66 • "Multipage PDF (whole batch in one PDF)" Create a merged PDF file of all the scanned images. • "Generate one PDF file per x page(s)" Create PDF files, each of which includes the specified number of pages, per scan. For example, when "2" is selected as the number of pages, scanning six pages of documents creates three files.
- Page 67 3.4 Changing Scan Settings [Paper size] tab ■ Paper size: Specify the paper size of the document to be loaded on the scanner. Click to select the size. The following paper sizes (Width x Length) can be selected. • Automatic detection •...
- Page 68 ■ [Custom] button With this function, you can add up to ten custom document sizes into the [Paper size] list. Clicking this button displays the following window. <When adding a custom document size> 1) Click the [Add] button. ⇒ The following window appears. 2) Configure settings as desired.
- Page 69 3.4 Changing Scan Settings <When deleting a custom document size> 1) In the "Add or Remove Custom sizes" window, select the document size you want to delete and click the [Remove] button. ⇒ The confirmation message appears. 2) Click the [Yes] button. ⇒...
- Page 70 Select mode in this drop-down procedure in list. the selected mode is illustrated The selected mode is described briefly Click to enable settings and close this window Click to show Help. Click to cancel settings and close this window The following explains settings you can change in the "Carrier Sheet Settings" window. Mode You can specify a method of scanning with the Carrier Sheet.
- Page 71 3.4 Changing Scan Settings Output image size You can specify an image size to output images of scanned documents. You can select it from the following paper sizes. Mode: Create facing pages in Mode: Create front and back images one image separately Automatic detection Automatic detection...
- Page 72 • When you select [Automatic detection] in the "Output image size" drop-down list and ATTENTION scan an irregular-sized document (not in the table above), the scanned image is output in a standard (ISO) size longer than and nearest to the original document size. The next longer ISO size may not be wide enough for your document.
- Page 73 3.4 Changing Scan Settings •Type in a name you want to use for the custom size in the "Name" field. ⇒The new name is added in the "Output image size" drop-down list. 3)When you finish, click the [OK] button. ⇒A new custom size is added in the list. 4)Click the [Close] button to close the "Add or Remove custom sizes"...
-
Page 74: Compression Tab
[Compression] tab ■ Compression rate: Change the compression rate and adjust the file size of the scanned image. The compression rate is changed by moving the slider. The higher the compression rate is, the smaller the file size is. As the compression rate increases, the quality of scanned images ATTENTION decreases. -
Page 75: Image Data Size
3.4 Changing Scan Settings Image data size HINT The following table shows rough estimates of sizes of generated images when a single-sided color document is scanned in respective modes. File type: PDF Paper size: A4 (Brochure) Color mode: Color Compression rate Scan mode Normal quality... -
Page 76: Various Settings According To Your Needs
Various settings according to your needs When you use default settings on ScanSnap, all you have to do is simply press the [SCAN] button to scan the documents, save images in the best condition, and display the scanned images on the screen;... -
Page 77: Scanning Only One Side Of A Document
3.5 Various settings according to your needs ■ Scanning only one side of a document Pressing the [SCAN] button on ScanSnap starts scanning documents in "Duplex scan" mode by default. If you want to change the [SCAN] button setting to "Simplex scan" mode, follow the procedure below. - Page 78 4. Load the document onto the scanner. 5. Press the [SCAN] button ⇒ The document is scanned in "Simplex scan" mode. To select the "Duplex scan" mode again, go to step 2 and select "Duplex Scan HINT (double-sided)" instead. The selected setting is valid until you change it again.
- Page 79 3.5 Various settings according to your needs ■ Scanning color document in black-and-white By default, ScanSnap automatically recognizes whether a document is black-and-white or color. Color documents are output as color image data, and black-and-white documents are output as monochrome image data. If you want to output all documents as monochrome image data, change the settings following the procedures below.
-
Page 80: Skipping Blank Pages
■ Skipping blank pages ScanSnap is able to remove blank pages automatically. When documents in which double-sided and single-sided pages are mixed are scanned in "Duplex scan" mode, the backside of single-sided (blank) pages are automatically removed, and the image data of only necessary pages is generated. To change the setting, follow the procedure below. - Page 81 3.5 Various settings according to your needs 3. Mark the [Allow automatic blank page removal] checkbox. 4. Click the [OK] button and close all the windows. ⇒ The setting takes effect the next time you scan documents. The following types of documents may be accidentally recognized as blank ATTENTION pages: •...
-
Page 82: Correcting Skewed Documents
■ Correcting skewed documents ScanSnap is able to automatically correct document skew. To change the setting, follow the procedure below. Operation 1. Click and hold the mouse button on the ScanSnap icon , and select "Settings" from the displayed menu. 2. - Page 83 3.5 Various settings according to your needs 3. Mark the [Correct skewed character strings automatically] checkbox. 4. Click the [OK] button and close all the windows. ⇒ The setting takes effect the next time you scan documents. Up to +/-5 degrees of skew can be corrected. ATTENTION This function detects a skew of the document based on the character strings on each sheet.
-
Page 84: Correcting The Orientation Of Scanned Image
■ Correcting the orientation of scanned image When there are pages of different orientations in a scanned document, ScanSnap is able to automatically rotate the orientation (view direction) of the scanned images. For example, it often happens that some pages are portrait (text) and some are landscape (tables) in a document. In addition, the backside of double-sided documents in calendar style is printed upside down. - Page 85 3.5 Various settings according to your needs 3. Mark the [Allow automatic image rotation] checkbox. 4. Click the [OK] button and close all the windows. ⇒ The setting takes effect the next time you scan documents. This function determines the orientation of pages based on the charac- ATTENTION ter’s direction.
-
Page 86: Scanning Documents Of Different Widths Or Sizes At A Time
■ Scanning documents of different widths or sizes at a time By marking the "Scan mixed paper size" checkbox, you can scan documents of different widths or sizes in one batch. To scan documents of various sizes, do the following. Operation 1. - Page 87 3.5 Various settings according to your needs 4. Click the [OK] button and close all the windows. This function is available only when "Automatic detection" is selected ATTENTION from the "Paper size" drop-down list. 5. Align the leading edge and centerline of all documents. ScanSnap S510M Operator's Guide...
- Page 88 6. Load the documents onto the paper chute. • Place all documents centering them under the pick roller. ATTENTION (Documents that are not under the pick roller cannot be fed.) • Adjust the side guide to the widest document. • Carefully load the smaller documents, which cannot contact the side guide, so that they can be fed straight.
- Page 89 3.5 Various settings according to your needs 7. Press the [SCAN] button ⇒ The size of all images output conforms to the respective documents. If the document was skewed during scanning, the output image size may ATTENTION be different from the original document size. ScanSnap S510M Operator's Guide...
-
Page 90: Rotating The Page View Of A Pdf File
■ Rotating the page view of a PDF file Even after scanning a document and saving it as a PDF file, you can change the view direction of this PDF file with Adobe Acrobat. When you want change the orientation of any other pages, follow the procedure below. Operation 1. - Page 91 3.5 Various settings according to your needs 3. You see the view direction is changed. For details on this function, refer to "Adobe Acrobat Help." HINT ScanSnap S510M Operator's Guide...
-
Page 92: Saving Scanned Images In Multiple Files
■ Saving scanned images in multiple files ScanSnap can save scanned images to multiple PDF files, each of which contains a preset number of pages. For example, you can scan a batch of filled forms and create a separate file for each. To change the setting, follow the procedure below. - Page 93 3.5 Various settings according to your needs 3. In the "PDF file format option" window, select "Generate one PDF file per x Page" and a number. Every PDF file created contains the specified number of pages. In "Duplex scan" mode, one sheet of paper has two pages (a front and a back). HINT It is recommended that you clear the [Allow automatic blank page removal] checkbox on the "Read Mode Option"...
- Page 94 ■ Continuing/stopping scanning after an error If an error such as the paper jam occurs while you scan a document containing more than one pages, you will see the following message. You can continue or stop scanning using the following procedure. Operation To continue scanning: 1.
- Page 95 3.5 Various settings according to your needs The [Continue Scanning] button may be grayed out as shown in the example ATTENTION below. If this is the case, it is not possible to continue scanning. ScanSnap S510M Operator's Guide...
-
Page 96: Converting Scanned Images To Searchable Text With Ocr
■ Converting scanned images to searchable text with OCR If you scan a text document, you will get an image of the document containing all the signs, letters, and numbers. However, the image data cannot be recognized as text. This means that you are not able to search the content of your document until processing it with OCR (Optical Character Recognition). - Page 97 3.5 Various settings according to your needs ⇒ The text information is added to the image data by the "Recognize Text" function. An error may occur when data scanned at 600dpi or more is converted with ATTENTION Adobe Acrobat 8. To avoid the error, do the following: If you are scanning color documents, in the "ScanSnap Manager - Scan and Save Settings"...
- Page 98 ■ Scanning Documents Using the Carrier Sheet The Carrier Sheet is a plastic sheet for loading the document specifically for the ScanSnap S510M/ S500M/fi-5110EOXM Series. It allows you to scan documents that cannot be scanned as it is. The document of larger than A4 size, such as A3 and B4 sizes, can be scanned by folding it in half. Insert the folded document into the Carrier Sheet and scan it in duplex mode.
- Page 99 3.5 Various settings according to your needs Operation 1. Click and hold the mouse button on the ScanSnap icon , and select "Settings" from the displayed menu. 2. On the [Paper size] tab, click the [Carrier Sheet Settings] button. ScanSnap S510M Operator's Guide...
- Page 100 3. In the "ScanSnap Carrier Sheet Settings" window, select "Create facing pages in one image" in the "Mode" drop-down list, and then click the [OK] button. 4. Select "Automatic detection" in the "Paper size" drop-down list on the [Paper size] tab.
- Page 101 3.5 Various settings according to your needs 5. Select "Duplex Scan" in the "Scanning side" drop-down list on the [Scanning] tab, and click the [OK] button. Operation 6. Fold the sheet to be scanned in half. Fold the sheet tightly and smooth out the crease. Otherwise, the sheet may be skewed during scanning.
- Page 102 8. Load the Carrier Sheet onto the ScanSnap. • Load the Carrier Sheet with the portion striped in black and white as the leading edge as shown in the right figure. • Adjust the side guides to the width of the Carrier Sheet to avoid skewing.
- Page 103 3.5 Various settings according to your needs • There may be a gap between the front and back side images, or a line may ATTENTION appear on the output image. When a sheet of thick paper is scanned, images on the both right and left side may be skewed to a trapezoidal shape.
- Page 104 To "Create front and back images separately" Use this mode for scanning a photograph with the Carrier Sheet when you do not want to get scratches on the photograph, or for scanning an irregular-shaped document such as the clipping of articles, which is difficult to scan as is.
- Page 105 3.5 Various settings according to your needs 3. On the "ScanSnap Carrier Sheet Settings" window, select "Create front and back images separately" in the "Mode" drop-down list, and then click the [OK] button. 4. Select "Automatic detection" in the "Paper size" drop-down list on the [Paper size] tab.
- Page 106 Operation 5. Open the Carrier Sheet and insert the material to scan. Neatly align the top of the material with the top of the Carrier Sheet. Center the material so that it is entirely contained in the Carrier Sheet. 6. Load the Carrier Sheet onto the ScanSnap. •...
- Page 107 3.5 Various settings according to your needs 7. Press the [SCAN] button ⇒ Scanning is started and the image data is generated in the specified size. • The image is centered and output in the specified size. ATTENTION When "Automatic detection" is selected in the "Output image size" drop- down list of the "Carrier Sheet Settings"...
-
Page 108: Saving Data In The Specified Folder
Saving Data in the Specified Folder This section describes how to save image files scanned with the ScanSnap in a shared folder. By using this action, you can save image files scanned with the ScanSnap in a networked folder to share information among group members. - Page 109 3.6 Saving Data in the Specified Folder ■ Operations in Quick Menu Operation 1. Load the document on the ScanSnap. For details, refer to sections "3.2 Scanning Different Document Types" (page 30) and "3.3 Loading Documents" (page 33). 2. Press the [SCAN] button ⇒...
- Page 110 4. Click the [Scan2Folder] action. ⇒ A preview window appears. 5. Verify a scanned image in the preview window. You can also change file names and destination folders and specify whether to state a path to a destination folder in an e-mail message to notify other members of it. Preview Window...
- Page 111 3.6 Saving Data in the Specified Folder Preview Window The image of the selected file is displayed. You can use the following navigation controls for paging through documents: To go to the first page, click this First Page button. To go to the previous page, click this Previous Page button. To go to the next page, click this Next Page button.
- Page 112 [History] button File names you have specified before are displayed in the "History" list; only file names you changed in the "File name" field are added to the list. (Up to 10 file names can be listed. When the 11th or later file name is speci- fied, a file name is deleted in chronological order.) Select a file name, and all file names listed in the "File name"...
- Page 113 3.6 Saving Data in the Specified Folder [History] button When this button is clicked, a list of folder names are displayed; up to 10 file names that have been added are displayed in reverse chronological order. The names of folders specified before these 10 folders in the list are not displayed.
- Page 114 [Browse] button Clicking this button displays the window; specify a destination folder in the window. [History] button When this button is clicked, a list of folder names are displayed; up to 10 file names that have been added are displayed in reverse chronological order.
- Page 115 3.6 Saving Data in the Specified Folder [Browse] button Clicking this button displays the window below; specify a destination folder in the window. "State a path to a destination folder in an E-mail message" checkbox After files are saved in a specified folder, an e-mail program is started with the path to the specified folder being stated in an e-mail message.
-
Page 116: Sending Files By E-Mail
Sending Files by E-mail This section describes how to send documents scanned with the ScanSnap by e-mail. The following e-mail software is supported. Mail ® Microsoft Entourage 2004 for Mac If you select "Scan to File" (only save image data to file), the scanned image is HINT saved to file after the scanning is complete. - Page 117 3.7 Sending Files by E-mail Icon List Descriptions of the selected action Operation 3. Place the mouse cursor on [Scan2E-mail]. ⇒ A description of the [Scan2E-mail] action is displayed. 4. When you want to change settings on the [Scan2E-mail] action, place the mouse cursor on the ( ) mark, and then click the [Setting] button (If you want to use default settings, go to step 6.)
- Page 118 In this window, you can change settings on the [Scan2E-mail] action as follows: "Show preview" checkbox A preview window appears when scanning is complete. You can visually check a scanned image before attaching it to an e-mail message. "Save scanned images to file" checkbox You can save PDF files attached to e-mail messages in a specified folder.
- Page 119 3.7 Sending Files by E-mail 5. Click the [OK] button to close the "Scan2E-mail -Options" window. • Contact your e-mail service provider to find out the maximum document size HINT that can be sent. • When the [Settings] button of a selected action is clicked, the selected action background color changes to yellow, and other actions become unselectable.
- Page 120 6. Click [Scan2E-mail] in the Action List. ⇒ A preview window appears. (You can change settings not to display a preview window.) 7. Verify a scanned image in the preview window. You can also change file names and specify whether to set a "Document Open" password and whether to save files sent by e-mail.
- Page 121 3.7 Sending Files by E-mail Preview Window The image of the selected file is displayed. You can use the following navigation controls for paging through documents: To go to the first page, click this First Page button. To go to the previous page, click this Previous Page button. To go to the next page, click this Next Page button.
- Page 122 [Serialize] button When multiple files are created at a scan, "_" and a serial number can be appended to each file name. Clicking this button displays the "Serialize" window. The [Serialize] button is available only when multiple files are cre- ated.
- Page 123 3.7 Sending Files by E-mail 8. Click the [Attach to E-mail] button. ⇒ An e-mail program is started with the selected files being attached to an e-mail message. • When the ScanSnap Quick Menu is displayed, the ScanSnap does not work ATTENTION even if you press the [SCAN] button.
-
Page 124: Using The Scansnap As A Copy Machine
Using the ScanSnap as a Copy Machine This section describes how to print scanned image files with a printer. By printing scanned images directly from the ScanSnap, you can use the ScanSnap as a copy machine. ■ Operations in Quick Menu Operation 1. - Page 125 3.8 Using the ScanSnap as a Copy Machine Operation 3. Place the mouse cursor on [Scan2Print]. ⇒ A description of the [Scan2Print] action is displayed. 4. When you want to change settings on the [Scan2Print] action, place the cursor on the ) mark, and then click the [Setting] button (If you want to use default settings, go to step 6.) ⇒...
- Page 126 5. Click the [OK] button to close the "Scan2Print - Options" window. When the [Settings] buttons of a selected action is clicked, the selected action HINT background color changes to yellow, and other actions become unselectable. To select another action, first close the "Scan2Print - Options" window, and then click on any point in areas other than actions, or place the mouse cursor on the selected action.
- Page 127 3.8 Using the ScanSnap as a Copy Machine ⇒ The "Scan2Print -Print" window appears. (This window will not appear unless the Show "Print" dialog checkbox is marked in step 4, and printing is performed immediately after clicking this action.) 7. Change settings for printing, and then click the [OK] button. Printer The currently selected printer is displayed.Select a printer to use.
- Page 128 "Allow automatic rotation" checkbox Images are rotated according to the length-to-width ratio of images so that they can be printed in either portrait orientation or landscape orientation, whichever best fits. "Center the image and print" checkbox Images are centered and printed. "Keep data used for printing as files"...
-
Page 129: Chapter 4 Uninstalling Scansnap
Chapter 4 Uninstalling ScanSnap The "Uninstallation" process removes the ScanSnap program files, which are installed on your computer, from the hard disk and restores the system environment to its original state. This chapter describes how to uninstall ScanSnap. 4.1 Uninstalling Supplied Programs ............... 114 ScanSnap S510M Operator's Guide... -
Page 130: Uninstalling Supplied Programs
Uninstalling Supplied Programs Follow the procedure below to uninstall ScanSnap Manager. ■ To uninstall ScanSnap Manager in Mac OS X v10.2 1. Start your computer. 2. Quit ScanSnap applications; all users must quit those running applications. (Click and hold the mouse button on the ScanSnap icon , and select "Quit"... - Page 131 4.1 Uninstalling Supplied Programs ■ To uninstall ScanSnap Manager in Mac OS X v10.3/v10.4 1. Start your computer. 2. Quit ScanSnap Manager; all users must quit those running applications. (Click and hold the mouse button on the ScanSnap icon , and select "Quit" from the displayed menu.) 3.
-
Page 133: Chapter 5 Troubleshooting
Chapter 5 Troubleshooting This chapter describes how to remove jammed documents and troubleshoot other problems. 5.1 Clearing Document Jams................... 118 5.2 Troubleshooting Checklist................. 120 ScanSnap S510M Operator's Guide... -
Page 134: Clearing Document Jams
Clearing Document Jams Cautions in clearing a paper jam are as follows: CAUTION • Do not pull out the jammed paper by force; be sure to open the ADF before removing the jammed document. • Do not touch sharp objects inside the scanner when removing jammed paper or you might be injured. - Page 135 5.1 Clearing Document Jams 3. Remove the jammed paper. 4. Close the ADF. Paper chute ⇒ You should hear the ADF click when it returns to its original position. Make sure that the ADF is firmly closed. Otherwise, paper jams or other feed- ATTENTION ing errors may occur.
-
Page 136: Troubleshooting Checklist
Check the items as described in the following table before requesting repair service. If you cannot solve the problem even after checking the following items, contact an authorized FUJITSU scanner service provider. Symptom Check The Item Out Resolution... - Page 137 5.2 Troubleshooting Checklist Symptom Check The Item Out Resolution Scanning does not Is the USB cable connected Connect the USB cable correctly. (When a start. correctly? hub is used, check the hub’s power supply.) Disconnect and then re-connect the AC cable Is the LED light blinking? and AC adapter.
- Page 138 Symptom Check The Item Out Resolution Thin lines are faint on Are you scanning docu- The color mode is used for capturing color the document. ments including typed text, images such as the photo in high quality. For (Example: The ruled tables with ruled lines, or other documents including textual content, lines of the table are...
- Page 139 5.2 Troubleshooting Checklist Symptom Check The Item Out Resolution Sheets of paper are not Is the Pick roller dirty? Clean the Pick roller following the instructions fed (stops midway). in section "6.3 Cleaning the Inside of the Scanner" (page 128). Is the Pick roller worn? Replace the Pick roller following the instructions in "7.3 Replacing the Pick Roller"...
- Page 140 (*2): The term "Multi-feed" refers to an error in which two or more sheets are fed into the scanner simul- taneously. * The latest information, which is updated on an as-needed basis, is available at the FAQ corner of our website. Please visit the website at: http://scansnap.fujitsu.com/...
-
Page 141: Daily Care
Chapter 6 Daily Care This chapter describes how to clean ScanSnap. WARNING Fire/Electric Shock Before you clean the scanner, turn off the scanner and disconnect the AC adapter from the power outlet. 6.1 Cleaning Materials ....................126 6.2 Cleaning the Scanner Exterior & Stacker ............127 6.3 Cleaning the Inside of the Scanner .............. -
Page 142: Cleaning Materials
(*1) (*2) Lint-free dry cloth Commercially available. (*3) *1) To purchase cleaning materials, contact the FUJITSU scanner dealer where you purchased the scanner. *2) It may take long before the cleaner vaporizes if a large quantity is used. When cleaning the scanner parts, dampen a cloth with modest quantities of the cleaner. -
Page 143: Cleaning The Scanner Exterior & Stacker
6.2 Cleaning the Scanner Exterior & Stacker Cleaning the Scanner Exterior & Stacker Clean the scanner exterior and the stacker with a cloth moistened with a small amount of Cleaner F1 or any neutral detergent. • Do not use paint thinner or other organic solvents. ATTENTION •... -
Page 144: Cleaning The Inside Of The Scanner
Cleaning the Inside of the Scanner Clean the inside of the scanner with a cloth moistened with Cleaner F1. After the scanner has been in use for a period of time, its inside will be contaminated with paper debris and dust. The accumulation of debris and dust may cause scanning problems. As a guideline, clean the ADF at least every 1,000 scans. - Page 145 6.3 Cleaning the Inside of the Scanner 2. Clean the following locations with a cloth moistened with cleaner F1. Pad ASSY Eject roller Plastic roller Pick roller Feed roller Glass It may take long before the cleaner vaporizes if a large quantity is used. When ATTENTION cleaning the scanner parts, dampen a cloth with modest quantities of the cleaner.
- Page 146 Turn on the scanner before cleaning the following locations, and rotate the rollers to clean them thoroughly. • Feed rollers (x 2) Clean lightly taking care not to scratch the surface of the rollers. Take particular care in cleaning the feed rollers since black debris on the rollers adversely affect the feed performance.
- Page 147 6.3 Cleaning the Inside of the Scanner 3. Close the ADF. Paper chute ⇒ You should hear the ADF click when it returns to its original position. When closing the ADF, make sure that it is completely closed. Otherwise, ATTENTION paper jams or other feeding errors may occur.
-
Page 148: Cleaning The Carrier Sheet
Cleaning the Carrier Sheet If the Carrier Sheet is used extensively, dirt and dust may stick onto the surface or the interior and cause scanning errors. Clean it regularly. <Cleaning method> Use a dry, soft cloth, or a soft cloth slightly moistened with Cleaner F1 or a mild detergent to lightly clean off the dirt and dust from the surface and the interior of the Carrier Sheet. -
Page 149: Replacing Consumables
Chapter 7 Replacing Consumables This chapter describes how to replace consumables. WARNING Fire/Electric Shock Before you replace the consumables, turn off the scanner and disconnect the AC adapter from the power outlet. 7.1 Replacing Consumables ..................134 7.2 Replacing the Pad ASSY ..................136 7.3 Replacing the Pick Roller................... -
Page 150: Replacing Consumables
Replacing Consumables This section describes how to replace consumables. ■ Part Nos. and Replacement Cycles of Consumables The following tables list the part numbers of consumables and their suggested replacement cycles. Suggested Replacement Description Cycle Pad ASSY PA03360-0002 50,000 sheets or one year Pick roller PA03360-0001 100,000 sheets or one year... - Page 151 Replace consumables using "Target value to change supplies" as guidelines. For details about purchasing consumables, visit the website below or contact the Fujitsu scanner dealer where you purchased your scanner. [Website] http://scansnap.fujitsu.com/...
-
Page 152: Replacing The Pad Assy
Replacing the Pad ASSY Replace the Pad ASSY following the procedure below. 1. Remove the documents on the paper chute. 2. Pull the cover open lever to open the ADF. Paper chute Cover open lever 3. Remove the Pad ASSY. Pinch both ends of the Pad ASSY and pull it out as shown below. - Page 153 7.2 Replacing the Pad ASSY 4. Attach the new Pad ASSY. Pad ASSY Make sure that the Pad ASSY is firmly attached. Otherwise, document jams or ATTENTION other feeding errors may occur. 5. Close the ADF. Paper chute ⇒ You should hear the ADF click when it returns to its original position. 6.
- Page 154 7. Click and hold the "ScanSnap Manager" icon on the Dock menu, and select [Check consumable supplies...] from the menu. ⇒ The "Check consumable status" window will appear. 8. In the "Check consumable status" window, click the [Reset] button of the "Pad ASSY Count."...
-
Page 155: Replacing The Pick Roller
7.3 Replacing the Pick Roller Replacing the Pick Roller Replace the Pick roller following the procedure below. 1. Remove the documents on the paper chute. 2. Open the ADF while pulling the cover open lever. Paper chute Cover open lever 3. - Page 156 4. Remove the sheet guide. Pinch the handle and claw together on both sides of the sheet guide to remove it. Handle Claw Sheet guide 5. Rotate the Pick roller bushing (on the left side). Pick roller Pick roller bushing Pick roller shaft...
- Page 157 7.3 Replacing the Pick Roller 6. Remove the Pick roller with its shaft. Slightly pull up the left part of the Pick roller shaft (about 5mm), move it towards the left side, and then raise it to remove from the scanner. Pick roller shaft Pick roller If the area around the Pick roller is contaminated by paper debris, it may cause...
- Page 158 If you push up the pick roller tab using your fingernail, your fingernail may be ATTENTION chipped. If you cannot push it up successfully with your fingernail, you can use a paper clip to push up the pick roller tab. 8.
- Page 159 7.3 Replacing the Pick Roller 10. Rotate the roller bushing (on the left) by rotating it as shown below. Pick roller Pick roller bushing Pick roller shaft 11. Attach the sheet guide to the scanner. Pinch the handles on both sides of the sheet guide and attach it to the scanner. Sheet guide Handle Claw...
- Page 160 12. Close the ADF. Paper chute ⇒ You should hear the ADF click when it returns to its original position. 13. Turn on the scanner. 14. Click and hold the "ScanSnap Manager" icon , and select on the Dock menu [Check consumable supplies] from the menu.
- Page 161 7.3 Replacing the Pick Roller ⇒ A confirmation pop-up screen appears. ⇒ When you click the [Yes] button, the counter is reset to "0." ScanSnap S510M Operator's Guide...
-
Page 162: Purchasing The Carrier Sheet
Purchasing the Carrier Sheet If the "Carrier Sheet" bundled in this product cannot be used for scanning due to damage or wear- and-tear, you can purchase just the Carrier Sheet separately. As a guideline, it is recommended to replace the Carrier Sheet every 500 scans. However, the number of times of use differs according to usage. -
Page 163: Appendix A Installation Specifications
Appendix A Installation Specifications The following table summarizes the installation specifications of ScanSnap. Item Specifications Dimensions Width Depth Height (Note) Minimum 284 mm 157 mm 158 mm 11.18 in. 6.18 in. 6.22 in. Maximum 284 mm 436.7 mm 299.5 mm 11.18 in. -
Page 165: Index
Index Consumables ........134 Continuing/stopping scanning after error AC adapter connector ....... 3 Correcting skewed documents ....66 ADF ............2 Cover open lever ........2 Allow automatic blank page removal ..46 Custom size ..........52 Allow automatic image deskew ....47 Allow automatic image rotation .. - Page 166 Loading Documents ........ 33 Safety Precautions ........x Save tab ..........42 Saving scanned images in multiple files . 76 Scan and Save Settings ......37 Menu ............36 SCAN button ..........3 Scan mixed paper size ......53 Scan2E-mail .......... 101 Normal quality .........
- Page 167 USB connector .......... 3 Weight ............. 30 ScanSnap S510M Operator's Guide...
-
Page 169: Repairs
Repairs Contact the store where you purchased your ScanSnap or an authorized service provider for per- forming repairs on this product. • The user must not perform any repairs on the scanner. ScanSnap S510M Operator's Guide... - Page 171 ScanSnap S510M Operator’s Guide P3PC-1942-01ENZ0 Date of issuance: July, 2007 Issuance responsibility: PFU LIMITED The contents of this manual are subject to change without notice. PFU LIMITED assumes no liability for incidental or consequential damages arising from the use of this manual, and any claims by a third party.