Maytag MES5775BA - 30 in. Slide-In Electric Range Use And Care Manual
Precision touch control 800 electric slide-in smoothtop
Hide thumbs
Also See for MES5775BA - 30 in. Slide-In Electric Range:
- Use and care manual (84 pages) ,
- Installation instructions manual (17 pages)
Table of Contents
Advertisement
Quick Links
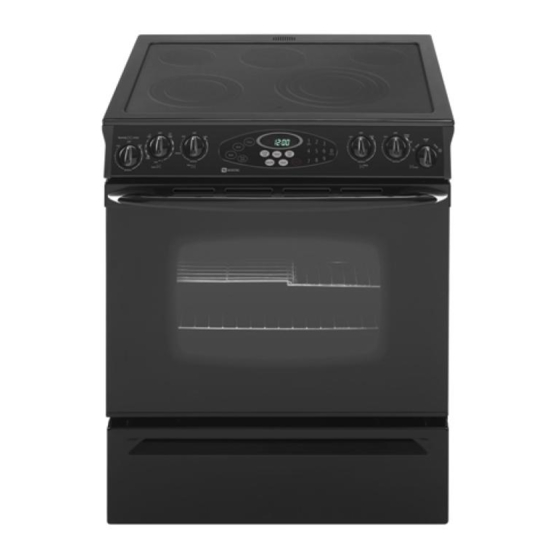
M_ YFAG
Precision Touch Control 800
Electric Slide-In Smoothtop
_+i!_ili_i+
iil iii i ii ! ¸ ¸,¸¸ ,_,_
.....
_
Table of Contents
0
Safety ..........................................
1-3
Surface
Cooking
......................
4-7
Surface Controls
Oven
Cooking
.........................
8-18
Baking
Broiling
ge
: Care
& Cleaning
...................
19-22
Self-Clean Oven
Maintenance
.........................
23-24
_
Troubleshooting
................... 25-26
_
Warranty
& Service ....................
27
Form No. A!0 EV05
Part No. 8113P500-60
©2005 May'tag Appliances Sales Co.
Litho U.S.A.
Advertisement
Table of Contents

Related Manuals for Maytag MES5775BA - 30 in. Slide-In Electric Range


Summary of Contents for Maytag MES5775BA - 30 in. Slide-In Electric Range
-
Page 1: Table Of Contents
Precision Touch Control 800 M_ YFAG Electric Slide-In Smoothtop _+i!_ili_i+ iil iii i ii ! ¸ ¸,¸¸ ,_,_ ..Table of Contents Safety .......... Self-Clean Oven : Care & Cleaning ....19-22 Surface Cooking ...... Cleaning Procedures Surface Controls Maintenance ...... - Page 2 Always disconnect power to appliance before servicing. proof d purchase. Model Number Serial Number Date of Purchase if you have questons oal Maytag Customer Assistance 1-800-688-9900 USA 1-800-688-2002 Canada 1-800-688-2080 _U.S. ] Tg for hearing or speech impaired} (Mon.-Fri., 8 am-8 pm Eastern Thne} Internet: http://www.maytag.com...
-
Page 3: Safety
Child Safety NEVER use aluminum foil to cover an oven rack or oven bottom. Misuse could result in risk of electric shock, fire, or damage to the appliance. Use foil only as directed in this guide. Do not use the cooktop or ovens as a storage area for above an appliance, Chi!dren c!Jmbjng on the appliance food or cooking utensils. - Page 4 recommended i nthisguidecancreate serious safety Clean with caution. Use care to avoid steam burns if a wet hazards, resultin performance p roblems, andreduce the sponge or cloth is used to wipe spills on a hot surface. lifeofthe components o fthe appliance. Some cleaners can produce noxious fumes if applied to a hot surface.
- Page 5 Surface CentreJs settings on the knob are used for these cooking operations. The highest setting is always used to bring water Use to turn on the surface elements. An hfinite choice of to a boil. Some elements offer an even higher speed for heat settings is avaiiabie from Low to High.
- Page 6 O Center Warrnin{_ cooktop. If foil melts, do not use the cooktop. Call an temperatures are approximate and authorized Maytag servicer. are hdicated on the control as Low, High 2-10 and High. However, the control can be set to any position between Low and High.
-
Page 7: Smoothtop Surface
S oothtop Surface Tips to Protect the Smoothtop Surface Su ace Smoothtop Rotes: C_ea_ing (see page 21 for more information} , Cooktop may emit light smoke and odor the first few ° Before first use, clean the cooktop. times the cooktop is used. This is normal °... - Page 8 , Donotusefoilorfoil-type containers. Foil m ay meltonto Secure handles. Cook,warewith loose or broken handles. thegHass. IfmetaH m erits onthecooktop, donotuse. C aHH Heavy handles that tilt the pan. authorized Maytag Servicer. Tight-fitting lids. Loose-fitting lids. Coekware Recommendations Flat bottom wok,s.
- Page 9 Control Panel The controi pand is designed for ease hl programming. The dispiay whdow on the controi shows thee of day, theer and oven functions. Control panel shown includes Convect and other model specific features. (Styling may vary depending on modeL} Bake Use for baking and roasting.
- Page 10 To recall the time of day when another time function is 4. At the end of the set time, one long beep will sound and showing, press the Clock pad. "End" will be displayed. CHocktime cannot be changed when the oven has been 5.
- Page 11 Baking Notes: To set Bake: , To change the even temperature during cooking, press 1, Press the Bake pad. Bake pad, then press the Aateset 0 pad or appropriate ° BAKE will flash. number pads until the desired temperature is displayed. , To change the even temperature during preheat, press °...
- Page 12 3. Press Convect Rake pad again or wait four seconds. , ROAST and the FAN icon will flash , BAKE will stop flashing. , O0:O0will flash in the display. , 1O0 ° or the actuM oven temperature if over 1O0° F will , 000 lights in the display.
-
Page 13: Cook & Hold
Cook & Hold When the cooking time has elapsed: , Four beeps wiHH sound. When ushg the Cook & HoHd option, the oven beghs to heat immediateHyafter the controHhas been set. Then, the oven , HOLD and WARM wiHH Hight. cooks for a specified Hengthof time. -
Page 14: Delay Cook & Hold
Delay Cook & Hold Keep Warm For safely keeping hot foods warm in the oven or for warming breads and plates. To set Keep Warm: Do not use ddayed baking for higMy perishabb foods such 1. Press the Keep Warm pad. as dairy products, pork, poultry, or seafood. - Page 15 4. For optimum browning, preheat broil dement for 3-4 minutes before adding food. 5. Hace food in the oven. Leave oven door open about four inches (the first stop}. UsE CAUTION when cooking with the Broil feature The 6. Turn meat once about haifvvay through cooking. grease from fatty [oods may ignite, If a fire should occur, 7.
-
Page 16: Sabbath Mode
Automatic Shut-Off/ Sabbath Mode Notes: Sabbath Mode , Sabbath Mode can be turned on at any time with or The oven will automatically turn off after 12 hours if you without the oven on. accidentally Heaveit on. This safety feature can be turned off. °... - Page 17 Adjusting the Oven Temperature Oven temperatures are carefully tested for a_-curacyat the The Favorite pad allows you to save the time and temperature from Cook & Hold function. factory. It is normal to notice some baking or browning differences between a new oven and an arid one. As ovens To set a Favorite cycle, a Cook &...
-
Page 18: Oven Racks
Oven Fans Oven Racks A convection fan (sdect moddsl) is used to circuHatehot air in the oven when the convection feature is sdected. A cooling fan will automatically turn on during aHbroiHing *Do nat attempt to change the rack position When the oven and some baking operations. - Page 19 RACK 1: Use for roasting iarge cuts of meat and pouitry, Create-A-Space TMHalf Rack some frozen pies, Angei Food cake or for two-rack baking and three-rack convection baking (sebct mode,is}. Select range models are /_ Models with an exposed bake element: 9 x 13 cakes, half rack.
- Page 20 Self-Cmean Oven To set Self-Clean: I Note: Oven temperature must be below 400° F to program a clean cycle. o [t is normal for parts of the range to become hot during a 1. Close the oven door. _f t'l_r_ o To prevent damage 1o oven door.
- Page 21 5. Press the Aatoset 0 pad to scroll through the After Serf-Cleaning seg-deaning settings. About one hour after the end of the seg-dean cycle, LOCK will turn off. The door can then be opened. HVy (Heavy Soft, 4 hours:) Auloset Some soil may leave a light gray, powdery ash.
-
Page 22: Cleaning Procedures
Cleaning Procedures o Be sure appliance is off and all parts are cool before handling or cleaniUgo This is to avoid damage and PasS!hie burnS. * Brand names are registered trademarks of the o To prevent staining 0r discoloration, c!ean appliance after each use, respective manufacturers. - Page 23 Oven Window , Avoid using excessive amounts of water which may seep under or behind gHasscausing staining. and Door - Glass , Wash with soap and water. Rinse with dear water and dry'. GHass cHeanercan be used if sprayed on a cHoth first.
-
Page 24: Oven Window
Oven Door Oven Window To protect the oven door window: , Do not pbce excessive weight on or stand on an open 1. Do not use abrasive cleaning agents such as steel wool oven door. This could cause the range to tip over break scouring pads or powdered cleansers as they may scratch the glass. - Page 25 Leve ing Legs Storage [}rawer (select models_) Be sure the anti-tip bracket secures one of the rear materials in this drawer. The drawer may become too warm !evei!ng Regs to the flOer. Thi s bracket prevents the range for these items when the oven is in use. from accidentally tipping.
- Page 26 PROBLEM For most concerns, try these first. , Check if oven controHshave been properHyset. , Check to be sure pHugis securdy inserted into receptacle. , Check or re-set circuit breaker. Check or repHacefuse. ° Check power suppHy. Part or all of appliance does not °...
- Page 27 Tiny scratches or abrasions. Smoothtop surface shows wear. - Make sure cooktop and pan bottom are clean. Do not slide glass or metal pans across top. Make sure pan bottom is not rough. Use the recommended cleaning agents. See page 21. Metal marks.
- Page 28 Name and address of your deaier and date appliance was purchased. d.A clear description of the problem you are having. e. Proof of purchase. Use and Care guides, service manuals and parts information are available from Maytag ServicessM,Maytag Customer Assistance.