Table of Contents
Advertisement
Advertisement
Table of Contents

Related Manuals for Echo PB-403


Summary of Contents for Echo PB-403
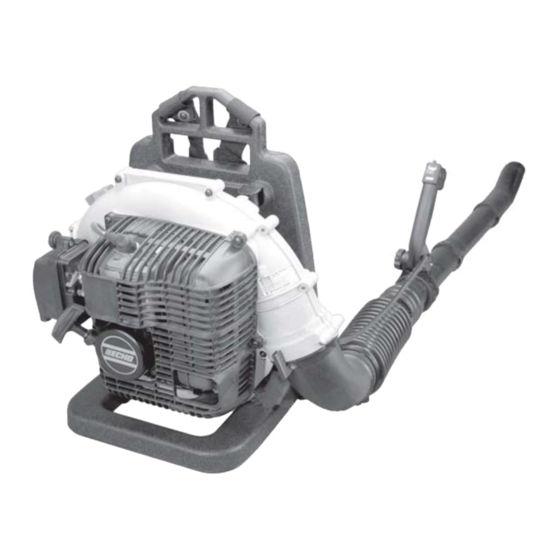
- Page 1 Power Blower Operator's Manual MODELS: Read rules for safe operation and all instructions carefully. ECHO provides this Operator's Manual which must be read and understood for proper and safe operation. X7501126900 PB-650 Serial Number 04001001 - 04002000 WARNING DANGER X750003020...
- Page 3 If a decal cannot be read, a new one can be ordered from your ECHO dealer. See PARTS ORDERING instructions for specific information. GENERAL WARNING DECAL (located on top of blower housing)
-
Page 4: International Symbols
PERSONAL CONDITION AND SAFETY EQUIPMENT Power Blower users risk injury to themselves and others if the power blower is used improperly and or safety precautions are not followed. Proper clothing and safety gear must be worn when operating a blower. - Page 5 • Limit the hours of operation. Try to fill each day with jobs where operating the blower or other hand-held power equipment is not required. • If you experience discomfort, redness and swelling of the fingers followed by whitening and loss of feeling, consult your physician before further exposing yourself to cold and vibration.
-
Page 6: Safe Operation
Operator's Manual and instructions for safe operation. • Do not point blower at people or animals. • Start unit on ground with throttle at idle. Check that blower pipe is not blocked by the ground or by any objects. WARNING Do not operate this product indoors or in inad- equately ventilated areas. - Page 7 1 - Straight Pipe 1 - Straight Pipe 1 - Operator's Manual 1 - Warranty Registration Card 1 - ECHO Emissions and Warranty Statement 1 - Plastic Bag 2 - Clamps w/screws 1 - Stick Handle 1 - Bolt 6x45...
-
Page 8: Specifications
When the lever is moved all the way forward the blower is at Wide Open Throttle (W.O.T.). When the lever is moved rearward to detent, the blower is at idle. When the lever is moved rearward past the idle detent the blower will stop. - Page 9 INSTALL BLOWER PIPES 1. Assemble straight pipe with swivel (A) into flexible pipe (B). 2. Assemble flexible pipe (B) to elbow (D) on blower. 3. Assemble clamps (C) onto both ends of flexible pipe (B) and tighten.
-
Page 10: Handling Fuel
Engine problems due to inadequate lubrication caused by failure to use an ISO-L-EGD and J.A.S.O. FC certified oil, such as Echo Premium 50:1 Two-stroke Oil, will void the two-stroke engine warranty. (Emission related parts only are covered for two years, regardless of two-stroke oil used, per the statement listed in the California Emission Defect Warranty Explanation.) -
Page 11: Starting Cold Engine
PERATION • Recoil starter: Use short pulls - only 1/2-2/3 of rope length for starting. Do not allow the rope to snap back in. Always hold the unit firmly. • Rotate spring loaded throttle handle downward to a comfortable operating position. STARTING COLD ENGINE 1. -
Page 12: Stopping Engine
2. Move throttle lever (A) to "O" (Stop) position. WARNING If engine does not stop when stop switch is moved to STOP position, close choke - COLD START position - to stall engine. Have your ECHO dealer repair stop switch before using blower again. OPERATING BLOWER WARNING... -
Page 13: Skill Level
ECHO Service Dealer for maintenance. To help you decide whether you want to DO-IT-YOURSELF or have the ECHO Dealer do it, each maintenance task has been graded. If task is not listed, see your ECHO Dealer for repairs. -
Page 14: Air Filter
AIR FILTER Level 1. Tools required: 25 - 50mm (1 - 2 in.) medium bristle paint brush. Parts required: Air Filter P/N A226000031 NOTE Clean daily. 1. Close choke (Cold Start Position). This prevents dirt from entering the carburetor throat when the air filter is removed. Brush accumulated dirt from the air cleaner area. -
Page 15: Spark Plug
Cleaning Grill 1. Remove accumulated debris from intake grill between backpack frame and blower housing. Cleaning Cylinder Fins 1. Remove engine cover (four screws), pull cover away from engine. Clean cylinder fins (A) to allow cooling air to pass freely. -
Page 16: Exhaust System
The cylinder exhaust port must be inspected and cleaned of excess carbon every 3 months or 90 hours of operation in order to maintain this engine within the emissions durability period. ECHO strongly recommends that you return your unit to your ECHO dealer for this important maintenance service. DANGER... - Page 17 High Altitude Adjustment High altitude adjustment is not required for proper operation of this engine. Level 2. Tools required: Screwdriver, tachometer (Echo P/N 99051130017) Parts required: none. NOTE Do not adjust carburetor unless necessary. If you have difficultly, see your ECHO dealer.
- Page 18 Blower Pipe clogged, loose or damaged WARNING DANGER Remedy Clean Clean See your ECHO dealer See your ECHO dealer Open choke Clean/replace air filter Adjust carburetor See your ECHO dealer Turn switch on See your ECHO dealer See your ECHO dealer Adjust 0.65mm (0.026in.)
- Page 19 7. Remove the spark plug and pour 7cc (1/4 oz., 1/2 tablespoon) of fresh, clean ECHO 2-stroke engine oil into the cylinder through the spark plug hole. A. Place a clean cloth over the spark plug hole.
-
Page 20: Echo Consumer Product Support
• Purchasing from your Echo Dealer. • Sending a check or money order for $2.00 per Parts Catalog or $1.50 per Operator's Manual made payable to ECHO, INCORPORATED. State on a sheet of paper the model number and serial number of the ECHO unit you have, part number of the manual (if known), your name and address and mail to address above. - Page 21 Assemble clamps (A) onto both ends of flexible pipe (B). Assemble straight pipe with swivel (C) into flexible pipe (B). Assemble flexible pipe (B) to elbow (D) on blower. Tighten clamps (A). Loosen wing nut (E) completely and expand open, stick handle clamp (F).
- Page 22 If you require assistance or have questions concerning the application, operation or maintenance of this product you may call the ECHO Consumer Product Support Department at 1-800-673-1558 from 8:30 am to 4:30 pm (Central Standard Time) Monday through Friday. Before calling, please know the model and serial number of your unit to help your Consumer Product Support Representative.
- Page 23 SUPPLEMENT TO OPERATOR'S MANUALS FOR MODELS AND PART NUMBERS: PB-403 U.S. X750002401( X7501126101) PB-403 Can X750002670( X7501126700) PB-413 U.S. X750002331( X7501126201) PB-603 U.S. X750002230( X7501125300) Please note this change: The clamps provided with these models for flex pipe assembly have changed from plastic to steel for im- proved attachment strength.