
Related Manuals for Panasonic KX-P1131E


Summary of Contents for Panasonic KX-P1131E
-
Page 1: Operating Instructions
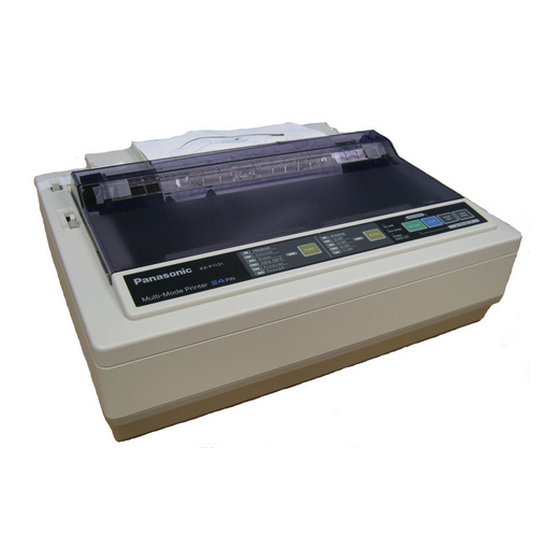
Operating Instructions Impact Dot Matrix Printer KX-P1131E Model No. Please carefully read this manual, and keep this documentation in a safe place for future reference. -
Page 2: Feature Highlights
Introduction Introduction Thank you for purchasing the Panasonic KX-P1131E Impact Dot Matrix Printer. This printer is a versatile, high quality 24-pin dot matrix printer which is designed to meet the needs of your office. This printer has been factory set to operate with the most popular software packages. Your application software should control the printer’s functions. - Page 3 • All other trademarks identified herein are the property of their respective owners. International ENERGY STAR Program As an ENERGY STAR ® Partner, Panasonic has determined that this product meets the ENERGY STAR guidelines for energy efficiency. Operating Instructions...
- Page 4 FCC Declaration of Conformity Trade Name: Panasonic Model Number: KX-P1131E Responsible Party: Panasonic Corporation of North America One Panasonic Way Secaucus, NJ 07094 U.S.A. Telephone No.: 1-800-726-2797 This device complies with Part 15 of the FCC Rules. Operation is subject to the following two conditions: (1) This device may not cause harmful interference, and (2) this device must accept any interference received, including interference that may cause undesired operation.
-
Page 5: Table Of Contents
Table of Contents Table of Contents Safety Information ..................7 For Your Safety .........................7 Precautions ........................10 Before You Start ..................11 Unpacking ........................11 Removing the Protective Paper ..................11 Installing the Platen Knob ....................11 Parts of the Printer ......................12 Setup .......................15 Installing the Software ....................15 System Requirements ....................15 Software Installation .......................15 Connecting to a Computer .....................16... - Page 6 Table of Contents Appendix ....................41 Printer Specifications .....................41 Paper Specifications .......................43 Fanfold Paper .........................43 Single Sheets .........................43 Envelopes ........................43 Printing Area ........................44 Supplies ...........................46 Index......................47 Operating Instructions...
-
Page 7: Safety Information
Safety Information Safety Information For Users For Your Safety To prevent severe injury and loss of life, read this WARNING section carefully before using the unit to ensure proper and safe operation of your unit. • This section explains the graphic symbols used in Power and Ground Connection this manual. - Page 8 Safety Information Operating Safeguards Plug the power cord firmly into an AC outlet. Otherwise, it can cause fire or If metal fragments or water gets into the electric shock. unit, turn the unit off and unplug the unit immediately. Contact your dealer for service.
- Page 9 Safety Information Operating Safeguards CAUTION If the unit falls down or gets damaged, turn the unit off, and unplug the power cord. Otherwise, it may cause fire or electric shock. Power When the unit is not used over an Do not place any liquids or heavy items extended period of time, switch it off, and on the unit.
-
Page 10: Precautions
Do not place the unit in direct sunlight and near hot Material Safety Data Sheet (MSDS). equipment. Please ask your Panasonic sales company about • The unit should not be exposed to extremely high obtaining the Material Safety Data Sheet. -
Page 11: Before You Start
Having unpacked the printer, make sure none of the contents shown below is missing or damaged. Report damage or shortages to the store from which the unit was purchased. Printer (KX-P1131E) A Protective paper Ribbon Cassette Installing the Platen Knob Insert the platen knob into the hole on the right side of the printer and rotate it slowly until it slips onto the shaft. -
Page 12: Parts Of The Printer
Before You Start Parts of the Printer Front View HEAD GAP Paper support (Page 21) Top cover Paper feed selector • " " (Friction) Single sheets and envelopes • " " (Tractor) Fanfold paper Head gap lever Adjusts the gap between the platen and the printhead. Position Used for 1 or 2... - Page 13 Before You Start Rear View Tractors Power switch (Page 17) Platen knob (Page 11) Power cord (Page 17) Serial No. Label Nameplate Operating Instructions...
-
Page 14: Control Panel
Before You Start Control Panel FONT indicators LF/FF switch These indicators show the Font being selected. Pressing this switch advances the paper one (Page 28) line at a time. Holding this switch advances the paper to the first print line of the next page. (Page 29) FONT switch TEAR OFF switch... -
Page 15: Setup
Setup Setup Installing the Software Select KX-P1131E (except for customers in Thailand). • For customers in Thailand, select KX-P1131E (Thailand). System Requirements Computer IBM PC/AT or compatible machine ® with a CD-ROM drive Operating Windows 2000 / Windows XP /... -
Page 16: Connecting To A Computer
Setup Connecting to a Notice • Computer Use a shielded parallel cable 1.95 m (6 ft. 5 in.) or less in length. An IEEE 1284-compatible parallel cable is Before you connect the printer for the first time, recommended. install the USB and Printer driver on to your computer. -
Page 17: Power Supply
Setup Power Supply Connect the power cord to a grounded AC outlet. • Plug the power cord into an outlet of the proper rating listed on the nameplate located in the rear of the printer. • The power switch is located on the right side of the printer toward the front. -
Page 18: Installing The Ribbon Cassette
Setup Installing the Ribbon Install the ribbon cassette (B) and push down 4 arrows (A) until they click into place. Cassette Mounting the Ribbon Cassette A Turn the power on. B Open the smoked plastic cover (A). Note • Do not take off the blue ribbon guide from the ribbon cassette. - Page 19 Setup A Lift the blue ribbon guide (A) from the ribbon Close the smoked plastic cover. cassette. Adjust the head gap lever for the thickness of paper you are using. B Slide the blue ribbon guide between the printhead nose (B) and the ribbon mask (C), Position Used for and push it down.
-
Page 20: Handling Paper
Setup Handling Paper Set the paper feed selector (A) to the " " position. Your Panasonic printer offers two paper feed choices: – Fanfold paper (Push tractor mode) – Single sheets and envelopes (Friction mode) Fanfold Paper (Push Tractor Mode) A Turn the power on. - Page 21 Setup Raise the tractor covers (A). Press LOAD/PARK This will load the paper to the first print line. Raise the top cover (A). This is done by inserting the side pins of the top cover into the slots in the upper cabinet. Place the paper with the printed side face down and align the paper sprocket holes (B) with the tractor pins (C), then close the tractor cover...
-
Page 22: Single Sheets And Envelopes (Friction Mode)
Setup Single Sheets and Envelopes Insert the paper support into the slot of the extension plate (A) until it stops. (Friction Mode) A Turn the power on. The PAPER OUT indicator will flash indicating that no paper is installed in the printer. B Adjust the head gap lever for the thickness of paper you are using. - Page 23 Setup Raise the top cover (A). A Separate the paper guides to the approximate This is done by inserting the side pins of the top width of your paper or envelope. cover into the slots in the upper cabinet. Note •...
-
Page 24: Tearing Off Paper
Setup Tearing off Paper Self Test With fanfold paper installed, this function allows you to The printer has a self test feature which allows you to advance your paper to the tear position. After tearing off test the printer. When activated, this feature will print 5 the page you can return your paper to the first printer lines of each resident font. -
Page 25: Using The Software
Scalable Page length To start the Control Panel Software program, from 11 in., 12 in., 14 in., 11 in., [Start], select [All programs] ® [Panasonic] ® 8 in., 8 in., 5 in., Free [Panasonic KX-P1131E] ® [Control Panel Software]. Top margin 0–450 (... - Page 26 Using the Software Print mode Install Graphic direction A.G.M. (Alternate Graphic Mode) (IBM only) Bi Direction, Uni Direction On, Off Text direction Auto CR (IBM only) Bi Direction, Uni Direction On (LF, VT, ESC+"J" +CR) Off (LF, VT, ESC+"J" only) Text Enhancement Bold Auto LF...
-
Page 27: Viewing The Command Reference Manual
In Control Panel, open [Add or Remove Programs]. • In Windows 2000, select [Add/Remove Programs], and in Windows Vista and Windows 7, select [Uninstall a program]. Select [Panasonic KX-P1131 Series] to uninstall. Follow the instructions on the screen. Operating Instructions... -
Page 28: Using The Control Panel
Using the Control Panel Using the Control Panel Using the Control Panel Selecting a Character Pitch This printer contains resident pitches which are accessible through the Control Panel. You can select Selecting a Character Font any one of the character pitches by pressing the PITCH switch on the Control Panel. -
Page 29: High Speed Mode
Using the Control Panel High Speed Mode Line Feed/Form Feed (LF/FF Switch) The High Speed mode is a feature for doubling the print speed only when LQ Font and one of the 120 dpi, You can adjust the paper position by using the front 180 dpi or 360 dpi of 24-pin bit image are selected. -
Page 30: Top Of Form Function (Tof Set)
Using the Control Panel Top of Form Function (TOF SET) Reverse Micro Line Feed: While pressing , press ON LINE This printer has a Top of Form (TOF) function which stores the first print line position and loads the paper to LOAD/PARK the designated position automatically. -
Page 31: Paper Parking (Load/Park Switch)
Using the Control Panel Paper Parking (LOAD/PARK Move the paper feed selector to " " (Tractor Mode). Switch) This function moves the fanfold paper to the park position, enabling you to use single sheets or envelopes without removing or wasting your fanfold paper. Tear off the printed page(s) of the fanfold paper being used (Page 24). -
Page 32: Paper Out Detector
Using the Control Panel Paper Out Detector Your printer has a paper out detector. When an out of paper condition occurs, printing stops, the printer goes to the OFF LINE mode, and the POWER/PAPER OUT indicator starts blinking. To continue printing to the end of the current page, follow the steps below. -
Page 33: Initial Setup Mode
Using the Control Panel Initial Setup Mode Press to set the item’s status. PITCH The item’s status will change each time you press The 18 features (items) can be set in the Initial Setup (Page 34). To change additional PITCH mode through the Control Panel. -
Page 34: Control Panel
Using the Control Panel Control Panel A FONT indicators: B PITCH indicators: C ON LINE indicator: Press Press Press FONT PITCH ON LINE Item Setting Emulation EPSON — — — — G.direction — — — — Tear off Manual Auto —... - Page 35 Using the Control Panel Item Setting A.G.M. — — — — (IBM only) Auto CR — — — — (IBM only) Auto load — — — — Paper out — — — — detect Auto Online — — — — Buffer 22 KB 8 KB...
-
Page 36: Serial Interface Setup Mode
Using the Control Panel Serial Interface Setup Mode The following items can be set in the Interface Setup mode through the Control Panel: Data length, Baud rate, Parity, Protocol and Signal polarity. You can select and change the desired item according to the status of the FONT/PITCH indicators. Load a sheet of paper (Page 20), and turn the power off. -
Page 37: Resetting All Current Settings To The Factory Settings
Using the Control Panel Resetting All Current Settings Printing Out the Current to the Factory Settings Settings Follow the instructions below: Follow the instructions below to get a print out of the current settings. Turn the power on while pressing the Load a sheet of paper, and turn the power off. -
Page 38: Maintenance & Troubleshooting
The printhead may be hot, use caution when the cover is open. – The platen should be cleaned with denatured alcohol only. – The carriage guide bar can be lubricated with a very light oil. Contact your Authorized Panasonic Service Center for advice on lubrication. Ribbon Cassette Note •... -
Page 39: Troubleshooting
The following table will assist the user in identifying and correcting some of the more common problems. If you need additional help, contact the store from which the unit was purchased or the Panasonic technical support number found in Page 4. - Page 40 Maintenance & Troubleshooting Symptom Possible Cause Probable Solution Fanfold paper is jamming. Paper is not installed correctly in Set paper feed selector to " " and tractor. rotate platen knob to remove jammed paper. Reinstall paper correctly into tractor. (Page 20) Printout is double-spaced.
-
Page 41: Appendix
Appendix Printer Specifications Power requirements: Frequency: Refer to the nameplate located on the rear of the printer. Current: Interface: USB 2.0 Full speed, Centronics parallel (IEEE1284 standard), RS-232C Serial interface Print fonts: 3 Draft (Pica, Elite, Micron) 7 Letter Quality (Courier, Bold PS, Prestige, Script, Sans Serif, Roman, OCR-B) 6 Scalable Fonts (Courier, Bold PS, Prestige, Script, Sans Serif, Roman) - Page 42 Appendix Paper Feed: Push Tractor feed (with fanfold paper) Friction feed (with single sheets or envelopes) Operating environment: Temperature: 10 °C–35 °C (50 °F–95 °F) Humidity: 30–80 % RH (Please allow the printer to stabilize at room temperature within the operating temperature range before operation.) Power consumption: Max: 180 W Ready: 3 W...
-
Page 43: Paper Specifications
Appendix Paper Specifications Paper which may be used with this unit must be within the specifications provided below. Fanfold Paper Width: 102–254 mm (4–10 in.) Quality and number of sheets: Weight Type of paper Sheets in lbs in g/m² Fine-quality paper 16–24 60–90 Non-carbon... -
Page 44: Printing Area
Appendix Printing Area Fanfold Paper 1st character Printing area Paper perforations Printing area Fanfold Paper 25.4 mm (1 in.) 17.8 mm (0.7 in.) 2 mm (0.08 in.) 15 mm (0.6 in.) The area near the paper perforations where the print quality may not be optimum. The minimum distance between the sprockets and first printable character. - Page 45 Appendix Single Sheets and Envelopes 1st character Printing area Single Sheets and Envelopes 3 mm (0.12 in.) 2 mm (0.08 in.) 15 mm (0.6 in.) The minimum distance between the edge of the paper and first printable character. (When the left paper guide is set to the 0 position and the margin is set to 0.) The area from the top edge of the paper to the top of the first printed character.
-
Page 46: Supplies
Appendix Supplies Model Number Description KX-P180 (USA and Canada) Ribbon Cassette (black) KX-P181 (Outside USA and Canada) Note • To purchase Ribbon Cassette, please contact your dealer. Operating Instructions... -
Page 47: Index
Index Index Head gap lever Head service life HIGH SPEED indicator High Speed mode Alternate Graphic Mode (A.G.M.) 26, 35 Auto CR 26, 35 Auto LF 26, 34, 40 Auto load 26, 35 Initial Setup mode Auto Online 26, 35 Interface 26, 41 Italic... - Page 48 Index Precautions Prestige Print Font Printer driver Printing Area Printing direction Printing Speed 2, 41 Proportional Spacing (P.S) Reverse micro line feed Ribbon cassette 11, 18, 38 Self Test Serial interface Serial interface cable Serial interface connector 12, 16 Serial Interface Setup mode Single sheet 22, 43, 45 Smoked plastic cover...
- Page 49 Web Site: http://www.panasonic.net/ PJQXC0334ZA KK0210KU0 © Panasonic System Networks Co., Ltd. 2010...