Table of Contents
Advertisement
Advertisement
Table of Contents

Related Manuals for Acer Aspire Z5771


Summary of Contents for Acer Aspire Z5771
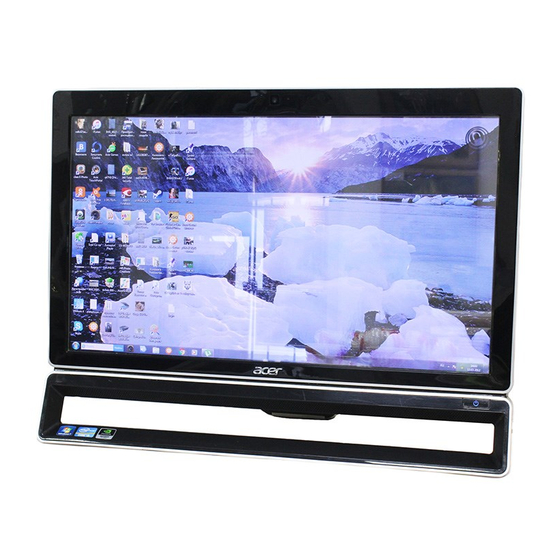
- Page 1 Acer AZ5770/AZ5771 SERVICEGUIDE...
-
Page 3: Table Of Contents
CHAPTER 1 Hardware Specifications Features ..........1-3 Quick Specification. - Page 4 Removing the TV Tuner ......3-27 Removing the WLAN ....... .3-28 Removing the Touch Pad control board .
- Page 5 Troubleshooting Introduction ......... 4-3 Hardware Diagnostic Procedure .
- Page 6 ii-vi...
-
Page 7: Hardware Specifications
CHAPTER Hardware Specifications... - Page 8 Features ..........1-3 Quick Specification.
-
Page 9: Features
Hardware Specifications and Configurations Features NOTE: NOTE: The features listed in this section is for your reference only. The exact configuration of the system depends on the model purchased. Quick Specification Operating system Genuine Windows 7 Home Premium 64-bit Processor Intel Core i7 3770S QC 3.1G 8M 65W Intel Core i5 3330S QC 2.8G 6M 65W Intel Core i5-2400S 2.5G 6M 65W... -
Page 10: Optical Media Drive
16:9 aspect ratio Touchscreen (AZ5771) Integrated Windows 7 compliant multi-touch capable optical solution Audio Creative THX TruStudio PC, featuring TruStudio Surround, TruStudio Crystalizer, TruStudio Speaker, TruStudio Dialog Plus, TruStudio Smart Volume High-definition audio Built-in microphone Integrated 2.5 W stereo speaker system Storage Serial ATA hard disk up to 2 TB Optical media drive... - Page 11 MultiMediaCard (MMC) SD Card SDHC Card Memory Stick Memory Stick PRO Duo Memory Stick PRO-HG Duo I/O ports Side Two USB 3.0 ports Multi-in-1 card reader Headphone and microphone line-out jack Back Four USB 2.0 ports ...
-
Page 12: System Compliance
Adobe Reader X NOOK for PC KOBO Office 2010 Silverlight Windows 7 Touch Pack(Touch) Windows Live Essentials 2011 NY Times Reader Norton Online Backup MyWinLocker Suite v4 McAfee Family Protection Shortcut McAfee Internet Security Suite WW McAfee Virus Definitions Acer Identity Card Acer Registration Acer Updater Acer eRecovery Management... -
Page 13: Chassis Specification
Chassis Specification Number of 5.25” Drive Bay Number of 3.5” Drive Bay Number of Total Add-in Slot 3 slots Control and Indicator 1 dual color LED for Power LED (S0(Blue, not blink), S3(amber, not blink) , S4(off), ... - Page 14 Power Supply Electrical Design Feature 135W/180W in stable mode (Acer Assign System Power Unit) EPS 2.0 (The maximum no-load power consumption for EPS 2.0 is 0.5W or less for adapters with an output power of 50W to 250W) Input:100~240V~2.4A 50~60HZ ...
- Page 15 Frequency 5 ~ 500 Hz 5Hz @ 0.0001 g^2/Hz to 20Hz @ 0.01 g^2/Hz (slope up) 20Hz to 500 Hz @ 0.01g^2/Hz(flat) Acceleration 2.20 g RMS Test Axis: 3 axes Test Time: 10 minutes (per axis; total 3 axes) ...
-
Page 16: Motherboard Specification
Motherboard Specification RoHS Should be compliant with RoHS Should be compliant with EuP Lot6 Size 190*230mm Certification Microsoft MDA 2010 compliant HDMI 1.4a Certificate fee paid by MB vendor Brand Logo "Acer Inc" logo Printed on the PCB ... - Page 17 Socket Quantity: 2 DIMMs Channel A: 1 slot; Channel B: 1 slot Dual channel support Speed support:1333MHz Capacity support: SO-DDR III un-buffered non-ECC DIMM support 1GB to 8GB max. Memory support Design Criteria: ...
-
Page 18: Ieee 1394
Side 2 jacks follow HD audio definition. Audio jacks’ color both are black. Add HD de-pop CKT (the attachment is the reference, please propose your solution) S/N ratio: 90 dB at rear output jack Follow Acer Audio Spec v5.2 and Audio C/R should support Acer Internal speaker ... -
Page 19: Hardware Monitor
TPM Module None Hardware Monitor Controller: Super I/O ITE 8772E Monitor Functions: Temperature: CPU/System Monitor System Ambient Temp Monitor CPU Temp H61 PCH bridge temperature Fan Speed: Monitor CPU fan speed ... - Page 20 4 USB 2.0 ports 1 RJ45 LAN port 1 DC power jack Side I/O connectors 1 MS/SD/MMC card reader connector 1 B-Cas card reader connector (BOM option; for Japan SKU only) 2 audio jacks (MIC/Headphone) ...
-
Page 21: System Tour
System Tour Table 1-1. Front View Icon Item Description IR Port Port to receive IR signal Webcam Web camera for video communication Speaker Deliver stereo audio output Power button Turns the computer on and off. 1-15 Hardware Specifications and Configurations... - Page 22 Table 1-2. Left View Icon Item Description 3 in 1 Card Reader Accepts Secure Digital (SD), MultiMediaCard (MMC), Memory Stick (MS) USB 3.0 ports Connects to USB 3.0 devices (e.g., USB mouse, USB camera). Note: The USB 3.0 port near to 3 in 1 Card Reader slot supports USB charge.
- Page 23 Table 1-3. Right View Icon Item Description Optical drive Internal optical drive; accepts CDs or DVDs. LCD signal source Switch the LCD signal source selection from MB selection switch or HDMI in port. 1-17 Hardware Specifications and Configurations...
- Page 24 Table 1-4. Rear View Icon Item Description Coaxial connector Connects to a TV SPDIF connector Connects to SPDIF USB 2.0 ports Connects to USB 2.0 devices (e.g., USB mouse, USB camera). USB 2.0 ports Connects to USB 2.0 devices (e.g., USB mouse, USB camera).
- Page 25 Table 1-4. Rear View Icon Item Description DC-In Jack Connects to AC adapter. Vesa mount hole Can hang the computer on the wall by fixing the vesa mount 1-19 Hardware Specifications and Configurations...
-
Page 26: M/B Placement
M/B Placement 1-20 Hardware Specifications and Configurations... -
Page 27: Jumper Setting
Table 1-5. Label Description Label Description CPU socket LGA115 socket CPU DIMM DDRIII DIMM slot PCIE x16 PCIE x16 slot Camera Camera module connector LCD connector DVI in connector converter converter connector 3D scalar 3D scalar connector Key Pad Key Pad connector CPU fan CPU fan connector SATA PWR... - Page 28 Internal header pin definition 1-22 Hardware Specifications and Configurations...
-
Page 29: Block Diagram
Block Diagram 1-23 Hardware Specifications and Configurations... - Page 30 1-24 Hardware Specifications and Configurations...
-
Page 31: System Utilities
CHAPTER System Utilities... - Page 32 CMOS Setup Utility ........2-3 Entering CMOS setup ....... .2-4 Navigating Through the Setup Utility.
-
Page 33: Cmos Setup Utility
System Utilities CMOS Setup Utility CMOS setup is a hard ware configuration program built into the system ROM, called the complementary metal- oxide semiconductor (CMOS) Setup Utility. Since most systems are already properly configured and optimized, there is no need to run this utility. You will need to run this utility under the following condition. -
Page 34: Entering Cmos Setup
Entering CMOS setup 1.Turn on the server and the monitor. If the server is already turned on, close all open applications, then restart the server. 2.During POST, press Delete. If you fail to press Delete before POST is completed, you will need to restart the server. The Setup Main menu will be displayed showing the Setup’s menu bar. -
Page 35: Bios Setup Utility
BIOS Setup Utility Main Table 2-1. Description Parameter System BIOS Version and Build Date of BIOS installed on the system. Processor Intel series, Core Frequency and Count of CPU installed on the system. Memory Total size of system memory installed on the system. Product Name Product name of the system. - Page 36 Advanced Advanced -> Miscellaneous Table 2-2. Parameter Description Options SATA Port (AHCI Port) 0 SATA Port (AHCI Port) 0 information. SATA Port (AHCI Port) 1 SATA Port (AHCI Port) 1 information. System Utilities...
- Page 37 Table 2-2. Parameter Description Options SATA Port (AHCI Port) 2 SATA Port (AHCI Port) 2 information. Bootup Num-Lock Selects power on state for Num Lock. Off/On USB Beep Message Enables or disables BIOS to display Disabled/Enabled error beeps or messages during USB device enumeration.
- Page 38 Table 2-3. Parameter Description Options DVMT Memory Size Select DVMT Mode Memory size used 128MB/256MB/Ma by Internal Graphics Device. ximum Advanced -> Integrated Peripherals Table 2-4. Parameter Description Options Onboard SATA Controller Onboard SATA Controller. Disabled/Enabled Onboard SATA Mode Onboard SATA Mode. [Native IDE] IDE Native IDE/AHCI mode.
- Page 39 Table 2-4. Parameter Description Options Onboard Audio Controller Enabled/Disabled Onboard Audio Disabled/Enabled Controller. Onboard LAN Controller Enabled/Disabled Onboard LAN Disabled/Enabled Controller. Onboard LAN Option ROM Enabled/Disabled Onboard LAN Option Disabled/Enabled ROM. Advanced -> PC Health Status Table 2-5. Parameter Description Options CPU Temperature (DTS) Information only.
- Page 40 Table 2-5. Parameter Description Options Smart Fan Enabled/Disabled Smart Fan. Disabled/Enabled Power Table 2-6. Parameter Description Options ACPI Suspend Mode Default set as [S3(STR)] S3 (STR) Deep Power Off Mode Enabled/Disabled Deep Power Off Disabled/Enabled Mode. Power On by RTC Alarm Enabled/Disabled RTC Wake up Disabled/Enabled Support.
- Page 41 Security Table 2-7. Parameter Description Options Supervisor Password: Information only. Installed/Installed User Password: Information only. Installed/Installed Change Supervisor Password Valid Keys: [Press Enter] (1)a-z (A-Z) non case sensitive. (2)0, 1-9 (3)11 special keys: ‘- = [] \ ; ‘ , . / (4)Key pad: 0-9 support and */-+.
-
Page 42: Boot Options
Table 2-7. Parameter Description Options Boot Sector Virus Protection Enabled/Disabled Boot Sector Virus Disabled/Enabled Protection. Display this item if onboard SATA mode is IDE mode. Hide this item if onboard SATA mode is AHCI mode. Boot Options Table 2-8. Parameter Description Options Boot Priority Order... - Page 43 Table 2-8. Parameter Description Options 4th Boot Device Default set as [Removable Device]. EFI Device/Hard Disk/CD&DVD/Removable Device/LAN 5th Boot Device Default set as [LAN]. EFI Device/Hard Disk/CD&DVD/Removable Device/LAN EFI Device Priority Specifies the Boot Device Priority [Press Enter] sequence from EFI Boot Devices. Hard Disk Drive Specifies the Boot Device Priority [Press Enter]...
- Page 44 Exit Table 2-9. Parameter Description Save & Exit Setup Exit system setup after saving the changes Discard Changes and Exit Setup Exit system setup without saving any changes. Save Changes Save Changes done so far to any of the setup options. Discard Changes Discard Changes done so far to any of the setup options.
-
Page 45: Ami Uefi Bios Flash Sop For Dos
AMI UEFI BIOS Flash SOP for DOS Flash UEFI BIOS SOP for DOS, 1. Please make a DOS bootable device. 2. Copy BIOS folder (ex: aParis-H61_D01 folder) into DOS bootable device. 3. Boot to DOS mode and enter the BIOS folder. 4. - Page 46 NOTE: NOTE: The AFUEFI tool version is by case. NOTE: NOTE: The command is by case. 2) After finishing flashing BIOS, please don’t execute any programs and reboot the system directly. 3) When system reboot, please press “Del” to enter BIOS Setup. 4) In Exit page, select “Load Default Settings”...
- Page 47 5) Select “Yes” and press “Enter” key. 6) Select “Save & Exit Setup” and press “Enter” key. 7) Select “Yes” and press “Enter” key. 2-17 System Utilities...
- Page 48 8) Flash BIOS is finished. 2-18 System Utilities...
-
Page 49: Ami Uefi Bios Flash Sop For Windows
AMI UEFI BIOS Flash SOP for Windows 1. Copy BIOS folder (ex: aParis-H61_D01 folder) under OS Desktop. 2. In BIOS folder, select WIN folder and execute “BIOS_WIN.bat” file. Please make sure the AFUWIN.exe tool version is 2.36 or later. 3. Press “Yes” to continue flashing BIOS. 2-19 System Utilities... - Page 50 NOTE: NOTE: The AFUWIN tool version is by case. 4. After finishing flashing BIOS, please don’t execute any programs and reboot the system directly. 5. When system reboot, please press “Del” to enter BIOS Setup. 6. In Exit page, select “Load Default Settings” and press “Enter” key. 7.
- Page 51 8. Select “Save & Exit Setup” and press “Enter” key. 9. Select “Yes” and press “Enter” key. 2-21 System Utilities...
- Page 52 10. Flash BIOS is finished. 2-22 System Utilities...
-
Page 53: Ami Uefi Bios Flash Sop For Dos With Me
AMI UEFI BIOS Flash SOP for DOS with ME NOTE: NOTE: This method is just for development stage, not suggest customer to flash ME. 1. Please make a DOS bootable device. 2. Copy BIOS folder (ex: aParis-H61_P01-D01 folder) into DOS bootable device. 3. - Page 54 NOTE: NOTE: The FPT tool version is by case. NOTE: NOTE: The command is by case. 2) After finishing flashing BIOS, please don’t execute any programs and shutdown system directly 3) Unplug AC power cord for 10 sec, 4) Reconnect the power cord. 5) Power on the system and press “Del”...
- Page 55 7) Select “Yes” and press “Enter” key. 8) Select “Save & Exit Setup” and press “Enter” key. 2-25 System Utilities...
- Page 56 9) Select “Yes” and press “Enter” key. 10) Flash BIOS is finished. [With ME lock] 2-26 System Utilities...
- Page 57 1) Check if the ME status with ME Info Utility and Manufacturing Mode is Disabled. Or, system can’t flash with FPT utility as below. 2-27 System Utilities...
- Page 58 2) If these have been disabled, please power off and remove “FLASH_OVERRIDE” jumper from Pin 1-2 to Pin 2-3. 3) Power on and boot to DOS to execute “BIOS_ME.bat” file. 2-28 System Utilities...
- Page 59 NOTE: NOTE: The FPT tool version is by case. NOTE: NOTE: The command is by case. 4) After finishing flashing BIOS, please don’t execute any programs and power off system. 5) Please replace “FLASH_OVERRIDE” jumper from Pin 2-3 to Pin 1-2. 6) Unplug AC power cord for 10 sec.
- Page 60 10) Select “Yes” and press “Enter” key. 11) Select “Save & Exit Setup” and press “Enter” key. 2-30 System Utilities...
- Page 61 12) Select “Yes” and press “Enter” key. 13) Flash BIOS is finished. 2-31 System Utilities...
-
Page 62: Ami Uefi Bios Flash Sop For Shell
AMI UEFI BIOS Flash SOP for SHELL 1.Please make a SHELL bootable device. 2.Copy BIOS folder into SHELL bootable device. 3.Boot to SHELL mode. 4.Type flash command as below: afushell64.efi Filename.rom /p /b /n /r 5.Please make sure the SHELL tool version is same as release note requirement. 6.After finishing flashing BIOS, please don’t execute any programs and reboot the system directly. - Page 63 9.Select “Yes” and press “Enter” key. 10.Select “Save & Exit Setup” and press “Enter” key. 2-33 System Utilities...
- Page 64 11.Select “Yes” and press “Enter” key. 12.Flash BIOS is finished. 2-34 System Utilities...
-
Page 65: Dmi Tool Utilities
DMI Tool Utilities 1. Please make a DOS bootable device. 2. Copy DMI_TOOL folder into the DOS bootable device. 3. Boot to DOS mode and enter DMI_TOOL folder. 4. Update DMI Method. 1) Edit and execute batch file Z5771.bat (Z5770.bat for non-touch) to update DMI data. For Example: 2-35 System Utilities... - Page 66 After finish update DMI data, please reboot the system. 2) Execute AMIDEDOS.EXE to update DMI data. - Please check “Help” for each command. 2-36 System Utilities...
- Page 67 2-37 System Utilities...
- Page 68 NOTE: NOTE: A command without parameter means it is a read command. NOTE: NOTE: A command with necessary parameter means it is a write command. Here show you the CMD which in commonly used. - If you want to Read/Write System manufacture in Type 1, use the CMD SM. [Read Command] AMIDEDOS /SM [Write Command] AMIDEDOS /SM “Acer”...
- Page 69 [Write Command] AMIDEDOS /SP "Aspire Z5770" NOTE: NOTE: Z5771 (non-Touch)/ Z5770 (Touch) - If you want to Read/Write System Family in Type 1, use the CMD SF. [Read Command] AMIDEDOS /SF [Write Command] AMIDEDOS /SF "Acer Desktop" - If you want to Read/Write Baseboard ManufactureFamily in Type 2, use the CMD BM. [Read Command] AMIDEDOS /BM [Write Command] AMIDEDOS /BM "Acer"...
-
Page 70: Lan Eeprom Utilities
LAN EEPROM Utilities To write the MAC address, 1. Create a DOS bootable USB HDD. 2. Copy the contents of the MAC folder to the HDD and remove the HDD form the computer. 3. Reboot the computer and press F12 during the boot sequence to enter the setup menu. 4. - Page 71 2-41 System Utilities...
- Page 72 2-42 System Utilities...
-
Page 73: System Disassembly And Assembly
CHAPTER System Disassembly and Assembly... - Page 74 Recommended Equipment......3-5 Pre-disassembly Procedure......3-5 Disassembly Process .
- Page 75 Replacing the HDD ....... . . 3-90 Replacing the Heatsink ......3-92 Replacing the Motherboard Shielding .
-
Page 77: Recommended Equipment
System Disassembly and Assembly This chapter contains step-by-step procedures on how to disassemble and assembly the desktop computer for maintenance and troubleshooting. Recommended Equipment To disassemble the computer, the following tools are suggested: Wrist grounding strap and conductive mat for preventing electrostatic discharge ... -
Page 78: Disassembly Process
Disassembly Process Table 3-1. Main screw list Screw Quantity Acer Part Number M3*5L (B) 86.GBL0U.001 M3*5L (F) 86.U6N0U.002 M3*8.0L (P) 86.U6N0U.005 M4*6L (B) 86.U6N0U.007 M2*2L (K) 86.U6N0U.001 M3*6L K 86.SHL0U.001 M3*4L+5.1 (X) 86.U6N0U.009 #6-32*3.6+3.8L K 86.U6N0U.008 M4*6L (F) 86.U6N0U.004 M2*4L (K) 86.U6N0U.003 M3*4L (B) 86.U6N0U.006... -
Page 79: Disassembly Flowchart
Disassembly Flowchart Removing the stand Removing the Rear Cover Removing the Removing the Removing the Removing the Removing the Removing the Removing the Motherboard Camera OSD board Converter Board Speaker Shielding Removing the Removing the Removing the Removing the Removing the Removing the Touchpad Control Memory... - Page 80 Table 3-2. Screw list Step Screw Quantity Acer Part Number Removing the Stand M4*6L (F) 86.U6N0U.004 Removing the Rear Cover M3*8.0L (P) 86.U6N0U.005 Removing the HDD M3*5L (B) 86.GBL0U.001 #6-32*3.6+3.8L K 86.U6N0U.008 Removing the ODD M3*5L (B) 86.GBL0U.001 M2*2L (K) 86.U6N0U.001 Removing the OSD Board M3*5L (B)
-
Page 81: Removing The Stand
Removing the Stand Press the latch which arrow pointed at and remove the hinge cover System Disassembly and Assembly... - Page 82 Unscrew 3 screws to remove the stand Size Quantity Screw Type M4*6L (F) 3-10 System Disassembly and Assembly...
-
Page 83: Removing The Rear Cover
Removing the Rear Cover Unscrew 7 screws to remove the rear cover. Size Quantity Screw Type M3*8.0L (P) 3-11 System Disassembly and Assembly... - Page 84 First, open one top side, then open the other top side. 3-12 System Disassembly and Assembly...
- Page 85 Open the low side. NOTE: NOTE: When removing the rear cover, be very very carefully, do not break the latch of rear cover & front cover 3-13 System Disassembly and Assembly...
- Page 86 Above photo shows below parts after removing the rear cover: 1. HDD 2. ODD 3. Converter board 4. Camera 5. OSD board 6. Motherboard shielding 7. System fan 8. touch pad control board ...
-
Page 87: Removing The Hdd
Removing the HDD 1. Unscrew 1 screw. 2. Remove the HDD module (with bracket) in the direction as indicated by the arrow Size Quantity Screw Type M3X5L (B) Unscrew 4 screws to take the HDD out from cage. Size Quantity Screw Type #6-32*3.6+3.8L K 3-15... -
Page 88: Removing The Converter Board
Removing the Converter Board Unplug the cables and unscrew 2 screws Remove the converter board. Size Quantity Screw Type M3X5L (B) 3-16 System Disassembly and Assembly... -
Page 89: Removing The Odd
Removing the ODD 1. Unscrew 1 screw. 2. Remove the ODD module (with bracket) in the direction as indicated by the arrow. Size Quantity Screw Type M3X5L (B) 3-17 System Disassembly and Assembly... - Page 90 Unscrew 4 screws to take ODD out from cage. Size Quantity Screw Type M2*2L (K) 3-18 System Disassembly and Assembly...
-
Page 91: Removing The Camera
Removing the Camera Remove the mylar 1. Unlock the latch and take out camera with cable 2. Remove the camera (and unplug the cable). 3-19 System Disassembly and Assembly... -
Page 92: Removing The Osd Board
Removing the OSD Board Unplug the cable and unscrew 2 screws to take out OSD board Size Quantity Screw Type M3X5L (B) 3-20 System Disassembly and Assembly... -
Page 93: Removing The Motherboard Shielding
Removing the Motherboard Shielding Unscrew the 12 screws. Size Quantity Screw Type M3X5L (F) 3-21 System Disassembly and Assembly... - Page 94 Remove the motherboard shielding in the direction as indicated by the arrow. 3-22 System Disassembly and Assembly...
-
Page 95: Removing The Display Card
Removing the Display Card 3-23 System Disassembly and Assembly... - Page 96 Unlock the 2 VGA locks. Remove the display card in the direction as indicated by the arrow. 3-24 System Disassembly and Assembly...
- Page 97 Above photo shows below parts after removing the display card: 1. Memory 2. TV tuner 3. WLAN 4. Heatsink 5. Speaker 6. Bluetooth 3-25 System Disassembly and Assembly...
-
Page 98: Removing The Memory
Removing the Memory 1. Unlock the upper memory connector 2. Remove the upper memory 3. Unlock the lower memory connector 4. Remove the lower memory 3-26 System Disassembly and Assembly... -
Page 99: Removing The Tv Tuner
Removing the TV Tuner Unplug the SATA cable & TV tuner cable, unscrew 2 screws Size Quantity Screw Type M2*4L (K) Remove the TV tuner in the direction as indicated by the arrow 3-27 System Disassembly and Assembly... -
Page 100: Removing The Wlan
Removing the WLAN 1. Unplug the WLAN cables, unscrew 2 screws Size Quantity Screw Type M2*4L (K) 2. Remove the WLAN in the direction as indicated by the arrow 3-28 System Disassembly and Assembly... -
Page 101: Removing The Touch Pad Control Board
Removing the Touch Pad control board Unscrew 2 screws to remove the shielding, Size Quantity Screw Type M3X5L (B) Unscrew 3 screws to and plug the FPC & cable to remove the touch pad control board. 3-29 System Disassembly and Assembly... - Page 102 Size Quantity Screw Type M3X5L (B) 3-30 System Disassembly and Assembly...
-
Page 103: Removing The Speaker
Removing the Speaker Unplug the cable and unscrew 4 screws, then remove the speaker in the direction as indicated by the arrow Size Quantity Screw Type M3*4L+5.1 (X) 3-31 System Disassembly and Assembly... -
Page 104: Removing The Heatsink
Removing the Heatsink Uncover the mylar and unscrew 5 screws. Size Quantity Screw Type M3X5L (B) Remove the heatsink in the direction as indicated by the arrow. 3-32 System Disassembly and Assembly... -
Page 105: Removing The Cpu
Removing the CPU 3-33 System Disassembly and Assembly... - Page 106 Press the latch and move it in the direction as indicated by the arrow Remove the CPU 3-34 System Disassembly and Assembly...
-
Page 107: Removing The System Fan
Removing the System Fan Unscrew 7 screws to remove the system fan cover (VESA cover). Size Quantity Screw Type M4*6L (B) Unscrew 3 screws to remove the system fan 3-35 System Disassembly and Assembly... - Page 108 Size Quantity Screw Type M3X5L (B) 3-36 System Disassembly and Assembly...
-
Page 109: Removing The Motherboard
Removing the Motherboard Unplug all the cable which connected to motherboard as below: 1. SATA power connector 2. Converter board connector 3. DVI connector 4. LVDS connector 5. OSD connector 6. IR cable connector 7. - Page 110 Unscrew 2 screws to remove the VGA bracket Size Quantity Screw Type M3*4L (B) 3-38 System Disassembly and Assembly...
- Page 111 Unscrew 6 screws to remove the motherboard. Size Quantity Screw Type M3X5L (B) 3-39 System Disassembly and Assembly...
-
Page 112: Removing The Left & Right Foot Stand (Power Led)
Removing the Left & Right Foot Stand (Power LED) Unscrew 5 screws. Size Quantity Screw Type M3X5L (B) M3*6L (K) 3-40 System Disassembly and Assembly... - Page 113 Over turn the left foot bracket. Unscrew 2 screws. Size Quantity Screw Type M3X5L (B) 3-41 System Disassembly and Assembly...
- Page 114 Take the switch holder out. Remove the switch holder, then remove the switch cable. 3-42 System Disassembly and Assembly...
- Page 115 Unscrew the 5 screws and remove the right foot bracket Size Quantity Screw Type M3X5L (B) M3*6L (K) 3-43 System Disassembly and Assembly...
-
Page 116: Removing The Base Pan
Removing the Base Pan 1. Unlock the latch 2. Unplug the LVDS cable Unscrew 10 screws. 3-44 System Disassembly and Assembly... - Page 117 Size Quantity Screw Type M3X5L (B) NOTE: NOTE: LCD power cannot be removed now, be careful, do not damage it. Unlock all the latch carefully. Remove the base pan in the direction as indicated by the arrow. 3-45 System Disassembly and Assembly...
-
Page 118: Removing The Ir
Removing the IR Remove the IR (with cable) in the direction as indicated by the arrow. 3-46 System Disassembly and Assembly... -
Page 119: Removing The Lcd
Removing the LCD Unscrew 4 screws Size Quantity Screw Type M3X5L (B) 3-47 System Disassembly and Assembly... - Page 120 Unplug the LCD power cable Take out the LCD with bracket 3-48 System Disassembly and Assembly...
- Page 121 Remove the LCD one side bracket Unscrew 2 screws. then remove another bracket Size Quantity Screw Type M3*5L (F) 3-49 System Disassembly and Assembly...
-
Page 122: Reassembly Process
Reassembly Process Table 3-3. Main screw list Screw Quantity Acer Part Number M3*5L (B) 86.GBL0U.001 M3*5L (F) 86.U6N0U.002 M3*8.0L (P) 86.U6N0U.005 M4*6L (B) 86.U6N0U.007 M2*2L (K) 86.U6N0U.001 M3*6L K 86.SHL0U.001 M3*4L+5.1 (X) 86.U6N0U.009 #6-32*3.6+3.8L K 86.U6N0U.008 M4*6L (F) 86.U6N0U.004 M2*4L (K) 86.U6N0U.003 M3*4L (B) 86.U6N0U.006... -
Page 123: Assembly Flowchart
Assembly Flowchart Replacing the Replacing the IR Replacing the Base Pan Replacing the Left & Right Foot Stand (Power LED) Replacing the Motherboard Replacing the Replacing the Replacing the Replacing the Replacing the Replacing CPU Display Card Memory System Fan Camera Speaker Replacing the... - Page 124 Table 3-4. Screw list Step Screw Quantity Acer Part Number Replacing the LCD M3*5L (F) 86.U6N0U.002 M3*5L (B) 86.GBL0U.001 Replacing the Base Pan M3*5L (B) 86.GBL0U.001 Replacing the Left & Right Foot M3*5L (B) 86.GBL0U.001 Stand (Power LED) M3*6L K 86.SHL0U.001 Replacing the System Fan M3*5L (B)
-
Page 125: Replacing The Lcd
Replacing the LCD Install the LCD one side bracket and screw it. Size Quantity Screw Type M3*5L (F) Install another LCD bracket 3-53 System Disassembly and Assembly... - Page 126 Install the LCD on the top bezel Screw 4 screws to fix the LCD on top bezel. Size Quantity Screw Type M3X5L (B) 3-54 System Disassembly and Assembly...
- Page 127 Plug the LCD power cable NOTE: NOTE: Be careful that do not plug it on backward 3-55 System Disassembly and Assembly...
-
Page 128: Replacing The Ir
Replacing the IR Install the IR (with cable) in the direction as indicated by the arrow. 3-56 System Disassembly and Assembly... -
Page 129: Replacing The Base Pan
Replacing the Base Pan Install the base pan on the LCD NOTE: NOTE: Before installing, through the LCD power cable above location 3-57 System Disassembly and Assembly... - Page 130 Lock all the latch Plug the LVDS cable 3-58 System Disassembly and Assembly...
- Page 131 Screw 10 screws to fix it. Size Quantity Screw Type M3X5L (B) 3-59 System Disassembly and Assembly...
-
Page 132: Replacing The Left & Right Foot Stand (Power Led)
Replacing the Left & Right Foot Stand (Power LED) Screw the 5 screws to fix the right foot bracket. Size Quantity Screw Type M3X5L (B) M3*6L (K) 3-60 System Disassembly and Assembly... - Page 133 For left foot bracket, first through the switch cable as photo indicated above. Install the cable on the switch holder. 3-61 System Disassembly and Assembly...
- Page 134 Screw 2 screws to fix the switch holder on left foot bracket. Size Quantity Screw Type M3X5L (B) Over turn the left foot bracket. 3-62 System Disassembly and Assembly...
- Page 135 Screw 5 screws to fix the left foot bracket. Plug the power button cable to the MB power button connector, be care of the cable arrangement, just refer to the indicated red line. NOTE: NOTE: After the power button cable and OSD cable all placed well, use a type to fix them, as picture indicated.
-
Page 136: Replacing The Motherboard
Replacing the Motherboard Screw 6 screws to fix the motherboard Size Quantity Screw Type M3X5L (B) 3-64 System Disassembly and Assembly... - Page 137 Screw 2 screws to fix the VGA bracket. Size Quantity Screw Type M3*4L (B) 3-65 System Disassembly and Assembly...
- Page 138 Plug all the cable which connected to motherboard as below: 1. SATA power connector 2. Converter board connector 3. DVI connector 4. LVDS connector 5. OSD connector 6. IR cable connector 7. Touchpad connector ...
-
Page 139: Replacing The System Fan
Replacing the System FAN 1. Screw 3 screws to fix system fan. Size Quantity Screw Type M3X5L (B) 3-67 System Disassembly and Assembly... - Page 140 2. Plug the fan cable to the Fan port on the MB. Arrange the cable as indicated by the line. 3-68 System Disassembly and Assembly...
- Page 141 3.Screw 7 screws to fix system fan cover. Size Quantity Screw Type M4*6L (B) 3-69 System Disassembly and Assembly...
-
Page 142: Replacing The Cpu
Replacing the CPU Install the CPU, notice the direction. Close the CPU bracket cover. 3-70 System Disassembly and Assembly... - Page 143 Lock the latch in the direction as indicated by the arrow. 3-71 System Disassembly and Assembly...
-
Page 144: Replacing The Memory
Replacing the Memory 1. Install the lower memory 2. Install the upper memory 3-72 System Disassembly and Assembly... -
Page 145: Replacing The Wlan
Replacing the WLAN 1.Install the WLAN card and screw 2 screws to fix the WLAN card. Size Quantity Screw Type M2*4L (K) 2. Arrange the WLAN cable as picture indicated by red line. 3-73 System Disassembly and Assembly... - Page 146 3. Plug the WLAN cable to the WLAN card as indicated by red circle. 3-74 System Disassembly and Assembly...
-
Page 147: Replacing The Display Card
Replacing the Display Card Install the display card in the direction as indicated by the arrow. 3-75 System Disassembly and Assembly... - Page 148 Lock 2 VGA locks. 3-76 System Disassembly and Assembly...
-
Page 149: Replacing The Speaker
Replacing the Speaker 1. Install the speaker in the direction as indicated by the arrow and screw 4 screws to fix it. Size Quantity Screw Type M3*4L+5.1 (X) 2. Arrange the Speaker cable as indicated by line in the picture. Be note of that, the cable should place vir the hole which arrow indicated. - Page 150 3. Attach black tape to fix the speaker. NOTE: NOTE: The IR cable should also be fixed here. 3-78 System Disassembly and Assembly...
-
Page 151: Replacing The Touchpad
Replacing the Touchpad 1.Plug the cable and screw 3 screws to fix the touchpad control board. Size Quantity Screw Type M3X5L (B) 2.Screw 2 screws to fix the shielding. 3-79 System Disassembly and Assembly... - Page 152 Size Quantity Screw Type M3X5L (B) 3. Arrange the touchpad cable to MB as indicated by red line in picture. 3-80 System Disassembly and Assembly...
-
Page 153: Replacing The Tv Tuner
Replacing the TV Tuner Install the TV tuner in the direction as indicated by the arrow Plug the cable and screw 2 screws to fix it Size Quantity Screw Type M2*4L (K) 3-81 System Disassembly and Assembly... -
Page 154: Replacing The Osd Board
Replacing the OSD Board 1. Plug the cable and screw 2 screws to fix the OSD board. Size Quantity Screw Type M3X5L (B) 2. Arrange the OSD cable as indicated line, plug it to MB. 3-82 System Disassembly and Assembly... -
Page 155: Replacing The Camera
Replacing the Camera 1. Plug the cable and lock the latch to fix the camera 2. Arrange the camera cable as indicated by the red line. 3-83 System Disassembly and Assembly... - Page 156 3. As indicated by red circle Attach the type to fix the cable. 3-84 System Disassembly and Assembly...
-
Page 157: Replacing The Odd
Replacing the ODD 1. Screw 4 screws fix the ODD in cage. Size Quantity Screw Type M2*2L (K) 2. Install the ODD module (with bracket) in the direction as indicated by the arrow. Screw 1 screw to fix it. 3-85 System Disassembly and Assembly... - Page 158 Size Quantity Screw Type M3X5L (B) 3. Plug the ODD&HDD power cable. Arrange as indicated by red line. Don’t forget to fix the cable by latches and place the cable under the FAN cover. 4.Plug the SATA cable for ODD, arrange it as indicated by red line, please also keep to use the latches to fix the SATA cable.
-
Page 159: Replacing The Converter Board
Replacing the Converter Board 1. Screw 2 screws to fix the converter board Size Quantity Screw Type M3X5L (B) 3-87 System Disassembly and Assembly... - Page 160 2. Arrange the convert board FPC cable as indicated by line, and then attach mylar to fix this cable. 3. Plug the convert board cable to the MB, be care of the cable arrangement, refer to the indicated red line 3-88 System Disassembly and Assembly...
- Page 161 4. At last, as shown in the above picture, use type to fix the cable, not forgot to attach mylar to fix the LVDS cable, camera cable and convert board cable. 3-89 System Disassembly and Assembly...
-
Page 162: Replacing The Hdd
Replacing the HDD 1. Screw 4 screws to fix the HDD in the cage. Size Quantity Screw Type #6-32*3.6+3.8L K 2. Install the HDD module (with bracket) in the direction as indicated by the arrow. 3. Screw 1 screw to fix it. Size Quantity Screw Type... - Page 163 4. Plug the ODD&HDD power cable, arrange the cable as indicated by red line.Be care of those latches. 5. Plug the SATA cable for HDD, please be note of the arrangement, refer to picture indicated by red line. 3-91 System Disassembly and Assembly...
-
Page 164: Replacing The Heatsink
Replacing the Heatsink 1.Install the heatsink in the direction as indicated by the arrow. 2. Screw 5 screws to fix the heatsink and attach the mylar. 3-92 System Disassembly and Assembly... - Page 165 Size Quantity Screw Type M3X5L (B) 3-93 System Disassembly and Assembly...
-
Page 166: Replacing The Motherboard Shielding
Replacing the Motherboard Shielding NOTE: NOTE: Before installing the motherboard shielding, tidy up the cables. Install the motherboard shielding in the direction as indicated by the arrow 3-94 System Disassembly and Assembly... - Page 167 Screw 12 screws to fix it Size Quantity Screw Type M3X5L (F) 3-95 System Disassembly and Assembly...
-
Page 168: Replacing The Rear Cover
Replacing the Rear Cover Above photo shows below parts after removing the rear cover: 1. HDD 2. ODD 3. Converter board 4. Camera 5. OSD board 6. Motherboard shielding 7. System fan 8. Touchpad ... - Page 169 Install the rear cover, lock the latch, then screw 7 screws to fix it. Size Quantity Screw Type M3*8.0L (P) 3-97 System Disassembly and Assembly...
-
Page 170: Replacing The Stand
Replacing the Stand Screw 3 screws to fix the stand on rear cover Size Quantity Screw Type M4*6L (F) 3-98 System Disassembly and Assembly... - Page 171 Install the hinge cover 3-99 System Disassembly and Assembly...
-
Page 172: Thermal Pad Location On Base Pan
Thermal Pad location on base pan Acer Part Name ACER PART NO. Quantity OEM PART NO. BASE PAN THERMAL PAD 47.U6N0U.001 1305-00E2000 FOR DIMM BASE PAN THERMAL PAD 47.U6N0U.003 1305-00EJ000 FOR CPU BASE PAN THERMAL PAD 47.U6N0U.004 1305-00EK000 FOR CAP BASE PAN THERMAL PAD 47.U6N0U.005 1305-00EL000... -
Page 173: Thermal Pad Location On Different Vga Card
Thermal Pad location on different VGA card nVidia GT530 Attach the thermal pad on VGA memories Acer Part Name ACER PART NO. Quantity OEM PART NO. VGA THERMAL PAD 47.U6N0U.002 1305-00E7000 3-101 System Disassembly and Assembly... - Page 174 nVidia GT520 There is no memory on back side, so VGA card doesn't need thermal pad Acer Part Name ACER PART NO. Quantity OEM PART NO. VGA THERMAL PAD 47.U6N0U.002 1305-00E7000 3-102 System Disassembly and Assembly...
- Page 175 CHAPTER Troubleshooting...
- Page 176 Introduction ......... 4-3 Hardware Diagnostic Procedure .
-
Page 177: Introduction
Troubleshooting Introduction This chapter provides instructions on how to trouble shoot system hardware problems. Hardware Diagnostic Procedure NOTE: NOTE: IMPORTANT: The diagnostic tests described in this chapter are only intended to test Acer products. Non-Acer products, prototype cards, or modified options can give false errors and invalid system responses. -
Page 178: System Internal Inspection
System Internal Inspection Turn off the system and all the peripherals connected to it. Unplug the power cord from the power outlets. Unplug the power cord from the system. Unplug all peripheral cables from the system. Place the system unit on a flat, stable surface. -
Page 179: Beep Codes
Beep Codes Beep codes are used by the BIOS to indicate a serious or fatal error to the end user. Beep codes are used when an error occurs before the system video has been initialized. Beep codes will be generated by the system board speaker, commonly referred to as the PC speaker. -
Page 180: Checkpoints
Checkpoints A checkpoint is either a byte or word value output to I/O port 80h. The BIOS outputs checkpoints throughout bootblock and Power-On Self Test (POST) to indicate the task the system is currently executing. Checkpoint sare very useful in aiding software developers or technicians in debugging problems that occur during the pre- boot process. -
Page 181: Bootblock Recovery Code Checkpoints
Table 4-2. Checkpoint Description Bootblock code is copied from ROM to lower system memory and control is given to it. BIOS now executes out of RAM. Copies compressed boot block code to memory in right segments. Copies BIOS from ROM to RAM for faster access. -
Page 182: Bios Recovery
Checkpoint Description Initialize the floppy controller in the super I/O. Some interrupt vectors are initialized. DMA controller is initialized. 8259 interrupt controller is initialized. L1 cache is enabled. Set up floppy controller and data. Attempt to read from floppy. Enable ATAPI hardware. Attempt to read from ARMD and ATAPI CDROM. - Page 183 6. Press Proceed with flash update start recovery. 7. Wait it compeled 8. ENTER and exit. (Recovery completed.) Troubleshooting...
-
Page 184: Calibration Sop Of Control Board
Calibration SOP of control board Run test.bat and check whether the firmware is the latest version, if yes, press "Next", and it will skip the firmware update. 4-10 Troubleshooting... - Page 185 Updating It spends 10 seconds to update the firmware, after that, program will show "Pass" or "Fail", press exit to continue. 4-11 Troubleshooting...
- Page 186 Device check,if the Hardware Vendor ID/Product ID/Chip Revision is not avaliable, the device information would be blank, it means that hardware may have problem. Press "Next" to continue. Install the acrylic fixture 1 4-12 Troubleshooting...
- Page 187 Following program's prompt, in order as up/right/low/left, press the proper hole by using the stylus. 4-13 Troubleshooting...
- Page 188 Following program's prompt, in order as up/right/low/left, draw a line in proper slot by using the stylus. After the drawing one line, stop until the next line turn green, do not exceed 10 cm/sec when drawing. 4-14 Troubleshooting...
- Page 189 When finishing calibration, will show above progress, and will show fail if it fails, press "Next" to continue. 4-15 Troubleshooting...
- Page 190 Pressing the 25 calibration points in proper hole by using the stylus. 4-16 Troubleshooting...
- Page 191 Uninstall acrylic fixture 1 and install the acrylic fixture 2, draw the 9 lines in order as up to low, press the "Pass" in green mark when finished. 4-17 Troubleshooting...
-
Page 192: Debug Card Information
Uninstall acrylic fixture 2 and install the acrylic fixture 3, draw the 9 lines in order as left to right, press the "Pass" in green mark when finished. Debug Card information Table 4-3. Pegatron Part Name Pegatron PN Photo SZ-LPC-D 90-C1G351-00XBN00Z FLAT-cable 1400-001C000... -
Page 193: Converter Board Setup
Converter board setup For different panels need different power supply, so it needs to adjust the settings of converter board, so the converter board can provide the proper power to the panel. Below is the mapping table of LCD panel & coverter board setting: Table 4-4. - Page 194 4-20 Troubleshooting...
-
Page 195: Jumper And Connector Locations
CHAPTER Jumper and Connector Locations... - Page 196 Jumper Setting ........5-4 Setting Jumper .
- Page 197 Jumper and Connector Locations Jumper and Connector Locations...
-
Page 198: Jumper Setting
Table 1-1. Label Description Label Description CPU socket LGA115 socket CPU DIMM DDR Ⅲ DIMM slot PCIE x16 PCIE x16 slot Camera Camera module connector LCD connector DVI in connector converter converter connector 3D scalar 3D scalar connector Key Pad Key Pad connector CPU fan CPU fan connector... - Page 199 This illustration shows a 3-pin jumper.Pins 1 and 2 are SHORT. Jumper and Connector Locations...
- Page 200 Jumper and Connector Locations...
-
Page 201: Fru List
CHAPTER FRU List... - Page 202 AZ5770/AZ5771 Exploded Diagrams..... . 6-4 FRU List ..........6-7...
- Page 203 FRU (Field Replaceable Unit) List This chapter provides users with a FRU (Field Replaceable Unit) listing in global configurations for the AZ5770/AZ5771. Refer to this chapter whenever ordering for parts to repair or for RMA (Return Merchandise Authorization). NOTE: NOTE: WHEN ORDERING FRU PARTS, check the most up-to-date information available on the regional web or channel.
-
Page 204: Az5770/Az5771 Exploded Diagrams
AZ5770/AZ5771 Exploded Diagrams Main Exploded Diagram Table 6-1. Item Part Name Quantity Memo PARIS A 23 HINGE COVER PARIS A 23 STAND ASM PARIS A 23 REAR CABINET ASM PARIS A 23 BKT VESA SUPPORT FRU (Field Replaceable Unit) List... - Page 205 Table 6-1. Item Part Name Quantity Memo AMIGO THERMAL MOUDLE & FLOWER PARIS 23 HDD CAGE PARIS 23 HDD GROMMET HDD MOUDLE PARIS 23 ODD CAGE ODD MOUDLE PARIS A 23 ODD BEZEL(RW ASM/RW BD ASM) PARIS 23 ANTENNA MYLAR ANTENNA CONVERTOR BOARD PARIS 23 SIDE STN BOARD...
- Page 206 Table 6-1. Item Part Name Quantity Memo PARIS TOUCH BOARD Touch SKU VGA BOARD PARIS 23 TOUCH PCB SHIELD Touch SKU PARIS 23 BKT MB VGA 2 PARIS A 23 SIDE IO DOOR PARIS A 23 BKT MBSHIELDING ASM PARIS A 23 SCREW RUBBER PARIS A 23 F-BEZEL SPONGE H Touch SKU PARIS A 23 F-BEZEL SPONGE V...
-
Page 207: Fru List
FRU List Category Description Adapter Adapter LITE-ON 180W 19V 5.1x7.4x12.5 Black AP.18003.004 PA-1181-02AB LF Adapter LITE-ON 135W 19V 5.1x7.4x12.5 Orange AP.13503.012 PA-1131-07AD, LV5 LED LF right angle Board CONTROL BOARD 55.GCG0U.001 OSD BOARD 55.U6N0U.002 CONVERT BOARD 55.U6N0U.001 Power Cord POWER CORD BLACK 1.8M US 3 PIN 27.GBL0U.001 POWER CORD BLACK AUSTRALIA 3 PIN 27.SHL0U.001... - Page 208 Category Description SATA CABLE - MB TO HDD 50.U6N0U.001 SATA POWER CABLE - MB TO HDD TO ODD 50.U6N0U.003 BACKLIGHT FFC CABLE 50.SHL0U.001 IR CABLE 50.U6N0U.005 LVDS CABLE 50.U6N0U.006 CABLE - MB TO OSD/B 50.U6N0U.007 CABLE - MB TO CONVERTER/B 50.SHL0U.003 CABLE - MB TO CONTROL/B 50.U6P0U.001...
- Page 209 Category Description WIRELESS ANTENNA - R 50.U6N0U.012 WIRELESS ANTENNA - L 50.U6N0U.013 TV COAXIAL CABLE - PAL 50.U6N0U.014 TV COAXIAL CABLE - NTSC 50.GCH0U.001 Chassis FRONT BEZEL 42.SHL0U.001 REAR CABINET ASSY 60.SHL0U.002 STAND ASSY 60.SHL0U.001 HINGE COVER 42.SHL0U.005 ODD BEZEL - DVD-RW 42.SHL0U.002 ODD BEZEL - BD 42.SHL0U.003...
- Page 210 Category Description BASE PAN 33.SHL0U.001 MB SHIELDING 33.SHL0U.003 HDD CAGE 33.U6N0U.003 ODD CAGE 33.U6N0U.004 LCD BRACKET - R 33.U6P0U.001 LCD BRACKET - L 33.U6P0U.002 LCD BRACKET - R , FOR NON TOUCH 33.U6N0U.005 LCD BRACKET - L , FOR NON TOUCH 33.U6N0U.006 6-10 FRU (Field Replaceable Unit) List...
- Page 211 Category Description STAND FRONT BRACKET - L 33.SHL0U.004 STAND FRONT BRACKET - R 33.SHL0U.005 STAND FRONT BRACKET - MIDDLE 33.SHL0U.002 MB/VGA BRACKET 33.U6N0U.010 BRACKET VESA SUPPORT 33.SHL0U.006 POWER SWITCH HOLDER 42.SHL0U.006 CLAMP HOLD 47.U6N0U.011 CONTROL BOARD SHIELDING 33.U6P0U.003 6-11 FRU (Field Replaceable Unit) List...
- Page 212 Category Description HDD GROMMET 47.U6N0U.010 VGA LOCK 42.SHL0U.008 PARIS 23 VGA HOLDER 42.SHL0U.007 SIDE BEZEL W/O B CAS 42.SHL0U.004 COAXIAL CAP for non TV 47.U6N0U.021 Thermal & Mylar BASE PAN THERMAL PAD FOR DIMM 47.U6N0U.001 BASE PAN THERMAL PAD FOR CPU 47.U6N0U.003 BASE PAN THERMAL PAD FOR CAP 47.U6N0U.004...
- Page 213 Category Description PANEL SPONGE NON TOUCH 47.U6N0U.014 FRONT BEZEL SPONGE H 47.U6P0U.001 FRONT BEZEL SPONGE V 47.U6P0U.002 PANEL SPONGE TOUCH 47.U6P0U.003 VGA THERMAL PAD 47.U6N0U.002 PARIS 23 MESH TYPE 13*35MM 47.SHL0U.001 PARIS 23 DVI GASKET 30*8MM 47.SHL0U.002 PARIS A 23 SCREW RUBBER 47.SHL0U.003 PARIS 23 MESH TYPE 47.GCH0U.003...
- Page 214 Category Description HDD SEAGATE 3.5" 7200rpm 1500GB KH.15K01.002 ST31500341AS(Brinks) SATA II 32MB LF F/W:CC4H HDD SEAGATE 3.5" 7200rpm 500GB KH.50001.022 ST3500413AS(Pharaoh 6G) SATA III 16MB LF F/W:JC45 HDD SEAGATE 3.5" 7200rpm 1000GB KH.01K01.016 ST31000524AS(Pharaoh 6G) SATA III 32MB LF F/W:JC45 HDD HGST 3.5"...
- Page 215 Category Description Keyboard LITE-ON SK-9621 USB Silver French with KB.USB0B.419 new acer logo Keyboard PRIMAX KB36211 USB Silver French with KB.USB0P.188 new acer logo Keyboard LITE-ON SK-9621 USB Silver US with new KB.USB0B.406 acer logo Keyboard PRIMAX KB36211 USB Silver US KB.USB0P.178 International with new acer logo Keyboard LITE-ON SK-9621 USB Silver German with...
- Page 216 Category Description Keyboard LITE-ON SK-9660 RF2.4 Silver US with KB.RF40B.124 new acer logo W/ MOUSE MS.11200.118 Keyboard PRIMAX KBRF36211 RF2.4 Silver US with KB.RF40P.101 new acer logo W/ MOUSE MS.11200.110 Keyboard LITE-ON SK-9660 RF2.4 Silver Traditional KB.RF40B.125 Chinese with new acer logo W/ MOUSE MS.11200.118 Keyboard PRIMAX KBRF36211 RF2.4 Silver KB.RF40P.102...
- Page 217 Category Description Memory KINGSTON SO-DIMM DDRIII 1333 1GB KN.1GB07.004 ACR128X64D3S1333C9 LF 128*8 0.065um Memory UNIFOSA SO-DIMM DDRIII 1333 1GB KN.1GB0H.017 GU672203EP0200 LF 128*8 0.065um Memory UNIFOSA SO-DIMM DDRIII 1333 4GB KN.4GB0H.002 HU6E4403EP0200 LF 256*8 46nm Memory NANYA SO-DIMM DDRIII 1333 4GB KN.4GB03.005 NT4GC64B8HB0NS-CG LF 256*8 0.055um Memory UNIFOSA SO-DIMM DDRIII 1333 2GB...
- Page 218 Category Description AverMedia A336-A Kits TV Tuner Card TU.10500.051 TU.10500.051 + ODM internal TV cable for AIO TU.10500.091 AverMedia A373-2D Kits TV Tuner Card TU.10500.089 AverMedia A336-D TV Tuner Card Kits TU.10500.052 TU.10500.096 WLAN Liteon WCBN611AH, Atheros WB222, WLAN DA.10211.002 802.11a/b/g/n 2X2 WLAN + Bluetooth 4.0 LE (mini-card) Half Size Lite-On WLAN WCBN611AH,Atheros WB222,WLAN...
- Page 219 Category Description SCREW M3X5L (B) W-ZN #2 86.GBL0U.001 SCREW #6-32*3.6+3.8L K B-ZN #2 86.U6N0U.008 SCREW M3*5L (F) W-ZN #1 86.U6N0U.002 SCREW M4*6L (F) B-ZN #2 86.U6N0U.004 SCREW M3*8.0L (P) B-NI #2 86.U6N0U.005 SCREW M4*6L (B) W-NI #2 86.U6N0U.007 SCREW M3*4L+5.1 (X) B-ZN #2 86.U6N0U.009 SCREW M3*6L K B-ZN #1 86.SHL0U.001...
- Page 220 6-20 FRU (Field Replaceable Unit) List...