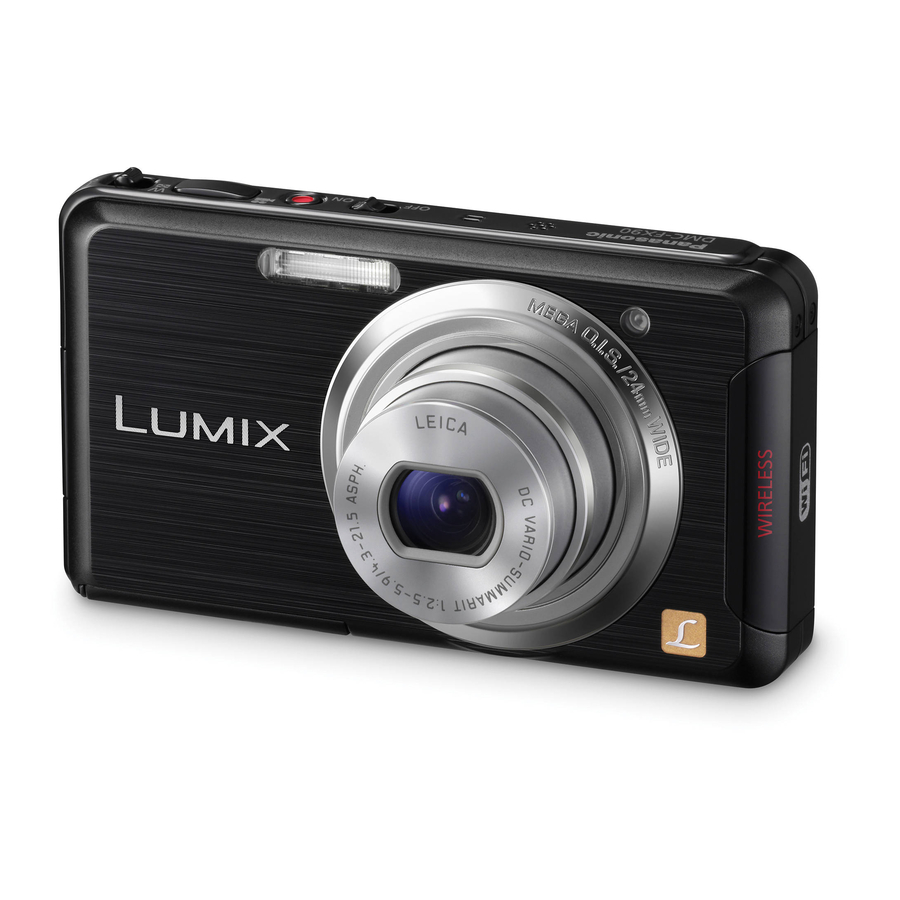
Panasonic Lumix DMC-FX90 Owner's Manual
For advanced features
Hide thumbs
Also See for Lumix DMC-FX90:
- Basic operating instructions manual (40 pages) ,
- Easy setup manual (2 pages) ,
- Operating instructions manual (193 pages)
Table of Contents
Advertisement
Quick Links
Download this manual
See also:
Basic Owner's Manual
Advertisement
Table of Contents

Related Manuals for Panasonic Lumix DMC-FX90


Summary of Contents for Panasonic Lumix DMC-FX90
- Page 1 Owner’s Manual for advanced features Digital Camera DMC-FX90 Model No. Before connecting, operating or adjusting this product, please read the instructions completely. VQT3S36-1...
-
Page 2: Table Of Contents
Contents Recording Before Use About the LCD Monitor......49 Taking pictures using the touch operation (Touch Shutter function)..50 Care of the camera ........5 Match the focusing and Standard Accessories .......6 exposure to a desired subject using touch Names and Functions of Main Parts ..7 operations (Touch AF/AE).......51 How to Use the Touch Panel ....8 Using zoom ..........53... - Page 3 • [AF Mode] .........82 • [Macro Mode] ........84 Wi-Fi • [Quick AF] .........85 • [Face Recog.]........85 • [Exposure] .........86 What you can do with the Wi-Fi • [i.Exposure] ........88 function..........119 • [Min. Shtr Speed] ......88 • Connect to your smartphone or •...
- Page 4 Connecting to other equipment Playing Back Pictures on a TV Screen...........144 • Playback using VIERA Link (HDMI) ..........146 Playing back 3D pictures.......148 Saving the Recorded Still Pictures and Motion Pictures ........150 • Copy by inserting the SD card into the recorder ........150 •...
-
Page 5: Before Use
Before Use Before Use Care of the camera Do not subject to strong vibration, shock, or pressure. • The lens, LCD monitor, or external case may be damaged if used in following conditions. It may also malfunction or image may not be recorded. –... -
Page 6: Standard Accessories
You can record or play back pictures on the built-in memory when you are not using a card. • If any accessories are lost, customers in the USA and Puerto Rico should contact Panasonic’s parts department at 1-800-833-9626 and customers in Canada should contact 1-800-99-LUMIX (1-800-995-8649) for further information about obtaining replacement parts. -
Page 7: Names And Functions Of Main Parts
19 Release lever (P12) 20 DC coupler cover (P13) • When using an AC adaptor, ensure that the Panasonic DC coupler (For shop display purpose only) and AC adaptor (optional) are used. For connection details, refer to P13. - 7 -... -
Page 8: How To Use The Touch Panel
Before Use How to Use the Touch Panel This touch panel is a type that detects pressure. Touch the screen Drag To touch and release the touch panel. A movement without releasing the touch panel. Use this to perform tasks such as selecting This is used when performing tasks such as icons or images displayed on the touch moving to the next image by dragging... -
Page 9: Preparation
To ensure that safe products are used we would recommend that a genuine Panasonic battery pack is used. • Use the dedicated charger and battery. - Page 10 Preparation ∫ About the [CHARGE] indicator The [CHARGE] indicator turns on: The [CHARGE] indicator is turned on during charging. The [CHARGE] indicator turns off: The [CHARGE] indicator will turn off once the charging has completed without any problem. (Disconnect the charger from the electrical socket and detach the battery after charging is completed.) •...
-
Page 11: Approximate Operating Time And Number Of Recordable Pictures
CIPA is an abbreviation of [Camera & Imaging Products Association]. • Temperature: 23 oC (73.4 oF)/Humidity: 50%RH when LCD monitor is on. • Using a Panasonic SD Memory Card (32 MB). • Using the supplied battery. • Starting recording 30 seconds after the camera is turned on. (When the Optical Image Stabilizer function is set to [On].) -
Page 12: Inserting And Removing The Card (Optional)/The Battery
Inserting and Removing the Card (optional)/the Battery • Check that this unit is turned off. • We recommend using a Panasonic card. Slide the release lever in the direction of the arrow and open the card/battery door. • Always use genuine Panasonic batteries. - Page 13 Using any other equipment may cause damage. Note • Always use a genuine Panasonic AC adaptor (optional). • When using an AC adaptor, use the AC cable supplied with the AC adaptor. • Some tripods cannot be attached when the DC coupler is connected.
-
Page 14: About The Built-In Memory/The Card
(4 GB to 32 GB) • Check that the PC and other equipment are compatible when using the SDXC Memory Cards. http://panasonic.net/avc/sdcard/information/SDXC.html SDXC Memory Card • Only the cards with capacity listed left can be used. (48 GB, 64 GB) ¢... - Page 15 Preparation Note • Do not turn this unit off, remove its battery or card, or disconnect the AC adaptor (optional) when the access indication is lit (when pictures are being written, read or deleted, or the built-in memory or the card is being formatted). Furthermore, do not subject the camera to vibration, impact or static electricity.
-
Page 16: Approximate Number Of Recordable Pictures And Available Recording Time
Preparation Approximate number of recordable pictures and available recording time ∫ About the display of the number of recordable pictures and available recording time • You can confirm the number of recordable pictures and available recording time by touching ] several times. (P49) A Number of recordable pictures B Available recording time... -
Page 17: Setting Date/Time (Clock Set)
Preparation Setting Date/Time (Clock Set) • The clock is not set when the camera is shipped. Turn the camera on. • If the language select screen is not displayed, proceed to step Touch [Language Set]. Select the language, and then touch [Set]. Touch [Clock Set]. -
Page 18: Changing The Clock Setting
Preparation Changing the Clock Setting Select [Clock Set] in the [Rec] or [Setup] menu. (P36) • The clock can be reset as shown in steps • The clock setting is maintained for 3 months using the built-in clock battery even without the battery. -
Page 19: Tips For Taking Good Pictures
Preparation Tips for taking good pictures Fit the strap and hold the camera carefully Hold the camera gently with both hands, keep your arms still at your side and stand with your feet slightly apart. • To prevent dropping, be sure to attach the supplied strap and fit it to your wrist. -
Page 20: Basic
Basic Basic Selecting the [Rec] Mode In Recording Mode touch [ • When operating in Playback Mode, touch [ ] to switch to Recording Mode and then touch [ Touch the Recording Mode icon. ∫ List of [Rec] Modes Normal Picture Mode (P21) The subjects are recorded using your own settings. -
Page 21: Taking Pictures With Your Favorite Settings (Normal Picture Mode)
Basic [Rec] Mode: Taking Pictures with Your Favorite Settings (Normal Picture Mode) The camera automatically sets the shutter speed and the aperture value according to the brightness of the subject. You can take pictures with greater freedom by changing various settings in the [Rec] menu. -
Page 22: Focusing
Basic Focusing Aim the AF area at the subject, and then press the shutter button halfway. When the subject is focused When the subject is not Focus focused Blinks Focus indication A White>Green White>Red AF area B Beeps 2 times Beeps 4 times Sound •... - Page 23 Basic ∫ When the subject is not in focus (such as when it is not in the center of the composition of the picture you want to take) Aim the AF area at the subject, and then press the shutter button halfway to fix the focus and exposure.
-
Page 24: Taking Pictures Using The Automatic Function (Intelligent Auto Mode)
Basic [Rec] Mode: Taking Pictures Using the Automatic Function (Intelligent Auto Mode) The camera will set the most appropriate settings to match the subject and the recording conditions so we recommend this mode for beginners or those who want to leave the settings to the camera and take pictures easily. - Page 25 Basic Changing the settings Following menus can be set. Menu Item [Flash] ¢ /[Selftimer]/[Picture Size] ¢ /[Burst]/[Color Mode] ¢ [Rec] [Motion Deblur]/[Face Recog.] [Rec Mode]/[Rec Quality] [Motion Picture] ¢ [Clock Set]/[World Time]/[Beep] /[Language]/[Stabilizer Demo.] [Setup] • For the setting method of the menu, refer to P36. ¢...
- Page 26 Basic Scene Detection When the camera identifies the optimum scene, the icon of the scene concerned is displayed in blue for 2 seconds, after which its color changes to the usual red. When taking pictures > [i-Portrait] [i-Scenery] ¦ [i-Macro] [i-Night Portrait] ¢...
-
Page 27: Recording Motion Pictures
Basic Applicable modes: Recording Motion Pictures Start recording by pressing the motion picture button. A Available recording time B Elapsed recording time • You can record motion pictures fitting each Recording Mode. • Release the motion picture button right after you press it. •... - Page 28 Also, the recording information may not be displayed properly. In this case, use this unit. • For details on AVCHD and MP4 compatible devices, refer to the support sites below. http://panasonic.jp/support/global/cs/dsc/ (This Site is English only.) - 28 -...
- Page 29 Basic Recording still pictures while recording motion pictures Still pictures can be recorded even while recording a motion picture. (simultaneous recording) During motion picture recording, press the shutter button fully to record a still picture. • The picture is saved with the following conditions. [AVCHD] Picture size [MP4]...
-
Page 30: Playing Back Pictures ([Normal Play])
Basic Playing Back Pictures ([Normal Play]) In Recording Mode touch [ • The display switches to normal playback. Note • This camera complies with the DCF standard “Design rule for Camera File system” established by JEITA “Japan Electronics and Information Technology Industries Association” and with Exif “Exchangeable Image File Format”. -
Page 31: Displaying Multiple Screens (Multi Playback)
Basic Displaying Multiple Screens (Multi Playback) Touch [ A Slide bar • It is possible to switch the playback screen by touching the following icons. – ]: 1 screen – ]: 12 screens – ]: 30 screens – ]: Calendar screen display •... -
Page 32: Playing Back Motion Pictures
Basic Playing Back Motion Pictures This unit was designed to play motion pictures using the AVCHD, MP4 and QuickTime formats. Motion JPEG In Playback Mode, select a picture with the motion picture icon (such as [ ]) and touch [ ] in the middle of the screen. -
Page 33: Creating Still Pictures From A Motion Picture
Basic ∫ Operations performed during Motion Picture Playback Display control panel by touching screen. • If no operation is performed for about 2 seconds, it will return to original status. Operate control panel by touching. Play/Pause Stop ¢ ¢ Fast rewind Fast forward Frame-by-frame rewind Frame-by-frame forward... -
Page 34: Deleting Pictures
Basic Deleting Pictures Once deleted, pictures cannot be recovered. • Pictures on the built-in memory or the card, that are being played back will be deleted. • Pictures that are not in the DCF standard or those that are protected cannot be deleted. To delete a single picture In Playback Mode, select the picture to delete and touch [... -
Page 35: To Delete Multiple Pictures (Up To 50) Or All The Pictures
Basic To delete multiple pictures (up to 50) or all the pictures In Playback Mode, touch [ Touch [Delete Multi] or [Delete All]. • [Delete All] > Confirmation screen is displayed. Pictures are deleted by selecting [Yes]. • It is possible to delete all pictures except the ones set as favorite when [All Delete ExceptÜ] is selected with the [Delete All] set. -
Page 36: Setting The Menu
Basic Setting the Menu The camera comes with menus that allow you to choose the settings for taking pictures and playing them back as you like and menus that enable you to have more fun with the camera and use it more easily. In particular, the [Setup] menu contains some important settings relating to the camera’s clock and power. - Page 37 Basic Touch the menu item. • The page can be changed by touching [ Touch the Settings. • Depending on the menu item, its setting may not appear or it may be displayed in a different way. Description of the icon is displayed by touching and holding the icon for menu item/ setting in steps –...
-
Page 38: Call Up Commonly Used Menus With Ease (Shortcut Setting)
Basic Call up commonly used menus with ease (Shortcut setting) You can have the LCD monitor display desired menu items. Up to 2 frequently-used menu items can be registered per [Rec]/[Playback] Mode. • Read for the [Rec] Mode menu, for the [Motion Picture] Mode menu, and P101 for the [Playback] Mode menu. -
Page 39: About The Setup Menu
Basic About the Setup Menu [Clock Set], [Economy] and [Auto Review] are important items. Check their settings before using them. For details on how to select the [Setup] menu settings, refer to P36. — [Clock Set] • Refer to for details. Set the time in your home area and travel destination. - Page 40 Basic Departure date and return date of the travel as well as the name of the travel destination can be set. You can display the number of days that have passed when playing back the pictures and stamp it on the recorded pictures with [Text Stamp] (P102).
- Page 41 Basic This allows you to set the beep and shutter sound. [ r ] ([Beep Level]): ] ([Shutter Vol.]): [t] (Low) ] (Low) [Beep] [u] (High) ] (High) [s] (Muted) ] (Muted) ] ([Beep Tone]): ] ([Shutter Tone]): Adjust the volume of the speaker to any of 7 levels. [Volume] •...
- Page 42 Basic These menu settings make it easier to see the LCD monitor when you are in bright places. ¢ [„] ([Auto Power LCD]) The brightness is adjusted automatically depending on how bright it is around the camera. [LCD Mode] […] ([Power LCD]): The LCD monitor becomes brighter and easier to see even when taking pictures outdoors.
- Page 43 Basic This allows you to set either to display or not display the histogram. ] ([On])/[ ] ([Off]) A Histogram is a graph that displays brightness along the horizontal axis (black to white) and the [Histogram] number of pixels at each brightness level on the vertical axis.
- Page 44 Basic You can conserve the battery life by setting these menus. Also, the battery life is conserved by dimming the LCD monitor. [ p ] ([Sleep Mode]): The camera is automatically turned off if the camera has not been used for the time selected on the setting. ] ([2MIN.])/[ ] ([5MIN.])/[ [10MIN.])/[...
- Page 45 Basic Reset the file number of the next recording to 0001. [No.Reset] • The folder number is updated and the file number starts from 0001. • A folder number between 100 and 999 can be assigned. When the folder number reaches 999, the number cannot be reset. We recommend formatting the card (P47) after saving the data on a PC or elsewhere.
- Page 46 Basic Set to match the color television system in each country or the type of TV. ] ( [TV Aspect]): [W]: [Output] When connecting to a 16:9 screen TV. [X]: When connecting to a 4:3 screen TV. • This will work when the AV cable (optional) is connected. Setup so this unit can be controlled by the remote control of the VIERA by automatically coupling this unit with the VIERA Link compatible equipment using HDMI micro cable (optional).
- Page 47 If the card cannot be formatted, please try another card before contacting your nearest Service Center. For Canadian assistance, please call: For USA and Puerto Rico assistance, please call: 1-800-99-LUMIX (1-800-995-8649) or 1-800-211-PANA(7262) or, contact us via the web at: send e-mail to: lumixconcierge@ca.panasonic.com http://www.panasonic.com/contactinfo - 47 -...
- Page 48 Basic Adjust the position of the touch panel if a different thing gets selected from what you touched or touch operation does not respond. Touch [Start]. Touch the orange [r] mark [Calibration] displayed on the screen in order with the stylus pen (supplied) (5 places).
-
Page 49: Recording
Recording Recording About the LCD Monitor Touch [ ] to change. • During Playback Zoom, while playing back motion pictures and during a slide show, you can only select “Normal display E” or “No display G”. In Recording Mode A Normal display ¢1 B Normal display ¢1... -
Page 50: Taking Pictures Using The Touch Operation (Touch Shutter Function)
Recording Applicable modes: Taking pictures using the touch operation (Touch Shutter function) Just by touching the subject to focus, it will focus on the subject and take the picture automatically. Touch [ • Icon will change to [ ], and taking a picture with the Touch Shutter function becomes possible. -
Page 51: Match The Focusing And Exposure To A Desired Subject Using Touch Operations (Touch Af/Ae)
Recording Applicable modes: Match the focusing and exposure to a desired subject using touch operations (Touch AF/AE) It is possible to set the focus and exposure to the subject specified on the touch panel. • Perform the operation after canceling the touch shutter function. Touch the subject you wish to focus on. - Page 52 Recording ∫ Setting up [ ] (AF Tracking) • The AF tracking frame will turn red and then turn off if the lock fails. Try to lock the frame again. • The camera records pictures with [AF Mode] as [ ] when locked or Dynamic Tracking is not working.
-
Page 53: Using Zoom
Recording Applicable modes: Using zoom Using the Optical Zoom/Using the Extended Optical Zoom (EZ)/Using the Intelligent Zoom/Using the Digital Zoom You can zoom-in to make people and objects appear closer or zoom-out to record landscapes in wide angle. To make subjects appear even closer (maximum of 9.8k), do not set the picture size to the highest setting for each aspect ratio (X/Y/W/ To make subjects appear closer use (Tele) Move the zoom lever to the Tele side. - Page 54 Recording ∫ Types of zooms Feature Optical Zoom Extended Optical Zoom (EZ) Maximum 9.8k ¢ magnification Picture No deterioration No deterioration quality [Picture Size] with (P77) Conditions None selected. Screen display ] is displayed. Feature Intelligent Zoom Digital Zoom Approximately 4 times the Optical Maximum Approximately 1.3 times the Optical Zoom, Extended Optical Zoom, or...
-
Page 55: Zooming With Touch Operation
Recording Note • The indicated zoom magnification is an approximation. • “EZ” is an abbreviation of “Extended Optical Zoom”. It is possible to take more magnified pictures with the optical zoom. • The lens barrel extends or retracts according to the zoom position. Take care not to interrupt the motion of the lens barrel while the zoom lever is rotated. -
Page 56: Taking Pictures That Match The Scene Being Recorded (Scene Mode)
Recording [Rec] Mode: Taking Pictures that Match the Scene Being Recorded (Scene Mode) When you select a Scene Mode to match the subject and recording situation, the camera sets the optimal exposure and hue to obtain the desired picture. In Recording Mode touch [ Touch [ Touch the scene mode to set. -
Page 57: [Transform]
Recording [Transform] Subject can be recorded either slim or stretched, and at the same time, skin can be recorded smoothly. ∫ Setting the level of transform Select the level of transform. Note • The picture size is fixed to 3M (4:3), 2.5M (3:2), 2M (16:9) or 2.5M (1:1). •... -
Page 58: [Panorama Assist]
Recording [Panorama Assist] You can take pictures with connections suitable for creating panorama images. ∫ Setting the recording direction Touch the direction to take picture. Touch [OK]. • The horizontal/vertical guideline will be displayed. Take the picture. • You can retake the picture by selecting [Retake]. Touch [Next]. -
Page 59: [Sports]
Recording [Sports] Set here when you want to take pictures of sports scenes or other fast-moving events. Note • Shutter speed may slow down up to 1 second. • This mode is suitable for taking pictures of subjects at distances of 5 m (16.4 feet) or more. [Night Portrait] This allows you to take pictures of a person and the background with near real-life brightness. -
Page 60: [Food]
Recording [Food] This mode allows you to take pictures of food with a natural hue without being affected by the ambient light in restaurants etc. [Party] Select this mode when you want to take pictures at a wedding reception or an indoor party etc. -
Page 61: [Baby1]/[Baby2]
Recording [Baby1]/[Baby2] This takes pictures of a baby with a healthy complexion. When you use the flash, the light from it is weaker than usual. It is possible to set different birthdays and names for [Baby1] and [Baby2]. You can select to have these appear at the time of playback, or have them stamped on the recorded image using [Text Stamp] (P102). -
Page 62: [Sunset]
Recording [Sunset] Select this mode when you want to take pictures of a sunset view. This allows you to take vivid pictures of the red color of the sun. [High Sens.] This mode minimizes the jitter of the subjects, and enables you to take pictures of these subjects in dimly lit rooms. -
Page 63: [Flash Burst]
Recording [Flash Burst] Still pictures are taken continuously with flash. It is convenient to take continuous still pictures in dark places. ∫ Picture size and aspect ratio Select the picture size of 3M (4:3), 2.5M (3:2), 2M (16:9) or 2.5M (1:1). •... -
Page 64: [Beach]
Recording [Beach] This allows you to take even more vivid pictures of the blue color of the sea, sky etc. It also prevents underexposure of people under strong sunlight. Note • Do not touch the camera with wet hands. • Problems caused by sand, seawater and fresh water are not covered by the product warranty. -
Page 65: [High Dynamic]
Recording [High Dynamic] You can use this mode to easily record pictures in which bright and dark regions of the scene are expressed with suitable brightness when looking into the sun, at night, or in similar circumstances. ∫ Setting the effect Natural color effect ] ([Standard]): Eye-catching effect which emphasises contrast and color... -
Page 66: Taking 3D Pictures (3D Photo Mode)
Recording [Rec] Mode: Taking 3D pictures (3D Photo Mode) Pictures are recorded continuously while moving the camera horizontally, and two picutres selected automatically are combined to make a single 3D picture. To view 3D pictures, a television that supports 3D is required (This unit will playback in 2D). -
Page 67: Taking Pictures While Changing The Skin Texture (Cosmetic Mode)
Recording [Rec] Mode: Taking pictures while changing the skin texture (Cosmetic Mode) Pictures can be taken while setting the texture or clearness of the skin. In Recording Mode touch [ Touch [ Touch the item. • Touch [3]/[4] to set the clearness. Item Adjustment contents To take a picture with soft skin. -
Page 68: Taking A Picture With Face Recognition Function
Recording Applicable modes: Recording Taking a Picture with Face Recognition Function Face Recognition is a function which finds a face resembling a registered face and prioritizes focus and exposure automatically. Even if the person is located towards the back or on the end of a line in a group photo, the camera can still take a clear picture. [Face Recog.] is initially set to [Off] on the camera. -
Page 69: Face Settings
Recording Face Settings You can register information such as names and birthdays for face images of up to 6 people. Registration can be facilitated by taking multiple face images of each person. (up to 3 pictures/registration) ∫ Point of recording when registering the face images •... - Page 70 Recording Set the item. • You can register up to 3 face images. Item Description of settings It is possible to register names. Select [SET]. Enter the name. [Name] • refer to “ ” For details on how to enter characters, Entering Text section on P72.
- Page 71 Recording Change or delete the information for a registered person You can modify the pictures or information of an already registered person. You can also delete the information of the registered person. Select [Face Recog.] from the [Rec] Mode menu. (P36) Touch [ ] ([Memory]).
-
Page 72: Entering Text
Recording Entering Text It is possible to enter babies’ and pets’ names and the names of travel destinations when recording. (Only alphabetical characters and symbols can be entered.) You can use the stylus pen (supplied) if it is hard to operate with your fingers. Display the entry screen. -
Page 73: Using The [Rec] Mode Menu
Recording Using the [Rec] Mode Menu [Flash] Applicable modes: For details on [Rec] Mode menu settings, refer to P36. Set the flash to match the recording. The flash is automatically activated when the recording conditions [‡] ([Auto]) make it necessary. The flash is automatically activated when the recording conditions make it necessary. - Page 74 Recording ∫ Available Flash Settings in Recording Mode The available flash settings depend on the Recording Mode. (±: Available, —: Not available, ¥: Scene Mode initial setting) ‡ ‰ Œ ‡ ‰ Œ ¢ — — — — — — —...
- Page 75 Recording ∫ The available flash range • The available flash range is an approximation. Wide Tele [Auto] in 60 cm (1.97 feet) to 5.9 m (19.4 feet) 1.0 m (3.28 feet) to 2.5 m (8.20 feet) [Sensitivity] ∫ Shutter speed for each flash setting Flash setting Shutter speed (Sec.) Flash setting...
-
Page 76: [Selftimer]
Recording [Selftimer] Applicable modes: This is for recording still pictures using the timer. Pictures are taken 10 seconds after shutter is pressed. ] ([10 sec.]) Pictures are taken 2 seconds after shutter is pressed. • When using a tripod etc., this setting is a convenient way to avoid the ] ([2 sec.]) jitter caused by pressing the shutter button. -
Page 77: [Picture Size]
Recording [Picture Size] Applicable modes: Set the number of pixels. The higher the numbers of pixels, the finer the detail of the pictures will appear even when they are printed onto large sheets. [Aspect Ratio]: [X] [Aspect Ratio]: [Y] 4000k3000 4000k2672 ] ([12M]) ] ([10.5M]) -
Page 78: [Quality]
Recording Note • If you change the aspect ratio, set the picture size again. • In specific modes, Extended Optical Zoom cannot be used, and the picture size for [ ] is not displayed. For details regarding modes in which Extended Optical Zoom cannot be used, refer to P55. -
Page 79: [Sensitivity]
Recording [Sensitivity] Applicable modes: This allows the sensitivity to light (ISO sensitivity) to be set. Setting to a higher number enables pictures to be taken even in dark places without the resulting pictures coming out dark. The ISO sensitivity is automatically adjusted according to the brightness. ] ([Auto]) •... -
Page 80: [White Balance]
Recording [White Balance] Applicable modes: In sunlight, under incandescent lights or in other such conditions where the color of white takes on a reddish or bluish tinge, this item adjusts to the color of white which is closest to what is seen by the eye in accordance with the light source. Automatic adjustment ] ([Auto White Balance]) - Page 81 Recording Setting the White Balance manually Set the White Balance value. Use to match the condition when taking photographs. Touch [Ò]. Touch [Ó]. Aim the camera at a sheet of white paper etc., so that the frame in the center is filled by the white object only and then touch [Set].
-
Page 82: [Af Mode]
Recording [AF Mode] Applicable modes: This allows the focusing method that suits the positions and number of the subjects to be selected. The camera automatically detects the person’s face. The focus [š] [Face and exposure can then be adjusted to fit the face no matter what Detection]) portion of the picture it is in. - Page 83 Recording ∫ About [š] (Face Detection) The following AF area frames are displayed when the camera detects the faces. Yellow: When the shutter button is pressed halfway, the frame turns green when the camera is focused. White: Displayed when more than one face is detected. Other faces that are the same distance away as faces within the yellow AF areas are also focused.
-
Page 84: [Macro Mode]
Recording [Macro Mode] Applicable modes: This mode allows you to take close-up pictures of a subject, e.g. when taking pictures of flowers. You can take pictures of a subject as close as 3 cm (0.10 feet) from ] ([AF Macro]) the lens by pressing the zoom lever upmost to Wide (1k). -
Page 85: [Quick Af]
Recording [Quick AF] Applicable modes: As long as the camera is held steady, the camera will automatically adjust the focus and focus adjustment will then be quicker when the shutter is pressed. This is useful when you do not want to miss a picture-taking opportunity. ] ([On])/[ ] ([Off]) Note... -
Page 86: [Exposure]
Recording [Exposure] Applicable modes: Use this function when you cannot achieve appropriate exposure due to the difference in brightness between the subject and the background. Look at the following examples. Underexposed Properly exposed Overexposed Compensate the exposure Compensate the exposure towards positive. - Page 87 Recording [Auto Bracket] Applicable modes: In this mode, 3 pictures are automatically recorded in the selected exposure compensation range each time the shutter button is pressed. With Auto Bracket d1 EV 1st picture 2nd picture 3rd picture d0 EV j1 EV i1 EV Touch [ ] during exposure compensation.
-
Page 88: [I.exposure]
Recording [i.Exposure] Applicable modes: Contrast and exposure will be adjusted automatically when there is a big difference in brightness between the background and subject, to bring the image close to real life. ] ([On])/[ ] ([Off]) Note • Even when the [Sensitivity] is set to [ISO100], [Sensitivity] may be set higher than [ISO100] if the picture is taken with [i.Exposure] set to valid. -
Page 89: [I.resolution]
Recording [i.Resolution] Applicable modes: Pictures with sharp profile and resolution can be taken by utilising the Intelligent Resolution Technology. [i.Resolution] is activated. ] ([On]) [i.Resolution] is activated, and the zoom magnification is ] ([i.Zoom]) increased by approximately 1.3 without noticeable deterioration in the picture. -
Page 90: [Burst]
Recording [Burst] Applicable modes: Pictures are taken continuously while the shutter button is pressed. ] ([On])/[ ] ([Off]) approx. 3.7 Burst speed (pictures/second) max. 7 pictures Number of recordable pictures Note • Focus, exposure, and White Balance will be fixed to the settings for the first picture. Depending on changes in the brightness of the subject, the recording may be brighter or darker from the second picture. -
Page 91: [Af Assist Lamp]
Recording [AF Assist Lamp] Applicable modes: AF Assist Lamp will illuminate the subject when the shutter button is pressed half-way making it easier for the camera to focus when recording in low light conditions. (Larger AF area is displayed depending on the recording conditions.) ] ([On])/[ ] ([Off]) Note... -
Page 92: [Stabilizer]
Recording [Stabilizer] Applicable modes: Using this mode, jitter during picture taking is detected, and the camera automatically compensates for the jitter, enabling jitter-free images to be taken. When recording motion pictures, “Active Mode” (stabilizer for motion pictures) will automatically function. This decreases the jitter of the image when recording motion picture while walking, etc. -
Page 93: Using The [Motion Picture] Mode Menu
Recording Using the [Motion Picture] Mode Menu [Rec Mode] Applicable modes: For details on [Motion Picture] Mode menu settings, refer to P36. This sets up the data format of motion pictures. Select this format to record HD (high definition) video for playback on [AVCHD] your HDTV using an HDMI connection. -
Page 94: [Rec Quality]
Therefore, the recording time is shortened when a subject with fast movement is recorded. • To play back AVCHD motion pictures recorded with this unit on Panasonic Blu-ray Disc Players (DMP-BD30/DMP-BD31/DMP-BD50) it is necessary to update the firmware of the Blu-ray Disc Player. -
Page 95: [Continuous Af]
Recording [Continuous AF] Applicable modes: It will continually keep on focusing on the subject that the focus was once set for. ] ([On])/[ ] ([Off]) Note • Set this function to [Off] if you wish to fix the focus on the position where you started the motion picture recording. -
Page 96: Playback/Editing
Playback/Editing Playback/Editing Various methods to playback You can play back the recorded pictures in various methods. In Playback Mode touch [ Touch the Playback Mode icon. • Following items can be selected. ¢ [2D/3D Settings] [Filtering Play] (P99) [Normal Play] (P30) [Playback Album] (P100) -
Page 97: [Slide Show]
Playback/Editing [Slide Show] You can play back the pictures you have taken in synchronisation with music, and you can do this in sequence while leaving a fixed interval between each of the pictures. You can also put together a slide show composed of only still pictures, only motion pictures, only 3D pictures etc. - Page 98 Playback/Editing ∫ Changing the slide show settings You can change the settings for Slide Show Playback by selecting [Effect] or [Setup] on the slide show menu screen. [Effect] This allows you to select the screen effects or music effects when switching from one picture to the next.
-
Page 99: [Filtering Play]
Playback/Editing [Filtering Play] Pictures are classified into only still pictures, only motion pictures, or only 3D pictures etc., and played back. Item Settings Only still pictures are played back. [Picture Only] Only motion pictures are played back. [Video Only] Only 3D pictures are played back. [3D Play] •... -
Page 100: [Playback Album]
Playback/Editing [Playback Album] Pictures registered to an album can be played back by the albums with [My Photo Album]. • For details on [My Photo Album], refer to P114. [Calendar] You can display pictures by recording date. Touch [3]/[4] to select the month to be played back. -
Page 101: Using The [Playback] Mode Menu
Playback/Editing Using the [Playback] Mode Menu This menu lets you perform editing like cropping recorded pictures, as well as set up protection of recorded pictures, etc. • With [Text Stamp], [Resize] or [Cropping], a new edited picture is created. A new picture cannot be created if there is no free space on the built-in memory or the card so we recommend checking that there is free space and then editing the picture. -
Page 102: [Text Stamp]
Playback/Editing [Text Stamp] You can stamp the recording date/time, name, location, travel date or title onto the recorded pictures. Select [ ]([Text Stamp]) on the [Playback] Mode menu. (P36) Touch [ ] ([Single]) or [ ] ([Multi]). Select an image you wish to stamp with text. •... - Page 103 Playback/Editing Select the item to stamp. Item Setting item [OFF] Stamp the year, month and date. [W/O TIME]: [Shooting Date] Stamp the year, month, day, hour and [WITH TIME]: minutes. [OFF] Stamps names registered in name settings for [Face Recog.]. [Name] Stamps names registered in name settings for [Baby1]/[Baby2] or [Pet] in Scene Mode.
-
Page 104: [Video Divide]
Playback/Editing [Video Divide] Recorded motion picture can be d in two. It is recommended for when you want to divide a part you need with a part you do not need. divide It cannot be restored once divided. Select [ ]([Video Divide]) on the [Playback] Mode menu. -
Page 105: [Resize]
Playback/Editing [Resize] To allow easy posting to web pages, attachment to e-mail etc., picture size (number of pixels) is reduced. Select [ ] ([Resize]) on the [Playback] Mode menu. (P36) Touch [ ] ([Single]) or [ ] ([Multi]). Select the picture and size. [Single] setting Drag the screen horizontally to select an image, and then touch [Set]. -
Page 106: [Cropping]
Playback/Editing [Cropping] You can enlarge and then crop the important part of the recorded picture. Select [ ] ([Cropping]) on the [Playback] Mode menu. (P36) Drag the screen horizontally to select an image, and then touch [Set]. Select the parts to be cropped. Touch [ ]: Enlarge Touch [... -
Page 107: [Favorite]
Playback/Editing [Favorite] You can do the following if a mark has been added to pictures and they have been set as favorites. • Play back only the pictures set as favorites. ([Favorite] in [Filtering Play]) • Play back the pictures set as favorites only as a slide show. •... -
Page 108: [Print Set]
When you want to use a photo printing store to print pictures recorded on the built-in memory, copy them to a card (P112) and then set the print setting. For more information visit: http://panasonic.jp/dc/dpof_110/white_e.htm Select [ ] ([Print Set]) on the [Playback] Mode menu. (P36) Touch [ ] ([Single]) or [ ] ([Multi]). - Page 109 Playback/Editing ∫ Canceling all the [Print Set] settings Select [Print Set] on the [Playback] Mode menu. Touch [ ] ([Cancel]). • Confirmation screen is displayed. It is executed when [Yes] is selected. Exit the menu after it is executed. ∫ To print the date After setting the number of prints, set/cancel printing with the recording date by touching [Date].
-
Page 110: [Protect]
Playback/Editing [Protect] You can set protection for pictures you do not want to be deleted by mistake. Select [ ]([Protect]) on the [Playback] Mode menu. (P36) Touch [ ] ([Single]) or [ ] ([Multi]). Select the picture. [Single] setting Drag the screen horizontally to select an image, and then touch [Set]. -
Page 111: [Face Rec Edit]
Playback/Editing [Face Rec Edit] You can delete or change the information relating to Face Recognition for the selected picture. Select [ ]([Face Rec Edit]) on the [Playback] Mode menu. (P36) Touch [ ] ([Replace]) or [ ] ([Cancel]). Drag the screen horizontally to select an image, and then touch [Set]. Touch the name of the person you wish to edit. -
Page 112: [Copy]
Playback/Editing [Copy] You can copy data of pictures you have taken from the built-in memory onto a card or from a card into the built-in memory. Select [ ]([Copy]) on the [Playback] Mode menu. (P36) Touch the copy destination. All the picture data in the built-in memory are copied onto the card at one time. -
Page 113: Having Fun
Having fun Having fun Having Fun with Recorded Pictures Pictures can be saved to an album, and recorded pictures can be edited with ease. Pictures can be saved in different groups within an album, which makes it easier to playback the picture you want. Stamps can be applied to pictures, and decorations or makeup effects applied to brighten up people's faces or expressions, which makes it easy to keep your favorite pictures in stunning quality. -
Page 114: [My Photo Album]
Having fun [My Photo Album] Pictures can be copied into specific albums and you can selectively retrieve your favorite ones. Registering pictures contained in the card by album allows the following. • Playing back only the pictures registered in albums. ([Playback Album]) •... -
Page 115: [Beauty Retouch]
Having fun [Beauty Retouch] Drag the screen horizontally to select an picture, and then touch [OK]. Touch the face of the person to edit. • Only a person with an arrow can be selected. Select [ ] or [ ], and touch an item. •... - Page 116 Having fun Touch [OK]. • You can go ahead and edit another person. Repeat steps • People already edited cannot be edited again. If you want to edit again, save the picture once and go back to select the person again. Touch [Save].
-
Page 117: [Art Retouch]
Having fun [Art Retouch] Drag the screen horizontally to select an picture, and then touch [OK]. Touch the item. Item Description of settings ] ([Saturation]) Saturation can be changed in w6 steps. ] ([Brightness]) Brightness can be changed in w6 steps. Drag the slide bar to set the effects. -
Page 118: [Image Stamp]
Having fun [Image Stamp] Drag the screen horizontally to select an picture, and then touch [OK]. Touch the position you wish to stamp. • Up to 10 stamps can be applied at once. After finishing the picture editing, touch [OK]. Touch [OK]. -
Page 119: Wi-Fi
Wi-Fi Wi-Fi What you can do with the Wi-Fi function Use the Wi-Fi function of this camera for wireless LAN communications for the following. Connect to your smartphone or PC and send images From this camera and... Send images to your Instantly send recorded smartphone or PC and view pictures to the WEB service or... - Page 120 Wi-Fi Send images to WEB service Preparation: ¢1 Acquire the “LUMIX CLUB” login ID (P134) Log into “LUMIX CLUB” and register the WEB service to send images to. (P140) ¢1 A wireless access point (broadband router) that is connected to the internet is required to acquire a Login ID.
- Page 121 Wi-Fi Send images to your PC Required steps This camera 2 4 5 Step Step 1 Install “PHOTOfunSTUDIO 6.4 HD Lite Edition with Wi-Fi” on your PC. • Refer to the separate “Basic Owner’s Manual” for further information on operating environments or installation.
-
Page 122: Connect To The Wireless Access Point (Broadband Router) And Send The Images
Wi-Fi Connect to the wireless access point (broadband router) and send the images With this camera and... Use the Wi-Fi function to Instantly send recorded images to your smartphone, the WEB service or AV connect to the wireless access point (broadband device via the wireless access point router). - Page 123 Wi-Fi Send images to WEB service Required steps Wireless access point This camera LUMIX CLUB WEB service (broadband router) Step 1 2 4 Step 1 Step 1 Connect this camera to the wireless access point (broadband router). (P128) 2 Acquire the “LUMIX CLUB” login ID. (P134) 3 Register the WEB service used to send images with “LUMIX CLUB”.
- Page 124 Wi-Fi Send images to home AV device Required steps Wireless access point This camera AV device (broadband router) 2 3 4 Step Step Step 1 Connect AV device to the wireless access point (broadband router). • Refer to the operating instructions of the AV device for more information on the connection method.
-
Page 125: Wi-Fi Function
LAN devices, ensure that the appropriate measures are taken for safety designs and defects for the systems used. Panasonic will not take any responsibility for any damage that arises when using the camera for any purpose other than as a wireless LAN device. -
Page 126: Connect With [Easy Setup]
Wi-Fi Connect with [Easy Setup] Touch [ ] on the playback screen. Touch [ ] ([Wi-Fi Setup]). Touch [Easy Setup]. Touch the destination icon for the image again. • When selecting [AV device], touch [Home] or [External]. • Follow the on-screen instructions and make the settings. •... - Page 127 The service may not be able to be used properly depending on the type of smartphone being used. For compatible devices, see the following support site. http://panasonic.jp/support/global/cs/dsc/ (This Site is English only.) • When downloading the app on a mobile network, high packet communication fees may be incurred depending on the details of your contract.
-
Page 128: How To Use The [Manual Setup] Menu
Wi-Fi How to Use the [Manual Setup] Menu [Wireless settings] Set the SSID and authentication type for the wireless access point (broadband router) you are connecting to manually before connecting. Preparation: Check the “SSID”, “Encryption Type” and “Encryption Key” for the wireless access point (broadband router) you are using. - Page 129 Wi-Fi When connecting with [WPS (Push-Button)] Press the wireless access point (broadband router) WPS button until it switches to WPS mode. • A message is displayed when the wireless access point (broadband router) has been saved. • Refer to the wireless access point (broadband router) instruction manual for details. When connecting with [WPS (PIN)] Touch the wireless access point (broadband router) you are connecting to.
- Page 130 Wi-Fi When connecting with [Search Wireless AP] Touch the wireless access point (broadband router) you are connecting to. • Touching [Update] will search for a wireless access point (broadband router) again. (If network authentication is encrypted) Enter the encryption key and touch [Set]. •...
- Page 131 Wi-Fi ∫ Set the first wireless access point (broadband router) to connect to When several wireless access points (broadband router) are saved, changing settings so the wireless access point (broadband router) that is used most often is connected first adds convenience. •...
-
Page 132: [Smartphone Connection]
Wi-Fi [Smartphone connection] Change settings to connect to your smartphone. Select [Manual Setup] in the [Wi-Fi Setup] menu. (P36) Touch [ ] ([Smartphone connection]). Touch settings. Send method Setting Details The camera displays the connection information (SSID, encryption key) required to use the wireless access point. Connect directly to the destination equipment without connecting to the wireless access point (broadband router). -
Page 133: [Upload Size]
Wi-Fi [Upload Size] If the picture size is too big, sending the picture may take too long, so make the picture smaller before sending it. The picture size can be set for each destination. Select [Manual Setup] in the [Wi-Fi Setup] menu. (P36) Touch [ ] ([Upload Size]). -
Page 134: [Lumix Club]
Acquire a “LUMIX CLUB” login ID (free). Use the “LUMIX CLUB” when uploading pictures to WEB services or external AV device. – Refer to the “LUMIX CLUB” site for details. http://lumixclub.panasonic.net/eng/c/ Select [Manual Setup] in the [Wi-Fi Setup] menu. (P36) Touch [ ] ([LUMIX CLUB]). - Page 135 Wi-Fi ∫ Check or change the acquired login ID/password Select [Manual Setup] in the [Wi-Fi Setup] menu. (P36) Touch [LUMIX CLUB]. Touch [Display account] to display the login ID and password. • The password is displayed as “ ”. • Close the menu if only checking the login ID.
-
Page 136: [External Av Device]
• See the following site for AV device that is compatible with “LUMIX CLUB”. (no compatible equipment as of August 2011.) http://panasonic.jp/support/global/cs/dsc/ (This Site is English only.) Preparation: Check the address number (16-digit number) and access number (4-digit number) of the destination AV device issued by “LUMIX CLUB”. -
Page 137: [Wi-Fi Password]
Wi-Fi [Wi-Fi Password] To prevent incorrect operation or use of the Wi-Fi function by a third party and to protect saved personal information, it is recommended that you protect the Wi-Fi function with a password. Setting a password will automatically display the password input screen when the Wi-Fi function is used. -
Page 138: [Mac Address]
Wi-Fi [MAC Address] Displays the MAC address set for the camera. A “MAC Address” is a unique address that is used to identify network equipment. Select [Manual Setup] in the [Wi-Fi Setup] menu. (P36) Touch [ ] ([MAC Address]). • The MAC address of the camera is displayed. -
Page 139: Send Image
Wi-Fi Send image Preparation before sending images When sending images to [WEB Service] • “ ” Perform Using WEB services. (P140) to save the WEB service being used. When you want to send pictures to your smartphone or use your [Smartphone] to send pictures •... - Page 140 • Check the “FAQ/Contact us” on the following site for compatible WEB services. http://lumixclub.panasonic.net/eng/c/ Preparation: Make sure that you have created an account on the WEB service you want to use, and have the login information available.
-
Page 141: Select A Single Image And Send It
Wi-Fi Select a single image and send it In Playback Mode, select the image to send and press [Wi-Fi]. • When the password input screen is displayed, enter the password set in [Wi-Fi Password]. Select destination. Check the destination and touch [Yes]. •... -
Page 142: Select Multiple Images And Send Them
Wi-Fi Select multiple images and send them • Images saved on the built-in memory cannot be sent. Copy the pictures to a card (P112) before sending. In Playback Mode, touch [ • When the password input screen is displayed, enter the password set in [Wi-Fi Password]. - Page 143 Wi-Fi Change destination/detailed settings Touch the picture destination icon and move it to the front. • When sending images to the WEB service via a smartphone, select [WEB Service]. • Moving the destination icon to the front will display a description.
-
Page 144: Connecting To Other Equipment
To connect with an HDMI micro cable (optional) • Always use a genuine Panasonic HDMI micro cable (RP-CHEU15; optional). Part numbers: RP-CHEU15 (1.5 m) (5 feet) •... - Page 145 • Proper playback (aspect ratio) will be dependent on the TV used for viewing. • Motion pictures recorded with [AVCHD] can be played back on Panasonic TVs (VIERA) with the AVCHD logo mark. • For cards compatible with playback, refer to the operating instructions of the TV.
-
Page 146: Playback Using Viera Link (Hdmi)
VIERA Link™ is a new name for EZ Sync™. • This function allows you to use your remote control for the Panasonic TV for easy operations when this unit has been connected to a VIERA Link compatible device using a HDMI micro cable (optional) for automatic linked operations. - Page 147 Available linked operations between this unit and a Panasonic TV is different depending on the types of Panasonic TVs even if they are compatible with VIERA Link. Refer to the operating instructions of the TV for the operations that support the TV.
-
Page 148: Playing Back 3D Pictures
SD card slot. For current information regarding devices that can play back 3D pictures recorded with this unit, please refer to the below support site. http://panasonic.jp/support/global/cs/dsc/ (This Site is English only.) Preparations: Set the [3D Playback] to [ (P47) Connect the unit to a 3D compatible television using the HDMI micro cable and display the playback screen. - Page 149 Connecting to other equipment Note • When the picture is not appropriate to view in 3D (disparity is too large, etc.) – [Slide Show]: The picture will be played back in 2D. – [Filtering Play]: Confirmation screen is displayed. Select whether or not to play back the picture in 3D. •...
-
Page 150: Saving The Recorded Still Pictures And Motion Pictures
File formats that can be used: [JPEG], [AVCHD] It is possible to copy onto Blu-ray disc, DVD disc, or hard disk by inserting an SD card with still pictures and motion pictures recorded by this unit into a Panasonic Blu-ray Disc Recorder or DVD Recorder. -
Page 151: Copy The Playback Image Using An Av Cable
Connecting to other equipment Copy the playback image using an AV cable File formats that can be used: [AVCHD], [MP4] Copy images played back with this unit to Blu-ray disc, DVD disc, hard disk, or video using a Blu-ray Disc Recorder, DVD recorder, or video. This can be played back with equipment that is not compatible with high definition, so it is convenient for distributing copies. -
Page 152: Copying To A Pc Using "Photofunstudio 6.4 Hd Lite Edition With Wi-Fi
Connecting to other equipment Copying to a PC using “PHOTOfunSTUDIO 6.4 HD Lite Edition with Wi-Fi” File formats that can be used: [JPEG], [MPO], [AVCHD], [MP4] It is possible to acquire still pictures and motion pictures recorded in [AVCHD] or [MP4] formats, or create conventional standard quality DVD video from the motion picture that was recorded as [AVCHD], using “PHOTOfunSTUDIO 6.4 HD Lite Edition with Wi-Fi”... -
Page 153: Loading Images On A Pc
(Doing so will cause recorded images to be erased so do not choose to format.) If the card is not recognized, please refer to the below support site. http://panasonic.net/avc/sdcard/information/SDXC.html • You can easily print out or mail the pictures you have imported. Use of the “PHOTOfunSTUDIO 6.4 HD Lite Edition with Wi-Fi”... -
Page 154: Connecting With A Usb Connection Cable
Connecting to other equipment Connecting with a USB connection cable Preparations: Turn on the camera and the PC. Remove the card before using the pictures in the built-in memory. A USB connection cable (supplied) • Check the directions of the connectors, and plug them straight in or unplug them straight out. (Otherwise the connectors may be bent out of shape which may cause malfunction.) B Align the marks, and insert. - Page 155 Connecting to other equipment Note • Before connecting or disconnecting the AC adaptor (optional), turn the camera off. • Before inserting or removing a card, turn the camera off and disconnect the USB connection cable. Otherwise, data may be destroyed. ∫...
-
Page 156: Upload Images To The Web Service Using The Upload Tool "Lumix Image Uploader
Connecting to other equipment ∫ Disconnecting the USB connection cable safely Select the [ ] icon in task tray displayed on the PC, and then click [Eject DMC-XXX] (XXX varies by model). • Depending on your PC’s settings, this icon may not be displayed. •... -
Page 157: Printing The Pictures
Connecting to other equipment Printing the Pictures If you connect the camera to a printer supporting PictBridge, you can select the pictures to be printed out and instruct that printing be started from the camera’s LCD monitor. • Some printers can print directly from the card removed from the camera. For details, refer to the operating instructions of your printer. -
Page 158: Selecting A Single Picture And Printing It
Connecting to other equipment Selecting a single picture and printing it PictBridge PictBridge PictBridge Drag the screen horizontally to select an 1/11 1/11 1/11 100 _ 0001 100 _ 0001 0001 image, and then touch [Print]. Multi Print Print Single Select Touch [Print start]. -
Page 159: Print Settings
Connecting to other equipment Print Settings Select and set the items both on the screen in step of the “Selecting a single picture and printing it” and in step of the “Selecting multiple pictures and printing them” procedures. • When you want to print pictures on a paper size or a layout which is not supported by the camera, set [Paper Size] or [Page Layout] to [{] and then set the paper size or the layout on the printer. - Page 160 Connecting to other equipment [Paper Size] Item Description of settings Settings on the printer are prioritized. 89 mmk127 mm [L/3.5qk5q] 127 mmk178 mm [2L/5qk7q] 100 mmk148 mm [POSTCARD] 101.6 mmk180.6 mm [16:9] 210 mmk297 mm [A4] 297 mmk420 mm [A3] 100 mmk150 mm [10k15cm] 101.6 mmk152.4 mm...
-
Page 161: Screen Display
Others Others Screen Display ∫ In recording 10 11 11 11 11 F2.5 F2.5 F2.5 1/60 1/60 1/60 Recording Mode 20 LCD Mode (P42) Number of Recordable Pictures (P16) : LCD power save (P44) Available recording time ¢ 21 Date Stamp (P92) (P16): 22 Self-timer Mode... - Page 162 Others ∫ In playback 100 _ 0001 100 _ 0001 100 _ 0001 0001 9s 9s 9s 1/11 1/11 1/11 9s 9s 9s Playback Mode (P96) 15 Power LCD (P42) Recording Mode (when recording : LCD power save (P44) motion pictures) (P93) 16 Histogram (P43)
-
Page 163: Cautions For Use
Others Cautions for Use Optimal use of the camera Keep this unit as far away as possible from electromagnetic equipment (such as microwave ovens, TVs, video games etc.). • If you use this unit on top of or near a TV, the pictures and/or sound on this unit may be disrupted by electromagnetic wave radiation. - Page 164 Others Cleaning Before cleaning the camera, remove the battery or the DC coupler (For shop display purpose only), or disconnect the power plug from the outlet. Then wipe the camera with a dry soft cloth. • When the camera is soiled badly, it can be cleaned by wiping the dirt off with a wrung wet cloth, and then with a dry cloth.
- Page 165 Others Battery The battery is a rechargeable lithium ion battery. Its ability to generate power comes from the chemical reaction that takes place inside it. This reaction is susceptible to the surrounding temperature and humidity. If the temperature is too high or too low, the operating time of the battery will become shorter.
- Page 166 Others About 3D ∫ About 3D viewing Anyone who is hyper sensitive to light, suffers from heart disease or is otherwise unwell should avoid viewing 3D contents. • Viewing 3D contents may have an adverse effect to the individual. If you feel tired, uncomfortable or otherwise strange when viewing 3D contents, stop viewing at once.
- Page 167 Information including personal information may be altered or vanish due to erroneous operation, effect of static electricity, accident, malfunction, repair, or other handlings. Please note in advance that Panasonic is not liable in any way for any direct or indirect damage from the alteration or vanishing of information or personal information.
- Page 168 About the picture data • Recorded data may be damaged or lost if the camera breaks down due to inappropriate handling. Panasonic will not be liable for any damage suffered due to loss of recorded data. About tripods or unipods •...
-
Page 169: Message Display
Others Message Display Confirmation messages or error messages will be displayed on the screen in some cases. The major messages are described below as examples. [This picture is protected] > Delete the picture after canceling the protect setting. (P110) [Some pictures cannot be deleted]/[This picture cannot be deleted] •... - Page 170 3D. [This battery cannot be used] • Use a genuine Panasonic battery. If this message is displayed even when a genuine Panasonic battery is used, contact the dealer or your nearest Service Center. •...
- Page 171 Others [Failed to connect wireless access point]/[Connection failed]/[No destination found] • Check following regarding the wireless access point (broadband router). > The wireless access point (broadband router) information set on this unit is wrong. Check the authentication type, encryption type, and encryption key. (P130) >...
-
Page 172: Troubleshooting
Others Troubleshooting First, try out the following procedures (P172–183). If the problem is not resolved, it may be improved by selecting [Reset] (P45) on the [Setup] menu when taking pictures. Battery and power source The camera cannot be operated even when it is turned on. The camera turns off immediately after it is turned on. - Page 173 Others The subject is not focused properly. • The focus range varies depending on the Recording Mode. > Set to the proper mode for the distance to the subject. • The subject is beyond the focus range of the camera. (P22) •...
- Page 174 Others When recording pictures or half-pressing the shutter button, reddish stripes may appear on the LCD monitor. Alternatively, part or all of the LCD monitor may turn a reddish color. • This is a characteristic of CCDs, and it appears when the subject has a bright part.
- Page 175 Others LCD monitor The LCD monitor becomes darker or brighter for a moment. • This phenomenon appears when you press the shutter button halfway to set the aperture value and does not affect the recorded pictures. • This phenomenon also appears when the brightness changes when the camera is zoomed or when the camera is moved.
- Page 176 Others Flash The flash is not activated. • Is the flash setting set to [Œ]? > Change the flash setting. (P73) • The flash is not available when [Auto Bracket] (P87) or [Burst] (P90) in the recording menu are set. Flash is activated several times.
- Page 177 Others The folder number and the file number are displayed as [—] and the screen turns black. • Is this a non-standard picture, a picture which has been edited using a PC or a picture which was taken by another make of digital camera? •...
- Page 178 Others About the Wi-Fi function It cannot connect to the wireless LAN. Radio waves get disconnected. • Use within the communication range of the wireless LAN network. • Connection types and security setting methods are different depending on the wireless access point (broadband router).
- Page 179 I have forgotten the login ID or password for the “LUMIX CLUB”. • Check the information in the login screen of “LUMIX CLUB”. http://lumixclub.panasonic.net/eng/c/ I do not have a wireless access point (broadband router) at my home, but I would like to perform service user registration of the “LUMIX CLUB”.
- Page 180 Others The image that was supposed to have uploaded to the WEB service is not there. • Upload may not complete when it is disconnected while transmitting the image. • It may take some time after uploading the image to be reflected in the WEB service depending on the status of the server.
- Page 181 Others TV, PC and printer The picture does not appear on the television. • Is the camera connected to the TV correctly? > Set the TV input to External Input Mode. The display areas on the TV screen and the camera’s LCD monitor are different. •...
- Page 182 The card is not recognized by the PC. (SDXC memory card is used) > Check if your PC is compatible with SDXC memory cards. http://panasonic.net/avc/sdcard/information/SDXC.html > A message prompting to format the card may be displayed when connecting, but do not format.
- Page 183 Others The lens clicks. • When the brightness changes due to zoom or camera movement etc., the lens may click and the picture on the screen may drastically change. However, the picture is not affected. The sound is caused by the automatic adjustment of the aperture. This is not a malfunction. The clock is reset.
- Page 184 Multimedia Interface are trademarks or registered trademarks of HDMI Licensing LLC in the United States and other countries. • HDAVI Control™ is a trademark of Panasonic Corporation. • QuickTime and the QuickTime logo are trademarks or registered trademarks of Apple Inc., used under license therefrom.
- Page 185 This product incorporates the following software: (1) the software developed independently by or for Panasonic Corporation, (2) the software owned by third party and licensed to Panasonic Corporation and/or, (3) open sourced software including the software developed by the OpenSSL Project for use in the OpenSSL Toolkit (http://www.openssl.org/), and the software written by Eric Young...
- Page 186 Others This product includes cryptographic software written by Eric Young (eay@cryptsoft.com). This product includes software written by Tim Hudson (tjh@cryptsoft.com). Original SSLeay License Copyright (C) 1995-1998 Eric Young (eay@cryptsoft.com) All rights reserved. This package is an SSL implementation written by Eric Young (eay@cryptsoft.com). The implementation was written so as to conform with Netscapes SSL.
- Page 187 Others This product contains encryption software developed by Eric Young, and can be used under the following licencing conditions. Copyright (C) 1995-1998 Eric Young (eay@cryptsoft.com) All rights reserved. This package is an SSL implementation written by Eric Young (eay@cryptsoft.com). The implementation was written so as to conform with Netscapes SSL. This library is free for commercial and non-commercial use as long as the following conditions are adhered to.
- Page 188 Others This product contains NetBSD software developed, and can be used under the following licencing conditions. Copyright (c) 1990 The Regents of the University of California. All rights reserved. This code is derived from software contributed to Berkeley by Chris Torek. Redistribution and use in source and binary forms, with or without modification, are permitted provided that the following conditions are met: Redistributions of source code must retain the above copyright notice, this list of conditions...
- Page 189 Others This product contains OpenSSL software developed by the OpenSSL Project, and can be used under the following licencing conditions. Copyright (c) 1999-2002 The OpenSSL Project. All rights reserved. Redistribution and use in source and binary forms, with or without modification, are permitted provided that the following conditions are met: Redistributions of source code must retain the above copyright notice, this list of conditions and the following disclaimer.
- Page 190 Others This product contains encryption software developed by Eric Young, and can be used under the following licencing conditions. Copyright (C) 1995-1998 Eric Young (eay@cryptsoft.com) All rights reserved. This package is an SSL implementation written by Eric Young (eay@cryptsoft.com). The implementation was written so as to conform with Netscapes SSL. This library is free for commercial and non-commercial use as long as the following conditions are adhered to.
- Page 191 Others This product contains NetBSD software developed, and can be used under the following licencing conditions. Copyright (c) 1990 The Regents of the University of California. All rights reserved. This code is derived from software contributed to Berkeley by Chris Torek. Redistribution and use in source and binary forms, with or without modification, are permitted provided that the following conditions are met: Redistributions of source code must retain the above copyright notice, this list of conditions...
- Page 192 Others This product contains NetBSD software developed, and can be used under the following licencing conditions. Copyright (c) 1989 The Regents of the University of California. All rights reserved. This code is derived from software contributed to Berkeley by Tom Truscott. Redistribution and use in source and binary forms, with or without modification, are permitted provided that the following conditions are met: Redistributions of source code must retain the above copyright notice, this list of conditions...
- Page 193 This product contains NetBSD software developed, and can be used under the following licencing conditions. Copyright (c) 1990, 1993 The Regents of the University of California. All rights reserved. This code is derived from software contributed to Berkeley by Chris Torek. Redistribution and use in source and binary forms, with or without modification, are permitted provided that the following conditions are met: Redistributions of source code must retain the above copyright notice, this list of conditions...