Table of Contents
Advertisement
Quick Links
Installation Guide for Cisco Secure ACS
Solution Engine 4.1
Version 4.1
License and Warranty
April 2007
Corporate Headquarters
Cisco Systems, Inc.
170 West Tasman Drive
San Jose, CA 95134-1706
USA
http://www.cisco.com
Tel: 408 526-4000
800 553-NETS (6387)
Fax: 408 526-4100
Text Part Number: OL-9969-03
Advertisement
Table of Contents

Related Manuals for Cisco CSACSE-1111-K9 - Secure Access Control Server Solution Engine


Summary of Contents for Cisco CSACSE-1111-K9 - Secure Access Control Server Solution Engine
- Page 1 Installation Guide for Cisco Secure ACS Solution Engine 4.1 Version 4.1 License and Warranty April 2007 Corporate Headquarters Cisco Systems, Inc. 170 West Tasman Drive San Jose, CA 95134-1706 http://www.cisco.com Tel: 408 526-4000 800 553-NETS (6387) Fax: 408 526-4100 Text Part Number: OL-9969-03...
- Page 2 You can determine whether your equipment is causing interference by turning it off. If the interference stops, it was probably caused by the Cisco equipment or one of its peripheral devices. If the equipment causes interference to radio or television reception, try to correct the interference by using one or more of the following measures: •...
-
Page 3: Table Of Contents
C H A P T E R System Description ACS SE Hardware Description Serial Port Solution Engine Specifications for the Cisco 1113 Front Panel Features for the Cisco 1113 Back Panel Features for the Cisco 1113 Serial Port Ethernet Connectors... - Page 4 Precautions for Rack-Mounting Precautions for Products with Modems, Telecommunications, or Local Area Network Options Required Tools and Equipment Installing and Configuring Cisco Secure ACS Solution Engine 4.1 C H A P T E R Installation Quick Reference Installing the Cisco 1113 in a Rack...
- Page 5 4-24 Recovering from Loss of Administrator Credentials 4-24 Re-imaging the Solution Engine Hard Drive 4-25 Upgrading and Migrating to Cisco Secure ACS Solution Engine 4.1 C H A P T E R Upgrade Scenarios Migration Scenarios Upgrade Paths Upgrade Procedure Performing a Full Upgrade From ACS SE 4.0.1 to ACS SE 4.1...
- Page 6 Contents Migrating from ACS for Windows to ACS SE 5-13 Migrating ACS SE on the ACS 1111 or ACS 1112 Platform to ACS SE 4.1 on the Cisco 1113 Platform 5-15 Technical Specifications for the Cisco 1113 A P P E N D I X...
- Page 7 Contents set timeout C-14 show C-14 shutdown C-14 start C-15 stop C-15 support C-16 tracert C-16 unlock guiadmin C-18 upgrade C-18 Book Title 78-xxxxx-xx...
- Page 8 Contents Book Title viii 78-xxxxx-xx...
-
Page 9: Preface
Preface This guide describes how to install and initially configure the Cisco Secure ACS Solution Engine (ACS SE), and includes upgrade and migration information for the Cisco 1111, Cisco 1112, and Cisco 1113 platforms. It also details administrative functions that you can perform from the command line interface. -
Page 10: Warning Definition
Opmerking Deze documentatie dient gebruikt te worden in combinatie met de installatiehandleiding voor het specifieke product die bij het product wordt geleverd. Raadpleeg de installatiehandleiding, configuratiehandleiding of andere verdere ingesloten documentatie voor meer informatie. Installation Guide for Cisco Secure ACS Solution Engine 4.1 OL-9969-03... - Page 11 Hinweis Dieses Handbuch ist zum Gebrauch in Verbindung mit dem Installationshandbuch für Ihr Gerät bestimmt, das dem Gerät beiliegt. Entnehmen Sie bitte alle weiteren Informationen dem Handbuch (Installations- oder Konfigurationshandbuch o. Ä.) für Ihr spezifisches Gerät. Installation Guide for Cisco Secure ACS Solution Engine 4.1 OL-9969-03...
- Page 12 Merk TA VARE PÅ DISSE INSTRUKSJONENE Merk Denne dokumentasjonen skal brukes i forbindelse med den spesifikke installasjonsveiledningen som fulgte med produktet. Vennligst se installasjonsveiledningen, konfigureringsveiledningen eller annen vedlagt tilleggsdokumentasjon for detaljer. Installation Guide for Cisco Secure ACS Solution Engine 4.1 OL-9969-03...
- Page 13 OBS! SPARA DESSA ANVISNINGAR OBS! Denna dokumentation ska användas i samband med den specifika produktinstallationshandbok som medföljde produkten. Se installationshandboken, konfigurationshandboken eller annan bifogad ytterligare dokumentation för närmare detaljer. Installation Guide for Cisco Secure ACS Solution Engine 4.1 xiii OL-9969-03...
-
Page 14: Documentation Updates
Contents Documentation Updates Table 1 Updates to Installation Guide for Cisco Secure ACS Solution Engine 4.1 Date Description 12/15/2009 Updated Solution Engine Specifications for the Cisco 1113 • Updated the table ACS SE Technical Specifications for the Cisco 1113 •... -
Page 15: Product Documentation
Contents Product Documentation We sometimes update the printed and electronic documentation after original publication. Therefore, Note you should also review the documentation on Cisco.com for any updates. Table 2 describes the product documentation that is available. Table 2 Product Documentation... -
Page 16: Related Documentation
A set of white papers about Cisco Secure ACS for Windows is available at: http://www.cisco.com/en/US/partner/products/sw/secursw/ps2086/prod_white_papers_list.html Much of the information in these papers is applicable to Cisco Secure ACS Solution Engine. Obtaining Documentation Cisco documentation and additional literature are available on Cisco.com. This section explains the product documentation resources that Cisco offers. -
Page 17: Documentation Feedback
Reporting Security Problems in Cisco Products Cisco is committed to delivering secure products. We test our products internally before we release them, and we strive to correct all vulnerabilities quickly. If you think that you have identified a vulnerability in a Cisco product, contact PSIRT: •... -
Page 18: Product Alerts And Field Notices
Modifications to or updates about Cisco products are announced in Cisco Product Alerts and Cisco Field Notices. You can receive Cisco Product Alerts and Cisco Field Notices by using the Product Alert Tool on Cisco.com. This tool enables you to create a profile and choose those products for which you want to receive information. -
Page 19: Submitting A Service Request
Cisco engineer. The TAC Service Request Tool is located at this URL: http://www.cisco.com/techsupport/servicerequest For S1 or S2 service requests, or if you do not have Internet access, contact the Cisco TAC by telephone. (S1 or S2 service requests are those in which your production network is down or severely degraded.) Cisco engineers are assigned immediately to S1 and S2 service requests to help keep your business operations running smoothly. -
Page 20: Definitions Of Service Request Severity
• The Cisco Online Subscription Center is the website where you can sign up for a variety of Cisco e-mail newsletters and other communications. Create a profile and then select the subscriptions that you would like to receive. To visit the Cisco Online Subscription Center, go to this URL: http://www.cisco.com/offer/subscribe... - Page 21 Cisco experts and other networking professionals. Join a discussion at this URL: http://www.cisco.com/discuss/networking “What’s New in Cisco Documentation” is an online publication that provides information about the • latest documentation releases for Cisco products. Updated monthly, this online publication is organized by product category to direct you quickly to the documentation for your products.
- Page 22 Contents Installation Guide for Cisco Secure ACS Solution Engine 4.1 xxii OL-9969-03...
-
Page 23: Cisco 90-Day Limited Hardware Warranty Terms
Your formal Warranty Statement, including the warranties and license agreements applicable to Cisco software, is available on Cisco.com. Follow these steps to access and download the Cisco Information Packet and your warranty and license agreements from Cisco.com. - Page 24 Ninety (90) days. Replacement, Repair, or Refund Policy for Hardware Cisco or its service center will use commercially reasonable efforts to ship a replacement part within ten (10) working days after receipt of a Return Materials Authorization (RMA) request. Actual delivery times can vary, depending on the customer location.
-
Page 25: Chapter 1 Cisco Secure Acs Solution Engine Overview
ACS SE provides almost the same set of features and functions as in the Cisco Secure ACS for Windows Server (the software product) in a dedicated, security hardened, application-specific, appliance packaging. -
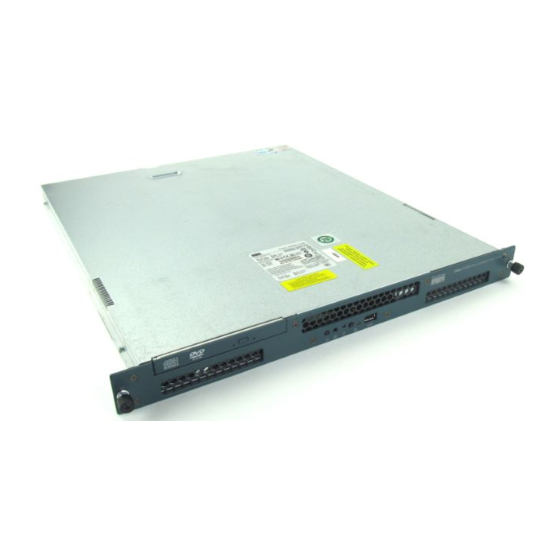
Page 26: Acs Se Hardware Description
ACS Release 4.1 and the Release Notes for Cisco Secure ACS Solution Engine. ACS SE Hardware Description ACS SE is a rack-mountable 1U box. The sections below describe the Cisco 1113 device, which runs on a Quanta S27 system. Serial Port The integrated serial port on the back panel of the appliance uses a 9-pin, D-subminiature connector. -
Page 27: Solution Engine Specifications For The Cisco 1113
Cisco Secure ACS Solution Engine Overview ACS SE Hardware Description Solution Engine Specifications for the Cisco 1113 The ACS SE on the Cisco 1113 platform has the following specifications: Intel Pentium IV 3.4 GHz/800FSB/2M KB CPU • Broadcom 5721J Ethernet network interface card •... - Page 28 Chapter 1 Cisco Secure ACS Solution Engine Overview ACS SE Hardware Description Figure 1-2 Front Panel Switches and Indicators for the Cisco 1113 C IS C O 1 1 B U IL D IN G B R O A D B...
-
Page 29: Back Panel Features For The Cisco 1113
USB port (not supported) Universal Serial Bus port. Do not use. Back Panel Features for the Cisco 1113 The back panel for the Cisco 1113 contains the AC power receptacle, Ethernet connectors, indicator LEDs, and a serial port. Figure 1-3 shows the back-panel features. -
Page 30: Serial Port
(Pin numbering proceeds bottom to top and right to left, as illustrated.) Installation Guide for Cisco Secure ACS Solution Engine 4.1 OL-9969-03... -
Page 31: Ethernet Connectors
Chassis ground Ethernet Connectors Your Cisco 1113 system has two integrated 10/100/1000-megabit-per-second (Mbps) Ethernet connectors. ACS SE supports the operation of either Ethernet connector, but not both connectors. Each Ethernet connector provides all the functions of a network expansion card and supports the 10BASE-T, 100BASE-TX, and 1000BASE-TX Ethernet standards. - Page 32 For 10BASE-T networks, use Category 3 or greater wiring and connectors. • For 100BASE-TX and 1000BASE-TX networks, use Category 5 or greater wiring and connectors. • The maximum cable run length is 328 feet (ft) or 100 meters (m). • Installation Guide for Cisco Secure ACS Solution Engine 4.1 OL-9969-03...
-
Page 33: Safety
C H A P T E R Preparing for Installation This chapter describes the safety instructions and site requirements for installing Cisco Secure ACS Solution Engine (ACS SE) 4.1, and guides you through installation preparation. It contains: Safety, page 2-1 •... - Page 34 This unit is intended for installation in restricted access areas. A restricted access area can be Warning accessed only through the use of a special tool, lock and key, or other means of security. Statement 1017 Installation Guide for Cisco Secure ACS Solution Engine 4.1 OL-9969-03...
- Page 35 Ultimate disposal of this product should be handled according to all national laws and regulations. Warning Statement 1040 Installation of the equipment must comply with local and national electrical codes. Statement 1074 Warning Installation Guide for Cisco Secure ACS Solution Engine 4.1 OL-9969-03...
-
Page 36: General Precautions
Maintaining Safety with Electricity Follow these guidelines when working on equipment powered by electricity: • If any of the following conditions occurs, contact the Cisco Technical Assistance Center: – The power cable or plug is damaged. – An object has fallen into the product. -
Page 37: Protecting Against Electrostatic Discharge
To predict and remedy strong EMI, consult RFI experts. Installation Guide for Cisco Secure ACS Solution Engine 4.1 OL-9969-03... -
Page 38: Preparing Your Site For Installation
Never defeat the ground conductor or operate the equipment in the absence of a suitably installed Warning ground conductor. Contact the appropriate electrical inspection authority or an electrician if you are uncertain that suitable grounding is available. Installation Guide for Cisco Secure ACS Solution Engine 4.1 OL-9969-03... -
Page 39: Creating A Safe Environment
In addition to using the console cable, use the provided standard Ethernet cable to connect the ACS SE to your network. For information detailing cable requirements, see Back Panel Features for the Cisco 1113, page 1-5. Installation Guide for Cisco Secure ACS Solution Engine 4.1 OL-9969-03... -
Page 40: Precautions For Rack-Mounting
Do not use a telephone line to report a gas leak while you are in the vicinity of the leak. • Installation Guide for Cisco Secure ACS Solution Engine 4.1 OL-9969-03... - Page 41 You need the following tools and equipment to install the ACS SE: Number 2 Phillips-head screwdriver • Tape measure and level • Antistatic mat or antistatic foam • ESD grounding strap • Installation Guide for Cisco Secure ACS Solution Engine 4.1 OL-9969-03...
- Page 42 Chapter 2 Preparing for Installation Required Tools and Equipment Installation Guide for Cisco Secure ACS Solution Engine 4.1 2-10 OL-9969-03...
-
Page 43: Installation Quick Reference
Following installation and initial configuration, see the User Guide for Cisco Secure ACS for information on how to use a browser and the web interface to fully configure your ACS SE to provide the AAA services that you want from this installation. -
Page 44: Installing The Cisco 1113 In A Rack
Perform the steps below when installing and servicing the Cisco Secure ACS SE. The rack must be properly secured to the floor, to the ceiling or upper wall, and where applicable, to adjacent racks. -
Page 45: Attaching The Chassis Rail Mount
Chapter 3 Installing and Configuring Cisco Secure ACS Solution Engine 4.1 Installing the Cisco 1113 in a Rack The server can be installed in a system 1U rack. The rack rail components are as follows (numbers in parentheses refer to... - Page 46 Chapter 3 Installing and Configuring Cisco Secure ACS Solution Engine 4.1 Installing the Cisco 1113 in a Rack Figure 3-2 Removing the Chassis Rail Mount Figure 3-3. Slide the white tab (1) in the direction of its arrow and slide out the chassis rail mount Step 2 part.
- Page 47 Chapter 3 Installing and Configuring Cisco Secure ACS Solution Engine 4.1 Installing the Cisco 1113 in a Rack Figure 3-4 Positioning Chassis Rail Mount on Chassis Figure 3-5. Align the holes (1) and then slide the rail until it locks into place (2).
-
Page 48: Attaching The Server Rail
Chapter 3 Installing and Configuring Cisco Secure ACS Solution Engine 4.1 Installing the Cisco 1113 in a Rack Figure 3-6 Chassis Rail Mount in Locked Position Attaching the Server Rail Now that you have mounted the chassis rail mount, retract the server rail that you previously extended and then attach it to the rack. - Page 49 Chapter 3 Installing and Configuring Cisco Secure ACS Solution Engine 4.1 Installing the Cisco 1113 in a Rack Figure 3-7 Retracting the Server Rail Attach the server rail to the rack as shown in the figure that corresponds to your rack:...
-
Page 50: Sliding Chassis On The Rack
Chapter 3 Installing and Configuring Cisco Secure ACS Solution Engine 4.1 Installing the Cisco 1113 in a Rack Figure 3-9 Attaching Rail to a Circular-Peg Rack Repeat this process with the other rail and rack assembly. Step 3 Leaving some play between the bracket and the rail until you install the rail into the rack will Note make affixing the rail to the rack easier. -
Page 51: Connecting To The Ac Power Source
Chapter 3 Installing and Configuring Cisco Secure ACS Solution Engine 4.1 Connecting to the AC Power Source Figure 3-10 Sliding the Chassis Rail Mount Extended Tab Insert the chassis in the rack. See Figure 3-11. Step 2 Figure 3-11 Sliding Chassis onto Rack Slide the chassis back and forth several times. -
Page 52: Connecting Cables
You perform the fourth and final part of the configuration, which includes providing AAA services by establishing administrative and user accounts and configuring network connections, from the web interface. See User Guide for Cisco Secure ACS for more information. Establishing a Serial Console Connection Before you can perform the initial configuration of ACS SE, you must establish a serial console connection to it. -
Page 53: Configuring Acs Se
Chapter 3 Installing and Configuring Cisco Secure ACS Solution Engine 4.1 Initial Configuration You may also use a serial concentrator connection, if desired. Power on ACS SE and the console, and open your terminal emulation communication software on the Step 2 console. - Page 54 Chapter 3 Installing and Configuring Cisco Secure ACS Solution Engine 4.1 Initial Configuration Appliance Base Image: [version number] CSA build [version number]: (Patch: [version number]) Status: Appliance is functioning properly The ACS Appliance has not been configured. Logon as “Administrator” with password “setup” to configure appliance.
- Page 55 Chapter 3 Installing and Configuring Cisco Secure ACS Solution Engine 4.1 Initial Configuration The new password must contain a minimum of 6 characters, and include a mix of at least three Note character types (uppercase letters, lowercase letters, digits, and special characters). Each of the following examples is acceptable: 1PaSsWoRd, *password44, Pass*word.
- Page 56 Chapter 3 Installing and Configuring Cisco Secure ACS Solution Engine 4.1 Initial Configuration For more information on the GUI administrator account, see Setting Up a GUI Administrator Account, page 3-16. Step 14 At the prompt, type Y for yes or N for No, and then press Enter.
-
Page 57: Verifying The Initial Configuration
Chapter 3 Installing and Configuring Cisco Secure ACS Solution Engine 4.1 Initial Configuration If network connectivity is validated in the previous two steps, at the prompt, Test network , type n or N, and then press Enter. connectivity [Yes]: The system continues to provide you with the opportunity to test network connectivity until you answer no. -
Page 58: Setting Up A Gui Administrator Account
Chapter 3 Installing and Configuring Cisco Secure ACS Solution Engine 4.1 Initial Configuration Reboot the ACS SE. For more information, see Rebooting the Solution Engine From a Serial Console, Step 1 page 4-3. Result: When the systems finish booting, a prompt appears on the console. -
Page 59: Next Steps
The HTML address is in the following format: http://<ip address>:2002, where ip address is the address that you assign during configuration. For information on setting up user, group, network, and other parameters, see the User Guide for Cisco Secure ACS. - Page 60 Chapter 3 Installing and Configuring Cisco Secure ACS Solution Engine 4.1 Initial Configuration Installation Guide for Cisco Secure ACS Solution Engine 4.1 3-18 OL-9969-03...
- Page 61 C H A P T E R Administering Cisco Secure ACS Solution Engine This section describes the major Cisco Secure ACS Solution Engine (ACS SE) system administration tasks that you can perform by using the command line interface (CLI) in the serial console connection.
- Page 62 Press the power switch and hold it down for 4 seconds to turn off the ACS SE. For the location of the Step 4 power switch see Figure 1-1 on page 1-3. Result: The ACS SE powers OFF. Installation Guide for Cisco Secure ACS Solution Engine 4.1 OL-9969-03...
- Page 63 Note You typically perform status determination in the ACS SE web interface. For more information, see “Determining the Status of Cisco Secure ACS Services” in the User Guide for Cisco Secure Access Control Server. To determine the status of the ACS SE and ACS Services: Log in to the ACS SE.
-
Page 64: Stopping Solution Engine Services From A Serial Console
You typically stop solution engine services in the web interface. You can stop any of the ACS SE services from the serial console. The ACS SE services include: CSAdmin • CSAgent • CSAuth • CSDbSync • Installation Guide for Cisco Secure ACS Solution Engine 4.1 OL-9969-03... - Page 65 Note You can start any of the ACS services from the serial console. The ACS SE services include: CSAdmin • CSAgent • CSAuth • CSDbSync • CSLog • CSMon • Installation Guide for Cisco Secure ACS Solution Engine 4.1 OL-9969-03...
- Page 66 To list the services and their status, you can use the show command. For more information, see Determining the Status of Solution Engine System and Services From a Serial Console, page 4-3. Installation Guide for Cisco Secure ACS Solution Engine 4.1 OL-9969-03...
- Page 67 Log off exportgroups Export group information to an FTP server exportlogs Export appliance diagnostic logs to FTP server exportusers Export user information to an FTP server help List commands Installation Guide for Cisco Secure ACS Solution Engine 4.1 OL-9969-03...
- Page 68 Exporting Logs, page 4-10 • Exporting a List of Groups, page 4-11 • Exporting a List of Users, page 4-12 • Backing Up ACS Data From the Serial Console, page 4-12 • Installation Guide for Cisco Secure ACS Solution Engine 4.1 OL-9969-03...
-
Page 69: Obtaining Support Logs From The Serial Console
FTP server user account name and press Enter. Step 8 Enter FTP Server Username Performing this next step begins the procedure that stops and restarts all services, and will interrupt use Caution of the ACS SE. Installation Guide for Cisco Secure ACS Solution Engine 4.1 OL-9969-03... -
Page 70: Exporting Logs
Step 5 At the prompt, enter your FTP server password and press Enter. Step 6 Step 7 At the prompt, enter the FTP server directory pathname and press Enter. Installation Guide for Cisco Secure ACS Solution Engine 4.1 4-10 OL-9969-03... -
Page 71: Exporting A List Of Groups
Step 8 Password: Result: The ACS SE exports the group list file to the specified location. When done the system displays the message: Transferring ‘groups.txt’ completed The system prompt returns. Installation Guide for Cisco Secure ACS Solution Engine 4.1 4-11 OL-9969-03... -
Page 72: Exporting A List Of Users
The system prompt reappears. Backing Up ACS Data From the Serial Console This section details how to use the serial console to back up ACS SE data to an FTP server. Installation Guide for Cisco Secure ACS Solution Engine 4.1 4-12 OL-9969-03... - Page 73 To proceed, type Y and press Enter. Step 11 Result: The ACS SE exports the backup file to the specified location and displays messages regarding the progress of the backup. Installation Guide for Cisco Secure ACS Solution Engine 4.1 4-13 OL-9969-03...
-
Page 74: Restoring Acs Data From The Serial Console
Step 8 File: At the prompt, to restore the user and Step 9 Select Components to Restore: User and Group Database: group database type Y and then press Enter. Installation Guide for Cisco Secure ACS Solution Engine 4.1 4-14 OL-9969-03... -
Page 75: Resetting The Solution Engine Administrator Password
Administrators table of the Administrative Control page in the ACS web interface. This account is called the CLI administrator account and allows access to the SE only through a serial console. Installation Guide for Cisco Secure ACS Solution Engine 4.1 4-15 OL-9969-03... -
Page 76: Resetting The Solution Engine Cli Administrator Name
Unlike other ACS administrative accounts, this unique administrative account is granted all privileges, cannot be deleted, and is not listed in the Administrators table of the Administrative Control page in the ACS web interface. Installation Guide for Cisco Secure ACS Solution Engine 4.1 4-16 OL-9969-03... -
Page 77: Setting The Gui Administrator Logon And Password
GUI administrator account and password is the password is the password for the GUI administrator. There is now a GUI administrator account that a remote user can use to access the ACS GUI running on the ACS SE. Installation Guide for Cisco Secure ACS Solution Engine 4.1 4-17 OL-9969-03... -
Page 78: Resetting The Solution Engine Database Password
Reconfiguring the IP address may cause other network devices to fail to recognize the ACS SE. Caution Reconfiguring the IP address causes services to restart. AAA services to users will be interrupted. Caution Installation Guide for Cisco Secure ACS Solution Engine 4.1 4-18 OL-9969-03... - Page 79 N. This procedure gives you an opportunity, if required, to correct network connections or retype the IP address. Result: The ACS SE restarts services, and displays the system prompt. Installation Guide for Cisco Secure ACS Solution Engine 4.1 4-19 OL-9969-03...
-
Page 80: Setting The System Time And Date Manually
(You can configure backup NTP servers if you desire.) To set the ACS SE system time and date manually, see Setting the System Time and Date Manually, page 4-20. Installation Guide for Cisco Secure ACS Solution Engine 4.1 4-20 OL-9969-03... -
Page 81: Setting The System Timeout
To set the ACS SE system timeout: Log in to the ACS SE. For more information, see Logging In to the Solution Engine From a Serial Step 1 Console, page 4-2. Installation Guide for Cisco Secure ACS Solution Engine 4.1 4-21 OL-9969-03... -
Page 82: Setting The Solution Engine System Domain
Result: The system restarts all services, and the hostname is reset. The system then displays the confirmation message: You should reboot appliance for the change to take effect. (The hostname is then reset after system reboot.) Installation Guide for Cisco Secure ACS Solution Engine 4.1 4-22 OL-9969-03... -
Page 83: Removing Installed Patches
Once stopped, the CSAgent service does not restart when the system is restarted; you must explicitly restart the service for it to operate. For more information, see the User Guide for Cisco Secure Access Control Server. Installation Guide for Cisco Secure ACS Solution Engine 4.1... -
Page 84: Recovery Management
Result: The system displays the prompt: Please remove this recovery CD from the drive, then hit RETURN to restart the system: Remove the recovery CD from the drive, and then press Enter. Step 7 Installation Guide for Cisco Secure ACS Solution Engine 4.1 4-24 OL-9969-03... -
Page 85: Re-Imaging The Solution Engine Hard Drive
[2] Restore hard disk image from CD [3] Exit and reboot Enter menu item number: [ ] Type 2, and then press Enter. Step 4 Result: The ACS SE displays the message: Installation Guide for Cisco Secure ACS Solution Engine 4.1 4-25 OL-9969-03... - Page 86 After re-imaging the solution engine hard drive, you must once again perform initial configuration of the Note ACS SE. For detailed instructions, see Configuring ACS SE, page 3-11. Installation Guide for Cisco Secure ACS Solution Engine 4.1 4-26 OL-9969-03...
-
Page 87: Upgrade Scenarios
Upgrade Procedure, page 5-4 • Migrating from ACS for Windows to ACS SE, page 5-13 • Migrating ACS SE on the ACS 1111 or ACS 1112 Platform to ACS SE 4.1 on the Cisco 1113 • Platform, page 5-15 Upgrade Scenarios Cisco Secure ACS Solution Engine 4.1 supports the following upgrade scenarios:... -
Page 88: Migration Scenarios
ACS SE 4.1 Upgrade CD. Use this CD to upgrade an existing ACS SE 3.3.3 installation to ACS 4.1. – ACS 4.1 Recovery CD for 1113. Use this CD to restore the Cisco 1113 system software if the system fails. Note... - Page 89 If you are upgrading on an ACS 1111 or 1112 device and need to restore the ACS 1111 or 1112 Note system software, obtain the required recovery CD from the Cisco Technical Assistance Center (TAC). For information on contacting the Cisco TAC, see...
-
Page 90: Upgrade Procedure
Obtain the ACS 4.0 to 4.1 upgrade package. Step 1 If the ACS SE is running Cisco Security Agent, you must disable the CSAgent service before upgrading. Step 2 You can do so at the console or in the web interface (ACS GUI). Using the: Console, enter show. - Page 91 Chapter 5 Upgrading and Migrating to Cisco Secure ACS Solution Engine 4.1 Upgrade Procedure Double-click the autorun.bat icon. The download utility starts. You are prompted to enter the hostname or IP address of the appliance, as shown in Figure 5-1.
- Page 92 Chapter 5 Upgrading and Migrating to Cisco Secure ACS Solution Engine 4.1 Upgrade Procedure Figure 5-3 Appliance Upgrade Form with Text Box for the Distribution Server Enter the IP address of the distribution server and then click Connect. The Appliance Upgrade Form page opens, as shown in Figure 5-4.
- Page 93 Chapter 5 Upgrading and Migrating to Cisco Secure ACS Solution Engine 4.1 Upgrade Procedure Figure 5-5 Appliance Upgrade Page Click Apply Upgrade. The upgrade utility applies the management software upgrade. Note This process takes several minutes. The system reboots several times.
- Page 94 Step 1 Step 2 If the ACS SE is running Cisco Security Agent, you must disable the CSAgent service before upgrading. You can do so at the console or in the web interface (ACS GUI). Using the: Console, enter show. If the CSAgent service is running, enter stop csagent.
- Page 95 Chapter 5 Upgrading and Migrating to Cisco Secure ACS Solution Engine 4.1 Upgrade Procedure Click Add Administrator. The Add Administrator page opens. Add a new administrator and grant all administrative privileges to the administrator. When you create a GUI administrator account, you will have two administrator accounts for the Note ACS SE: one each for a GUI and CLI.
- Page 96 Chapter 5 Upgrading and Migrating to Cisco Secure ACS Solution Engine 4.1 Upgrade Procedure Figure 5-7 Appliance Upgrade Page Click Download. The Appliance Upgrade Form page opens, as shown in Figure 5-8. On this page, you enter the IP address of the distribution server.
- Page 97 Chapter 5 Upgrading and Migrating to Cisco Secure ACS Solution Engine 4.1 Upgrade Procedure Figure 5-9 Appliance Upgrade Form Click Download Now. The upgrade utility downloads the upgrade image. The Appliance Upgrade page opens, as shown in Figure 5-10. The Appliance Versions table provides information about the software version.
- Page 98 Chapter 5 Upgrading and Migrating to Cisco Secure ACS Solution Engine 4.1 Upgrade Procedure The download utility starts. You are prompted to enter the hostname of IP address of the appliance, as shown in Figure 5-6. Enter the hostname or the IP address of the distribution server and then click Install.
- Page 99 Migrating from ACS for Windows to ACS SE Migrating from Cisco Secure ACS for Windows Server (ACS for Windows) to ACS SE uses the backup and restore features of ACS. Backup files produced by ACS for Windows are compatible with ACS SE, provided that both are using the same version of ACS software.
- Page 100 In the web interface of ACS for Windows 4.1, use the ACS Backup feature to back up the database. For Step 3 more information about the ACS Backup feature, see the User Guide for Cisco Secure ACS for Windows Server.
- Page 101 Upgrading and Migrating to Cisco Secure ACS Solution Engine 4.1 Migrating ACS SE on the ACS 1111 or ACS 1112 Platform to ACS SE 4.1 on the Cisco 1113 Platform Migrating ACS SE on the ACS 1111 or ACS 1112 Platform to ACS SE 4.1 on the Cisco 1113 Platform...
- Page 102 Chapter 5 Upgrading and Migrating to Cisco Secure ACS Solution Engine 4.1 Migrating ACS SE on the ACS 1111 or ACS 1112 Platform to ACS SE 4.1 on the Cisco 1113 Platform Installation Guide for Cisco Secure ACS Solution Engine 4.1...
- Page 103 A P P E N D I X Technical Specifications for the Cisco 1113 Table A-1 provides the technical specifications of the Cisco Secure ACS Solution Engine (ACS SE) on the CSACSE-1113-K9 platform. Table A-1 ACS SE Technical Specifications for the Cisco 1113...
- Page 104 DVD-ROM QSI DVD-ROM Combo 1. The latest Cisco ACS 1113 appliances contain a 160-GB or 250-GB hard disk drive (the older Cisco ACS 1113 appliances contain a 80-GB hard disk drive). These appliances support high-availability (HA) deployments. You can deploy any combination of 80-GB, 160-GB, or 250-GB appliances in your HA deployments.
- Page 105 A P P E N D I X Windows Service Advisement The operating system for the Cisco Secure ACS Solution Engine (ACS SE) is a customized and minimized version of the Windows 2000 operating system. The ACS SE removes all extraneous services, blocks all unused ports, and otherwise prevents all other access to the ACS server system, thereby dramatically increasing the security posture of ACS.
- Page 106 Maintains an up-to-date list of computers on your network and supplies the list to programs that request it. Distributed File System Manages logical volumes distributed across a local or wide area network. Installation Guide for Cisco Secure ACS Solution Engine 4.1 OL-9969-03...
- Page 107 Remote Access Auto Connection Creates a connection to a remote network whenever a program Manager references a remote DNS or NetBIOS name or address. Remote Access Connection Manager Creates a network connection. Installation Guide for Cisco Secure ACS Solution Engine 4.1 OL-9969-03...
- Page 108 WMDM PMSP Service — Workstation Provides network connections and communications. Windows Installer Installs, repairs, and removes software according to instructions contained in the .msi files. Windows Time Sets the computer clock. Installation Guide for Cisco Secure ACS Solution Engine 4.1 OL-9969-03...
-
Page 109: Command Reference
A P P E N D I X Command Reference This appendix summarizes the command line interface (CLI) commands of the Cisco Secure ACS Solution Engine (ACS SE). This appendix contains: CLI Conventions, page C-1 • Command Privileges, page C-1 •... - Page 110 For help on a specific command, type the command name, a space, and a question mark (?), and then • press Enter, for example, show?. The help contains command usage information and syntax. Installation Guide for Cisco Secure ACS Solution Engine 4.1 OL-9969-03...
- Page 111 To back up ACS data to an FTP server, use the backup command: backup [server] [username] [filepath} Syntax Description server Hostname for the FTP server to which the file will be sent. Installation Guide for Cisco Secure ACS Solution Engine 4.1 OL-9969-03...
- Page 112 The following command syntax downloads an upgrade image from the system with the address 10.51.256.256: download 10.51.256.256 exit To log out of the system, use the exit command: exit Syntax Description This command has no arguments or keywords. Installation Guide for Cisco Secure ACS Solution Engine 4.1 OL-9969-03...
- Page 113 Otherwise, you can enter each filename with a space separating each filename. You are then prompted for the FTP server address, user login name, password, and the filepath for the file or files to be uploaded. Installation Guide for Cisco Secure ACS Solution Engine 4.1 OL-9969-03...
- Page 114 To list descriptions of commands, use the help command: help Syntax Description This command has no arguments or keywords. Example The following command lists descriptions of commands: help Installation Guide for Cisco Secure ACS Solution Engine 4.1 OL-9969-03...
- Page 115 To send ICMP echo_request packets for diagnosing basic network connectivity, use the ping command: ping [-t] [-a] [-n count] [-l size] [-f] [-i TTL] [-v TOS] [-r count] [-s count] [{-j host-list}|{-k ost-list}] [-w timeout] destination-list Installation Guide for Cisco Secure ACS Solution Engine 4.1 OL-9969-03...
- Page 116 -s count Timestamp for count hops. -j host-list Loose source route along host-list. -k host-list Strict source route along host-list. -w timeout Timeout in milliseconds to wait for each reply. Installation Guide for Cisco Secure ACS Solution Engine 4.1 OL-9969-03...
- Page 117 Example The following command causes a soft reboot of the ACS SE: reboot restart To restart one or more of the ACS services, use the restart command: restart [service name(s)] Installation Guide for Cisco Secure ACS Solution Engine 4.1 OL-9969-03...
- Page 118 Example The following command employs the user account joeadmin to retrieve a restore file, allofit, from the restoredata folder on the topaz FTP server: restore topaz joeadmin restoredata allofit Installation Guide for Cisco Secure ACS Solution Engine 4.1 C-10 OL-9969-03...
- Page 119 This command sets the administrator name to john: set admin john set dbpassword To set the ACS SE database password, use the set dbpassword command. Subsequent prompts take you through the process. set dbpassword Installation Guide for Cisco Secure ACS Solution Engine 4.1 C-11 OL-9969-03...
- Page 120 Example This command sets the ACS SE name to acs1: set hostname acs1 set ip To set the ACS SE IP configuration, use the set ip command: set ip Installation Guide for Cisco Secure ACS Solution Engine 4.1 C-12 OL-9969-03...
-
Page 121: Set Time
Use the set time command to begin the setting of the timezone, current date, and current time. Subsequent prompts take you through the process. For more information, see Setting the System Time and Date Manually, page 4-20. Installation Guide for Cisco Secure ACS Solution Engine 4.1 C-13 OL-9969-03... - Page 122 The following command lists ACS SE information: show shutdown To shut down the appliance from the serial console, use the shutdown command: shutdown Syntax Description This command has no arguments or keywords. Installation Guide for Cisco Secure ACS Solution Engine 4.1 C-14 OL-9969-03...
- Page 123 Use the stop command to stop any ACS service. You can determine the status of each service by using the show command. For more information, see Stopping Solution Engine Services From a Serial Console, page 4-4. Installation Guide for Cisco Secure ACS Solution Engine 4.1 C-15 OL-9969-03...
- Page 124 -d3 -u ftp://host\diagdir\diag.cab sammy tracert To display the network route to a specified host and identify faulty gateways, use the tracert command: tracert [-d] [-h maximum_hops] [-j host-list] [-w timeout] target_name Installation Guide for Cisco Secure ACS Solution Engine 4.1 C-16 OL-9969-03...
- Page 125 51 ms 70 ms sjck-as-gw2.cisco.com [171.69.14.246] 60 ms 90 ms 80 ms sj-frame-1.cisco.com [171.70.192.54] 150 ms 180 ms 161 ms 10.19.253.225 141 ms 160 ms 170 ms 10.19.253.228 Trace complete. Installation Guide for Cisco Secure ACS Solution Engine 4.1 C-17 OL-9969-03...
- Page 126 Use the upgrade command to install an upgrade package that you have already loaded to the ACS SE. Ensure that you have stopped CSAgent prior to employing the upgrade command. Example The following initiates the second stage of an upgrade: upgrade Installation Guide for Cisco Secure ACS Solution Engine 4.1 C-18 OL-9969-03...
- Page 127 Quanta (1113) version 1-3, A-2 initial 3-10 hardware description initial procedure 3-11 for Quanta (1113) version verifying 3-15 help Installation Guide for Cisco Secure ACS Solution Engine 4.1 IN-1 OL-9969-03...
- Page 128 4-25 restart command LAN options, precautions for logging off logging on login credentials, characteristics 4-24 safety logs, obtaining support electrostatic discharge general precautions installation preventing EMI Installation Guide for Cisco Secure ACS Solution Engine 4.1 IN-2 OL-9969-03...
- Page 129 Windows, migrating from 5-13 temperature, operating Windows services time and date, setting 4-20 time and date, setting with NTP 4-20 timeout, setting manually 4-21 turning on the WLSE 3-10 Installation Guide for Cisco Secure ACS Solution Engine 4.1 IN-3 OL-9969-03...
- Page 130 Index Installation Guide for Cisco Secure ACS Solution Engine 4.1 IN-4 OL-9969-03...