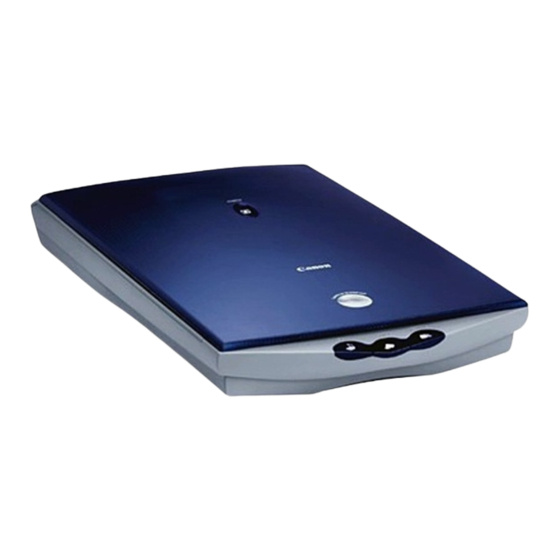
Canon D1250U2F - CanoScan USB Flatbed Scanner User Manual
For windows
Hide thumbs
Also See for D1250U2F - CanoScan USB Flatbed Scanner:
- Specifications (2 pages) ,
- Quick start manual (31 pages) ,
- User manual (69 pages)
Table of Contents
Advertisement
Quick Links
Download this manual
See also:
User Manual
Advertisement
Table of Contents

Related Manuals for Canon D1250U2F - CanoScan USB Flatbed Scanner


Summary of Contents for Canon D1250U2F - CanoScan USB Flatbed Scanner
-
Page 1: Scangear Toolbox
English ScanGear Toolbox 3.1 User’s Guide for Windows Contents Index Next Page... - Page 2 1. No part of this guide may be reproduced, transmitted, transcribed, stored in a retrieval system, or translated into any language in any form, by any means, without the prior written permission of Canon Inc. 2. Canon Inc. reserves the right to change the specifications of the hardware and software described herein at any time without prior notice.
-
Page 3: How To Use The Buttons In This Guide
How to Use the Buttons in this Guide symbol in the text marks a link to a page related to that topic. Click the to jump to that page. Chapter 1 Toolbox Buttons (1/2) Toolbox Basics This topic introduces the buttons contained in the Toolbox’s main window. -
Page 4: Table Of Contents
Contents (1/2) How to Use the Buttons in this Guide ......3 Copy Settings Dialog ............. 19 Contents................4 Scanner settings - Image quality ........19 Scanner settings - Brightness ..........20 Chapter 1 Toolbox Basics Scanner settings - Scale ............20 Printer settings .............. - Page 5 Contents (2/2) Chapter 4 Useful Hints Selecting a Scanner ............34 Linking to Other Application Programs ......35 Appendices File Formats ..............37 Uninstalling the Toolbox ..........38 List of Default Settings..........39 Index ................40 Contents Index Previous View Next View Previous Page Next Page...
-
Page 6: What Is The Toolbox
Chapter 1 What is the Toolbox? Toolbox Basics ScanGear Toolbox 3.1 (the Toolbox) is a program that makes your scanner faster and easier to use. Without the Toolbox, for example, you would have to perform each of the following steps if you wished to scan and display a page from a magazine in an image editing application program. -
Page 7: Installing The Program
Chapter 1 Installing the Program Toolbox Basics This topic explains how to install the Toolbox program. Installing the Toolbox Use the CanoScan Setup CD-ROM that came with your System Requirements scanner to install the Toolbox program. Please see the separate Quick Start Guide for installation instructions. The following minimum requirements must be met to install the program. -
Page 8: Starting/Closing The Toolbox
• Please see Chapter 3 “Using the Scanner Buttons” for Click the Windows [start] menu and select [All Programs] instructions for using Toolbox with the buttons on the or [Programs], followed by [Canon ScanGear Toolbox 3.1] scanner. and [ScanGear Toolbox 3.1]. Contents... -
Page 9: Closing The Toolbox
Chapter 1 Starting/Closing the Toolbox (2/2) Toolbox Basics To close the program when you have opened a settings Closing the Toolbox dialog, click the dialog’s [Cancel] button or close box, To close the Toolbox, click the close box on the main and then click the main window’s close box. -
Page 10: Scan-1 And Scan
Chapter 1 Toolbox Buttons (1/2) Toolbox Basics This topic introduces the buttons contained in the Toolbox’s main window. See Chapter 2 “Using the Toolbox” for the instructions to adjust each button’s settings. Click here to minimize the window. Save Mail Click here and click an After scanning, it saves After scanning, it starts... - Page 11 Chapter 1 Toolbox Buttons (2/2) Toolbox Basics Scan-1 and Scan-2 Buttons Photo Button The Scan-1 button will be linked to PhotoBase and the With CanoScan D1250U2F, the Photo button will be Scan-2 button to Photoshop Elements (or PhotoStudio linked to PhotoRecord if you installed all the software 2000) if you installed all the software according to the according to the “Install the Software”...
-
Page 12: Clicking A Button To Start An Action
Chapter 2 Clicking a Button to Start an Action Using the Toolbox To start a Toolbox function, click the button in the main window. When you click the button, the corresponding settings dialog appears. For example, when you click the Scan-1 button, a Scan settings dialog appears. -
Page 13: File Name
Chapter 2 Settings Common to the Dialogs (1/6) Using the Toolbox This topic explains the settings common to the settings dialogs The details of each setting common to virtually all the dialogs are for all the functions using the Scan-1 button settings as the ex- explained starting from the next page. -
Page 14: Color (Auto Crop)
Chapter 2 Settings Common to the Dialogs (2/6) Using the Toolbox Scanner settings - Image type Select a scanning mode. Black and White: Scans and expresses images in two colors: black and white. Black and White (OCR): Produces sharper results than a standard black and white scan. -
Page 15: Scanner Settings - Image Quality
Chapter 2 Settings Common to the Dialogs (3/6) Using the Toolbox Scanner settings - Image quality Select the resolution (fineness) at which images are scanned. See more detail about this category in the explanation for each settings dialog. Scanner settings - Paper size Select the size of the item to be scanned from among the following: A4, A5 Portrait, A5 Landscape, B5, Letter, Executive,... - Page 16 Chapter 2 Settings Common to the Dialogs (4/6) Using the Toolbox Scanner settings - Use the scanner driver to make advanced settings If a check mark is placed beside it, when you click the [Scan] button (or the [Copy] button in the Copy function) in the down right of the dialog, the ScanGear CS-U window will open to allow you to set the various scanning options.
-
Page 17: Save Scanned Image To - File Name
Chapter 2 Settings Common to the Dialogs (5/6) Using the Toolbox Save scanned image to - File name Input a root name for the scanned image. Note • This category is not available in the Copy settings dialog. • The first scanned image is saved with the root name. From the second, the file is saved under the same root name, successive four-digit numbers are added to the root. -
Page 18: Save Scanned Image To - Put Pictures In A Subfolder Using Today's Date
Chapter 2 Settings Common to the Dialogs (6/6) Using the Toolbox Save scanned image to - Put pictures in a subfolder using today’s date If this setting has a check mark beside it, a subfolder bearing the scanning date (2001-05-03, for example) is automatically created within the selected folder and the scanned images are saved to the subfolder. -
Page 19: Copy Settings Dialog
Chapter 2 Copy Settings Dialog (1/3) Using the Toolbox This topic explains the categories available on the Copy settings dialog. Note • For an explanation of the settings not included here, see ”Settings Common to the Dialogs” in this chapter. Scanner settings - Image quality This setting determines the resolution (fineness) at which a scanned image is reproduced. -
Page 20: Scanner Settings - Brightness
Chapter 2 Copy Settings Dialog (2/3) Using the Toolbox Scanner settings - Brightness You can adjust the brightness by dragging the tab left or right. Moving it left darkens the image and moving it right brightens it. Note • This category sets the threshold value for black and white when the Black and White option is selected in the Image type category. -
Page 21: Printer Settings
Chapter 2 Copy Settings Dialog (3/3) Using the Toolbox Printer settings These categories control the settings used to print the image on a printer. Paper size: Sets the size of paper on which the image will be printed. Number of copies: Sets the number of copies to print (up to a maximum of 99). -
Page 22: Mail Settings Dialog
Chapter 2 Mail Settings Dialog (1/2) Using the Toolbox This topic explains the categories available on the Mail settings dialog. Note • For an explanation of the settings not included here, see ”Settings Common to the Dialogs” in this chapter. Scanner settings - Upper limit of attached file Large image files may take a long time to exchange over e-mail and place a burden on the mail server or the... -
Page 23: Mapi
Chapter 2 Mail Settings Dialog (2/2) Using the Toolbox Scanner settings - Image quality This setting determines the resolution (fineness) at which a scanned image is reproduced. The options will change according to the maximum file size set for attachments. Important •... -
Page 24: Ocr Settings Dialog
Chapter 2 OCR Settings Dialog Using the Toolbox This topic explains the categories available on the OCR settings dialog. Note • For an explanation of the settings not included here, see ”Settings Common to the Dialogs” in this chapter. Scanner settings - Image type Only the Black and White, Black and White (OCR) and Grayscale modes are available. -
Page 25: Save Settings Dialog
Chapter 2 Save Settings Dialog Using the Toolbox This topic explains the categories available on the Save settings dialog. Note • For an explanation of the settings not included here, see ”Settings Common to the Dialogs” in this chapter. Scanner settings - Image quality This setting determines the resolution (fineness) at which a scanned image is reproduced. -
Page 26: Scan-1 And Scan-2 Settings Dialog
Chapter 2 Scan-1 and Scan-2 Settings Dialogs Using the Toolbox This topic explains the categories available on the Scan-1 and Scan-2 settings dialogs. The Scan-1 button will be linked to PhotoBase and the Scan-2 button to Photoshop Elements (or PhotoStudio 2000) if you installed all the software according to the “Install the Software”... -
Page 27: Scanner Settings - Original
Chapter 2 Photo Settings Dialog (1/2) Using the Toolbox This topic explains the categories available on the Photo settings dialog. The Photo button will be linked to PhotoRecord if you installed all the software according to the “Install the Software” section of the Quick Start Guide. (CanoScan D1250U2F only) Important •... -
Page 28: Scanner Settings - Paper Size
Chapter 2 Photo Settings Dialog (2/2) Using the Toolbox Note • The [Monochrome Photo], [Monochrome Negative Film], and [Monochrome Positive Film] settings all produce grayscale images. • The Descreen function is turned off when you select the [Color Photo] or [Monochrome Photo] settings. •... -
Page 29: Copy Button
Chapter 3 Using the Scanner Buttons (1/3) Using the Scanner Buttons There are three buttons at the front of the scanner. Confirming Scanner Button Settings Please examine the row of symbols above the buttons in the Toolbox’s main window. SCAN E-MAIL COPY The CanoScan D1250U2F also has another button on its... -
Page 30: What Happens When A Scanner Button Is Pressed
Chapter 3 Using the Scanner Buttons (2/3) Using the Scanner Buttons For example, if you have not made any changes to the What Happens when a Scanner Button is Pressed? settings after installing all the software according to The following complete procedure is carried out when the “Install the Software”... -
Page 31: What Scan Settings Are Used
Chapter 3 Using the Scanner Buttons (3/3) Using the Scanner Buttons What Scan Settings Are Used? Changing Settings after a Button Has Been Pressed You may wish to know what settings are used when a If you decide to change the scan settings after a scanner scan is initiated by simply pressing a scanner button. -
Page 32: Changing The Functions Of Scanner Buttons
Chapter 3 Changing the Functions of Scanner Buttons (1/2) Using the Scanner Buttons The buttons at the front of the scanner can be assigned to a Click the arrow of the list box under the Scan different Toolbox function. button to which you wish to assign the function and select the desired function from the list. - Page 33 Chapter 3 Changing the Functions of Scanner Buttons (2/2) Using the Scanner Buttons This will change the button’s function. Click the [OK] button. Note • Selecting the [Show main window] option in the list box under the Scanner button causes the Toolbox main window (the window shown above) to display when that button is pressed.
-
Page 34: Selecting A Scanner
Chapter 4 Selecting a Scanner Useful Hints This topic explains how to select a scanner if more than one Click the [OK] button. scanner associated with the Toolbox is connected to the computer. Start the Toolbox. The main window will display. Click the [Settings] button. -
Page 35: Linking To Other Application Programs
Chapter 4 Linking to Other Application Programs (1/2) Useful Hints This topic explains the procedure for linking or changing the Click the [Set...] button. application program started by the Scan-1, Scan-2 or Photo buttons. Important • Application programs that do not support image files cannot be linked. - Page 36 Chapter 4 Linking to Other Application Programs (2/2) Useful Hints Note Confirm that the desired application program is displayed and click the [Apply] button. • You can label the Scan-1 or Scan-2 button with the name of the linked application program. Click the Scan-1 or Scan-2 name under the button and use the keyboard to input a name up to 8 characters long.
-
Page 37: File Formats
File Formats Appendices PNG File You can select the format of the files in which scanned images are saved by the Toolbox. This topic explains the various characteristics The Portable Network Graphics (PNG) format is of the different file formats. gradually gaining wide acceptance as an image file format for web sites (Internet). -
Page 38: Uninstalling The Toolbox
1. Click the Windows [Start] menu and select [Settings] and [Control Panel]. 2. Double-click the [Add/Remove Programs] icon. 3. Select [Canon ScanGear Toolbox 3.1] and click the [Add/Remove] or [Change/Remove] button. Follow the onscreen instructions to complete the procedure. -
Page 39: Upper Limit Of Attached File
List of Default Settings Appendices The table below shows the default settings of each settings Note dialogs. (“–” means that the item cannot be selected.) • Click the [Defaults] button in each dialog to return to the default status. The information about the application program linked with the function will also return to the initial status. -
Page 40: Index
Index Brightness 20 Mail Settings Dialog 22 Uninstalling the Toolbox 38 Upper Limit of Attached File 22 Buttons (Main Window) 10 Upper Limit of Attached File 22 MAPI 23 Buttons (Scanner) 29 Use the Scanner Driver to Make Advanced Settings Buttons (Settings dialog) 13 Moiré...