Western Digital WDBLGT0040KBK Quick Install Manual
Small office storage server
Hide thumbs
Also See for WDBLGT0040KBK:
- Administrator's manual (76 pages) ,
- Product specifications (2 pages)
Table of Contents
Advertisement
Quick Links
Download this manual
See also:
Administrator's Manual
Advertisement
Table of Contents

Related Manuals for Western Digital WDBLGT0040KBK


Summary of Contents for Western Digital WDBLGT0040KBK
- Page 1 WD Sentinel DX4000 ™ Small Office Storage Server Administrator’s Quick Install Guide...
-
Page 2: How The Wd Sentinel Fits Into Your Office
Introduction This quick install guide steps the Administrator through the procedures for setting up ® ® the WD Sentinel server and connecting a Windows PC and then a Mac computer to it. Note: Before connecting a Mac computer to the WD Sentinel server, you must connect and configure the WD Sentinel server with a Windows PC. - Page 3 User Types Administrator Users (e.g., Business Owner) (e.g., Employees) Primary Setup Tasks Primary Interface • Physically connects the WD Launchpad—Logs in using the Sentinel server to the network. assigned user name and password. • Configures the WD Sentinel server itself. This is a one-time Primary Launchpad Tasks procedure.
-
Page 4: System Requirements
System Requirements Local Network Router/switch (Gigabit recommended to maximize performance) DHCP enabled Client Computer A client computer running one of the Windows operating systems listed below. Client Operating ® Windows XP SP3 (32 bit)/Windows Vista System Compatibility (32 or 64 bit)/ Windows 7 (32 or 64 bit) any version ®... - Page 5 Views Front Power/Status LED Power button Scroll buttons Drive status LEDs Back Power ports USB ports Ethernet ports 1 & 2 1 & 2 1 & 2 Reset/Recovery button Kensington Security Lock...
- Page 6 Step 1: Connect WD Sentinel DX4000 to Your Network Using the provided Ethernet cable, connect the WD Sentinel server (either Ethernet port) to a DHCP-enabled LAN. Using the provided AC power adapter, connect the WD Sentinel server (either power port) to an electrical outlet or a UPS.
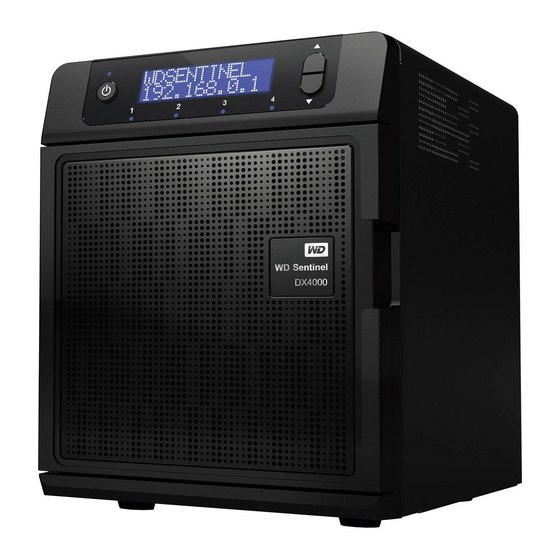
- Page 7 Press the on/off button for one second one time to power up the WD Sentinel server. Wait for the LCD on the front of the WD Sentinel server to display WDSENTINEL and the IP address before configuring the server. WARNING! This process takes a few minutes. Do not interrupt the process.
- Page 8 Verify localization settings, or select correct values from the drop-down lists: Click Next to review the date and time, and then select the checkbox to verify the settings: Click Next to display Microsoft and Western Digital license agreements. Read the agreements and select the checkboxes to accept the license terms:...
- Page 9 Click Next to personalize your WD Sentinel server: The WD Sentinel server has a default name of WDSENTINEL. Enter a unique name for your WD Sentinel server, for example, Company-Name (must contain 1-12 characters; may be upper case, lower case, numeric, or a combination;...
- Page 10 Click Next to specify how server software updates should occur. Make a selection: Note: If you choose the first or second option on this screen, the subsequent installation process may take longer, depending on Windows updates that may be available at the time. The installation begins.
- Page 11 To connect this current Windows PC computer to your server, leave the Connect this Computer checkbox selected, click Finish, and proceed to Step 3. Step 3: Connect the First Computer Now connect one Windows PC (most likely the one you have been using) to the WD Sentinel server by installing Connector software on it.
- Page 12 Click Next to display a progress bar. The installation process may take up to 30 minutes. At the logon screen, enter the Administrator password:...
- Page 13 Click Next and enter a unique description for your computer so the server will be able to distinguish yours from others on the network: Click Next to display wake-up options, and make a selection:...
- Page 14 Click Next to display Microsoft program options, and make a selection: Note: It is a best practice to select the Open Dashboard to administer your server option and launch the Dashboard after finishing the Connector software installation. To take advantage of shared storage capabilities of your WD Sentinel server, on the Dashboard, create a user account and assign access privileges to the shared folders.
- Page 15 Step 4: Access the Dashboard (Windows PCs Only) and Launchpad You can only access the Dashboard using a Windows PC that is already connected to your WD Sentinel server. The Dashboard Sign in screen appears if you elected it to do so after the Connector software is loaded, or you can navigate to Start or >(All)Program(s) >Windows Storage Server 2008 R2>Windows Storage Server 2008 R2 Dashboard.
- Page 16 Click the arrow to display the Dashboard: Best Practices: Complete the Getting Started tasks on the Home page of the Dashboard. Note: For instructions, see the WD Sentinel DX4000 Administration Guide. Create at least one active user account now. Launchpad Sign in (Users) After you set up users with a user name, password, and permissions on the Dashboard, they can access the Launchpad Sign in screen by one of the following methods:...
- Page 17 Enter your user name and password. Click the arrow to display the Launchpad. It lists four tasks: Backup, Remote Web Access, Shared Folders, and Dashboard. Click Dashboard to display the Dashboard Sign in screen. Only users with administrative access and knowledge of the Administrator password can sign in.
-
Page 18: Step 5: Connect Additional Computers
Step 5: Connect Additional Computers Once you have one Windows PC connected to the WD Sentinel server, you can connect more (25 maximum) Windows PCs or Mac computers to your WD Sentinel server. Connecting More Windows PCs Open Internet Explorer and in the address field, type http://<IP address>/ connect. - Page 19 Type the user name and password of an account that administers this Mac computer and click OK: The Connect a Computer to the Server wizard has seven screens that are listed on the left. Click Continue to move through them:...
- Page 20 Enter the WD Sentinel server’s IP address shown on the WD Sentinel server’s LCD screen and click Continue: Enter a computer name to uniquely identify the Mac:...
- Page 21 Enter the Administrator password for the WD Sentinel server and press Continue: A progress bar appears and then the computer description screen. Enter a unique description of the Mac computer and click Continue:...
- Page 22 10. A progress bar shows the status of the installation, and then the Summary screen appears, verifying that the computer is connected to the server. Select the Automatically start Launchpad at startup checkbox. Click Close: The Launchpad Sign in screen displays. Users who have been set up on the Dashboard (using a Windows PC) sign in here: Note: The Dashboard is not accessible from Mac computers.
-
Page 23: Rebooting The Wd Sentinel Server
Rebooting the WD Sentinel Server Following is the cleanest procedure for rebooting the WD Sentinel server using a Windows PC: On the Dashboard Home page, click the Server Settings link on the upper right of the window. On the bottom left of the General screen, click the shutdown arrow and select Restart: WARNING! An unclean shutdown could occur should you hold the power button down for more than 3 seconds. -
Page 24: Technical Support Services
Technical Support Services http://support.wdc.com www.westerndigital.com If you encounter problems with this product, please contact WD Technical Support. North America English 855.556.5117 Spanish 855.556.5117 Asia Pacific +800.6008.6008 Japan 00 531 650442 Europe (toll free*) 00800.27549338 * Austria, Belgium, Denmark, France, Germany, Ireland, Italy, Netherlands, Norway, Spain, Sweden, Switzerland, United Kingdom Europe (non toll free) +31.880062100... - Page 25 Western Digital, WD, the WD logo, and My Passport are registered trademarks in the U.S. and other countries; WD Sentinel is a trademark of Western Digital Technologies, Inc. Other marks may be mentioned herein that belong to other companies.