Table of Contents
Advertisement
Advertisement
Table of Contents

Summary of Contents for DigiCam DIGICAM ES3310
-
Page 2: Table Of Contents
Section 1 Getting to Know Your Digital Camera... 1 Overview...1 Front View ...1 Rear View ...2 Side View...2 Bottom View ...3 Section 2 Getting Up and Running ... 4 Loading the Batteries...4 Inserting and Removing an Optional SD Card...4 Protecting Data on an SD Card ...5 Opening and Closing the Lens Cover ...5... - Page 3 Connecting the Camera to a Television ...26 Viewing Photos and Movie Clips on a Television ...26 Section 6 Transferring Data to a Computer ... 27 Installing the Digital Camera Driver ...27 Connecting Your Camera to a Computer ...28 Mass Storage Mode...28 PC Camera Mode...28...
-
Page 4: Section 1 Getting To Know Your Digital Camera
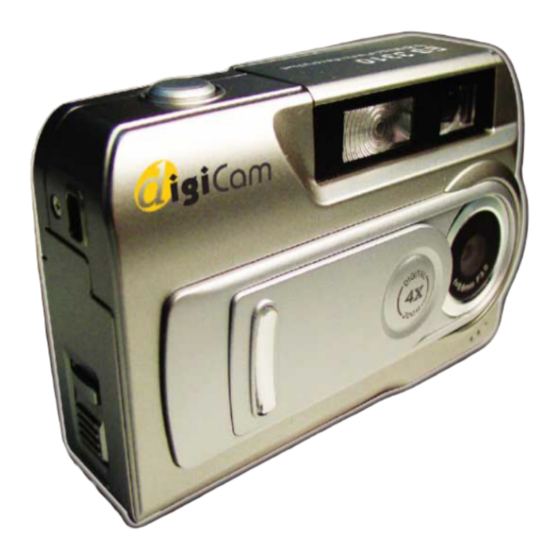
Getting to Know Your Digital Camera Overview Your new digital camera delivers high quality images at up to 2976x2232 resolution as well as short movie clips using a 3.2-Megapixel CMOS sensor. With the optical viewfinder and built-in 1.5" TFT color LCD monitor, you can compose images and then examine them in detail. The camera adjusts exposure and color balance automatically or lets you change these settings manually and features a 4x digital zoom to increase your control over the pictures you take. -
Page 5: Rear View
Rear View Power Button Mode Button LCD Monitor The mode button ( ) is used to switch between the two main operation modes. Turn to section 3, Camera Mode, and section 4, Playback Mode, for full details The direction button ( ) is used in Camera Mode for general setting, and in the Playback Mode to navigate through menus. -
Page 6: Bottom View
For information on fitting batteries, turn to Loading the Battery in section 2. To learn how to install a memory card, turn to Inserting an Optional SD Card in section 2. For information on transmitting images and movie clips to a computer using the TV Out ( ) and USB ( ) ports, turn to Section 5, Viewing Photos and Movie Clips... -
Page 7: Section 2 Getting Up And Running
Loading the Batteries You must load 2 AA size alkaline batteries before the camera can be used: Press down and hold the release button, and slide the battery/SD Card cover in the direction of the arrow to release the cover. Insert the batteries according to the correct polarity marks (+ or -). -
Page 8: Protecting Data On An Sd Card
Protecting Data on an SD Card Valuable data on an SD Card can be protected by preventing any new data being written onto the same card. To do this: Slide the write-protected tab on the side of the SD memory card to LOCK. -
Page 9: Turning The Camera On And Getting Started
Turning the Camera On and Getting Started To turn on once the batteries are loaded: 1. Open the lens cover first, and then press down and hold the power button for ONE second. 2. When the camera is turned on, the GREEN LED underneath the direction button will light up. -
Page 10: Section 3 Camera Mode
Direction Button Functions The Camera Mode is for taking photos and short movies. In this mode, the direction button has the following functions: Enter Button Enter Button Up Button Up Button Left Button Left Button Right Button Right Button Down Button Down Button LCD Monitor Information Right button: LCD monitor on but information off →... -
Page 11: Taking Photos
Taking Photos Once your camera is turned on, you can compose pictures using the viewfinder or the LCD monitor. Using the viewfinder will save battery power. You may find it easier to compose your pictures with the LCD monitor however. Close-up shots in particular will be more accurate if composed through the LCD monitor. -
Page 12: Taking Movies
Taking Movies Taking short movies is simple with your camera. Simply set your camera to Movie Mode, frame your picture using the viewfinder or LCD monitor and press the shutter button to start recording. When a movie is recording, the RED LED underneath the direction button will remain lit and a time indicator will display on LCD monitor. -
Page 13: Using The Self-Timer
Using the Self-Timer The self-timer allows you to take photos with a 10-second time delay so that you can join the scene in the photo. 1. To activate the self-timer, press the left direction button while in Camera Mode. The self-timer icon ( ) will appear on the center of the LCD Monitor screen. -
Page 14: Camera Mode Settings
Camera Mode Settings Camera Mode Settings are used to change shooting mode, resolution, flash setting, LCD brightness and advanced settings. These settings are changed from the Camera Mode Options Menu. To open this menu: 1. When in Camera Mode, press the enter button. - Page 15 The following table summarizes the choices available in the Camera Mode Options Menu: Submenu Display Shooting Mode Resolution Flash Setting Advanced Settings LCD Brightness Changes made to Resolution, Flash , Quick Review, Video, Sound and Language settings are saved when the camera is powered off. Other options return to their default settings each time the camera is powered on.
-
Page 16: Taking Photos Continuously
Taking Photos Continuously With the camera set to Multisnap Mode, you can take up to FIVE photos. To enter Multisnap Mode, use the direction button to select the multisnap icon ( press the enter button. Changing Resolution Your camera gives you the option of taking photos at different resolutions. Resolution determines size and hence quality of images. -
Page 17: Using The Flash
Using the Flash Your camera has two flash settings: Auto-flash: the flash fires automatically according to lighting conditions. Use this mode for general photography Flash Off: the flash won’t fire under any circumstances. Use this mode when taking images in a place where flash photography is prohibited, or when the subject is distant (beyond the range of the flash). -
Page 18: Advanced Settings
Advanced Settings The Advanced Settings submenu contains options for configuring your camera set up and more advanced options to improve the quality of your photos. You can set the following options by press the direction button and then enter button. Submenu Display Exposure... -
Page 19: Adjusting Exposure
Format Card Language Exit Adjusting Exposure Your camera adjusts automatically depending on lighting conditions. In certain circumstances you may wish to adjust the exposure compensation setting, for instance to avoid making your subject too dark when it is backlit or shot against a bright background or to avoid making lights appear too bright in night shots. -
Page 20: Adjusting White Balance
Adjusting White Balance Your camera adjusts the color balance of images automatically depending on lighting conditions. You can override the automatic setting if you wish. Four white balance settings are available: Automatic: The camera automatically adjusts white balance. Daylight: Use when outside on a clear day Fluorescent: Use when under fluorescent tube lighting. -
Page 21: Quick Review Settings
Quick Review Settings Quick Review allows you to have a look at your photos after you have taken them. With Quick Review on, images are displayed for seconds immediately after they are taken. Video Settings Before outputting video that you have taken, you should ensure that the appropriate TV standard for your area is selected –... -
Page 22: Sound Settings
Sound Settings You can enable sound effects to signal power on and off, and taking of photos and movie clips. ON: Enable audio effects OFF: Disable audio effects Formatting a Memory Card This camera only supports memory cards with the FAT16 format. A new card or one that has been used in another device will probably need to be formatted before it can be used,... -
Page 23: Selecting Interface Language
Selecting Interface Language You can change the interface language. The following languages are available: English German French Italian Spanish Portuguese... -
Page 24: Section 4 Playback Mode
Direction Button Functions The Playback Mode is for viewing and managing photos and movie clips stored on the built-in memory or on an optional memory card. In this mode, the direction button has the following functions: Enter Button Enter Button Up Button Up Button Left Button... -
Page 25: Displaying Single & Thumbnail Images
Displaying Single & Thumbnail Images In Playback Mode, stored photos can be viewed ONE at a time or as NINE thumbnail images. Displaying Single Images The default setting for viewing stored images is as single images ( ). Thus when you turn on your camera and press the mode button to enter Playback Mode, images will automatically be displayed one at a time. -
Page 26: Making Slide Shows
Making Slide Shows You can set your camera to display images one after another in turn. To start a slide show: 1. When in Playback Mode, press the Enter button to open the Options Menu appears. The Display Mode submenu is the first item. 2. -
Page 27: Deleting Images And Movie Clips
Deleting Images and Movie Clips To delete images and/or movie clips: 1. In Playback Mode, locate the image or movie clip you want to delete. 2. When the image (or first frame of movie clip) is displayed, press Enter. 3. Open the Deletion Menu ( ). 4. -
Page 28: Using Dpof Settings
Using DPOF Settings DPOF (Digital Print Order Format) makes printing your photos extremely simple. You only have to select which photos you want to have printed using the DPOF submenu and then insert your card into a compatible printer (or give the card to a printing service) to print the selected images out. -
Page 29: Section 5 Viewing Photos And Movie Clips On A Tv
Viewing Photos and Movie Clips on a TV Connecting the Camera to a Television You can view stored images and movie clips on a television. To connect to a television: 1. Connect one end of the movie cable to your camera’s TV Out port. -
Page 30: Section 6 Transferring Data To A Computer
You can transfer images and movie clips stored on your camera to a computer and send them in emails to friends or post them on websites. To do this you should: 1. Install the digital camera driver on your computer 2. Connect your camera to the computer 3. -
Page 31: Connecting Your Camera To A Computer
Connecting Your Camera to a Computer Your camera connects to a computer through a USB cable such as that provided in the camera package. 1. Connect the computer and camera with the supplied USB cable. 2. Press the PC Mode/Movie button to switch between Mass Storage Mode and PC Camera Mode. -
Page 32: Installing Bundled Software
Installing Bundled Software The CD-ROM supplied with your camera contains three pieces of software. ArcSoft PhotoImpression 3 is a user-friendly application that helps you retouch, edit and organize images. ArcSoft VideoImpression 2.0 allows you to edit movie clips and is equally easy to use. -
Page 33: Section 7 Troubleshooting
Can’t turn the camera on The batteries may not be installed or may be incorrectly installed: Check the batteries, ensure they are oriented correctly. The Battery / SD Card Cover may be open: Close the cover. The batteries may be out of power: Replace the batteries. Camera turns on but the LCD monitor is blank The monitor may have been turned off: Press the right direction button to switch the monitor on. -
Page 34: Section 8 Specifications And System Requirements
Interface TV out Power Supply Dimension Weight 3.2 Mega-pixel CMOS Sensor Digital Camera, PC Camera, Movie Clips f=9.6mm F3.0 Normal: 130cm ~ Infinity; Portrait: 60cm ~ 130cm; Macro: center 20cm Recording Mode: 4x, Playback Mode: 4x Optical 1.5” TFT Color LCD Built-in 16M Memory;... -
Page 35: System Requirements
System Requirements Windows 98SE/2000/ME/XP Pentium MMX, Celeron or AMD Athlon® 64MB RAM CD-ROM drive 500MB free HDD space Available USB port 16-bit Color Display...