Table of Contents
Advertisement
Quick Links
Download this manual
See also:
User Manual
Advertisement
Table of Contents

Related Manuals for Hawking HAWNU1


Summary of Contents for Hawking HAWNU1
- Page 1 UICK NSTALLATION UIDE Hi-Gain Wireless-150N USB Network Adapter with Range Amplifier Mac OS X Windows XP Windows 7 & Vista START HERE HAWNU1...
-
Page 2: Check Package Contents
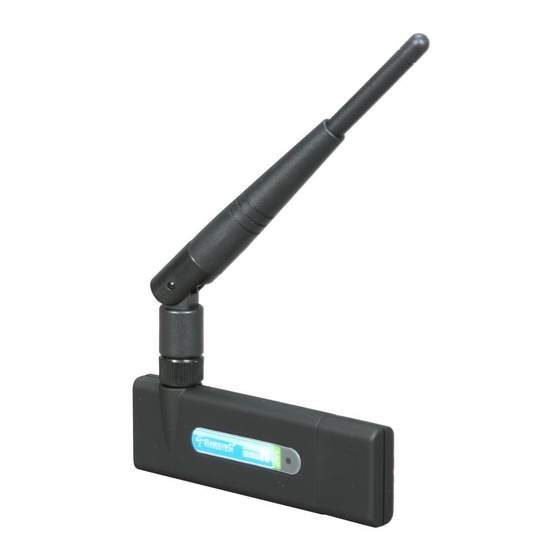
OVERVIEW Check Package Contents - One Hi-Gain Wireless-150N USB Adapter with Cap - One External Dipole Antenna - CD (Drivers and User’s Manual) Installation Instructions are divided into three sections (Windows 7 & Vista, Windows XP, and Mac OS X): - Windows 7 &... -
Page 3: Windows 7 & Vista
Windows 7 & Vista Installation Instructions for Windows 7 & Vista IMPORTANT! Do not connect the Wireless-N USB Adapter into the USB port until you have installed the driver from the CD and are instructed to do so. Otherwise, the Adapter may not operate properly. - Page 4 Windows 7 & Vista User Account Control: Select ‘Allow’ to continue. Then, wait for the InstallShield Wizard to guide you through the setup. Read through the License Agreement. Select “I accept the terms of the license agreement” and “Next”. Select the Default option and click “Next”.
- Page 5 Windows 7 & Vista Select “Install” to continue. The install wizard will prompt you to insert the USB Adapter into your PC. IGNORE the message for now. Select “OK” to continue. (It is recommended to finish installing the driver before plugging in the Adapter.) You are now finished installing the software...
- Page 6 Windows 7 & Vista Now, insert the Adapter into an available USB Port. Wait a few seconds until your system detects the new hardware (Adapter). A Found New Hardware screens may show up at this point, select “Locate and Install driver software (recommended)”.
- Page 7 Windows 7 & Vista [Win7 ]Step 2: If you are connecting to a Security-enabled Network, your system will prompt you to enter your security key. If you don’t have the security key, please contact your network administrator or the person who set up the selected wireless network.
- Page 8 Windows 7 & Vista [Win Vista] Step 2: Select a Network and click Connect. Please wait until the adapter connects. [Win Vista] Step 3: If you are connecting to an unsecured networking, se- lect ‘Connect Anyway’ . (See the right image) If you are connecting to a security-enabled Network, type in the network security...
- Page 9 Windows 7 & Vista [Win Vista] Step 4 You are now connected to a wireless network. To save this specific network for fu- ture access, select Save this network. Select a location or you may customize the name and location type, etc. Close the Set Network Location when you are done.
-
Page 10: Windows Xp
Windows XP Installation Instructions for Windows XP Important: Do Not connect the Network Adapter into the USB port until you have installed the driver from the CD and are instructed to do so. Otherwise, the Adapter may not operate correctly. Driver &... - Page 11 Windows XP Select “Install driver and Hawking Wireless Utility” and “Next”. Select “Hawking Wireless Configuration”, then click “Next” . Please wait a few seconds. Your system is installing the software. Select “Finish” , when it is done. - page 10 -...
- Page 12 Windows XP Plug-in the Adapter into your USB port. A Welcome to the Found New Hardware Wizard screen will guide you through the rest of the installation. Select “Yes, this time only” and “Next”. Select “Install the software automatically (Recommended) and wait until the wizard installs the software.
-
Page 13: Hawking Wireless Utility
For more settings, please refer to the User Manual located on the Setup CD. Hawking Wireless Utility Locate the Hawking icon in the system tray, right click on it and then choose Hawking Wireless Utility. Connect To: Step 1: In the Hawking Wireless Utility, click on the NETWORK tab. - Page 14 Windows XP Step 2: In the Authentication and Security window, please enter in your network’s security information. If you don’t have this information, please request it from your network administrator who set up your network. WPA Encryption a. Encryption Type: Select TKIP or AES b.
-
Page 15: Wireless Status
Windows XP WEP Encryption a. Select 64-bit or 128- b. Passphrase - this is case sensitive and contains no more than 16 alphanumeric characters. ( Must be the same as your network). c. 64-bit WEP key: exactly 10 hexadecimal characters and must be the same as your network. -
Page 16: Installation For Mac Os
Mac OS Installation for Mac OS X Important: 1) Do not connect the Wireless USB adapter to your computer until you have installed the driver from the CD and are instructed to do so. Otherwise, the adapter may not operate correctly. 2) Installation software requires you to restart your computer, be sure to save all your work before installation. - Page 17 Mac OS Next, select the appropriate Mac OS X to install. Panther ~ Mac OS X10.3 Tiger ~ Mac OS X 10.4 Leopard ~ Mac OS X 10.5 Snow Leopard ~ Mac OSX 10.6 If you are uncertain about which Mac OS you are using, go to the Finder’s Menu Bar, select the APPLE...
- Page 18 Mac OS Select a destination for the driver. Select “Continue”. (Typically, the default destination is the Macintosh HD.) Select Install Install If your computer is password protected*, enter the password and click OK. If it is not password protected, leave the password field blank and click OK to continue.
- Page 19 Mac OS At this point, if you have not saved all your work, please do so. Then, select continue to Install. Install Please wait for the installation process to complete. Select Finish when it is done and your computer will reboot.
- Page 20 Mac OS CONNECTING TO YOUR WIRELESS NETWORK After your computer reboots, insert the HAWNU1 Adapter into an available USB port Note: To make sure the HAWNU1 Adapter works properly, you must turn off any previously installed wireless card (including the built-in airport card.) To turn the airport card off, locate the airport wireless icon at the top right...
- Page 21 Mac OS From the menu that appears, double click the NETWORK icon to begin enabling your Hawking wireless device before using the wireless utility. Your computer will automatically detect the USB Wireless-N adapter. Be sure to note the port number i.e.
- Page 22 Mac OS Mac OS 10.3-10.4 In the Network screen, click on the “Show” field, make sure the Ethernet Adapter (en#) is selected. “Using DHCP” should be selected in the Configure IPv4 field. Mac OS 10.5 Leopard Finally, select “Apply Now” to confirm and close the window (if you cannot choose “Ap- ply Now”...
- Page 23 The handshake icon ( ) means you are connected to the associat- ed network with the SSID next to the icon. (the example above shows the HAWNU1 is connected to a network with the name Hawking.) If you wish to connect to a different network, select the network you wish to connect to, either double click on it or click on the connect button.
- Page 24 Mac OS 10. SECURITY When logging on to a secured network, the Wireless Utility will prompt you to enter the Encryption Key. If you are unsure about your security key, please contact your network administrator. Be sure to enter the correct Authentication Type and Encryption Type.
- Page 25 SALES INFORMATION sales@hawkingtech.com Hawking is a registered trademark of Hawking Technologies, Inc. ©2010 Hawking Technologies, Inc. All rights reserved. Other brands and product names are trademarks or registered trademarks of their respective owners. Apple, Mac, and Airport are registered trademarks of Apple Computer, Inc, No affiliation is implied or expressed.