Panasonic SC-BTT490 Owner's Manual
Blu-ray disc home theater sound system
Hide thumbs
Also See for SC-BTT490:
- Easy setting manual (2 pages) ,
- Operating instructions manual (56 pages) ,
- Installation instructions manual (10 pages)
Table of Contents
Advertisement
Owner's Manual
TM
Blu-ray Disc
Home Theater Sound System
Model No. SC-BTT490
Unless otherwise indicated, illustrations in this Owner's Manual are of SC-BTT490 for U.S.A.
Thank you for purchasing this product.
For optimum performance and safety, please read these instructions carefully.
Please keep this manual for future reference.
If you have any questions, contact:
U.S.A. and Puerto Rico : 1-800-211-PANA(7262)
Canada : 1-800-561-5505
P
PC
PX
VQT3X49-3
Advertisement
Table of Contents

Related Manuals for Panasonic SC-BTT490


Summary of Contents for Panasonic SC-BTT490
- Page 1 Blu-ray Disc Home Theater Sound System Model No. SC-BTT490 Unless otherwise indicated, illustrations in this Owner’s Manual are of SC-BTT490 for U.S.A. Thank you for purchasing this product. For optimum performance and safety, please read these instructions carefully. Please keep this manual for future reference.
-
Page 2: Important Safety Instructions
Getting started CAUTION Unit ≥ This unit utilizes a laser. Use of controls or adjustments or IMPORTANT SAFETY performance of procedures other than those specified herein may result in hazardous radiation exposure. ≥ Do not place sources of naked flames, such as lighted candles, INSTRUCTIONS on this unit. -
Page 3: Table Of Contents
The following limits are in place regarding the usage of this unit. You must be aware of these limits before using this unit. Panasonic will in no way be responsible for any incidental damage which may arise due to a failure to obey these limits, or to any condition of use or disuse of this unit. -
Page 4: Package Contents And Accessories
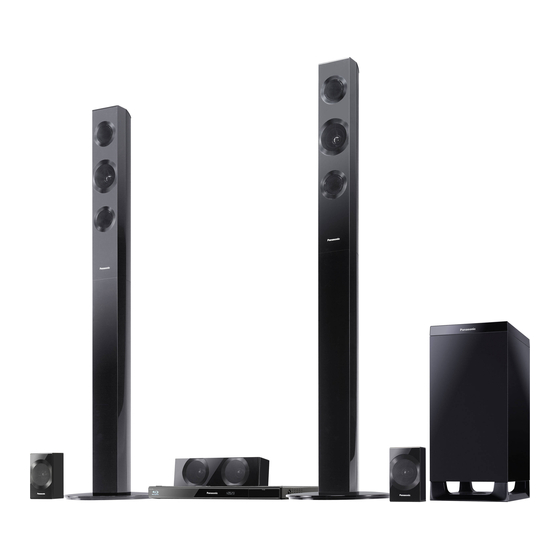
Package contents and accessories Getting started Check the package contents and supplied accessories before using this unit. Package contents Main unit (SA-BTT490) FRONT CENTER SURROUND SUBWOOFER (SB-HF490) (SB-HC490) (SB-HS290) (SB-HW490) (Speakers) (Speaker cable) (Stands) (Bases) (Screws) Parts Parts number RYP1714B-K: RED Stands (with cables) RYP1714A-K: WHITE RYP1745-K k 2... -
Page 5: Unit And Media Care
Accessories ∏ 1 Remote control ∏ ∏ 1 FM indoor ∏ 1 Sheet of speaker 1 AC power supply cord (N2QAYB000727) For the U.S.A. and Canada antenna cable sticker (K2CB2CB00021) (RSAX0002) For units with PX printed on the packaging (K2CQ2CA00007) ∏... -
Page 6: Playable Media
Playable media Type Logo examples Type detail Playable contents BD-Video Video BD-RE Video, JPEG, MPO BD-R Video, MKV DVD-Video Video DVD-R Video, AVCHD, MKV, JPEG, MPO, FLAC, MP3, WAV DVD-R DL DVD-RW Video, AVCHD — +R/+RW/+R DL Music CD Music [CD-DA] MKV, JPEG, CD-R —... -
Page 7: Region Management Information
∫ Discs that cannot be played in ∫ Music CD this unit ≥ Operation and sound quality of CDs that do not conform to CD-DA specifications (copy control Any other disc that is not specifically CDs, etc.) cannot be guaranteed. supported or previously described. -
Page 8: Control Reference Guide
Control reference guide Turn the unit on and off Remote control Select title numbers, etc./Enter numbers or characters [CANCEL]: Cancel Select the source Basic playback control buttons ( Select preset radio stations ( Show status messages ( Show the Home screen of the VIERA Connect ( [3, 4, 2, 1]: Move the highlight for selection [OK]: Confirm the selection... - Page 9 Main unit (Front) OPEN/CLOSE iPod SD CARD SD card slot ( Standby/on switch [Í/I] ( USB port ( Press to switch the unit from on to standby Remote control signal sensor mode or vice versa. In standby mode, the unit Distance: Within approx.
-
Page 10: Step 1: Positioning
≥ For optional wall mount, refer to page 42. Wireless connections (SH-FX71) ∫ Enjoy surround speaker sound wirelessly Use the optional Panasonic wireless system (SH-FX71). ∫ Upgrade to 7.1-channel system The main unit is designed to enjoy the 7.1ch surround sound. A more theater-like effect is possible with a wireless connection. -
Page 11: Step 2: Preparing The Speakers
STEP 2: Preparing the speakers Assembling the front speakers Attach the stand to the base. Thread the speaker cable through the base. Tighten the 3 screws (supplied) securely. Slide the speaker cable into the groove. Attach the speaker. Speaker cable (Continued on the next page) VQT3X49... -
Page 12: Connecting The Speaker Cables
Tighten the screw (supplied) securely. ≥ To prevent damage or scratches, lay down a soft cloth and perform assembly on it. Connecting the speaker cables Attach the speaker cable sticker (supplied) and connect the speaker cables to the speakers. ≥ When connecting speakers with the optional wireless system SH-FX71 ( 10), use the supplied speaker cables of SH-FX71. -
Page 13: Step 3: Connections
STEP 3: Connections Turn off all equipment before connection and read the appropriate owner’s manual. Do not connect the AC power supply cord until all other connections are complete. Speaker connection Connect the speaker cables to the terminals of the same color. VQT3X49... -
Page 14: Connection To A Tv
∫ HDMI ≥ Use the High Speed HDMI cables. Non-HDMI-compliant cables cannot be utilized. It is recommended that you use Panasonic’s HDMI cable. When outputting 1080p signal, please use HDMI cables 5.0 meters (16.4 ft.) or less. Recommended part number (High Speed HDMI Cable): RP-CDHS15 (1.5 m/4.9 ft.), RP-CDHS30 (3.0 m/9.8 ft.), RP-CDHS50 (5.0 m/16.4 ft.), etc. -
Page 15: Fm Antenna Connection
Standard picture and better audio Optical digital audio cable (not supplied) VIDEO IN OPTICAL AUDIO IN Video cable (not supplied) Standard picture and audio VIDEO IN Audio cable (not supplied) AUDIO IN AUDIO OUT Video cable (not supplied) FM antenna connection Affix this end of the antenna to a wall or pillar where the reception is best. - Page 16 Other device connection ∫ When the connecting devices have an HDMI terminal e.g., Set Top Box, etc. Video game, etc. AV IN AV OUT AV OUT (ARC) HDMI cable HDMI cable (not supplied) (not supplied) HDMI standby pass-through Even if this system is in standby mode, the audio and/or video signal from the device connected to the HDMI1 IN (CABLE/SAT) or HDMI2 IN terminal will be sent to the TV connected to the HDMI AV OUT terminal (the sound will not be output from this system).
-
Page 17: Step 4: Connecting To An Ac Power Source
(This site is in English only.) For additional information about this unit refer to http://www.panasonic.com/consumer/support (For U.S.A.) ≥ The unit is not compatible with public wireless LAN services provided in airports, stations, cafes etc. ≥ See page 3 for the precautions of wireless LAN connection. -
Page 18: Step 5: Settings
≥ You can perform this setup anytime by selecting “Easy Setting” in the Setup menu. ( ≥ If this unit is connected to a Panasonic TV (VIERA) ∫ “WPS (PUSH button method)” supporting HDAVI Control 2 or later via an HDMI cable, If you are using a wireless router that supports then setting information on the TV such as “On-screen... -
Page 19: Firmware Updates
3 Enter your encryption key (password). Reprogramming the remote control Encryption Key (Password) If you have more than one Panasonic products Shift Delete Finish and the remote control operates both products at once, you will need to change the remote control code to prevent this occurrence. -
Page 20: Inserting Or Removing Media
Press [jAUDIO] several times to select ≥ If you connect a Panasonic product with a USB the audio. (MAIN, SAP) connection cable, the setup screen may be ≥ Set “PCM-FIX” ( 37) to “Off”. -
Page 21: Home Menu
HOME menu Videos/Photos/Music Disc Major functions of this unit can be operated from Play back the contents. ( the HOME menu. ≥ When multiple contents are SD Card recorded, select the types Preparation of contents or the title. Turn on the television and select the appropriate video input on the television. -
Page 22: Multi User Mode
≥ Perform the “Remote Device Settings”. ( as an icon. ( 32, “Icon Personalization”) ≥ To use smartphones as a remote control, installation of dedicated software is required. For more details, refer to the following website. http://panasonic.jp/support/global/cs/ (This site is in English only.) VQT3X49... -
Page 23: Playback
Playback Playback Pause Insert the media. Press [;PAUSE]. ≥ Press [;PAUSE] again or [1PLAY] to restart play. Playback starts depending on the media. Select the item to play and press [OK]. Search/Slow-motion Repeat this procedure if necessary. Search While playing, press [SEARCH6] or ≥... - Page 24 Displaying menus and Enjoying 3D video and playback information photos Show top menu/pop-up Preparation Connect 3D compatible TV to an HDMI AV OUT menu terminal of this unit using a High Speed HDMI Cable. ( 14, 16) Press [POP-UP MENU/TOP MENU]. ≥...
-
Page 25: Using The Ipod/Iphone
Using the iPod/iPhone Slideshow Compatible iPod/iPhone (as of January 2012) Play a slideshow of photos and make various ≥ Update your iPod/iPhone with the latest settings during the playback. software before using this unit. ≥ Compatibility depends on the software version Insert the media. -
Page 26: Ipod/Iphone Connection
iPod/iPhone Connection iPod/iPhone Playback Preparation Preparation ≥ Turn the main unit off or reduce the volume of ≥ To display the picture, turn on the TV and select the main unit to its minimum. the appropriate video input mode. Push the center of drawer (A), and pull Press [HOME]. -
Page 27: Viera Link
VIERA Link “HDAVI Control” is a off power to the television convenient function which will link the When the unit is connected to a Panasonic TV operations of this unit and a Panasonic TV (VIERA) that supports HDAVI Control 2 or later. -
Page 28: Enjoying Tv And Stb With Unit's Speakers
Select the STB audio Enjoying TV and STB with unit’s speakers When the STB power is turned on, this unit and the TV will automatically turn on. The video is You can select whether audio is output from the output from the TV, and the audio is output from unit’s speakers or the TV speakers by using the the speakers of this unit. -
Page 29: Listening To The Radio
Listening to the Radio ∫ Manual tuning and presetting Select a radio broadcast. You can preset up to 30 channels. 1 Press [RADIO] to select “FM”. Preparation 2 Press [SEARCH6] or [SEARCH5] to Make sure that the FM antenna is connected. select the frequency. -
Page 30: Enjoying Network Service (Netflix, Etc.)
* Images are for illustration purposes, contents may change discontinued either temporarily or permanently without without notice. notice. Therefore, Panasonic will make no warranty for the Preparation content or the continuity of the services. ≥ Network connection ( ≥... -
Page 31: Home Network Feature
Select the equipment and press [OK]. the operating instructions for each of the equipment. Select the item to play and press [OK]. http://panasonic.jp/support/global/cs/ ≥ You may be able to use convenient (This site is in English only.) functions depending on the content by ≥... -
Page 32: Option Menu
Option menu ∫ Repeat Play (Only when the elapsed time is being displayed A variety of playback operations and settings can on the unit’s display.) be performed from this menu. Select the item which you want to repeat. Available options differ depending on the playing ≥... -
Page 33: Video Settings
∫ Playback Information Window Video Settings Displays the following. ∫ Picture Mode Audio/video attribute information of disc. Select the picture quality mode during play. Settings status of “Digital Audio Output” ( 36). ≥ If you select “User”, you can change settings in “Picture Adjustment”. -
Page 34: Audio Settings
Digital Tube Sound: Audio Settings This feature gives you warm sound, like that produced by a vacuum tube amplifier. “Surround Effects” and “Sound Effects” can also Digital Tube be set by using the [SURROUND] and [SOUND] A crisp, delicate sound Sound 1 on the remote control. -
Page 35: Setup Menu
Setup menu ∫ High Clarity Sound Plus When playing back music contents, it improves Change the unit’s settings if necessary. The the sound quality by stopping the video output. settings remain intact even if you switch the unit ≥ Only when you have selected “Enable” in “High to standby. - Page 36 ∫ Still Mode (paused video) HDMI Resolution The items supported by the connected devices are Select the type of picture shown when you pause indicated on the screen as “¢”. When any item playback. without “¢” is selected, the images may be distorted. ≥...
- Page 37 HDMI Audio Output This setting selects whether or not to output audio from HDMI. ∫ 3D BD-Video Playback ≥ Audio will be output through the system's Select the playback method of 3D compatible speakers when “Off” is selected. video software. ∫...
- Page 38 For the setting and operation method of connected settings to be set. Current connection settings equipment, refer to the following Website. and connection state can be checked. http://panasonic.jp/support/global/cs/ (This site is in English only.) Connection Setting The wireless router connection wizard will be displayed.
- Page 39 Registration Type TV Aspect Set to match the type of television connected. Allow connection to all the Auto When connected to a 4:3 aspect television and equipment that is accessing this unit. playing 16:9 ratio image: Set the permission of the connection Manual individually for the equipment that is The sides are cut off...
-
Page 40: Speaker Settings
A test signal is output. Change the remote control code if other While listening to the test signal Panasonic products react to this remote control. Press [3, 4] to adjust the volume of each ∫ Firmware Update ( speaker (... -
Page 41: Enjoying Sound Effects From All Speakers
Enjoying sound effects ∫ Delay time For optimum listening with 5.1-channel sound, all from all speakers the speakers, except for the subwoofer, should be the same distance from the seating position. For more details on each setting, refer to “Audio If either distance 1 or 2 is less than 3, Settings”... -
Page 42: Speaker Installation Option
Speaker installation Front speaker Attach to a wall without the base and the stand. option Consult a qualified building contractor when attaching the speakers to a wall. Improper attachment may result in damage to the wall and speakers and personal injury. Attaching to a wall You can attach all of the speakers (except ... - Page 43 Front speaker assembly option Preventing the speakers from falling or dropping It is possible to shorten the height of the front speaker by directly connecting the speaker to the Preventing from falling base without using the stand. Front speaker Preventing from dropping Preparation Front speaker, Surround speaker, Center speaker Detach the speaker cable from the stand.
-
Page 44: Troubleshooting Guide
–“00 RET” is displayed on the unit’s display. For U.S.A.: 2 Repeatedly press [1] (right) on the remote www.panasonic.com/help control or [Í/I] on the unit until “08 FIN” is Enter the model number. displayed on the unit’s display. - Page 45 This unit does not recognize the USB If irregular coloring occurs on your TV, turn connection correctly. the TV off for about 30 minutes. Disconnect and reconnect the USB cable. If it If it persists, move the speakers further away from the TV. still does not recognize the connection, turn the power of this unit off and on again.
- Page 46 Playback Sound Disc cannot be played. No sound. The disc is dirty. ( Low volume. Distorted sound. Cannot hear the desired audio type. Still pictures (JPEG) do not play back normally. Check connections to speakers and other The images that were edited on the PC, such as equipment.
-
Page 47: Messages
Messages Radio The following messages or service numbers Distorted sound or noise is heard. appear on the television or unit’s display. Adjust the position of the antenna. On the television A beat sound is heard. Try to keep a certain amount of distance between the antenna and the TV. - Page 48 Check the unit using the troubleshooting On the unit’s display guide. If the service number remains displayed, do the following. 1 Disconnect the plug from the AC outlet, wait a The unit fails to operate properly. Press [Í/I] few seconds, then reconnect it. on the main unit for 3 seconds to switch the 2 Press [Í/I] to turn the power on.
-
Page 49: Specifications
Specifications SPEAKER SECTION* GENERAL FRONT SPEAKERS q) CONE TYPE Full range: 6.5 cm (2 Dimensions (WkHkD): 292 mmk1185 mmk292 mm Power consumption qk46 qk11 (For the U.S.A. and Canada): 84 W Mass (Weight): Approx. 2.6 kg (5.7 lbs) CENTER SPEAKER (For units with PX printed q) CONE TYPE on the packaging):... -
Page 50: Supplemental Information
Supplemental File format information File format Extension Reference ∫ Display languages list This unit supports ID3 tags, but only titles, artist names Display Language Display Language Display Language “.MP3”, “.mp3” and album names can be English Japanese Arabic displayed. French Chinese Hindi German... - Page 51 Responsible Party: Panasonic Corporation of North America One Panasonic Way, Secaucus, NJ 07094 Support Contact: Panasonic Consumer Marketing Company of North America Telephone No.: 1-800-211-PANA (7262) THE FOLLOWING APPLIES ONLY IN CANADA. This Class B digital apparatus complies with Canadian ICES-003.
- Page 52 EZ Sync™ is a trademark of Panasonic Corporation. MPEG Layer-3 audio coding technology licensed from Fraunhofer IIS and Thomson. “AVCHD”, “AVCHD 3D”, “AVCHD Progressive” and “AVCHD 3D/Progressive” are trademarks of Panasonic Corporation and Sony Corporation. SDXC Logo is a trademark of SD-3C, LLC.
- Page 53 MERCHANTABILITY or FITNESS FOR A PARTICULAR PURPOSE. At least three (3) years from delivery of products, Panasonic will give to any third party who contacts us at the contact information provided below, for a charge no more than our cost of physically performing source code distribution, a complete machine-readable copy of the corresponding source code covered under GPL v2/LGPL v2.1.
-
Page 54: Limited Warranty
PURCHASER WILL BE REQUIRED TO FURNISH A SALES RECEIPT/ PROOF OF PURCHASE INDICATING DATE OF PURCHASE, AMOUNT PAID Purchase Parts, Accessories and Instruction Books online for all Panasonic AND PLACE OF PURCHASE. CUSTOMER WILL BE CHARGED FOR THE Products by visiting our Web Site at: REPAIR OF ANY UNIT RECEIVED WITHOUT SUCH PROOF OF http://www.pstc.panasonic.com... - Page 55 Home Theater Systems Product - One (1) year, parts and labour This warranty is given only to the original purchaser, or the person for whom it was purchased as a gift, of a Panasonic brand product mentioned above sold by an authorized Panasonic dealer in Canada and purchased and used in Canada, which product was not sold “as is”, and which product was delivered to you in new condition in the original...
-
Page 56: Index
(servicing) instructions in the literature accompanying the appliance. ® As an ENERGY STAR Partner, Panasonic has determined that this product meets the ® ENERGY STAR guidelines for energy efficiency.