Table of Contents
Advertisement
Quick Links
Advertisement
Table of Contents

Related Manuals for Palsonic PVP150


Summary of Contents for Palsonic PVP150
- Page 1 DVD Player PVP-150 USER'S MANUAL...
-
Page 2: Introduction
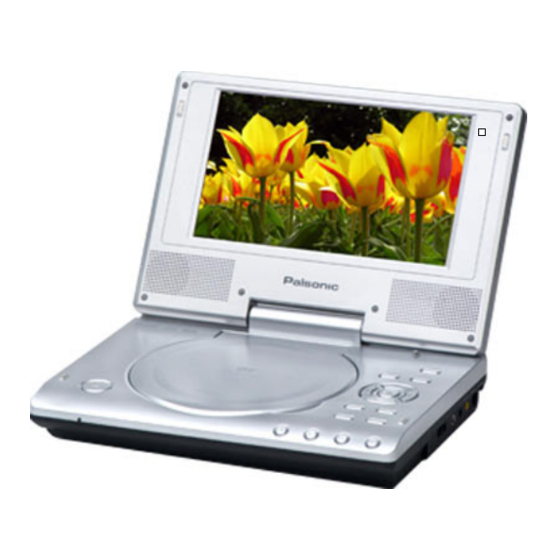
Introduction Thank you for choosing the 7” portable DVD Player. The unit applies the latest state of the art electronics and is designed for use in hotels, offices, vehicles or your home. The DVD Player is constructed to provide years of reliable, trouble-free service, and is compact so that you can take it with you anywhere and is designed for quick and easy setup. -
Page 3: Important Safety Instructions
Important Safety Instructions The lightning flash with arrowhead symbol, within an equilateral triangle, is intended to alert the user to the presence of uninsulated “Dangerous Voltage” within the product’s enclosure that may be of sufficient magnitude to constitute a risk of electric shock to persons. The exclamation point within an equilateral triangle is intended to alert the user to the presence of important operating and maintenance (servicing) instructions in the literature accompanying the appliance. - Page 4 Important Safety Instructions Note: Read these instructions. Keep these instructions. Heed all warnings. Follow all instructions. Do not use near water. Clean only with dry cloth. Do not block any ventilation openings. Maintain well ventilated conditions around the product. Do not put product on bed, sofa or anything that blocks ventilation. Install in accordance with the manufacturer’s instructions.
-
Page 5: Table Of Contents
Important Safety Information Copyright Protection This product incorporates copyright protection technology that is protected by U.S. patents and other intellectual property rights. Use of this copyright protection technology must be authorised by Macrovision, and is intended for home and other limited viewing uses only unless otherwise authorised by Macrovision. -
Page 6: Table Of Contents
Table Of Contents Introduction --------------------------------------------------------------------------------------------- Important Safety Instructions --------------------------------------------------------------------- Table of Contents ------------------------------------------------------------------------------------- Main Features ------------------------------------------------------------------------------------------ Description - Front Panel -------------------------------------------------------------------------- Description - Right and Left Panel ------------------------------------------------------------- Description - Bottom Panel ----------------------------------------------------------------------- System Connections -------------------------------------------------------------------------------- Connecting to a TV ------------------------------------------------------------------------------------ Connecting to an Amplifier --------------------------------------------------------------------------- Connecting to Headphone --------------------------------------------------------------------------- Power Supply Connections -----------------------------------------------------------------------... -
Page 7: Main Features
Function Features High Resolution MPEG2 decoding format achieves more than 500 lines of horizontal resolution LCD (Liquid Crystal Display) Screen 7" Colour LCD screen. Shock-Resistant Function Electronic shock-resistant design makes it possible to be used as a car-loaded DVD player. Compatibility Plays DVD disc and compatible with CD and JPEG discs, etc. -
Page 8: Description - Front Panel
Description - Front Panel LCD Screen Present a high-resolution picture. Speaker Two speakers produce stereo sound. SETUP button Press to enter the player's system setup. - 7 -... - Page 9 Description - Front Panel TITLE button Press to display the title menu if it exists in the disc. MENU button Press to display or cancel the menu. Direction buttons ( Press to select menu items or settings. buttons are also used as the buttons to search forward fast and search backward fast respectively.
-
Page 10: Description - Right And Left Panel
Description - Right and Left Panels Right Side View Volume Control Used to adjust the volume of the headphone and speaker. Headphone Jack Used to connect headphones for private listening. When the headphones are connected to this jack, the speaker will be turned off automatically. Audio Output Jack Used for audio output. -
Page 11: Description - Bottom Panel
Description - Bottom Panel Built in great capacity rechargeable lithium ion battery Note: Unprofessional persons are not allowed to open the cover of the rechargeable battery. - 10 -... -
Page 12: System Connections
System Connections Always ensure that the DVD player, TV and any other electrical equipment that connecting with DVD player is switched off and unplugged from the power supply. Ensure that you observe the colour coding when connecting audio and video cables. -
Page 13: Connecting To An Amplifier
System Connections Connecting to An Amplifier Before connecting to amplifier, please refer to your audio equipment's manual first. Follow the drawings below to connect the DVD player to AV amplifier. AMPLIFIER Connecting to Headphones Connect the headphones to the right side of the player for private listening - 12 -... -
Page 14: Power Supply Connections
Power Supply Connections Using of the Power Adapter AC 100~240V The player comes with a power adapter. Plug one end of the power adapter in to the slot marked DC 12V IN on the right side of the DVD player (as the figure shows above). Plug the other end of the power cord to a grounded outlet. -
Page 15: About The Rechargeable Battery
About the Rechargeable Battery Rechargeable Battery Pack Your portable DVD player comes with a built-in lithium ion rechargeable battery in the DVD player. Charge the battery fully before initial use. Charging time is normally about 6 hours. A fully charged battery delivers about 3 hours of use but playing time varies from disc to disc. -
Page 16: Disc Information
Disc Information Disc Formats Supported By This Player PLAYBACK TIME/ DISC LOGO DIAMETER PLAYBACK SIDES 133 min (SS-SL) 242 min (SS-SL) 12cm 266 min (DS-SL) 484 min (DS-SL) 41 min (SS-SL) 75 min (SS-SL) 82 min (DS-SL) 150 min (DS-SL) 74 min 12cm 20 min... -
Page 17: Playback Operations
Playback Operation Preparations Connect the DVD Player to power source. Turn on the player by switching the POWER switch on the left side of the player to Press the OPEN button on the front panel to open the disc tray cover. Load the disc with the label side facing up. -
Page 18: Cd Disc Playback
Playback Operation Slow Playback Press the SLOW button to start slow playback. Press it repeatedly and it will be played at the speed of forward 1/2, 1/4, 1/8, 1/16 or normal playback in sequence. Under the slow playback state press the button to pause playback and press the button again to resume normal playback. -
Page 19: Picture Cd Playback
Playback Operation Fast playback Press the button to start fast forward playback. Press it repeatedly, it will be played at the speed of 2X, 4X, 8X, 16X or normal playback in sequence. Press the button to start fast reverse playback. Press it repeatedly, it will be played at the speed of 2X, 4X, 8X, 16X or normal playback in sequence. -
Page 20: System Setup
System Setup You can change the default settings of this unit to customise its performance to your own preference. Read this section to learn how to set up the system. Note: the system should only be set up in the state that no disc is in the DVD drive or the unit is in the completely stop mode. -
Page 21: Language Setup
System Setup Language Setup The items included in this sub-menu are shown as below: LANGUAGE SETUP OSD LANG ENGLISH AUDIO FRANCIS DISC MENU ESPANOL SUBTITLE DEUTSCH ITALIANO MAIN PAGE SET OSD LANGUAGE Press the button to highlight the item you want to set up. Press the button to enter the setup of the selected item. - Page 22 System Setup Preference The items included in this sub-menu are shown as below: PREFERENCES TV DISPLAY 4:3 PS RESUME 4:3 LB DEFAULTS 16:9 MAIN PAGE SET TV DISPLAY MODE Press the button to highlight the item you want to set up. Press the button to enter the setup of the selected item.
-
Page 23: Definitions
Definitions Letterbox screen This refers to a screen on which the playback picture of wide-screen DVDs appears with black bands running along the top and bottom. Pan & Scan screen This refers to a screen on which the playback picture of wide-screen DVDs is cut off at the left and right sides. -
Page 24: Troubleshooting
Troubleshooting Problem How To Check Make sure the disc cover is completely closed. Make sure a disc is loaded. Make sure the disc is loaded with label side up. Disc should be clean, not dirty or warped. Player’s region code should be the same as The player cannot play. -
Page 25: Specifications
Specifications TFT screen size 7 inches Video System PAL/NTSC Frequency Response 20Hz~20kHz ±2.5dB Audio Signal-to-Noise >85dB Audio distortion + noise < -70dB (1KHz) Channel Separation > 70dB (1KHz) Dynamic Range > 80dB (1KHz) Output Level: 1.5V± , Load: 10K Analog Audio Audio Out Output Level:1V ±0.2, Load: 75... - Page 26 PALSONIC CORPORATION PTY LTD 1 JOYNTON AVENUE WATERLOO NSW 2017 AUSTRALIA TEL: (02) 9313 7111 FAX: (02) 9313 7555 www.palsonic.com.au PALSONIC CUSTOMER SERVICE TELEPHONE AUSTRALIA: 1300 657 888...