D-Link DCS-942L User Manual
Enchanced wireless n day & night home network camera
Hide thumbs
Also See for DCS-942L:
- Quick installation manual (80 pages) ,
- User manual (71 pages) ,
- Faq (58 pages)
Table of Contents
Advertisement
Advertisement
Table of Contents

Related Manuals for D-Link DCS-942L


Summary of Contents for D-Link DCS-942L
-
Page 2: Manual Overview
Manual Overview D-Link reserves the right to revise this publication and to make changes in the content hereof without obligation to notify any person or organization of such revisions or changes. Information in this document may become obsolete as our services and websites develop and change. -
Page 3: Table Of Contents
Wireless Installation Considerations ........12 Admin ................39 Camera Installation Wizard .............13 System................40 WPS - Push Button Setup ..........14 Firmware Upgrade ............41 Status ................42 mydlink Portal ..............15 Device Info ..............42 Camera Status ................16 Log ..................43 Live Video ..................17 Camera Info ..................19 D-Link DCS-942L User Manual... - Page 4 Table of Contents Wireless Security .............44 What is WEP? ................44 What is WPA? ................45 Configuring the DCS-942L with a Router ....46 Troubleshooting ..............52 Wireless Basics ..............55 Wireless Modes ................59 Networking Basics ............60 Check your IP address ...............60 Statically Assign an IP Address ..........61 Technical Specifications ..........62...
-
Page 5: Product Overview
Section 1 - Product Overview Product Overview Package Contents DCS-942L Enhanced Wireless N Day & Night Home Network Camera Camera Stand and Mounting Kit Camera CAT5 Ethernet Cable Power Adapter Manual and Software on CD Quick Install Guide Note: Using a power supply with a different voltage than the one included with your product will cause damage and void the warranty for this product. -
Page 6: Introduction
Congratulations on your purchase of the DCS-942L Enhanced Wireless N Day & Night Home Network Camera. The DCS-942L is a versatile and unique solution for your small office or home. Unlike a standard webcam, the DCS-942L is a complete system with a built-in CPU and web server that transmits high quality video images for security and surveillance. -
Page 7: Features
Simple to Use The DCS-942L is a stand-alone system with a built-in CPU requiring no special hardware or software such as PC frame grabber cards. The DCS-942L supports both ActiveX mode for Internet Explorer and Java mode for other browsers such as Firefox® and Safari®. -
Page 8: Hardware Overview
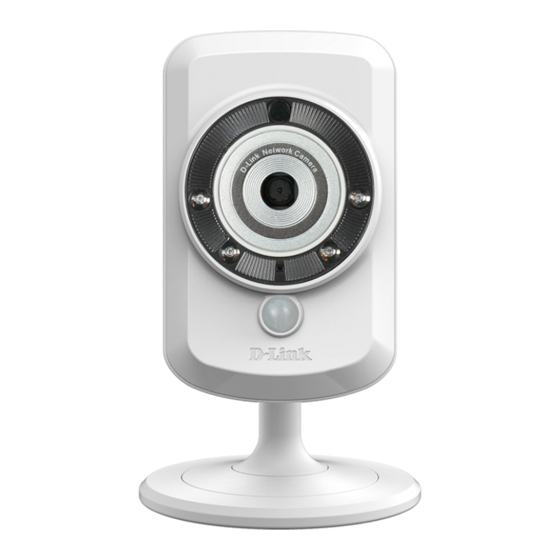
Section 1 - Product Overview Hardware Overview Front View Passive Infrared Sensor (PIR) for motion detection IR Sensor IR LED Camera Lens Microphone D-Link DCS-942L User Manual... -
Page 9: Hardware Overview
Section 1 - Product Overview Hardware Overview Side View Micro SD card slot D-Link DCS-942L User Manual... -
Page 10: Rear View
Section 1 - Product Overview Rear View Headphone/ Speaker Jack Ethernet Port Power Receptor Power LED Reset WPS LED WPS Button Camera Stand D-Link DCS-942L User Manual... -
Page 11: Installation
Hardware Installation Connect the Ethernet Cable Connect the included Ethernet cable to the network cable connector located on the top panel at the rear of the DCS-942L and attach it to the network. Attach the External Power Supply Attach the external power supply to the DC Power receptor located on the rear panel of the DCS-942L and connect it to your wall outlet or power strip. -
Page 12: Wireless Installation Considerations
Wireless Installation Considerations The D-Link Wireless Network Camera lets you access your network using a wireless connection from anywhere within the operating range of your wireless network. However, the number, thickness and location of walls, ceilings, or other objects that the wireless signals must pass through, may limit the range. -
Page 13: Camera Installation Wizard
Insert the Installation CD-ROM into your computer’s CD drive to start the autorun program. The CD-ROM will open the Camera Installation Wizard. Simply click Start to go through the Installation Wizard, which will guide you through the installation process from connecting your hardware to configuring your camera. D-Link DCS-942L User Manual... -
Page 14: Wps - Push Button Setup
WPS button is on your router, please refer to your router’s User Manual. WPS Button The DCS-942L will automatically create a wireless connection to your router. While connecting, the green LED will flash and your camera will reboot. D-Link DCS-942L User Manual... -
Page 15: Mydlink Portal
Portal After registering your DCS-942L camera with a mydlink account in the Camera Installation Wizard. You will be able to remotely access your camera from the www.mydlink.com website. After signing in to your mydlink account, you will see a screen similar... -
Page 16: Camera Status
• Check to make sure that the LED on your camera is lit solid green. If you still cannot access your camera, reset your camera and run the Camera Installation Wizard again from the CD-ROM included in your package. D-Link DCS-942L User Manual... -
Page 17: Live Video
Video will be shown at VGA resolution (640x480) if viewing your camera from a PC on the same local network, or at QVGA resolution (320x240) if viewing your camera from a PC on a remote network. D-Link DCS-942L User Manual... - Page 18 1. Download the VLC file from WEB site. 2. Execute the program and setup the configurations of the software. 3. Enable the “Mozilla plug-in” to install the components. 4. Finished the installation, then you can see the live video in the browser. D-Link DCS-942L User Manual...
-
Page 19: Camera Info
MAC Address: Displays the MAC address of your device. Device activated On: Displays the time and date that your device was added to mydlink. Support: This section provides you with links to various support websites and downloads related to your product. D-Link DCS-942L User Manual... -
Page 20: Configuration
After completing the Camera Installation Wizard, you are ready to use your camera. The camera’s built-in Web configuration utility is designed to allow you to easily access and configure your DCS-942L. At the end of the wizard, click Go To Camera, or enter the IP address of your camera into a web browser. -
Page 21: Live Video
Please make sure that you have the latest version of Java application installed on your computer to ensure proper operation when viewing the video in Java mode. The Java application can be downloaded free from Sun’s web site (http://www.java.com). Live Video A Live Video from the camera is displayed upon logging into the camera’s web interface. D-Link DCS-942L User Manual... - Page 22 PC through to the speakers connected to the camera. Turns the Infrared lights on or off. IR LED On/Off button (Icon only appears when you set to manual IR) Zoom buttons Zooms in or out of the picture. D-Link DCS-942L User Manual...
-
Page 23: Setup
You may choose to configure your network by using the Internet Connection Setup Wizard that includes step-by-step instructions. Alternatively, if you prefer to have finer control over settings, you can manually configure your connection using the Manual Internet Connection Setup. D-Link DCS-942L User Manual... -
Page 24: Internet Connection Setup Wizard
Section 4 - Configuration Internet Connection Setup Wizard This wizard will guide you through a step-by-step process to configure your new D-Link Camera and connect the camera to the Internet. Click Next to continue. Select how the camera will connect to the Internet. If you are unsure how your camera will connect to the Internet, select Automatic IP. - Page 25 Enter your password used to connect to the DDNS server. Timeout: You can setup how often the camera notifies the DDNS server of its current global IP address by entering a whole number in hours. Click Next to continue. D-Link DCS-942L User Manual...
- Page 26 Auto Daylight Saving to have DST set automatically or select Set date and time manually to enable drop-down menus so that you can set the start and end time of daylight saving yourself. Click Next to continue. D-Link DCS-942L User Manual...
- Page 27 Section 4 - Configuration A summary of the options you selected is displayed for confirmation. Click Apply to complete the Setup. D-Link DCS-942L User Manual...
-
Page 28: Network
Primary DNS. PPPoE Settings: If you are using a PPPoE connection, enable it and enter the User Name and Password for your PPPoE account. You can get this information from your Internet service provider (ISP). D-Link DCS-942L User Manual... - Page 29 Enable this setting to configure your camera as a UPnP device in the network. Apple: Checking the Bonjour box will allow the camera to be discoverable on the network and visible to Apple devices. Click Save Settings to save your changes. D-Link DCS-942L User Manual...
-
Page 30: Wireless
Ad-Hoc is a wireless connection used without an access point, where your DCS-942L is directly connecting to your PC. This is done using the on-board wireless adapter on the DCS-942L connected to a wireless adapter on the PC. -
Page 31: Ddns
Password: Enter your password used to connect to the DDNS server. Timeout: You can setup how often the camera notifies the DDNS server of its current global IP address by entering a whole number in hours. D-Link DCS-942L User Manual... -
Page 32: Image Setup
Slow Shutter: Allows you to select a slow shutter speed so as to capture more light in the image. You can select from 1/15 second, 1/10 second, 1/7.5 second or 1/3.75 second. Change to the image settings are effective immediately. D-Link DCS-942L User Manual... -
Page 33: Audio And Video
Allows you to control the IR LEDs on the front of the camera. Audio Setup: Allows you to enable or disable and adjust the volume level of the speaker and microphone. Click Save Settings to save your changes. D-Link DCS-942L User Manual... -
Page 34: Time And Date
Internet time server. Choose the one that is closest to your camera. Set the Date and Select this to set the time manually. Time Manually: Copy your Click to synchronize the time information from Computer’s Time your PC. Settings: D-Link DCS-942L User Manual... -
Page 35: Video Clip
Target: Select where you want the video clip to be sent. It may be saved to an SD Card, uploaded to an FTP or E-mailed to an e-mail address. Click Save Settings to save your changes. D-Link DCS-942L User Manual... -
Page 36: Snapshot
Target: Select where you want the snapshot to be sent. It may be saved to an SD Card, uploaded to an FTP or E-mailed to an e-mail address. Click Save Settings to save your changes. D-Link DCS-942L User Manual... -
Page 37: Motion Detect
Clear: Clears all motion detection areas from the picture. Refresh Image: Updates the image with a new one at the time the button is pressed. Click Save Settings to save your changes. D-Link DCS-942L User Manual... -
Page 38: Sd Card
If you want to erase the SD card or if it is a new one, click Format SD Card. Note: Format SD Card will erase all the contents of the SD card. D-Link DCS-942L User Manual... -
Page 39: Maintenance
LED Light: Select Normal to enable the LED on the front of the device, or select off to disable the LED. It can also be set to flicker on and off. D-Link DCS-942L User Manual... -
Page 40: System
Section 4 - Configuration System This section allows you to save and restore your configuration, restore the factory settings, and/or restart the camera. D-Link DCS-942L User Manual... -
Page 41: Firmware Upgrade
Firmware Upgrade Your current firmware version and date will be displayed on your screen. You may go to the D-Link Support Page to check for the latest firmware versions available. To upgrade the firmware on your DCS-942L, please download and save the latest firmware version from the D-Link Support Page to your local hard drive. -
Page 42: Status
Section 4 - Configuration Status Device Info This section displays detailed information about your device and network settings. D-Link DCS-942L User Manual... -
Page 43: Log
Section 4 - Configuration The system log records camera events that have occurred. D-Link DCS-942L User Manual... -
Page 44: Wireless Security
Section 5 - Security Wireless Security This section will show you the different levels of security you can use to protect your data from intruders. The DCS-942L offers the following types of security: • WPA-PSK (Pre-Shared Key) • WEP (Wired Equivalent Privacy) What is WEP? WEP stands for Wired Equivalent Privacy. -
Page 45: What Is Wpa
WPA-PSK/WPA2-PSK uses a passphrase or key to authenticate your wireless connection. The key is an alpha-numeric password between 8 and 63 characters long. The password can include symbols (!?*&_) and spaces. This key must be the exact same key entered on your wireless router or access point. D-Link DCS-942L User Manual... -
Page 46: Configuring The Dcs-942L With A Router
DCS-942L, follow the steps outlined in the Quick Install Guide. After you have completed the setup of the DCS-942L outlined in the Quick Installation Guide you will have an operating camera that has an assigned IP Address. - Page 47 Run your Internet Explorer Web browser. In the address bar, type in the IP Address that was assigned to the Network Camera by the DCC program. The DCS-942L Live Video Page appears with a window displaying live video from the camera. You are able to view this screen from any PC running Internet Explorer on your LAN.
- Page 48 The Setup > Network page displays the port settings for your camera. If necessary, these ports can be changed if they are already in use by other devices (e.g. in a multiple camera environment). Note: Both the HTTP port and RTSP port are required to be opened for the DCS-942L. D-Link DCS-942L User Manual...
- Page 49 Router Set-Up and Installation The following steps generally apply to any router that you have on your network. The D-Link DIR-655 is used as an example to clarify the configuration process. Configure the initial settings of the DIR-655 by following the steps outlined in the DIR-655 Quick Installation Guide.
- Page 50 The firewall security features built into the DIR-655 router prevent users from accessing the video from the DCS-942L over the Internet. The router connects to the Internet over a series of numbered ports. The ports normally used by the DCS-942L are blocked from access over the Internet.
- Page 51 800. Not all routers are the same, so refer to your user manual for specific instructions on how to open ports. Enter valid ports in the Virtual Server section of your router. Please make sure to check the box next to the camera name on the Virtual Server List to enable your settings. D-Link DCS-942L User Manual...
-
Page 52: Troubleshooting
Troubleshooting This chapter provides solutions to problems that can occur during the installation and operation of the DCS-942L. Read the following descriptions if you are having problems. (The examples below are illustrated in Windows Vista® and XP. If you have a different operating system, the screenshots on your computer will look similar to the following examples.) - Page 53 This URL will open a webpage where you will be asked to log in by entering your camera’s password. After entering your password, your camera’s Live View window will open, and you will be able to configure your camera as well. 4. Why does the LED not light up? D-Link DCS-942L User Manual...
- Page 54 CMOS sensor. 8. The camera is producing noisy images. How can I solve the problem? The video images might be noisy if the Network Camera is used in a very low light environment. D-Link DCS-942L User Manual...
- Page 55 You may also need to change the security settings on your browser to allow the ActiveX plug-in to be installed. If you are using Internet Explorer with a version number lower than 7, then you will need to upgrade your Web browser software in order to view the streaming video transmitted by the Network Camera. D-Link DCS-942L User Manual...
-
Page 56: Wireless Basics
D-Link wireless products are based on industry standards to provide easy-to-use and compatible high-speed wireless* connectivity within your home, business or public access wireless networks. Strictly adhering to the IEEE standard, the D-Link wireless family of products will allow you to securely access the data you want, when and where you want it. - Page 57 D-Link is the worldwide leader and award winning designer, developer, and manufacturer of networking products. D-Link delivers the performance you need at a price you can afford. D-Link has all the products you need to build your network. How does wireless work? Wireless works similar to how cordless phone work, through radio signals to transmit data from one point A to point B.
- Page 58 Appendix A - Wireless Basics Who uses wireless? Wireless technology has become so popular in recent years that almost everyone is using it, whether it’s for home, office, business, D-Link has a wireless solution for it. Home • Gives everyone at home broadband access •...
- Page 59 The wireless connection in public places is usually called “hotspots”. Using a D-Link Cardbus Adapter with your laptop, you can access the hotspot to connect to Internet from remote locations like: Airports, Hotels, Coffee Shops, Libraries, Restaurants, and Convention Centers.
-
Page 60: Wireless Modes
• Ad-Hoc – Directly connecting to another computer, for peer-to-peer communication, using wireless network adapters on each computer, such as two or more DCS-942L wireless network Cardbus adapters. An Infrastructure network contains an Access Point or wireless router. All the wireless devices, or clients, will connect to the wireless router or access point. -
Page 61: Networking Basics
Check your IP address After you install your new D-Link adapter, by default, the TCP/IP settings should be set to obtain an IP address from a DHCP server (i.e. wireless router) automatically. To verify your IP address, please follow the steps below. -
Page 62: Statically Assign An Ip Address
Windows® Vista - Click on Start > Control Panel > Network and Internet > Network and Sharing Center > Manage Network Connections. Windows XP - Click on Start > Control Panel > Network Connections. Step 2 Right-click on the Local Area Connection which represents your D-Link network adapter and select Properties. Step 3 Highlight Internet Protocol (TCP/IP) and click Properties. -
Page 63: Technical Specifications
• Reset to factory default • DHCP Client VIDEO CODECS • NTP Client (D-Link) • DNS Client • H.264 • DDNS Client (Dyndns and D-Link) • MPEG-4 • SMTP Client • MJPEG • FTP Client VIDEO FEATURES • HTTP Server •... - Page 64 • ADPCM EMISSION (EMI), SAFETY & OTHER CERTIFICATIONS SD CARD SLOT • FCC Class B • Micro SD card • IC • C-Tick PIR SENSOR • CE • Built-in Piezoelectricity Passive Infrared sensor for motion detection D-Link DCS-942L User Manual...
-
Page 65: Contacting Technical Support
• Hardware Revision (located on the label on the bottom of the Network Camera (e.g. rev A1)) • Serial Number (s/n number located on the label on the bottom of the Network Camera). You can find software updates and user documentation on the D-Link website as well as frequently asked questions and answers to technical issues. -
Page 66: Warranty
Any repair or replacement will be rendered by D-Link at an Authorized D-Link Service Office. The replacement hardware need not be new or have an identical make, model or part. D-Link may, at its option, replace the defective Hardware or any part thereof with any reconditioned product that D-Link reasonably determines is substantially equivalent (or superior) in all material respects to the defective Hardware. - Page 67 D-Link further warrants that, during the Software Warranty Period, the magnetic media on which D-Link delivers the Software will be free of physical defects. The customer’s sole and exclusive remedy and the entire liability of D-Link and its suppliers under this Limited Warranty will be, at D-Link’s option, to replace the non-conforming Software (or defective media) with software that substantially conforms to D-Link’s...
- Page 68 • USA residents send to 17595 Mt. Herrmann, Fountain Valley, CA 92708. D-Link will not be held responsible for any packages that are lost in transit to D-Link. The repaired or replaced packages will be shipped to the customer via UPS Ground or any common carrier selected by D-Link.
-
Page 69: Limitation Of Liability
Appendix B - Technical Specifications While necessary maintenance or repairs on your Product can be performed by any company, we recommend that you use only an Authorized D-Link Service Office. Improper or incorrectly performed maintenance or repair voids this Limited Warranty. -
Page 70: Copyright Statement
No part of this publication or documentation accompanying this product may be reproduced in any form or by any means or used to make any derivative such as translation, transformation, or adaptation without permission from D-Link Corporation/D-Link Systems, Inc., as stipulated by the United States Copyright Act of 1976 and any amendments thereto. - Page 71 The availability of some specific channels and/or operational frequency bands are country dependent and are firmware programmed at the factory to match the intended destination. The firmware setting is not accessible by the end user. For detailed warranty information applicable to products purchased outside the United States, please contact the corresponding local D-Link office.
-
Page 72: Registration
Appendix E - Registration Registration Product registration is entirely voluntary and failure to complete or return this form will not diminish your warranty rights. Version 1.0 July 21, 2011 D-Link DCS-942L User Manual...