Table of Contents
Advertisement
Advertisement
Table of Contents

Related Manuals for HP L1744A


Summary of Contents for HP L1744A
- Page 1 HP vp6200 Series Digital Projector User’s Guide...
- Page 2 Notice © Copyright 2004 Hewlett-Packard Development Company, L.P. The information contained herein is subject to change without notice. The only warranties for HP products and services are set forth in the express warranty statements accompanying such products and services. Nothing herein should be construed as constituting an additional warranty.
-
Page 3: Table Of Contents
Contents 1. Safety Instructions ........5 2. Introduction ..........7 Projector Features ........... 7 Shipping Contents ........... 8 Accessories ............. 9 Projector Exterior View ..........9 Front / Upper Side ................9 Rear Side ..................9 Connector Panel ................10 Controls and Functions .......... - Page 4 Menu Operation ............. 25 Using the Menus ................25 1. Picture Menu ................26 2. Advanced Picture Menu ............27 3. Setup Menu ................28 4. Advanced Setup Menu ............. 29 5. Information Menu ..............30 6. Maintenance .......... 31 Care of the Projector ..........
-
Page 5: Safety Instructions
1. Safety Instructions Your projector is designed and tested to meet the latest standards for safety of information technology equipment. However, to ensure safe use of this product, it is important that you follow the instructions mentioned in this manual and marked on the product. - Page 6 • Do not block the ventilation holes. - Do not place this unit on a blanket, bedding or any other soft surface. - Do not cover this unit with a cloth or any other item. - Do not place inflammables near the projector. If the ventilation holes are seriously obstructed, overheating inside the unit may result in damage.
-
Page 7: Introduction
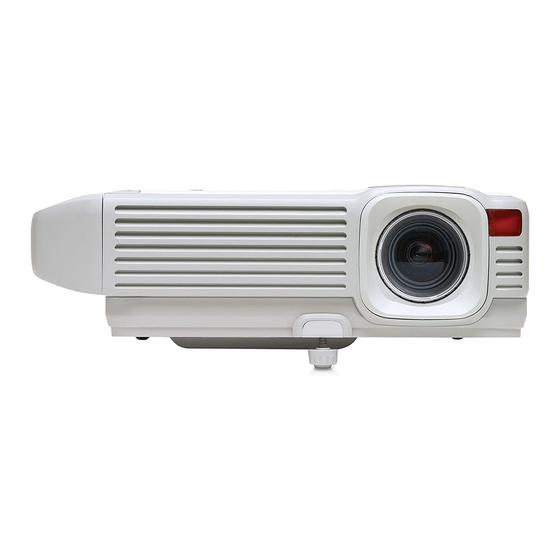
2. Introduction Projector Features The projector integrates high-performance projection and a user-friendly design to deliver high reliability and ease of use. The projector offers the following features: • Compact and portable unit • High quality manual zoom lens • One-key auto-adjustment to display the best picture quality •... -
Page 8: Shipping Contents
Shipping Contents The projector is shipped with the cables required for connection to a PC. Carefully unpack and verify that you have all of the items shown below. If any of these items are missing, please contact your place of purchase. Projector Power cord VGA cable... -
Page 9: Accessories
Accessories Get more from your presentations with HP projector accessories. You can purchase accessories at www.hp.com or through your projector dealer. • HP ceiling mount kit enables you to simply and discreetly install your projector on the ceiling. • HP mobile screens with built-in handles are easy to carry and set up anywhere you need them. -
Page 10: Connector Panel
Connector Panel Refer to page for more information on making connections to various equip- ment. IR remote sensor USB output VGA output Audio input S-Video input Composite-video input VGA input (PC/ YPbPr/ YCbCr) Power cord socket 2. Introduction... -
Page 11: Controls And Functions
Controls and Functions Projector Hide button (Refer to page for more information.) Hides the display. Source button (Refer to page for more information.) Switches to the next input source. Cycles through VGA, composite video, and S-video inputs. Temperature-warning light (Refer to page for more information.) Turns on when the internal temperature is too high. -
Page 12: Remote Control
Remote Control Keystone button (Refer to page for more information.) Adjust the picture to eliminate slanted sides. Menu button and directional arrows (Refer to page for more informa- tion.) Change projector settings using the on-screen menu. Keystone button (Refer to page for more information.) Adjust the picture to eliminate slanted sides. -
Page 13: Aiming The Remote Control
Aiming the Remote Control Infrared (IR) remote control sensors are located on the front and the back of the projector. The remote control must be held at an angle within 30 degrees of the pro- jection screen or the projector’s IR remote control sensors to function correctly. The distance between the remote control and the sensors should not exceed 6 meters (19.5 feet). -
Page 14: Installation
3. Installation Choosing a Location Your projector is designed to be installed in the four installation configurations shown here. Your room layout or personal preference will dictate which installation configuration you use. I. Table front II. Ceiling front III. Table rear IV. -
Page 15: Adjusting The Height
Adjusting the Height The projector is equipped with 1 quick-release adjuster foot and 2 rear adjuster feet. These adjusters change the image height and projection angle. To adjust the projector, Lift the projector up and press the adjuster button to release the adjuster. The adjuster will drop into position and be locked. - Page 16 Screen size chart (4:3 aspect ratio) Distance Diagonal measure- Distance Diagonal measurement from ment from screen screen Minimum Maximum Minimum Maximum zoom zoom zoom zoom feet inch feet inch feet inch meter meter meter 2.49 29.9 3.05 36.6 0.62 62.2 0.76 76.2 3.73...
-
Page 17: Connection
4. Connection When connecting a signal source to the projector, be sure to: Turn all equipment off before making any connections. Use the correct signal cables for each source. Ensure the cables are firmly inserted. In the connections shown below, only certain cables are included with the projector (see page 8). -
Page 18: Connecting S-Video Devices
Connecting S-Video Devices Audio cable S-Video cable Connecting Composite-Video Devices Audio cable Composite -video cable If the selected video image is not displayed after the projector is turned on and the correct video source has been selected, check that the video source is turned on and operating cor- rectly. -
Page 19: Connecting To Display Devices
Connecting to Display Devices If you want to monitor your presentation close-up on a monitor as well as on the screen, you can connect the VGA signal output port on the projector to an external monitor with a VGA cable. VGA cable 4. -
Page 20: Operation
5. Operation Startup Switch all of the connected equipment on. Plug the power cord into the projector and into a wall socket. Turn on the wall socket switch (where fitted). Press Power on the remote control or projector to start the unit. The Power button flashes during warm up, then turns on solid. -
Page 21: Shutdown
Shutdown Press the Power button on the projector or remote control. The Power button flashes and the lamp shuts down, the fans continue to run for approximately 2 minutes to cool down the projector. To protect the lamp, the projector will not respond to any commands during the cooling process. -
Page 22: Keystone Correction
Keystone Correction Keystoning refers to the situation where the projected image is noticeably wider at either the top or bottom. It occurs when the projector is not perpendicular to the screen. To correct this, besides adjust- ing the height of the projector, you will need to manually cor- rect it following one of these steps. -
Page 23: Auto Sync Adjustment
Auto Sync Adjustment In some situations when showing a PC display, the picture may be cut off at the edges. To correct this, press auto sync on the the projector or remote control. Within 3 seconds, the projector will re-adjust the values of Frequency and Tracking to pro- vide the best picture quality. -
Page 24: Picture Mode
Picture Mode Press the picture mode button on the projector or remote control to select a operation mode that suits your need. There are several opera- tion modes available for different types of signals. PC Signal Input Graphics Vivid Video Economy YPbPr / S-Video / Composite-Video Signal Input Gaming... -
Page 25: Menu Operation
Menu Operation Using the Menus The projector is equipped with on-screen menus for making various adjustments and settings. The following example describes the adjustment of the keystone setting. Press menu on the projector or Adjust keystone values by remote control to open the on- pressing the left or screen menu. -
Page 26: Picture Menu
1. Picture Menu Some picture adjustments are available only when certain input ports are in use. Unavailable adjustments are not shown on the screen. FUNCTION DESCRIPTION Picture mode is provided so you can optimize your projector image set-up to suit your program type. PC Signal Input Graphics Mode: Is designed for presentations. -
Page 27: Advanced Picture Menu
Increases or decreases the color intensity of the image. Saturation Adjusts the color tones of the image. The higher the value, the Tint more reddish the image becomes. The lower the value, the more greenish the image becomes. 2. Advanced Picture Menu Some picture adjustments are available only when certain input ports are in use. -
Page 28: Setup Menu
3. Setup Menu FUNCTION DESCRIPTION Turns sound on or off. Muted Not muted Mute Adjusts the volume level. Volume Sets the length of time the OSD will remain active after your last Timeout for button press. The range is from 5 to 100 seconds. menu Returns all settings to the factory preset values. -
Page 29: Advanced Setup Menu
4. Advanced Setup Menu FUNCTION DESCRIPTION The projector can be installed on a ceiling or behind a screen, or with one or more mirrors. Table front: Select this setting with the projector set on the floor and audience viewing the projected images from the front side of the screen. -
Page 30: Information Menu
5. Information Menu This menu shows you the current operating status of the projector. 5. Operation... -
Page 31: Maintenance
6. Maintenance Care of the Projector Your projector needs little maintenance. Keep it clean for best performance. Never remove any parts of the projector except the lamp. Contact your dealer if other parts needs replacing. Cleaning the Lens Clean the lens whenever you notice dirt or dust on the surface. Use a canister of compressed air to remove dust. -
Page 32: Lamp Information
Lamp Information Warning Messages When the Lamp indicator lights up red or a message appears suggesting it is time to replace the lamp, please install a new lamp or consult your dealer. An old lamp may cause a malfunction in the projector and in some instances the lamp may break. - Page 33 Loosen the screw that holds the lamp to the projector. If the screw is not loosened com- pletely, they could injure your fingers. It is strongly recommended that you use a mag- netic-head screwdriver. Slide the latch to release the lamp. Lift the handle so that it stands up.
-
Page 34: Indicators
Indicators Power indicator The projector is off. Flashing The projector is warming up or cooling down. The projector is on and operating normally. Lamp indicator The projector is operating normally. The lamp is bad or has reached the end of its life. Temperature indicator The projector is operating normally. -
Page 35: Troubleshooting
7. Troubleshooting The projector does not turn on. Cause Remedy Plug the power cord into the AC inlet on the There is no power from the power projector, and plug the power cord into the cord. power outlet. If the power outlet has a switch, make sure that it is switched on. -
Page 36: Specifications
8. Specifications Projector Specifications All specifications are subject to change without notice. General Product name Digital Projector Model name vp6220 (XGA) vp6210 (SVGA) Optical Display system 1-CHIP DMD Lens F/Number vp6220 F=2.4 to 2.6, f= 24.0 to 29.1 mm vp6210 F=2.4 to 2.6, f= 18.6 to 22.7 mm Lamp 200W lamp... -
Page 37: Timing Chart
Timing Chart Supported Timing for PC Input Horizontal Vertical Pixel Resolution Frequency Frequency Frequency Mode (kHz) (Hz) (MHz) 720x400 37.927 85.039 35.500 720x400_85 31.469 59.940 25.175 VGA_60 37.861 72.809 31.500 VGA_72 640x480 37.500 75.000 31.500 VGA_75 43.269 85.008 36.000 VGA_85 37.879 60.317 40.000... -
Page 38: Dimensions
9. Dimensions Unit: mm 9. Dimensions... -
Page 39: Regulation Statements
This section presents information that shows how your digital projector complies with regulations in certain regions. Any modifications to your digital projector not expressly approved by Hewlett-Packard could void the authority to operate the dig- ital projector in these regions. -
Page 40: Canada
For more information, consult your dealer, an experienced radio/television techni- cian, or the following booklet, prepared by the Federal Communications Commis- sion: How to Identify and Resolve Radio-TV Interference Problems. This booklet is available from the U.S. Government Printing Office, Washington, DC 20402, Stock Number 004-000-00345-4. - Page 41 DECLARATION OF CONFORMITY According to ISO/IEC Guide 22 and EN 45014 Manufacturer's Name: Hewlett Packard Company Manufacturer's Address: Hewlett Packard Company Digital Projection & Imaging 1000 NE Circle Blvd. Corvallis, OR 97330-4239 Declares, that the product(s): Product Name: Digital Projector Model Number(s): vp6210, vp6220 Regulatory Model:...