
Related Manuals for EUTECH INSTRUMENTS WATERPROOF C401 COLORIMETER


Summary of Contents for EUTECH INSTRUMENTS WATERPROOF C401 COLORIMETER
- Page 1 Instruction Manual C401/301/201/102/101 Portable Colorimeter 68X357704 Rev. 0 08/04 Technology Made Easy ...
- Page 2 The information presented in this manual is subject to change without notice as improvements are made, and does not represent a commitment on the part of Eutech Instruments Pte Ltd/ Oakton Instruments. Note: Eutech Instruments Pte Ltd/ Oakton Instruments reserves the right to make improvements in design, construction, and appearance of our products without notice.
-
Page 3: Table Of Contents
TABLE OF CONTENTS INTRODUCTION ........................1 C401/301/201/102/101 C ......2 NPACKING OLORIMETER AND CCESSORIES ..........................3 ISPLAY ....................... 4 EYS AND UNCTIONS ....................5 ATTERY NSTALLATION MEASUREMENT ........................6 ....................6 ENERAL NFORMATION ..................7 REPARATION OF AMPLE ..................... 7 EASUREMENT ROCEDURE &... -
Page 4: Introduction
Introduction C401/301/201/102/101 1 INTRODUCTION Thank you for selecting the waterproof portable C401/301/201/102/101 Colorimeter. Depending on the model selected, the C401/301/201/102/101 Colorimeter allows you to measure up to four parameters - namely the pH, Cyanuric acid, Free Chlorine and Total Chlorine of an aqueous sample in the field. -
Page 5: Unpacking C401/301/201/102/101 Colorimeter And Accessories
Introduction C401/301/201/102/101 Unpacking C401/301/201/102/101 Colorimeter and Accessories The table below indicates the items that you should find in your Colorimeter shipment. Item Quantity 1. Field Portable C401/301/202/102/101Colorimeter with 4 “AAA” batteries 2. Instruction Manual 3. Instrument Carrying Case 4. Empty Vial 5. -
Page 6: Display
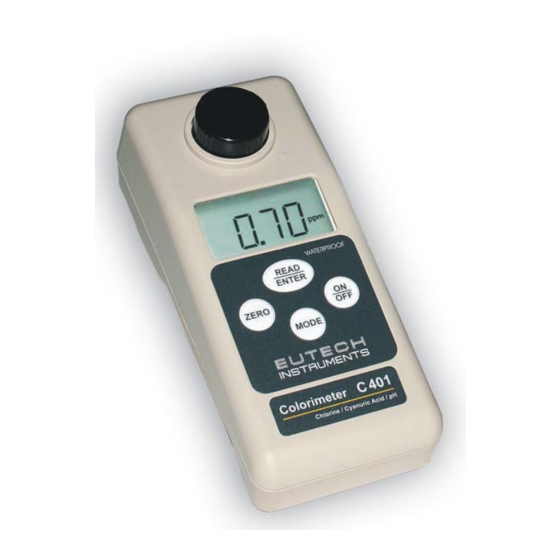
Introduction C401/301/201/102/101 Sample Vial Sample Well Meter Index Liquid Crystal Marking Display Keypad Figure 1: Parts of C401/301/201/102/101Colorimeter Display All the LCD segments and annunciators that can appear on the display are shown in Figure 2. The display is used for reporting the colorimeter reading, communicate error messages and provide guidance for the operation of the instrument. -
Page 7: Keys And Functions
Introduction C401/301/201/102/101 Keys and Functions The keypad has four keys: ON/OFF, MODE, ZERO and READ/ENTER. Keys Functions Powers on and shuts off the meter. With the auto switch-off feature ON/OFF the meter automatically shuts off 10 minutes after last key press. Selects the test to be performed. -
Page 8: Battery Installation
Introduction C401/301/201/102/101 Battery Installation Four AAA-sized batteries are included in your meter’s packaging: 1. Use a Philips screwdriver to remove the two screws holding the battery cover. See Figure 4 : Battery Installation. 2. Remove the battery cover. 3. Insert the batteries. Follow the diagram inside the cover for correct polarity. -
Page 9: Measurement
Measurement C401/301/201/102/101 2 MEASUREMENT General Information The waterproof C401/301/202/102/101Colorimeter allows you to measure up to four parameters - namely the pH, Cyanuric acid, Free Chlorine and Total Chlorine of a sample and reports the results in appropriate units (ppm or pH). Each specific measurement has its own range as listed in the specifications. -
Page 10: Preparation Of Sample Vial
Measurement C401/301/201/102/101 Preparation of Sample Vial Obtain a clean and dry sample vial (Figure 6). Take care to handle the sample vial by the top. Rinse the vial with approximately 10 ml of the sample water, capping the vial with the black screw cap and gently inverting it several times. - Page 11 Measurement C401/301/201/102/101 indicate the last test performed Select the desired test to be performed by pressing the MODE key. Press the READ/ENTER key to confirm your selection. The meter will display [STbY] indicating it is ready to accept a measurement or a blanking.
-
Page 12: Chlorine , Free & Total (0 - 6 Ppm C L 2 )
Measurement: Chlorine, Free & Total C401/301/201/102/101 Chlorine, Free & Total (0 – 6ppm Cl DPD method for Free Chlorine - applicable to water, treated water, • estuary water and seawater. DPD method for Total Chlorine - applicable to water, treated •... - Page 13 Measurement: Chlorine, Free & Total C401/301/201/102/101 Remove the vial from the meter and add into it the content of one DPD Free sachet (for Free Chlorine determination) or the content of one DPD Total sachet (for Total Chlorine determination). Replace the cap, ensuring it is screwed on finger tight to the vial. Invert the vial repeatedly for approximately 20 seconds, until the powder has dissolved.
-
Page 14: Sample Collection
Measurement: Chlorine, Free & Total C401/301/201/102/101 Chlorine, Free & Total Measuring Hints & Tips 2.4.1 Sample Collection Chlorine determination must take place as soon as possible after the sample is taken or else low results may be obtained. Plastic containers should not be used to collect the sample because these may have a high chlorine demand which will lead to low reading results. -
Page 15: Interferences
Measurement: Chlorine, Free & Total C401/301/201/102/101 2.4.3 Interferences Acidity: Greater than 250ppm CaCO3 may cause interference. To remove this interference, neutralise a separate sample to pH6-7 using 1N Sodium Hydroxide. Record the volume used and add the same volume of 1N Sodium Hydroxide to the sample before carrying out the above test procedure. -
Page 16: Correcting For Dilution
Measurement: Chlorine, Free & Total C401/301/201/102/101 Subtract the result obtained in step 5 from the result obtained in step 1 to give the true result. 2.4.4 Correcting for dilution To correct for any reagent added to the sample to neutralise it, a dilution correction factor must be used: Final Volume ÷... -
Page 17: Chemistry
Measurement: Chlorine, Free & Total C401/301/201/102/101 To re-calibrate the meter: All instruments are factory calibrated and user calibration is not recommended. However, if a Chlorine standard can be prepared, measured accurately and qualified by a different method (titration, for example) or another instrument of higher precision and accuracy, then a Chlorine standard in the 4.1-5.0 ppm Cl range can be used. -
Page 18: Cyanuric Acid (5-90 Ppm)
Measurement: Cyanuric Acid C401/301/201/102/101 Cyanuric Acid (5-90 ppm) For water and treated water • Switch the meter on by pressing the ON/OFF key. Press the MODE key repeatedly until [CYNA] is displayed. Press the READ/ENTER key to confirm the test parameter. The meter will read [STbY] indicating it is in stand-by mode, waiting for either blanking or measurement. - Page 19 Measurement: Cyanuric Acid C401/301/201/102/101 Shake for Add content of one 1 minute Cyanuric Acid sachet Gently push the vial back fully into the sample well of the instrument, whilst again aligning the ▼ mark on the vial with the ▲ mark on the meter.
-
Page 20: Sample Collection
Measurement: Cyanuric Acid C401/301/201/102/101 Cyanuric Acid Measuring Hints & Tips 2.5.1 Sample Collection Samples may be collected in either plastic or glass bottles. It is advisable to wash the container with sample water before collecting the sample. Do not store the sample for more than 24 hours before conducting the analysis. -
Page 21: Chemistry
Measurement: Cyanuric Acid C401/301/201/102/101 be accurately prepared, or measured by a different method or instrument of higher precision and accuracy, then a Cyanuric Acid standard in the 66- 75 ppm range can be used. Please refer to section 3.3 Cyanuric Acid for details. -
Page 22: Ph (5.9-8.2 Ph Units)
Measurement: pH C401/301/201/102/101 pH (5.9-8.2 pH units) For water and wastewater (Phenol Red Method) • Switch the meter on by pressing the ON/OFF key. Press the MODE key repeatedly until [PH] is displayed. Press the READ/ENTER key to confirm the test parameter. The meter will read [STbY] indicating it is in stand-by mode, waiting for either blanking or measurement. - Page 23 Measurement: pH C401/301/201/102/101 Indicator Phenol Invert several Add 20 drops of pH Indicator times to mix. (Phenol Red) reagent Gently push the vial back fully into the sample well of the instrument, whilst again aligning the ▼ mark on the vial with the ▲ mark on the meter.
-
Page 24: Sample Collection
Measurement: pH C401/301/201/102/101 pH Measuring Hints & Tips 2.6.1 Sample Collection Samples may be collected in either plastic or glass bottles. It is advisable to wash the container with sample water before the sample is collected. For accurate results, analysis should be conducted as soon as possible after sample collection. -
Page 25: Chemistry
Measurement: pH C401/301/201/102/101 2.6.5 Chemistry The monitoring and control of the pH of water is important in many different applications. This test method provides a quick and accurate method for measuring pH in the range pH5.9 - 8.2. A precise amount of phenol red indicator is added to a sample of water. The phenol red changes color from yellow at pH5.9 through to dark red at pH8.2. -
Page 26: Calibration
Calibration C401/301/201/102/101 3 CALIBRATION The C401/301/201/102/101 Colorimeter was calibrated and tested prior to leaving the factory. Therefore, it is possible for you to use the instrument directly out of the box. Re-calibration of the instrument is NOT recommended particularly in the case of chemical tests of very unstable and/or difficult to prepare calibration solutions. -
Page 27: Chlorine, Free & Total
Calibration: Chlorine, Free & Total C401/301/201/102/101 Chlorine, Free & Total Prepare a Chlorine standard in the 4.1-5.0 ppm Cl range, measure and record the concentration value. Ensure the meter is switched off. Press and hold the ZERO key while switching the meter on by pressing the ON/OFF key. The meter will momentarily flash the model number and then display the CAL annunciator at the top left corner of the screen indicating the instrument is in calibration mode. - Page 28 Calibration: Chlorine, Free & Total C401/301/201/102/101 10. Select another clean vial, un-screw the cap and fill it with 10 ml of the prepared Chlorine standard (fill up to the line on the vial). 11. Select a DPD Free sachet, or a DPD Total sachet, depending on the selected test.
- Page 29 Calibration: Chlorine, Free & Total C401/301/201/102/101 NOTE: If you wish to abort the calibration process, do NOT press the READ/ENTER key as in step 16. Press the ZERO key instead. The meter will display [AbRT] and CAL annunciator to signify that the calibration has been aborted without saving the calibration value.
-
Page 30: Cyanuric Acid
Calibration: Cyanuric Acid C401/301/201/102/101 Cyanuric Acid Prepare a Cyanuric Acid standard solution in the 66 - 75 ppm range and record the concentration value. Ensure the meter is switched off. Press and hold the ZERO key while switching the meter on by pressing the ON/OFF key. The meter will momentarily flash the model number and then display the CAL annunciator at the top left corner of the screen indicating the instrument is in calibration mode. - Page 31 Calibration: Cyanuric Acid C401/301/201/102/101 11. Select another clean vial, un-screw the cap and fill it with 10 ml of the prepared Cyanuric Acid standard solution (fill up to the line on the vial). 12. Select a Cyanuric Acid sachet. Open the sachet and tip the contents into the vial containing the calibration standard.
- Page 32 Calibration: Cyanuric Acid C401/301/201/102/101 NOTE: If you wish to abort this calibration process, do NOT press the READ/ENTER key as in step 17. Press the ZERO key instead. The meter will display [AbRT] and CAL annunciator to signify that the calibration has been aborted without saving the calibration value.
-
Page 33: P H
Calibration: pH C401/301/201/102/101 Ensure at least 10 ml of clear pH7.0 buffer is available. Ensure the meter is switched off. Press and hold the ZERO key while switching the meter on by pressing the ON/OFF key. The meter will momentarily flash the model number and then display the CAL annunciator at the top left corner of the screen indicating the instrument is in calibration mode. - Page 34 Calibration: pH C401/301/201/102/101 11. Select another clean vial, un-screw the cap and fill it with 10 ml of the pH7.0 colorless buffer. (fill up to the Indicator line on the vial). Phenol Note: A proper calibration requires exactly 10 ml volume of pH7.0 buffer.
- Page 35 Calibration: pH C401/301/201/102/101 NOTE: If you wish to abort this calibration process, do NOT press the READ/ENTER key as in step 17. Press the ZERO key instead. The meter will display [AbRT] and CAL annunciator to signify that the calibration has been aborted without saving the calibration value.
-
Page 36: Restoring Factory Calibration
Restoring Factory Calibration C401/301/201/102/101 Restoring Factory Calibration The C401/301/201/102/101 Colorimeter allows you to reset the meter back to the factory default calibration values. This feature is extremely useful when there are errors in calibration or when you have new calibration standards. 1. - Page 37 Restoring Factory Calibration C401/301/201/102/101 METER OFF Press MODE and ON/OFF keys simultaneously and hold for 2 seconds before MODE releasing MODE Press MODE key to select To retain last To restore factory READ READ calibration values calibration ENTER without retrieving ENTER factory calibration.
-
Page 38: Troubleshooting Guide
* If an error message appears, take the appropriate corrective action and re-do the desired procedure. If the problem persists, contact Eutech Instruments or your dealer. See Sections on Warranty and Return of Items on page 39. -
Page 39: Routine Maintenance
Routine Maintenance C401/301/201/102/101 5 ROUTINE MAINTENANCE The supplied carrying case is optimal for protecting the instrument. If you do not plan on leaving the instrument in the supplied carrying case, when not in use, ensure that the instrument has been turned off and that a clean sample vial fitted with a black cap has been placed in the sample well. -
Page 40: Accessories
Accessories C401/301/201/102/101 6 ACCESSORIES The items shown below are recommended accessories and replacement parts for the instrument. Item Description Eutech Oakton Instruments Instruments Order Code. Order Code. pH Colorimeter with sample vials, a 30 ml bottle, pH Indicator (Phenol Red) Reagent Kit ECC101 35645-10 and batteries in a rugged carrying case... -
Page 41: Specifications
Specifications C401/301/201/102/101 7 SPECIFICATIONS Measurement Method Photometric Light Source Light Emitting Diode (LED) Wavelength 525 nm Detector Silicon photodiode Absorbance Range 0 – 2.5 Abs Photometric Precision +/- 0.0015 Abs 0 – 1.99 ppm (Free & Total Chlorine) 2.0 – 6.0 ppm (Free & Total Chlorine) Automatic Range Selection 5.9 –... -
Page 42: Warranty
Instruments/ Oakton Instruments will not be responsible for damage resulting from careless or insufficient packing. A restocking charge will be made on all unauthorized returns. NOTE: Eutech Instruments Pte Ltd/ Oakton Instruments reserve the right to make improvements in design, construction, and appearance of products without notice. - Page 44 For more information on Eutech Instruments/ Oakton Instruments’ products, contact your nearest distributor or visit our website listed below: Oakton Instruments Eutech Instruments Pte Ltd Distributed by: P.O Box 5136, Blk 55, Ayer Rajah Crescent, Vernon Hills, IL60061, USA #04-16/24 Singapore 139949...