Denon DVD-1940CI Operating Instructions Manual
Dvd audio-video / super audio cd player
Hide thumbs
Also See for DVD-1940CI:
- Specification (46 pages) ,
- Instrucciones de funcionamiento (38 pages) ,
- Specifications (2 pages)
Table of Contents
Advertisement
Advertisement
Table of Contents

Related Manuals for Denon DVD-1940CI


Summary of Contents for Denon DVD-1940CI
- Page 1 DVD AUDIO-VIDEO / SUPER AUDIO CD PLAYER DVD-1940CI...
-
Page 2: Important Safeguards
WARNING : TO REDUCE THE RISK OF FIRE OR ELECTRIC SHOCK, DO NOT EXPOSE THIS APPLIANCE TO RAIN OR MOISTURE. CAUTION RISK OF ELECTRIC SHOCK DO NOT OPEN CAUTION : TO REDUCE THE RISK OF ELECTRIC SHOCK, DO NOT REMOVE COVER (OR BACK). -
Page 3: Precautions
PRECAUTIONS Laser Safety This unit employs a laser. Only a qualified service person should remove the cover or attempt to service this device, due to possible eye injury. CAUTION: USE OF CONTROLS OR ADJUSTMENTS OR PERFORMANCE OF PROCEDURES OTHER THAN THOSE SPECI- FIED HEREIN MAY RESULT IN HAZARDOUS RADIATION EXPOSURE. -
Page 4: Table Of Contents
PRECAUTIONS Dew Warning Moisture condensation may occur inside the unit when it is moved from a cold place to a warm place, or after heating a cold room or under conditions of high humidity. Do not use the DVD Player at least for 2 hours until its inside is dry. Avoid the Hazards of Electrical Shock and Fire •... -
Page 5: Introduction
INTRODUCTION The serial number of this product may be found on the back of the DVD player. No others have the same serial number as yours. You should record the number and other vital information here and retain this book as a per- manent record of your purchase to aid identification in case of theft. -
Page 6: About The Discs
ABOUT THE DISCS Playable Discs Playable Mark (logo) discs DVD-Audio * 1, 2, 4 DVD-Video * 1, 2, 4 DVD-R DVD-RW * 1, 2, 3, 4, 5, 6, 7, 8 Super Audio CD * 2, 4 Audio CD * 2, 4 CD-R CD-RW * 2, 3, 4, 6,... -
Page 7: Features
FEATURES ¡Progressive Scan system The progressive scan system provides less flickering and images in higher resolution than that of traditional 480i (525i), 576i (625i) or multi television signals through the interlace scan system. ¡TV Type Use this to set your TV’s video format (MULTI, NTSC or PAL). ¡Analog 5.1-channel Dolby and DTS surround output This player is equipped with analog 5.1-channel Dolby and DTS surround audio out jacks for playback. -
Page 8: Functional Overview
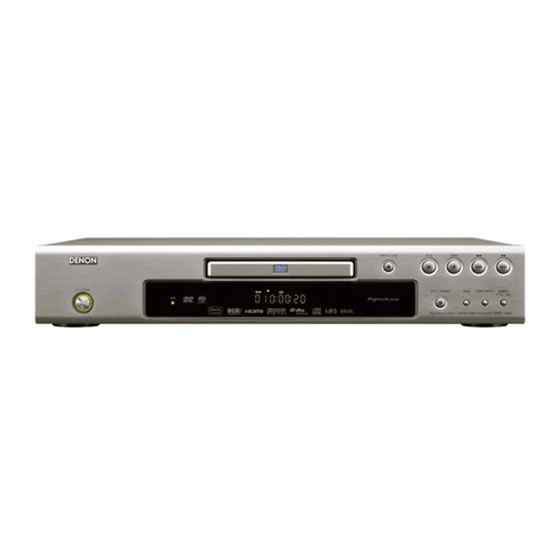
FUNCTIONAL OVERVIEW FRONT PANEL REMOTE CONTROL The buttons with circled numbers can only be operated with the remote control. 1. ON/STANDBY (POWER ON/OFF) Buttons [page 17] 2. Disc loading tray 3. OPEN/CLOSE Button [page 17] 4. PLAY Button [page 17] 5. -
Page 9: Tour Of The Remote Control
FUNCTIONAL OVERVIEW Tour of the Remote Control Buttons on remote control work in different ways for DVD-Video, DVD-Audio, Audio CD, Super Audio CD, MP3, JPEG, WMA and DivX ® : Refer to the following table for correct use. DVD-Video, DVD-Audio POWER ON/OFF Buttons •... -
Page 10: Front Panel Display
FUNCTIONAL OVERVIEW Tour of the Remote Control DVD-Video, DVD-Audio MENU Button • To call up the menu on a disc. TOP MENU Button • To call up the top menu on a disc. ENTER, Cursor Buttons • To move the cursor and determine its position. -
Page 11: Displays During Operation
FUNCTIONAL OVERVIEW Displays during Operation Power on Power off Tray open Tray closed Loading the Disc No disc inserted or cannot read HDMI output mode (480p/576p) is selected (576p is displayed after 480p) HDMI output mode (720p) is selected HDMI output mode (1080i) is selected HDMI output mode (1080p) is selected... -
Page 12: Connections
5.1-channel input terminals. When using the DENON Satellite Remote Control, 1. Connect the DENON Satellite Remote Control to the REMOTE CONTROL IN jack of this player. This allows you to oper- ate this player with the Satellite Remote Control. -
Page 13: Connection To An Audio System
CONNECTIONS The following shows examples of connections commonly used to connect the DVD player to TV and other components. If using this DVD player to play back a DVD in a Dolby Digital Multi-channel surround or DTS surround format, the DVD player outputs a Dolby Digital or DTS data stream from its OPTICAL or COAXIAL DIGITAL OUT jacks. -
Page 14: Connection To 5.1-Channel Surround Sound System
CONNECTIONS Connection to 5.1-channel Surround Sound System Analog 5.1-channel audio signals can be output from the DVD player. The multi-channel audio signals recorded in packed PCM and the multi-channel Super Audio CDs can be played back when an AV amplifier equipped with analog 5.1-channel audio inputs is connected. Center speaker Front speaker (left) -
Page 15: Connection To A Tv (For Video)
CONNECTIONS Connection to a TV (for video) Basic audio Audio Cable (supplied) AUDIO OUT (analog) • Method 1 DVD Player + TV with Video Input Jack • Method 2 DVD Player + TV with S-Video Input Jack • Method 3 DVD Player + TV with Component Video Input Jacks NOTES: •... -
Page 16: Connection To A Tv With An Hdmi Compatible Port
CONNECTIONS Connection to a TV with an HDMI Compatible Port A simple 1-cable connection (using a commercially available cable) with a device having an HDMI (High- Definition Multimedia Interface) connector allows digital transfer of the digital images of DVD-Video and other sources, DVD-Video, and the multi-channel sound of DVD-Audio. -
Page 17: Disc Playback
DISC PLAYBACK Basic Playback DVD-V DVD-A JPEG Getting started • Turn on the power of the TV, amplifier and any other com- ponents which are connected to the DVD player. • Make sure the TV and audio receiver (commercially avail- able) are set to the correct channel. -
Page 18: Disc Menu
DISC PLAYBACK Disc Menu Press the MENU button. • The DVD main menu will appear. If the feature is not available, appear on the TV screen. If disc menu is available on the disc, audio language, subtitle options, chapters for the title and other options will appear for selection. -
Page 19: Slow Forward / Slow Reverse
DISC PLAYBACK • For Audio CDs, Super Audio CDs, MP3, WMA and DivX the approximate speed is 1 (x2), 2 (x8), and 3 (x30). • For Audio CDs, Super Audio CDs, MP3 and WMA, sound will be output at any speed of fast forward and reverse search. To return to normal playback, press the PLAY button. -
Page 20: Time Search
DISC PLAYBACK NOTES: • The SKIP H H and G G buttons are not available when playback is stopped. • When the SKIP H, G button is pressed during play- back DivX ® video file, and if it does not change previ- ous/next track, press the MENU button. -
Page 21: Program Playback
DISC PLAYBACK Program Playback This function allows you to program a playback order of DVD-Audio, Audio CD, Super Audio CD, MP3, JPEG, or WMA in a desired sequence. In stop mode, press the MODE button repeatedly until the pro- gram screen appears. •... -
Page 22: Mp3 / Jpeg / Wma Playback
DISC PLAYBACK MP3 / JPEG / WMA Playback When a DVD-R/RW or CD-R/RW disc with MP3, JPEG or WMA files is inserted in the DVD player, the file list will appear on display. The number of tracks is also displayed on the front panel. -
Page 23: Divx Playback
DISC PLAYBACK • The size change mode may have no effect on some files (e.g. files with a small picture size). • In stop mode, press the MENU button. Kodak Picture CD menu appears. NOTES on WMA: • The DVD player can reproduce data recorded as ISO 9660 level 2 with 31 characters file name included punctuation marks. -
Page 24: Divx Subtitle
DISC PLAYBACK DivX ® Subtitle The subtitle created by the user can be displayed during DivX ® media file playback. After select the DivX ® media file, the SUBTITLE LIST will appear except when the “DivX SUBTITLE” setting is “OFF”. Refer to “Language Setting” on page 28. SUBTITLE LIST FILE : fi... -
Page 25: Slide Show Mode
DISC PLAYBACK Press the DISPLAY button during playback. • Current file name will be dis- played. Press the DISPLAY button again. • Title name based on tag infor- mation of currently played-back file will be displayed. Press the DISPLAY button again. -
Page 26: Audio Language
DISC PLAYBACK Audio Language The DVD player allows you to select a language (if multiple languages are available) during DVD or DivX Press the AUDIO button during playback. Press the AUDIO button repeatedly to select your desired language. <DVD> 1.ENG Dolby D 3/2.1ch 48k/3 2.FRE Dolby D 3/2.1ch 48k/3 3.JPN Dolby D 3/2.1ch 48k/3 •... -
Page 27: Picture Control
DISC PLAYBACK Picture Control DVD-V Picture Control adjusts Brightness, Contrast, Color, Gamma Correction and Sharpness of the specific display. During playback, press the MODE button. Press the Cursor buttons (K or L) to switch among items. Press the ENTER button or the Cursor buttons (s or B) to adjust the selected item to a desired level. -
Page 28: Dvd Setup
DVD SETUP In Setup menu, QUICK mode, CUSTOM mode and INITIALIZE mode are available (refer to pages 28-32). QUICK mode consists of the setting menus frequently used, and they are accompanied with You can make all settings in CUSTOM mode. Language Setting Language setting can be varied with some DVDs or DivX Subtitles recorded in discs. -
Page 29: Audio Setting
DVD SETUP PROG.MODE (Default: AUTO1) • Press the Cursor buttons (K or L) to select a mode for the pro- gressive scan output, then press the ENTER button. • AUTO1: mode suitable for images on the film material. • AUTO2: mode for images on the material of 30-frame film. •... -
Page 30: Speaker Setting For Analog Audio
DVD SETUP ANALOG AUDIO (Default : 2 CHANNEL) • Set AUDIO MODE to ANALOG beforehand to perform this setting. 2 CHANNEL: Output 2ch sound from the 5.1ch AUDIO OUT jacks. MULTI CHANNEL: Output Multi channel sound from the 5.1ch AUDIO OUT jacks. AUDIO AUDIO ANALOG AUDIO... -
Page 31: Speaker Setting For Hdmi Audio
DVD SETUP Speaker Setting for HDMI AUDIO When HDMI AUDIO is selected for MULTI CHANNEL, the bass manage- ment setting menu will appear. Set the Speaker Configuration, delay time and channel level for each speakers (front, center, surround and sub woofer). Speaker Configuration Set the size of each speaker between LARGE and SMALL. -
Page 32: Reset To The Default Settings (Except For Ratings Control)
DVD SETUP SLIDE SHOW (Default : 5sec) • This adjusts the playback speed of the JPEG SLIDE SHOW. • Press the Cursor buttons (K or L) to select between 5 sec and 10 sec, then press the ENTER button. DivX(R) VOD •... -
Page 33: Troubleshooting Guide
TROUBLESHOOTING GUIDE If the DVD player does not perform properly when operated as instructed in this Operating Instruction, check the player, con- sulting the following checklist. Problem No power No sound or picture Distorted picture Completely distorted picture or black/ white picture with DVD No sound or distorted sound No audio at digital output... -
Page 34: Specifications
SPECIFICATIONS SIGNAL SYSTEM NTSC/PAL color APPLICABLE DISCS (1) DVD-Video/DVD-Audio Discs 1-layer 12cm single-sided discs, 2-layer 12cm single-sided discs, 2-layer 12cm double-sided discs (1 layer per side) 1-layer 8cm single-sided discs, 2-layer 8cm single-sided discs, 2-layer 8cm double-sided discs (1 layer per side) (2) Super Audio CD (3) DVD-R/DVD-RW (4) Compact discs (Audio CD) - Page 35 MEMO – 35 –...
- Page 36 TOKYO, JAPAN Denon Brand Company, D&M Holdings Inc. www.denon.com Printed in China 1VMN23655 00D 511 4658 000 E6EE0UD *****...