Table of Contents
Advertisement
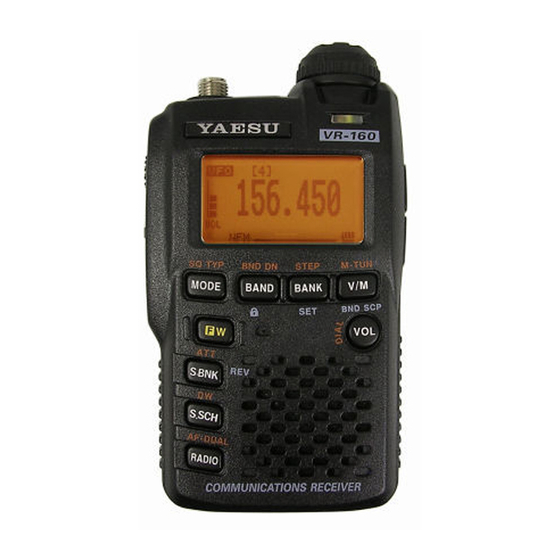
AM/FM/WFM
COMMUNICATIONS RECEIVER
VR-160
O
M
VERTEX STANDARD CO., LTD.
4-8-8 Nakameguro, Meguro-Ku, Tokyo 153-8644, Japan
VERTEX STANDARD
US Headquarters
10900 Walker Street, Cypress, CA 90630, U.S.A.
YAESU UK LTD.
Unit 12, Sun Valley Business Park, Winnall Close
Winchester, Hampshire, SO23 0LB, U.K.
VERTEX STANDARD HK LTD.
Unit 5, 20/F., Seaview Centre, 139-141 Hoi Bun Road,
Kwun Tong, Kowloon, Hong Kong
VERTEX STANDARD AUSTRALIA PTY., LTD.
Normanby Business Park, Unit 14/45 Normanby Road
Notting Hill 3168, Victoria, Australia
Advertisement
Table of Contents

Related Manuals for Yaesu VR-160


Summary of Contents for Yaesu VR-160
- Page 1 4-8-8 Nakameguro, Meguro-Ku, Tokyo 153-8644, Japan VERTEX STANDARD US Headquarters 10900 Walker Street, Cypress, CA 90630, U.S.A. YAESU UK LTD. Unit 12, Sun Valley Business Park, Winnall Close Winchester, Hampshire, SO23 0LB, U.K. VERTEX STANDARD HK LTD. Unit 5, 20/F., Seaview Centre, 139-141 Hoi Bun Road, Kwun Tong, Kowloon, Hong Kong VERTEX STANDARD AUSTRALIA PTY., LTD.
-
Page 2: Table Of Contents
General Description ............1 Scanning ................44 Setting the Scan-Resume Mode ........44 Controls & Connections ............ 2 Keypad Functions ............3 VFO Scanning ............... 44 LCD Display ..............4 How to Skip (Omit) a Frequency during VFO Scan ............47 Accessories &... -
Page 3: General Description
Additional equipment may be connected to the top panel ACC jack for expanded opera- tion. We appreciate your purchase of the VR-160, and encourage you to read this manual thor- oughly, to learn about the many exciting features of your new YAESU communications... -
Page 4: Controls & Connections
SPEAKER KEYPAD The internal speaker is These nine keys select located here. many of most important operating features on the VR-160. The functions of the keys are described in detail on the pages to fol- low. VR-160 O... -
Page 5: Keypad Functions
“FM” broadcast band. No Action. Toggle the DIAL knob Rotate the DIAL knob while holding the [ VOL ] function between the “Fre- quency Control” and “Re- key to adjust the audio vol- ceiver Audio Control”. ume level. VR-160 O... -
Page 6: Lcd Display
: Automatic Power-Off Active & R :Receiving an FM broadcast in Stereo DW: Dual Watch Active : Battery Indicator TSQ: Tone Squelch Active DCS: Digital Code Squelch Active RTN: Reverse Tone Squelch Active User Programmed Reverse CTCSS Decoder Active S&PO M VR-160 O... -
Page 7: Accessories & Options
VAC (Type-BF plug). Availability of accessories may vary. Some accessories are supplied as standard per local requirements, while others may be unavailable in some regions. Consult your Yaesu dealer for details regarding these and any newly available options Connection of any non-Yaesu- approved accessory, should it cause damage, may void the Limited Warranty on this ap- paratus. -
Page 8: Inportant Notice
MPORTANT OTICE Please read this manual carefully before using the VR-160 radio. Indicates Personal injury, fire hazard, or elec- tric shock is Highly likely to occur. Indicates Personal injury, fire hazard, or elec- tric shock may occur. Indicates Equipment damage may occur. - Page 9 +5 °C to +35 °C. Do not expose this equipment to direct sunlight. Properly recycle discarded battery packs after affixing tape across the Do not place this equipment in a terminals. location exposed to dust and/or high humidity. VR-160 O...
-
Page 10: Installation Of Accessories
Do not over-tighten or use extreme force. Notes: When installing the supplied antenna, never hold the upper part of the antenna while screwing it onto the mating connector on the transceiver. VR-160 O... -
Page 11: Installation Of Fnb-82Li Battery Pack
“Lock” position. UNLOCK Important Note: There is a small stud in the Battery Compartment of the VR-160. This stud is a switch for the battery detection. Please be careful not to break this stud while changing the battery. Risk of explosion if battery is replaced by incorrect type. Dispose of used batteries according to the instructions. -
Page 12: Battery Charging
Do not attempt to forcibly charge the bat- tery, Please contact your Yaesu dealer. 3) If you do not use the VR-160 for a long time, remove the FNB- 82LI Lithium-Ion battery pack from the VR-160, as battery leak- age could cause damage to the VR-160 and FNB-82LI. -
Page 13: Installation Of Fba-37 Alkaline Battery Case
1) The FBA-37 is designed for use only with AA-type Alka- line cells. 2) If you do not use the VR-160 for a long time, remove the alkaline batteries from the FBA-37, as battery leakage could cause damage to the VR-160 and FBA-37. -
Page 14: Operation
Battery Pack has been detected. After this 2-second interval, the display will resume its normal indication of the operating frequency. 3. To turn the VR-160 off, press and hold in the orange POWER switch again for one second. 1) If you don’t hear the two “Beep” tones when the radio comes on, the Beeper may have been disabled via the Set Mode Item 13: BEEP SELECT. -
Page 15: Squelch Adjustment
[VOL] key function via Set Mode Item 60: VOLUME MODE. See page 86 for details. The VR-160’s Squelch system allows you to mute the background noise when no signal is being received. The Squelch system makes “standby” operation more pleasant, and signifi- cantly reduces battery current consumption. -
Page 16: Selecting The Operating Band
3. Once you have selected the desired band, you may initiate manual tuning (or scanning) per the discussion in the next chapter. 1) The VR-160 has an AM / FM broadcast radio. You can receive these bands independently. See page 16 for details. -
Page 17: Frequency Navigation
PERATION The VR-160 will initially be operating in the “VFO” mode. This is a channelized system which allows free tuning throughout the currently-selected operating band. Two basic frequency navigation methods are available on the VR-160: 1 ) T Rotation of the DIAL knob allows tuning in the pre-programmed steps established for the current operating band. -
Page 18: Am And Fm Broadcast Reception
6. Press the [ RADIO ] key briefly again to exit from the AM and FM Broadcast Recep- tion mode and return to normal operation. If you wish to output the audio of the FM Broadcast station to the VR-160 internal speaker while using the earphone antenna, select Set Mode Item 48: SPEAKER OUT to “SPEAKER”. -
Page 19: Af-Dual Operation
Operation is resumed as determined by the user settings in the below procedures. 1. Set the VR-160 to the desired frequency using the VFO or Memory channel selection. 2. Press the [ F/W ] key then press the [ RADIO ] key. This provides a “Short-cut”... -
Page 20: Advanced Operation
DVANCED PERATION Now that you’re mastered the basics of VR-160 operation, let’s learn more about some of the really neat features. In order to prevent accidental frequency change, various aspects of the VR-160’s keys and switches may be locked out. -
Page 21: Keypad/Lcd Illumination
PERATION /LCD I Your VR-160 includes a reddish illumination lamp which aids in nighttime operation. The red illumination yields clear viewing of the display in a dark environment, with minimal degradation of your night vision. Three options for activating the lamp are provided: KEY 2 sec - KEY 10 sec: Illuminates the Keypad/LCD for the selected illumination time when any key pressed. -
Page 22: Changing The Channel Steps
A number of steps may be important to your operating requirements. Automatic (“AUTO”) step selection is based on the current operating frequency. The VR-160 is set up at the factory in the “AUTO” configuration, which probably is satisfactory for most operation. -
Page 23: S-Meter Squelch
Full Scale on the S-meter, the squelch will only open on signals which are Full Scale on the S-meter. In this case, the Noise Squelch overrides the action of the S-meter Squelch. VR-160 O... -
Page 24: Checking The Battery Voltage
4. Press and hold in the [ BANK ] key for one second to return to normal operation. The VR-160 can display the radio’s inside case temperature, measured by an internal sensor. 1. Press and hold in the [ BANK ] key for one second to enter the Set mode. -
Page 25: Band Scope Operation
Note: Do not forget to pull the DIAL knob to rotate the DIAL knob. 5. To turn the Band Scope off and operate on the center (displayed) channel, press and hold the [ V/M ] key for one second. VR-160 O... -
Page 26: Tone Squelch/Dcs Operation
When the Tone Squelch is activated, the “TSQ” icon will appear in the display. During Tone Squelch operation, you may set up the VR- 160 so a ringing “bell” sound alerts you to an incoming call. See page 29 for details. VR-160 O... - Page 27 Digital Code Squelch system shortly. Selecting “RVTN” in step 2 above, will activate the Reverse Tone Squelch system, which mutes your VR-160 receiver when it receives a call from the radio sending a matched Tone Frequency. The “TSQ” icon will blink on the display when the Reverse Tone Squelch system is activated.
-
Page 28: Dcs Operation
Another form of tone access control is Digital Code Squelch, or DCS. It is a newer, more advanced tone system which generally provides more immunity from false paging than does Tone Squelch system. The DCS is built into your VR-160, and operation is very similar to that just described for Tone Squelch. -
Page 29: Dcs Code Inversion
[ BANK ] key for one second to save the new settings and exit to normal operation. This is different from the usual method of restoring normal operation, and it applies only to the configuration of the CTCSS/DCS frequencies. Remember to restore the default setting to “NORMAL” when done. VR-160 O... -
Page 30: Tone Search Scanning
Set Mode Item 56: TONE-SCH MUTE to “OFF.” See page 86 for details. You can also change the Tone Search scanning speed, using Set Mode Item 57: TONE-SCH SPEED. See page 86. Tone Scanning works either in the VFO or Memory modes. VR-160 O... -
Page 31: Tone Squelch/Dcs Bell Operation
PERATION /DCS B During Tone Squelch or DCS operation, you may set up the VR-160 so a ringing “bell” sound (or user programmed beep) alerts you to an incoming call. Here is the procedure for activating the Tone Squelch/DCS Bell: 1. -
Page 32: Programming The User Beep
[ BAND ] / [ V/M ] key, then press the [ MODE ] key repeatedly untill the “INS” notation is displayed in the Memory Channel Number display slot. Press and hold in the [ MODE ] key for one VR-160 O... - Page 33 14. When you have programmed User Beep, press the [ BANK ] key briefly to confirm the User Beep. You may check your work by monitoring the programmed User Beep. To do this, repeat steps 1 - 4 above, then press the [F/W] key. VR-160 O...
-
Page 34: Memory Mode
EMORY ODE R The VR-160 provides a wide variety of memory system resources. These include: “Regular” Memory Channels, which include: 900 “Standard” memory channels, numbered “1” through “900”. 100 “Frequency Skip Memories,” numbered “901” through “000”. 50 sets of band-edge memories, also known as “Programmable Memory Scan”... -
Page 35: Regular Memory Channel Operation
On rare occasions the memorized data may become corrupted by miss operation, or static electricity. When repairs are made the memory data may be lost. Please write down or record the memorized information so you will be able to restore it if needed. VR-160 O... -
Page 36: Memory Recall
[ BANK ] key for one second to save the label and return to memory mode with the alpha-numeric “Tag” (label) displayed. The large alpha-numeric “Tag” (label) appears on the display, and the small channel frequency indication appears at the right of the memory channel number. VR-160 O... - Page 37 Release the MONI switch to return to the normal display. To disable the alpha-numeric Tag and enable the large frequency display: 1. Set the VR-160 to the “MR” (Memory Recall) mode, and recall the memory channel on which you wish to disable the alpha-numeric Tag.
-
Page 38: Memory Offset Tuning
Once you have recalled a particular memory channel, you may easily tune off that channel, as though you were in the “VFO” mode. 1. With the VR-160 in the “MR” (Memory Recall) mode, select the desired memory channel. 2. Press the [ F/W ] key, then press the [ V/M ] key to activate the “Memory Tuning”... -
Page 39: Masking Memories
[S.SCH] key to restore the memory channel’s data. Watch out! You can manually store data over a “Masked” memory, deleting previous data, if you’re not careful. Use the “next available memory” storage technique to avoid over-writing a masked memory. VR-160 O... -
Page 40: Memory Bank Operation
EMORY ODE R The large number of memories available in the VR-160 could be difficult to utilize with- out some means of organizing them. Fortunately, the VR-160 includes provision for di- viding the memories into as many as 24 Memory Groups, so you can categorize the memo- ries in a manner convenient to you. -
Page 41: Removing Memories From A Memory Bank
8. Repeat steps 6 and 7 to program the remaining letters, numbers, or symbols of the desired label. A total of six characters may be used in the creation of a label. 9. If you make a mistake, press the [ BAND ] key to backspace the VR-160 O... -
Page 42: Memory Only Mode
To place the radio into the Memory Only mode, turn the radio off. Now press and hold in the [ V/M ] key while turning the radio on. To return to normal operation, repeat the above power-on procedure. VR-160 O... -
Page 43: Special Memory Channel Operation
EMORY ODE S The VR-160 provides Special Memory Channels, which made up of: 10 “Weather Broadcast” Channels. 281 VHF Marine Channels 89 popular Short-wave Broadcast Station Memory Channels. You may assign the Special Memory Channels to a Memory Bank. See page 36 regard- ing Memory Bank Operation for details. -
Page 44: Vhf Marine Channels
156.450 157.150 161.750 156.425 157.125 161.725 156.500 157.200 161.800 156.475 157.175 161.775 156.550 157.250 161.850 156.525 157.225 161.825 156.600 157.300 161.900 156.575 157.275 161.875 156.650 157.350 161.950 156.625 157.325 161.925 156.700 157.400 162.000 156.675 157.375 161.975 157.425 162.025 VR-160 O... -
Page 45: Short-Wave Broadcast Station Memory Channels
Radio Japan 9.780 PORTUG Radio Portugal 11.860 JAPAN Radio Japan 11.630 PORTUG Radio Portugal 5.995 AUSTRA Radio Australia 15.550 PORTUG Radio Portugal 9.580 AUSTRA Radio Australia 21.655 PORTUG Radio Portugal 9.660 AUSTRA Radio Australia 12080 AUSTRA Radio Australia VR-160 O... -
Page 46: Scanning
CANNING The VR-160 allows you to scan just the memory channels, the entire operating band, or a portion of that band. It will halt on signals encountered, so you can talk to the station(s) on that frequency, if you like. - Page 47 5. When you have made your selection, press and hold in the [ BANK ] key for one sec- ond to save the new setting and exit to normal operation. The default condition for this Set Mode Item is “2.0sec”. VR-160 O...
- Page 48 7. To cancel scanning, press the SCAN switch or [ V/M ] key. 1) When you start scanning, the VR-160 will be changing frequency in the upward direction. If you want to change direction of the scan while it is un- derway, rotate the DIAL knob one click in the opposite direction (in this case, one click counter-clockwise).
-
Page 49: Vfo Scanning
Frequency Skip Memory; this will restore the frequency into the VFO scan loop. The VR-160 allows adjustment of the Squelch level “on the fly” while you are scanning. 1. While the scanner is engaged, press the [ F/W ] key. Then press the MONI switch (the current squelch level will appear on the dis- play). -
Page 50: Memory Scanning
Scan-Resume mode set previ- ously. When there are no memory channels corresponding to the selected Memory Scan mode, the “MS ERR” notation will appear on the display. 5. To cancel scanning, press the SCAN switch or [ V/M ] key. VR-160 O... -
Page 51: How To Skip (Omit) A Channel During Memory Scan Operation
“skipped” memory channel. To re-institute a channel into the scanning loop, perform the “How to Skip (Omit) a Chan- nel during Memory Scan Operation” described previously, then select “OFF” in step 5. VR-160 O... -
Page 52: Preferential Memory Scan
CANNING The VR-160 also allows you to set up a “Preferential Scan List” of channels which you can “flag” within the memory system. These channels are designated by a blinking “ ” icon when you have selected them, one by one, for the Preferential Scan List. -
Page 53: Memory Bank Scan
8. Now, press and hold in the [ BAND ] key for one second to initiate the Memory Bank Link Scan. 9. To remove a Memory Bank from the Memory Bank Link Scan, repeat steps 1 - 5 above, to delete the “ ” icon from the Memory Bank number indication. VR-160 O... -
Page 54: Programmable (Band Limit) Memory Scan (Pms)
7. 50 pairs of Band Limit memories, labeled L1/U1 through L50/U50 are available. You therefore can set upper and lower operation limits on a number of bands, if you like. 8. To cancel PMS scanning, press the [ V/M ] key. VR-160 O... -
Page 55: Priority Channel Scanning (Dual Watch)
However, the “ ” icon will appear on the display, and every five seconds the VR-160 will check the Priority Channel for activity. If a station appears on the Priority Channel, the radio will pause on that channel, as described pre- viously. -
Page 56: Automatic Lamp Illumination On Scan Stop
CANNING The VR-160 will automatically illuminate the LCD Lamp whenever the scanner stops on a signal; this allows you to see the frequency of the incoming signal better at night. Note that this will, of course, increase the battery consumption, so be sure to switch it off during the day (the default condition for this feature is “ON”). - Page 57 VR-160 O...
-
Page 58: Smart Search Operation
The Smart Search feature allows you to load frequencies automatically where activity is encountered by your radio. When Smart Search is engaged, the VR-160 will search above and below your current frequency, storing active frequencies as it goes (without stopping on them even momentarily). -
Page 59: Storing Smart Search Memories
8. To return to normal operation, just press the [ S.SCH ] key. Smart Search is a great tool when visiting a city for the first time. You don’t need to spend hours looking up repeater frequencies from a reference guidebook…just ask your VR-160 where the action is! VR-160 O... -
Page 60: Channel Counter Operation
The VR-160 performs a high-speed search within a ±5 MHz range from the frequency displayed on the LCD. When the strongest signal in that range is identified, the VR-160 displays the frequency of that (strongest) signal, and writes it into the special “Channel Counter”... -
Page 61: Setting The Channel Counter Sweep Width
3. Press the [ BANK ] key momentarily to enable adjustment of this Set Mode Item. 4. Rotate the DIAL knob to select the desired bandwidth. 5. When you have made your selection, press the PTT switch to save the new setting and exit to normal operation. VR-160 O... -
Page 62: Cw Learning Feature
EARNING EATURE The VR-160 provides a CW learning function, which sends the designated Morse Code via the sidetone (heard in the speaker) to help your CW learning. 1. Press and hold in the [ BANK ] key for one second to enter the Set mode. - Page 63 1) The “CPM” selection is based on the international “PARIS” standard, which stipulates five characters per word. 2) You may adjust the CW sidetone pitch via Set Mode Item 20: CW PITCH. Available selections are 400 - 1000 Hz (50 Hz/step). VR-160 O...
-
Page 64: Cw Training Feature
CW T RAINING EATURE The VR-160 provides another CW learning function; call it a CW Training feature, which sends random Morse Code via the sidetone (heard in the speaker), so you can improve your CW proficiency. 1. Press and hold in the [ BANK ] key for one second to enter the Set mode. -
Page 65: Miscellaneous Setting
ISCELLANEOUS ETTING The VR-160 provides a password feature which can minimize the chance that your trans- ceiver could be used by an unauthorized party. When the password feature is activated, the radio will ask for the four digit password to be entered when the radio is first turned on. -
Page 66: Att (Front End Attenuator)
When the attenuator is activated, the “ATT” icon will appear on the display. An important feature of the VR-160 is its Receive Battery Saver, which “puts the radio to sleep” for a time interval, periodically “waking it up” to check for activity. If somebody is talking on the channel, the VR-160 will remain in the “active”... -
Page 67: Wakeup Feature
When the radio is turned off, the Wakeup feature will be engaged, and the “WAKEUP” notation will be seen on the display. You may cancel the Wakeup feature (complete power off) tempo- rarily by pressing the POWER switch while the Wakeup feature is engaged. VR-160 O... -
Page 68: Disabling The Busy Indicator
3 minutes before the APO shut- down time. Three minutes thereafter, the microprocessor will shut down the radio automatically. Just press and hold in the POWER switch for one second to turn the radio back on after an APO shutdown, as usual. VR-160 O... -
Page 69: Automatic Power-On Feature
ETTING -O F The VR-160 also includes the capability to turn itself on after a programmed time interval. 1. Press and hold in the [ BANK ] key for one second to enter the Set mode. 2. Rotate the DIAL knob to select Set Mode Item 36: ON TIMER. -
Page 70: My Bands Operation
(omit) these bands from the band selection loop. My Bands Setup 1. Set the VR-160 to the VFO mode. 2. Press and hold in the [ BANK ] key for one second to enter the Set mode. 3. Rotate the DIAL knob to select Set Mode Item 59: VFO SKIP. -
Page 71: Changing The Status Of The [ Vol ] Key
5. When you have made your selection, press and hold in the [ BANK ] key for one sec- ond to save the new setting and exit to normal operation. The VR-160 has three types of S-meter symbol formats available. You may change the default setting to any of the available symbols. -
Page 72: Cloning
The VR-160 includes a convenient “Clone” feature, which allows the memory and con- figuration data from one transceiver to be transferred to another VR-160. This can be particularly useful when configuring a number of transceivers for a public service opera- tion. -
Page 73: Set Menu Mode
The VR-160 Set Mode, already partially discussed in many previous chapters, is easy to activate and set. The Set Mode is used to configure a wide variety of radio parameters, some of which have not been detailed previously. Use the following procedure to activate the Set Mode and adjust the various parameters: 1. - Page 74 40 [ PRI TIMER ] 100ms - 0.9ms ( 100 ms/step ) or Selects the time between the Priority (Dual Watch) 1.0sec - 10.0sec ( 0.5 sec/step ) ( 5.0sec ) channel checks, when the feature is active. VR-160 O...
- Page 75 NORMAL / AUTOBACK 61 [ WAKE UP ] OFF / 5 sec - 60 sec ( 5 sec/step ) Setting of the Wakeup feature. 62 [ WX ALEAT ] Enables/Disables the NOAA Weather Alert Fea- OFF / ON ture. VR-160 O...
- Page 76 FW 0.3 sec / FW 0.5 sec / and holding the [ ] key) is held determines the function they ac- FW 0.7 sec / FW 1.0 sec/FW 1.5 sec tivate. Select the [ ] key function. 60 [ VOLUME MODE ] NORMAL / AUTOBACK VR-160 O...
- Page 77 25 / 50 /100 kHz 58 [ VFO MODE ] Selects or disables the VFO band edge limiting for the current band. ALL / BAND 62 [ WX ALT ] Enables/Disables the NOAA Weather Alert Feature. OFF / ON VR-160 O...
- Page 78 BAR ANTENNA: Uses the internal Bar Antenna only. BAR+EXT ANT: Uses both the internal Bar Antenna and the Rubber Flex Antenna. The Bar Antenna is directional; rotate the VR-160 for best reception. Set Mode Item 04 ANTENNA ATT Function: Enables/Disables the receiver Front-end Attenuator.
- Page 79 KEY+SCAN: The beeper sounds when you press a key or when the scanner stops. KEY: The beeper sounds when you press any key. Set Mode Item 14 BELL RINGER Function: Selects the number of Bell ringer repetitions. Available Values: 1 time - 20 times/CONTINUOUS Default: 1 time VR-160 O...
- Page 80 Available Values: 400 - 1000 Hz (50 Hz/step) Default: 700 Hz Set Mode Item 21 CW TRAINING Function: Enables/Disables the CW Training feature. See page 62 for details. Set Mode Item 22 DC VOLTAGE Function: Indicates the DC Supply Voltage. VR-160 O...
- Page 81 Available Values: KEY 2 sec - KEY 10 sec/CONTINUOUS/OFF Default: KEY 5 sec (5 seconds) KEY 2 sec - KEY 10 sec: Illuminates the LCD/Keypad for the selected time, when any key is pressed. CONTINUOUS: Illuminates the LCD/Keypad continuously. OFF: Disables the LCD/Keypad illumination. VR-160 O...
- Page 82 Note: This Set Mode Item can select and set the function to each memory channel indi- vidually. Set Mode Item 33 MR PROTECT Function: Enables/Disables the Memory Write Protector. Available Values: OFF/ON Default: OFF When this function is set to “ON”, the memory write operation is ignored. VR-160 O...
- Page 83 Stores the data into the memory channel, which is next highest from the last- stored memory channel. Set Mode Item 36 ON TIMER Function: Set the On Timer Time. Available Values: OFF/00H.10M (00:10) - 24H.00M (24:00) (10 minutes/step) Default: OFF The On Timer turns on the radio at the programmed time. VR-160 O...
- Page 84 Set Mode Item 40 PRI TIMER Function: Selects the time between the Priority (Dual Watch) channel checks, when the feature is active. Available Values: 100ms - 0.9ms (100 ms/step) or 1.0sec - 10.0sec (0.5 sec/step) Default: 5.0sec See page 53 for details. VR-160 O...
- Page 85 The Scan resume time (default 2 seconds) is set by the Set Mode Item 44: SCAN RE-START. HOLD: The scanner will halt on a signal it encounters. It will not restart auto- matically; you must manually re-initiate scanning if you wish to resume. VR-160 O...
- Page 86 Set Mode Item 50 SQL S-METER Function: Adjusts the Squelch threshold to the S-meter level. Available Values: OFF/LEVEL 1 - LEVEL 8 Default: OFF Note: This Set Mode Item can select and set the function to each memory channel indi- vidually. VR-160 O...
- Page 87 Set Mode Item 54 TEMPERATURE Function: Indicates the current temperature inside the radio’s case and selects the mea- surement units (“°F” or “°C”) for the temperature sensor. Press the [ MODE ] key to toggle the measurement units between “°F” and “°C”. VR-160 O...
- Page 88 Available Values: NORMAL/AUTOBACK Default: NORMAL The [ VOL ] key keeps the status while pressing the [ VOL ] key. NORMAL: AUTOBACK: The [ VOL ] key keeps the status approximately three seconds after pressing the [ VOL ] key. VR-160 O...
- Page 89 Set Mode Item 61 WAKEUP Function: Setting of the Wakeup feature. Available Values: OFF/5 sec - 60 sec (5 sec/step) Default: OFF Set Mode Item 62 WX ALT Function: Enables/Disables the NOAA Weather Alert Feature. Available Values: OFF/ON Default: OFF VR-160 O...
-
Page 90: Appendix
PPENDIX AM R The VR-160 allows connecting an external antenna to an ACC Jack. Connecting a user constructed or aftermarket antenna may provide superior AM band sensitivity and recep- tion. 1. Press and hold in the [ BANK ] key for one second to enter the Set mode. -
Page 91: Line-In Audion Connections
PPENDIX -I A The VR-160 allows connecting the audio signal from the external audio equipment such as an iPod ® to an ACC Jack. If you engage the AF-DUAL function, you may monitor the amateur radio signal while listening to your favorite music, for example. -
Page 92: Computer Connections
PPENDIX The VR-160 allows connecting a computer USB port to the ACC Jack, and enables memory management and configuration using the Optional ADMS-5 Advanced Data Management System. 1. Press and hold in the [ BANK ] key for one second to enter the Set mode. -
Page 93: S-Meter Connections
V, S9 = 1.3 V) to the ACC Jack. Adjust the external potentiometer (R) in your metering system so the external meter reading is same as the VR-160 S-Meter reading. The analog S-meter does not deflect on the AM and FM Broadcast band (504 - 1791 kHz and 76.00 - 107.90 MHz). -
Page 94: Specifications
WFM: Triple-Conversion Superheterodyne AM Radio/FM Radio: Single-Conversion Superheterodyne 1st: 47.25 MHz (AM, NFM) Intermediate Frequencies: 1st: 45.8 MHz (WFM) 1st: 130 kHz (AM Broadcast/FM Broadcast) 2nd: 450 kHz (AM, NFM) 2nd: 10.7 MHz (WFM) 3rd: 1 MHz (WFM) VR-160 O... - Page 95 47 x 81 x 23 mm (w/FNB-82LI, w/o knob & antenna) 47 x 81 x 31 mm (w/FBA-37, w/o knob & antenna) 130 g (w/FNB-82LI & antenna) Weight: 185 g (w/FBA-37 & antenna) Specifications are subject to change without notice VR-160 O...
-
Page 96: Reset Procedures
2. Press and hold in the [ MODE ] and [ V/M ] keys while turning the radio on. 3. Press the [ F/W ] key momentarily to reset all settings to their factory defaults (press any other key to cancel the Reset procedure). VR-160 O... - Page 97 VR-160 O...
- Page 98 VR-160 O...
-
Page 99: Declaration Of Conformity
Declaration of Conformity We, Yaesu UK Ltd. declare under our sole responsibility that the following equipment com- plies with the essential requirements of the Directive 1999/5/EC. Type of Equipment: Communications Receiver Brand Name: YAESU Model Number: VR-160 Manufacturer: Vertex Standard Co., Ltd. - Page 100 Copyright 2010 Printed in Japan VERTEX STANDARD CO., LTD. All rights reserved. No portion of this manual may be reproduced without the permission of VERTEX STANDARD CO., LTD.