Table of Contents
Advertisement
Quick Links
Advertisement
Table of Contents

Related Manuals for Yamaha CRW2100S - CRW - CD-RW Drive


Summary of Contents for Yamaha CRW2100S - CRW - CD-RW Drive
-
Page 2: Fcc Information
This product, when installed as indicated in the instructions contained in this manual, meets FCC requirements. Modifications not expressly approved by Yamaha may void your authority, granted by the FCC, to use the product. 2. IMPORTANT: When connecting this product to accessories and/or another product use only high quality shielded cables. - Page 3 LASER INFORMATION Laser Product Class: Class 1 CAUTION Laser Diode Properties Use of controls or adjustments or performance of Wavelength: 780-787 nm procedures other than those specified herein may result Pulse Durations and Max. Output in hazardous radiation exposure. at the lens of the Laser Pickup Unit Read Mode: 0.7mW (Continuous) ACHTUNG...
- Page 5 OWNER’S MANUAL...
- Page 6 Otherwise, there is an increased risk of electrical shock, fire or damage to the device. Return the device immediately to the store at which it was purchased or alternatively, to the nearest Yamaha dealer (listed at the back of this manual).
- Page 7 Otherwise, dust can build up inside the device, increasing the risk of fire or damage. For information about servicing charges, contact the store at which the device was purchased or alternatively, the nearest Yamaha dealer (listed at the back of this manual). The device should be serviced about once a year.
- Page 8 WARRANTY YAMAHA AND SUPPLIERS ACCEPT NO LIABILITY FOR THE LOSS OF ANY DATA OR ANY PROBLEMS CAUSED AS A RESULT. AS A PRECAUTION, IT IS RECOMMENDED THAT THE DISCS BE TESTED AFTER THEY HAVE BEEN WRITTEN TO.
-
Page 9: Table Of Contents
This document may not, in whole or in part, be copied, photocopied, reproduced, translated, transmitted or reduced to any electronic medium of machine readable form without prior consent in writing from Yamaha. Windows is a registered trademark of Microsoft Corporation. -
Page 10: Introduction
The CRW2100S supports extracting digital audio data at up to 40X speed, as well as recording digital sound with complete fidelity even when writing at 16X speed. Reliable writing Yamaha’ s proprietary Pure-Phase Laser System improves jitter values to allow the signal to be recorded accurately. - Page 11 Technology that reduces phase interference of the laser beam, so that it shines accurately on the disc. *2 Jitter value An important measure of recording quality. This has been improved 25% compared with Yamaha models not using this technology. *3 Running OPC (Optimum Power Control) CD-R/RW discs vary by manufacturer in their recording characteristics, and the laser output required to write data differs by disc.
-
Page 12: Before Use
A spare PCI expansion slot for a SCSI card (if one hasn’t been installed yet). A SCSI card to connect SCSI devices (including the CRW2100S drive) to your computer. Make sure it has an internal bus connector. Yamaha recommends any of Adaptec’s AHA-2940-series cards (PCI slot). -
Page 13: Supported Discs
• Refer to the page at the URL below before attempting to read these discs on a Yamaha CD-R/RW drive not bearing the High Speed CD-RW logo. URL: http://www.yamaha.co.jp/english/product/computer/ *1 Compatible with Orange Book Part 2. -
Page 14: Tools
Before Use About CD-ROM A CD-ROM disc is a compact disc containing high-density read-only data. It has many applications, including the playback of music and video, the archiving of data, as well as on-line documentation. The following are descriptions of each CD-ROM format: CD-DA: Up to 74 minutes of stereo audio is written in 16-bit resolution at a sampling rate of 44.1kHz for a 74 minutes disc. -
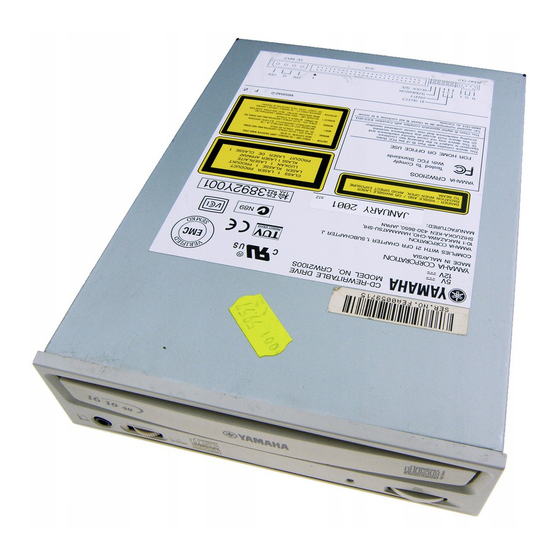
Page 15: Front And Rear Of Unit
Front and Rear of Unit Front Panel The CRW2100S drive’ s front panel features the following: Eject button Manual Eject hole Disc tray Press this button when you Only use this if no other The tray is used to hold the disc. need to open or close the method is available for It slides out from the drive unit... -
Page 16: Rear Panel
Front and Rear of Unit Rear Panel The CRW2100S drive’ s rear panel features the following: AUDIO OUT connector SCSI INTERFACE connector Connect one end of the 4-pin Insert the connector of the SCSI ribbon cable here. audio cable to this and the Make sure you align the red line of the ribbon cable with other end to your computer’s pin 1 of the drive’s connector, marked “SCSI... -
Page 17: Setup Flowchart
Setup Flowchart This flowchart shows the procedure for setting up the CRW2100S drive. For easy cross-referencing, the relevant pages in this manual are also given. STEP STEP Purchase a SCSI card Do you have a SCSI card? Recommended models: Adaptec AHA-2940-series (PCI) STEP Check that the SCSI card is Install the SCSI card... -
Page 18: Setup Procedures
Setup Procedures Serial Number Once you have taken the CRW2100S drive out of its packaging, you should immediately note down the serial number found at the top of the drive with the bar code. You may need to refer to this number when requesting Customer Support services. - Page 19 Setup Procedures To set each jumper switch, you have to bridge the two pins in the respective column of the grid with a plastic shunt. Shunts are already attached to the jumper switches in their default configurations. Rear Panel S C S IN T E R F A C O N...
-
Page 20: Scsi Id Number
Setup Procedures 1 SCSI ID Number Each of the SCSI devices connected to the computer is identified by its SCSI ID number. You need to assign a number from “0” to “7” for each SCSI device. Commonly, ID number “7” is reserved for the computer’ s SCSI card itself. Therefore, the CRW2100S drive can actually be assigned an ID number from “0”... - Page 21 Setup Procedures 2 Parity Check The parity check is used for error correction during data transmissions. If parity- checking has to be disabled, the shunt on the Parity jumper switch should be removed. Parity ON (Default) Parity OFF Normally leave this setting alone.
- Page 22 Setup Procedures Termination ON (Default) Termination OFF ID SELECT ID SELECT PARITY PARITY TERMINATOR TERMINATOR BLOCK SIZE BLOCK SIZE 1 2 4 1 2 4 Set to “ON” if CRW2100S drive is last device on SCSI chain 4 Block Size The data block size of the CRW2100S drive can be set to 512 bytes per sector by setting the Block Size jumper switch to “ON.”...
-
Page 23: Installing The Crw2100S Drive
Setup Procedures Installing the CRW2100S Drive You can install the CRW2100S drive in one of two ways: As an additional drive If the casing of your computer has a spare 5.25-inch drive bay available, such as with many tower-type designs, you can install the CRW2100S drive in addition to the computer’... - Page 24 Setup Procedures Fitting the CRW2100S as an Additional Drive 1 Power down your computer and unplug it from the AC outlet. If you proceed without doing this, you run the risk of receiving an electric shock and/or short-circuiting and damaging components, including the CRW2100S drive.
- Page 25 Setup Procedures 3 Touch a metal part of the computer’s chassis or power supply unit to drain any static charge that may have built up inside your body. Drain any static charge You can permanently damage equipment if you touch it while there is any static charge in your body.
- Page 26 Setup Procedures 5 Leave enough room behind the drive for connecting the power, SCSI and audio cables. Then tighten the four fastening screws on the sides of the unit by hand to hold the drive in place.
- Page 27 Setup Procedures 6 Connect one end of the 50-pin SCSI flat cable to the computer’s SCSI card. Align the red line of the cable with Pin 1 of the card’s SCSI connector. Next, connect a free 50-pin connector on the SCSI flat cable to the back of the CRW2100S drive such that the red line on the cable is aligned with pin 1, marked “SCSI INTERFACE CONNECTOR 1.”...
- Page 28 Setup Procedures 7 Connect the audio cable between the CRW2100S drive and the computer’s sound card, or the motherboard’s audio connector if it has built-in audio. One end of the audio cable has two connectors: a vertically-mounted type (PH) and a horizontally-mounted type (MPC).
- Page 29 Setup Procedures 8 Connect a 4-pin power cable to the power supply connector of the CRW2100S drive marked “DC INPUT.” S C S IN T E R F A C O N N E C T O R Bottom 4-pin power cable n There may be more than one 4-pin power cable available.
- Page 30 Setup Procedures ) Attach the outer casing of the computer and any screws that were removed. ! Reconnect the computer to the AC outlet and power it up. n When you power up the computer, make sure the LED on the panel of the CRW2100S drive blinks in green attempting reading disc information.
- Page 31 “Device Manager” button in “System * This is a screen shown in the Windows 98 Second Edition environment. Properties.” # Double-click “YAMAHA CRW2100S” listed under “CDROM” (in Windows 95/98/98 Second Edition) and click the “Settings” tab. Check the “Sync data transfer”...
- Page 32 Setup Procedures Replacing an Existing CD-ROM Drive with the CRW2100S Drive n The existing CD-ROM drive in the computer is assumed to be an IDE-type. 1 Power down your computer and unplug it from the AC outlet. If you proceed without doing this, you run the risk of receiving an electric shock and/or short-circuiting and damaging components including the CRW2100S drive.
- Page 33 Setup Procedures 3 Touch a metal part of the computer’s chassis or power supply unit to drain any static charge that may have built up inside your body. Drain any static charge You can permanently damage equipment if you touch it while there is any static charge in your body.
- Page 34 Setup Procedures 5 Remove the four screws holding the CD-ROM drive in place, then slide the drive forward and out from the drive bay. Slide the CRW2100S drive backwards into the now-vacant bay without applying excessive force. CD-ROM drive CRW2100S 6 Leave enough room behind the drive for connecting the power, SCSI and audio cables.
- Page 35 Setup Procedures 7 Connect one end of the 50-pin SCSI flat cable to the computer’s SCSI card. Align the red line of the cable with Pin 1 of the card’s SCSI connector. Next, connect a free 50-pin connector on the SCSI flat cable to the back of the CRW2100S drive such that the red line on the cable is aligned with pin 1, marked “SCSI INTERFACE CONNECTOR 1.”...
- Page 36 Setup Procedures 8 Connect the audio cable between the CRW2100S drive and the computer’s sound card, or the motherboard’s audio connector if it has built-in audio. One end of the audio cable has two connectors: a vertically-mounted type (PH) and a horizontally-mounted type (MPC).
- Page 37 Setup Procedures 9 Connect the 4-pin power cable to the power supply connector of the CRW2100S drive marked “DC INPUT.” S C S IN T E R F A C O N N E C T O R Bottom 4-pin power cable n There may be more than one 4-pin power cable available.
- Page 38 Setup Procedures ! Attach the outer casing of the computer and any screws that were removed. @ Reconnect the computer to the AC outlet and power it up. n When you power up the computer, make sure the LED on the panel of the CRW2100S drive blinks in green attempting reading disc information.
- Page 39 * This is a screen shown in the Windows 98 Second Edition environment. “Device Manager” button in “System Properties.” $ Double-click “YAMAHA CRW2100S” listed under “CDROM” (in Windows 95/98/98 Second Edition) and click the “Settings” tab. Check the “Sync data transfer”...
-
Page 40: Operation
Operation This section explains how to operate the CRW2100S drive after you have installed it. You can load and eject a disc (as described below) only when the computer is powered on. Loading a Disc 1 Open the tray by pressing the Eject button on the CRW2100S drive’s front panel. -
Page 41: Ejecting A Disc In An Emergency
Operation n It may not be possible to eject the disc tray while a disc is being read or in other situations, depending on the SCSI command. n Only remove the disc after the disc tray has opened fully. Otherwise, you risk damaging the drive or the disc. -
Page 42: Troubleshooting
Troubleshooting Please also refer to the YAMAHA CD-R/RW Drives web site for more information. YAMAHA CD-R/RW Drives web site URL: http://www.yamaha.co.jp/english/product/computer/ Europe: http://www.yamaha-yste.com/ The drive does not power up. Is the 4-pin power cable from the computer’ s power supply attached correctly? The computer does not start up. - Page 43 Troubleshooting Are the pins and holes on the SCSI connectors straight and not deformed? Check the connectors. Is the terminator on the CRW2100S drive set correctly? It should be set to ON only if it is the last device on the SCSI chain. Otherwise, it should be set to OFF.
- Page 44 CDs, CD-ROMs and blank CD-R/RW discs (the front panel LED remains lit in orange after any discs have been inserted), you should contact your nearest Yamaha dealer. Errors occur when writing a disc at a high speed directly from a separate CD-ROM drive to the CRW2100S drive.
-
Page 45: Appendix
Appendix Writing Modes Disc-at-Once (DAO) This mode is used when writing a complete disc in a single pass without pausing. Data cannot be added later, even if the full capacity of the blank disc has not been used. Example: General CD-ROM 650MB Data Track 1... -
Page 46: Packet Writing
Appendix Session-at-Once (SAO) As a writing method that combines the advantages of the above-mentioned “Disc- at-Once” and “Track-at-Once,” you can combine multiple tracks into one session and write them, and then add additional data. For example, this is the writing method used to create a CD EXTRA format CD. The music tracks will be recorded in the first session, and the data will be recorded in the second session. -
Page 47: About The Firmware
To ensure more reliable operations and enhanced performance of the drive, updates to the firmware will be made available. You can find information about the most recent firmware for the drive on YAMAHA CD-R/RW Drives web site. URL for YAMAHA CD-R/RW Drives web sites: http://www.yamaha.co.jp/english/product/computer/... -
Page 48: Led Indicator Messages
Appendix LED Indicator Messages The CRW2100S drive properly installed inside the computer will indicate the following LED messages while the drive (and the computer) is turned on. Indicator Messages Status LED Color Green Ready (with disc) Ready (no disc) Orange Green Tray operation (opening/closing) Tray fully opened... - Page 49 Appendix Writing Methods Disc-at-Once (DAO) Session-at-Once (SAO) Track-at-Once (TAO) Packet Writing Writing/Reading Speed Writing CD-R 1X, 2X, 4X, 8X, 12X (CLV) 16X (12X – 16X Partial CAV) CD-RW 2X, 4X, 8X (CLV) 10X (4X – 10X Full CAV) Reading 40X (max.) Full CAV Note) •...
- Page 50 Appendix Audio Out Analog audio output Frequency range: 20 – 20,000 Hz Output level: 700mVrms Power Consumption 11W (when writing or reading) 4.5W (standby - during disc spindown) 1.1W (sleep - combined with the computer’ s power saving) Power Supply 5V DC 5% 12V DC 10% Operating Environment...
-
Page 51: Index
Appendix Index Symbols 4-pin power cable ......20, 28 lead-in ..........36 4-pin power connector ....... 24 lead-out ..........36 LED ..........6, 39 Loading a disc ........31 additional drive ........14 Long-Nosed Pliers ......... 5 audio cable ........19, 27 lug .......... - Page 52 Bei weiteren Fragen wenden Sie sich Sitte an Ihren Händler oder eine der folgenden Firmen. Pour plus de détails sur les produits, veuillez vous adresser à Yamaha ou au distributeur le plus proche figurant dans la liste suivante : Si tiene alguna pregunta, por favor póngase en contacto con su distribuidor o una de las...