Table of Contents
Advertisement
Quick Links
Advertisement
Table of Contents

Related Manuals for Yamaha CD Recordable/Rewritable Drive CRW2200S


Summary of Contents for Yamaha CD Recordable/Rewritable Drive CRW2200S
- Page 2 This product, when installed as indicated in the instructions contained in this manual, meets FCC requirements. Modifications not expressly approved by Yamaha may void your authority, granted by the FCC, to use the product. When connecting this product to accessories and/or another product use only high quality shielded cables.
- Page 3 Class 1 780-787 nm 0.7mW (Continuous) Max. 38mW (for 166ns, Min. Cycle 86.6ns) Klasse 1 780-787 nm 0,7mW (kontinuierlich) Max. 38mW (für 166ns, Zyklusmin. 86,6ns) Classe 1 780-787 nm 0,7mW max. 38mW (pour 166ns, cycle min. 86,6ns) Clase 1 780-787 nm 0,7mW máx.
-
Page 5: Safety Precautions
Otherwise, there is an increased risk of electrical shock, fire, or damage to the device. Return the device immediately to the store where it was purchased, or alternatively, to the nearest Yamaha dealer (listed at the back of this manual). - Page 6 Yamaha dealer (listed at the back of this manual). The device should be serviced about once a year. This drive is for use only with movable equipment, weighing less than 18 kg.
- Page 7 About CD-R/RW discs Precautions for Transportation Copyrights WARRANTY...
-
Page 8: Table Of Contents
Table of Contents SCSI connection and E-IDE (ATAPI) connection ... 1 Introduction... 2 Before Use ... 4 Front and Rear of Unit... 9 SCSI Connection Set Up ...12 Removing the SCSI convertor ...32 E-IDE (ATAPI) Connection Set Up ...35 Operation ...50 Troubleshooting ...52 Appendix...57... -
Page 9: Scsi Connection And E-Ide (Atapi) Connection
SCSI connection and E-IDE (ATAPI) connection For SCSI Connection SCSI convertor drive Notes For IDE Connection... -
Page 10: Introduction
High speed writing/reading SafeBurn™ (Enhanced write stability technology) Generous 8MB of buffer memory Buffer Underrun Protection Optimum Write Speed Control Reliable writing Yamaha’s proprietary Pure-Phase Laser System (patent applied for) Running OPC (Optimum Power Control) High-fidelity digital audio CD TEXT support drive... - Page 11 Introduction...
-
Page 12: Before Use
Before Use System Requirements Note PC/AT-Compatible Computer Note About SCSI cards Operating System (OS) CD Writing Software Note Hard Drive Space About disk image files... - Page 13 Before Use Supported Discs Notes Note About the Orange Book...
- Page 14 Before Use...
- Page 15 Before Use...
-
Page 16: Serial Number
Before Use Serial Number Serial number (3 letters and 7 digits) Serial No. -
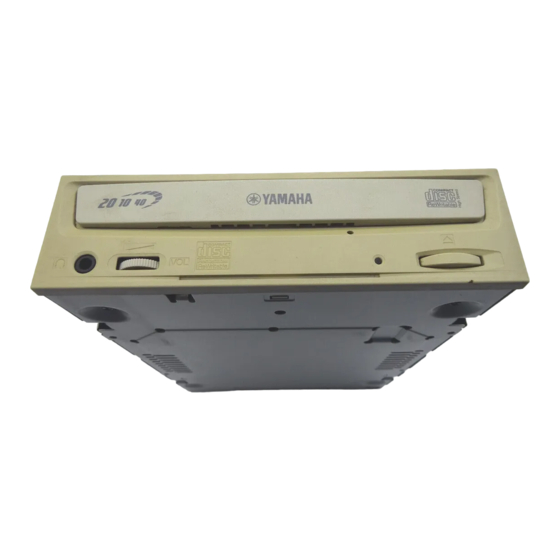
Page 17: Front And Rear Of Unit
Front and Rear of Unit Front Panel... - Page 18 Front and Rear of Unit Rear Panel (with the SCSI Convertor)
- Page 19 Front and Rear of Unit Rear Panel (without the SCSI Convertor)
-
Page 20: Scsi Connection Set Up
SCSI Connection Set Up Tools Phillips Screwdriver Note Long-Nosed Pliers... -
Page 21: Setup Flowchart
SCSI Connection Set Up Setup Flowchart Connecting the STEP ( P. 14 – 29) 1. Opening the Computer ( P. 14) 2. Audio cable connection ( P. 16) 3. Installing the SCSI Convertor to the 4. Setting the Jumper Switches ( P. 20) 5. -
Page 22: Connecting The
SCSI Connection Set Up Connecting the Note Opening the Computer 1 1 1 1 2 2 2 2 Cover Front panel... - Page 23 SCSI Connection Set Up 3 3 3 3 Discharge any static charge...
- Page 24 Audio cable connection 4 4 4 4 Notes on playing audio CDs ANALOG AUDIO SCSI Connection Set Up Audio cable (to Sound card)
- Page 25 SCSI Connection Set Up Examples of the digital connection DIGITAL AUDIO Note Digital audio cable (to Sound card)
- Page 26 SCSI Connection Set Up Installing the SCSI Convertor to the drive Notes 5 5 5 5 SCSI Convertor 6 6 6 6 Screw Note...
- Page 27 SCSI Connection Set Up 7 7 7 7 Yellow wire Bottom Smaller connector Power cable Note Bigger connector Bottom DC INPUT connector...
- Page 28 Setting the Jumper Switches 8 8 8 8 Jumper switches 1 2 4 Note ID SELECT PARITY. TERMINATOR BLOCK SIZE Rear Panel SCSI Connection Set Up...
-
Page 29: Scsi Id Number
SCSI Connection Set Up SCSI ID Number SCSI ID 0 SCSI ID 3 (Default) SCSI ID 6 Note SCSI ID 1 SCSI ID 2 SCSI ID 4 SCSI ID 5 SCSI ID 7... - Page 30 Parity Check Parity ON (Default) Normally leave this setting alone. The setting allows for the parity checking. Normally, set PARITY to ON to enable error correction. Note Termination Hard disk drive (unterminated) MO drive (terminated) Terminator SCSI Connection Set Up Parity OFF The setting does not allow for parity...
- Page 31 SCSI Connection Set Up Termination ON (Default) Set to “ON” if last device on SCSI chain Note Block Size About the Block Size Block size OFF (Default) Note Termination OFF Set to "OFF" if the is not the last device on the SCSI chain Block size ON Set to “ON”...
- Page 32 SCSI Connection Set Up Choosing the Connection Method 9 9 9 9 CD-ROM drive Note...
- Page 33 SCSI Connection Set Up Installing the 10 10 Note Audio cable 40-pin IDE cable Notes 5.25-inch drive bay slot Front cover 4-pin power cable...
- Page 34 Note 11 11 11 11 Notes 12 12 12 12 Motherboard SCSI connector 50-pin SCSI flat cable Colored line Colored line SCSI Connection Set Up SCSI INTERFACE connector...
- Page 35 SCSI Connection Set Up 13 13 Note Note Note Audio cable Vertically- Horizontally- mounted mounted type (PH) type (MPC) Sound card Audio input connector Digital audio cable Sound card SPDIF...
- Page 36 14 14 14 14 Bottom Notes 15 15 15 15 SCSI Connection Set Up Power cable 4-pin power cable Bottom...
- Page 37 SCSI Connection Set Up 16 16 Cover 17 17 Front panel...
- Page 38 Configuring for the Operating System 18 18 18 18 For Windows NT For Windows 2000 Professional Notes SCSI Connection Set Up...
- Page 39 SCSI Connection Set Up 19 19 Notes Installing the CD Writing Software 20 20...
-
Page 40: Removing The Scsi Convertor
Removing the SCSI convertor Tools Phillips Screwdriver Note Removing the SCSI convertor Notes 1 1 1 1 1 1 1 1 2 2 2 2 2 2 2 2 3 3 3 3 3 3 3 3... - Page 41 Removing the SCSI convertor 4 4 4 4 Audio cable 50-pin SCSI flat cable 4-pin power cable 5 5 5 5 Screw...
- Page 42 6 6 6 6 SCSI convertor 7 7 7 7 Analog audio cable Smaller connector Bigger connector Power cable Removing the SCSI convertor...
-
Page 43: E-Ide (Atapi) Connection Set Up
E-IDE (ATAPI) Connection Set Up Tools Phillips Screwdriver Note Long-Nosed Pliers... - Page 44 Setup Flowchart STEP Does your computer have a SCSI connection with the drive? Connecting the STEP ( P. 37 – 46) 1. Opening the Computer ( P. 37) 2. Choosing the Connecting Method ( P. 38) 3. Setting the Jumper Switches ( P. 42) 4.
- Page 45 E-IDE (ATAPI) Connection Set Up Connecting the Note Opening the Computer 1 1 1 1 2 2 2 2 2 2 2 2 3 3 3 3 3 3 3 3...
- Page 46 E-IDE (ATAPI) Connection Set Up Choosing the Connection Method 4 4 4 4 CD-ROM drive Note...
- Page 47 E-IDE (ATAPI) Connection Set Up Slave Motherboard Primary Master Secondary Slave Master Notes Note...
- Page 48 Hard disk (master) Hard disk (slave) IDE cable (primary) Hard disk (master) IDE cable (primary) Note E-IDE (ATAPI) Connection Set Up CD-ROM drive etc. (master) (slave) IDE cable (secondary) (master) IDE cable (secondary)
- Page 49 E-IDE (ATAPI) Connection Set Up Notes...
- Page 50 Setting the Jumper Switches Rear Panel Master Note About the CSEL jumper switch E-IDE (ATAPI) Connection Set Up Slave (factory setting)
- Page 51 E-IDE (ATAPI) Connection Set Up Installing the 6 6 6 6 7 7 7 7 11 11 8 8 8 8 Motherboard Colored line Notes IDE connector 40-pin IDE cable Colored line IDE interface connector...
- Page 52 9 9 9 9 Notes ANALOG AUDIO Vertically- mounted type (PH) E-IDE (ATAPI) Connection Set Up Audio cable Sound card Audio input connector Horizontally- mounted type (MPC)
- Page 53 E-IDE (ATAPI) Connection Set Up Note Examples of the digital connection DIGITAL AUDIO Note Digital audio cable SPDIF Sound card...
- Page 54 10 10 10 10 Bottom Notes 11 11 11 11 12 12 12 12 13 13 13 13 17 17 E-IDE (ATAPI) Connection Set Up DC INPUT connector 4-pin power cable 15 15 16 16...
- Page 55 E-IDE (ATAPI) Connection Set Up Configuring for the Operating System 14 14 For Windows NT For Windows 2000 Professional Notes...
- Page 56 E-IDE (ATAPI) Connection Set Up 14 14 About DMA Settings (Setting of Transfer Mode) Notes...
- Page 57 E-IDE (ATAPI) Connection Set Up Installing the CD Writing Software 16 16...
-
Page 58: Operation
Operation Loading a Disc 1 1 1 1 2 2 2 2 3 3 3 3 Ejecting a Disc 1 1 1 1 2 2 2 2 3 3 3 3... - Page 59 Operation Notes Ejecting a Disc in an Emergency Manual Eject hole Paper Clip 1 1 1 1 2 2 2 2 Note 3 3 3 3 4 4 4 4...
-
Page 60: Troubleshooting
Troubleshooting The drive does not turn on. (When the LED on the front panel of the drive does not light up.) The computer does not start up. is not recognized. (In the case of SCSI connection) Note... - Page 61 Troubleshooting is not recognized. (In the case of E-IDE (ATAPI) connection)
- Page 62 Troubleshooting The disc tray does not open. The disc keeps being ejected. The drive does not operate correctly.
- Page 63 Troubleshooting No sound of CD-DA (audio CD) disc is audible. Note...
- Page 64 Troubleshooting The drive ejects or fails to read the disc, or the front panel LED remains lit in orange after the disc has been loaded (meaning that the disc has not been recognized). ( P. 60) The “Buffer Underrun” error message is displayed. Note Other problems...
-
Page 65: Appendix
Appendix Writing Modes Disc-at-Once (DAO) Example: General CD-ROM Example: Audio CD Note Track-at-Once (TAO) Note... - Page 66 Appendix Session-at-Once (SAO) Example: CD EXTRA Packet Writing Notes on Packet Writing...
- Page 67 Appendix About firmware Determining the firmware version of the (in Windows 95/98/98 Second Edition/Me) Note SCSI ID For Windows NT For Windows 2000 Professional drive The firmware revision indicated here varies depending on the software version of the drive.
-
Page 68: Specifications
Appendix LED Indicator Messages Specifications Supported Formats Note... - Page 69 Appendix...
- Page 70 Appendix...
- Page 71 Appendix series complies with the following specifications...
- Page 72 Appendix Index...
- Page 73 Appendix...
- Page 74 Bei weiteren Fragen wenden Sie sich Sitte an Ihren Händler oder eine der folgenden Firmen. Pour plus de détails sur les produits, veuillez vous adresser à Yamaha ou au distributeur le plus proche figurant dans la liste suivante : Si tiene alguna pregunta, por favor póngase en contacto con su distribuidor o una de...