Table of Contents
Advertisement
Available languages
Available languages
Quick Links
See also:
User Manual
Advertisement
Chapters
Table of Contents

Related Manuals for Haier HMV1630DBBB


Summary of Contents for Haier HMV1630DBBB
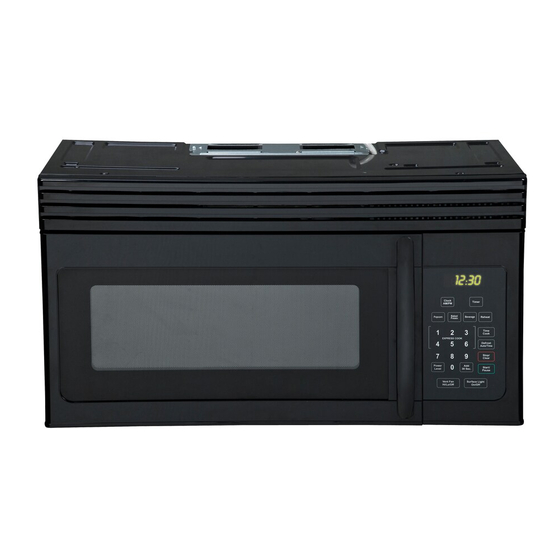
- Page 1 Over the Range Microwave Oven Installation Installation du Four À Micro-Ondes À Hotte Intégrée Instalación del Horno Microondas Part # MW-7777-01 Installation Manual Model # HM1630 Manual del Usuario Para Modelo de # HM1630 Guide de l’Utilisateur Modéle# HM1630 Quality Innovation Style...
-
Page 2: Table Of Contents
English TABLE OF CONTENTS PAGE SAFETY PRECAUTIONS ................2 Electrical Requirements ................3 Before Using Your Microwave Oven ............4 Hood Exhaust ..................5-6 Damage – Shipment/Installation ..............7 OVER THE RANGE MICROWAVE OVEN INSTALLATION INSTRUCTIONS WHAT DO I NEED TO HAVE TO INSTALL THE MICROWAVE OVEN? ..7-8 Parts Included .................. -
Page 3: Safety Precautions
10. Do not, under any circumstances, cut, deform or remove any of the prongs from the power cord. Do not use with an extension cord. Thank you for using our Haier product. This easy-to-use manual will guide you Model number in getting the best performance from your Haier Microwave Oven. -
Page 4: Electrical Requirements
English ELECTRICAL REQUIREMENTS Product rating is 120 volts AC, 60 Hertz and 1550 watts. This product must be connected to a supply circuit of the proper voltage and frequency. Wire size must conform to the requirements of the National Electrical Code or the prevailing local code for this kilowatt rating. -
Page 5: Before Using Your Microwave Oven
English BEFORE USING YOUR MICROWAVE OVEN IMPORTANT: READ AND SAVE THESE INSTRUCTIONS Doing so will: Call your dealer when you have questions or need service. When you call, you will need the microwave model and serial numbers. This is the safety alert symbol. This symbol alerts you to potential hazards that may seriously injure you and others. -
Page 6: Hood Exhaust
English English HOOD EXHAUST NOTE: Read these next two pages only if you plan to vent your exhaust to the outside. If you plan to recirculate the air back into the room, proceed to page 7. OUTSIDE TOP EXHAUST (EXAMPLE ONLY) The following chart describes an example of one possible ductwork installation. -
Page 7: Hood Exhaust
English English NOTE: If you need to install ducts, note that the total duct length of 31⁄4” x 10” (8.2 x 25.4 cm) rectangular or 6” (15.2 cm) diameter round duct should not exceed 120 equivalent feet (36.5 m). Outside ventilation requires a HOOD EXHAUST DUCT. Read the following carefully. NOTE: It is important that venting be installed using the most direct route and with as few elbows as possible. -
Page 8: Damage-Shipment/Installation
English English DAMAGE—SHIPMENT/INSTALLATION bought for repair or replacement. responsibility of the customer. replacement must be made by arrangement between customer and installer. PARTS INCLUDED HARDWARE PACKET ADDITIONAL PARTS PART QUANTITY PART QUANTITY Wood Screws Top Cabinet TOP CABINET TEMPLATE (1⁄4“ x 2“) Template Rear Wall Toggle Bolts... -
Page 9: Mounting Space
English English TOOLS AND MATERIALS NEEDED Ruler or tape measure and straight edge Pencil Carpenter square # 1 Phillips screwdriver (optional) Tin snips (for cutting damper, if required) Scissors Electric drill with 3⁄16“, 1⁄2“ and 5⁄8“ (to cut template, if necessary) drill bits Filler blocks or scrap wood pieces, if needed... -
Page 10: Placement Of The Mounting Plate
English 1. PLACEMENT OF THE MOUNTING PLATE A. REMOVING THE MICROWAVE OVEN FROM THE CARTON/ REMOVING THE MOUNTING PLATE 1. Remove the installation instructions, filters, glass tray and the small hardware bag. Do Carton not remove the Styrofoam protecting the front of the oven. -
Page 11: Determining Wall Plate Location
English C. DETERMINING WALL PLATE LOCATION UNDER YOUR CABINET. Mounting Plate Tabs Mounting Plate Tabs Touching the Cabinet Bottom Touching the Back Frame 30ʺ (76.2 cm) to Cooktop Mounting Plate with Tabs Below Cabinet Bottom the Same Distance as the Front Overhang Depth 30ʺ... -
Page 12: Aligning The Wall Plate
English Hole B Hole A Draw a Vertical Line on Wall from Center of Centerline Top Cabinet Notches Hole D Hole C Area E CAUTION: Wear gloves to avoid cutting fingers on sharp edges. D. ALIGNING THE WALL PLATE Draw a vertical line on the wall at the center of the 30” (76.2 cm) wide space. Use the mounting plate for the rear wall. -
Page 13: Installation Types
English 2. INSTALLATION TYPES (Choose A,B or C) This microwave oven is designed for adaptation to the following three types of ventilation: This microwave is shipped assembled for Recirculating. Select the type of ventilation required for your installation and proceed to the section. A. -
Page 14: Outside Top Exhaust
English A. OUTSIDE TOP EXHAUST (VERTICAL DUCT) INSTALLATION OVERVIEW A1. Attach Mounting Plate to Wall A2. Prepare Top Cabinet A3. Adapting Microwave Blower for Outside Top Exhaust A4. Check Damper Operation A5. Mount Microwave Oven A6. Adjust Exhaust Adaptor A7. Connect Ductwork Make sure the screws for the blower motor and blower plate are securely tightened when they are reinstalled. -
Page 15: Preparation Of Top Cabinet
English A2. USE TOP CABINET TEMPLATE FOR PREPARATION OF TOP CABINET You need to drill holes for the top support screws, a hole large enough for the power cord to fit through, and a cutout large enough for the exhaust adaptor. CABINET TEMPLATE. -
Page 16: Mount The Microwave Oven
English English A3. ADAPTING MICROWAVE BLOWER FOR OUTSIDE TOP EXHAUST AFTER: Fan Blade Openings Facing Top Place the blower unit back into the opening. Secure blower unit to microwave with the screw removed in Step 1. Make Back of sure the screw is tight. Microwave Replace blower plate with the screw Back of... -
Page 17: Adjust The Exhaust Adaptor
English English A5. MOUNT THE MICROWAVE OVEN Lift microwave, tilt it forward, and hook slots NOTE: When mounting the microwave oven, thread power at back bottom edge onto four lower tabs of cord through hole in bottom of top cabinet. Keep it tight mounting plate. -
Page 18: Outside Back Exhaust
English English B. OUTSIDE BACK EXHAUST (HORIZONTAL DUCT) INSTALLATION OVERVIEW B1. Prepare Rear Wall B2. Remove Blower Plate B3. Attach Mounting Plate to Wall B4. Prepare Top Cabinet B5. Adjust Blower B6. Mount the Microwave Oven Make sure the screws for the blower motor and blower plate are securely tightened when they are reinstalled. -
Page 19: Preparation Of Top Cabinet
English English B3. ATTACH THE MOUNTING PLATE TO THE WALL Attach the plate to the wall using toggle bolts. At least one wood screw must be used to attach the plate to a wall stud. Remove the toggle wings from the bolts. Insert the bolts into the mounting plate through the holes designated to go into drywall and reattach the toggle wings to... -
Page 20: Adapting Microwave Blower For Outside Back Exhaust
English B5. ADAPTING MICROWAVE BLOWER FOR OUTSIDE BACK EXHAUST Remove and save screw that holds Blower Motor Back of blower motor to microwave. Microwave Blower Motor Screw Carefully pull out the blower unit. The Before: Fan Blade Openings Facing wires will extend far enough to Forward End B allow you to adjust the blower unit. -
Page 21: Mount The Microwave Oven
English 10. Attach the exhaust adaptor to the Adaptor rear of the oven by sliding it into the Back of guides at the top center of the back of Microwave the oven. Push in securely until it is in the lower locking tabs. Take care to Guide assure that the damper hinge is Locking Tabs... - Page 22 English 5. Insert 2 self-aligning screws through outer top cabinet holes. Turn two full turns on each screw. 6. Tighten center screw completely. 7. Tighten the outer two screws to the top of the microwave oven. (While tightening screws, hold the microwave oven in place against the wall and the top cabinet.) 8.
-
Page 23: Recirculating
English C. RECIRCULATING (NON-VENTED DUCTLESS) INSTALLATION OVERVIEW C1. Attach Mounting Plate to Wall C2. Prepare Top Cabinet C3. Check Blower Plate C4. Mount the Microwave Oven C5. Install or change Charcoal Filter Make sure the screws for the blower motor and blower plate are securely tightened when they are reinstalled. -
Page 24: Mount The Microwave Oven
English C2. USE TOP CABINET TEMPLATE FOR PREPARATION OF TOP CABINET You need to drill holes for the top support screws, a hole large enough for the power cord to fit through. Read the instructions on the TOP CABINET TEMPLATE. Tape it underneath the top cabinet. -
Page 25: Installing Or Change The Charcoal Filter
English 3. Insert a self-aligning screw through top Cabinet Front Cabinet Bottom Shelf center cabinet hole. Temporarily secure Filler Block the oven by turning the screw at least two full turns after the threads have engaged. Equivalent to Depth (It will be completely tightened later.) Be of Cabinet Recess sure to keep power cord tight. - Page 26 Français English TABLE DES MATIERES PAGE MESURES DE SÉCURITÉ................2 Exigences Électriques ................3 Avant D’utiliser Votre Four À Micro-Ondes ........... 4 Évacuation De La Hotte................5-6 Dommages — Expédition/Installation ............7 INSTRUCTIONS D’INSTALLATION DU FOUR À MICRO-ONDES À HOTTE INTÉGRÉE CE DONT J’AI BESOIN POUR L’INSTALLATION DU FOUR À...
-
Page 27: Mesures De Sécurité
12. Enlever la porte ou le dessus du compartiment du lave-vaisselle lorsque vous vous débarrassez d’un vieux lave-vaisselle. Merci d’utiliser un produit Haier. Ce manuel facile d’utilisation vous Numéro de modèle guidera pour obtenir une performance maximale de votre lave-vaisselle. -
Page 28: Exigences Électriques
Français EXIGENCES ÉLECTRIQUES Les caractéristiques nominales de ce produit sont : 120 V CA, 60 Hz et 1550 W. Ce produit doit être branché à un circuit d’alimentation de tension et de fréquence appropriées. La grosseur des fils doit être conforme aux exigences du Code national d’électricité... -
Page 29: Avant D'utiliser Votre Fourà Micro-Ondes
Français AVANT D’UTILISER VOTRE FOUR À MICRO-ONDES IMPORTANT : LIRE ET CONSERVER CES INSTRUCTIONS Ce faisant : Appeler votre fournisseur si vous avez des questions ou besoin de réparations. Lors de l’appel, vous aurez en main les numéros de modèle et de série. Ceci est le symbole d’alerte de sécurité. -
Page 30: Évacuation De La Hotte
Français ÉVACUATION DE LA HOTTE REMARQUE : Ne lisez les deux pages suivantes que si vous décidez d’évacuer l’air du ventilateur à l’extérieur. Si vous décidez de recycler l’air dans la pièce, rendez-vous à la page 7. ÉVACUATION À L’EXTÉRIEUR PAR LE DESSUS (EXEMPLE SEULEMENT) Le tableau suivant décrit un exemple d’installation de conduit. - Page 31 Français Si vous devez installer des conduits, notez que la longueur totale du conduit rectangulaire de 3-1/4 po x 10 po (8,2 x 25,4 cm) ou du conduit rond de 6 po (15,2 cm) de diamètre L’évacuation vers l’extérieur requiert un CONDUIT D’ÉVACUATION POUR HOTTE. Lisez attentivement ce qui suit.
-
Page 32: Dommages - Expédition/Installation
Français DOMMAGES — EXPÉDITION/INSTALLATION vous l’avez acheté pour réparation ou remplacement. reste à la charge du client. différente du client), la réparation ou le remplacement doivent faire l’objet d’une entente entre le client et l’installateur. PIÈCES COMPRISES SACHET DE QUINCAILLERIE ADDITIONAL PARTS PIÈCE QUANTITÉ... -
Page 33: Outils Nécessaires
Français OUTILS NÉCESSAIRES Règle ou ruban à mesurer et règle droite Crayon Équerre de menuisier Tournevis Phillips n (facultative) Cisailles de ferblantier (pour couper le registre, Ciseaux (pour couper le si nécessaire) Perceuse électrique avec forets gabarit, si nécessaire) de 3/16, 1/2 et 5/8 po Entretoises d’assemblage ou pièces de bois de récupération, si besoin est, pour l’espacement avec... -
Page 34: Ce Qu'il Faut Faire Avant L'installation Du Four À Micro-Ondes
Français 1. INSTALLATION DE LA PLAQUE DE MONTAGE A. ENLÈVEMENT DU FOUR À MICRO-ONDES DE LA BOÎTE/ ENLÈVEMENT DE LA PLAQUE DE MONTAGE 1. Retirez les directives d’installation, les filtres, Boîte le plateau en verre et le sachet de quincaillerie. N’enlevez pas la protection en polystyrène du devant du four. -
Page 35: Établissement De L'emplacement De La Plaque Murale Sous Votre Armoire
Français C. ÉTABLISSEMENT DE L’EMPLACEMENT DE LA PLAQUE MURALE SOUS VOTRE ARMOIRE Languettes de la plaque de montage Languettes de la plaque de touchant le dessous de l’armoire montage touchant le rebord arrière À 30 po (76,2 cm) de la surface de cuisson Au moins 30 po (76,2 cm), moins de 36 po (91,4 cm) -
Page 36: Alignement De La Plaque Murale
Français Trou B Trou A Tracez une ligne verticale sur le mur à partir du centre de Encoches de la l’armoire supérieure ligne centrale Trou D Trou C Zone E ATTENTION: Portez des gants pour éviter de vous blesser sur les bords coupants. D. -
Page 37: Types D'installation
Français 2. TYPES D’INSTALLATION (Choisissez A, B ou C) Ce four à micro-ondes est conçu pour s’adapter aux trois types d’évacuation suivants: Ce four à micro-ondes est équipé à l’usine en vue d’une Recyclage. Choisissez le type d’évacuation approprié à votre installation et rendez-vous à cette section. A. -
Page 38: Évacuation À L'extérieur Par Le Dessus
Français A. ÉVACUATION À L’EXTÉRIEUR PAR LE DESSUS CONDUIT VERTICAL VUE D’ENSEMBLE DE L’INSTALLATION A1. Fixation de la plaque de montage au mur A2. Préparation de l’armoire supérieure A3. Ajustement du ventilateur A4. Vérification du fonctionnement du registre A5. Installation du four à micro-ondes A6. -
Page 39: Pour La Préparation De L'armoire Supérieure
Français A2. UTILISATION DU GABARIT POUR ARMOIRE SUPÉRIEURE POUR LA PRÉPARATION DE L’ARMOIRE SUPÉRIEURE Vous devez percer des trous pour les vis de soutien supérieures, ainsi qu’un trou suffisamment grand pour y faire passer le cordon d’alimentation et une ouverture assez grande pour l’adaptateur d’évacuation. -
Page 40: Vérification Du Fonctionnement Du Registre
Français A3. ADAPTATION DU VENTILATEUR DU FOUR À MICRO-ONDES POUR L’ÉVACUATION À L’EXTÉRIEUR PAR LE DESSUS APRÈS : Ouvertures des pales du ventilateur orientées vers le haut Replacez l’ensemble du ventilateur dans l’ouverture. Fixez l’ensemble de ventilateur au four à micro-ondes en utilisant la vis de l’étape 1. -
Page 41: Ajustement De L'adaptateur D'évacuation
Français A5. INSTALLATION DU FOUR À MICRO-ONDES Soulevez le four, penchez-le vers l’avant, et REMARQUE : Lors de l’installation du four à microondes, faites passer le accrochez les fentes situées sur le bord cordon d’alimentation à travers le trou situé dans le fond de l’armoire inférieur à... -
Page 42: Connexion Au Conduit
Français Conduit du domicile A7. CONNEXION AU CONDUIT Tirez sur le conduit du domicile pour le raccorder à l’adaptateur d’évacuation. Scellez les joints du conduit à l’aide de ruban adhésif en toile. B. ÉVACUATION À L’EXTÉRIEUR PAR L’ARRIÈRE CONDUIT HORIZONTAL VUE D’ENSEMBLE DE L’INSTALLATION B1. -
Page 43: Fixation De La Plaque De Montage Au Mur
Français B3. FIXATION DE LA PLAQUE DE MONTAGE AU MUR Fixez la plaque au mur à l’aide des boulons à ailettes. Vous devez utiliser au moins une vis à bois pour fixer la plaque à un montant. Enlevez les écrous à ailettes des boulons. Insérez les boulons dans la plaque de montage à... -
Page 44: Pour L'évacuation À L'extérieur Par L'arrière
Français B5. ADAPTATION DU VENTILATEUR DU FOUR À MICRO-ONDES POUR L’ÉVACUATION À L’EXTÉRIEUR PAR L’ARRIÈRE Enlevez et conservez la vis qui retient Moteur du ventilateur Arrière du four le moteur du ventilateur au four à à micro-ondes micro-ondes. Vis du moteur du ventilateur Enlevez délicatement l’ensemble du AVANT : Ouvertures des... -
Page 45: Installation Du Four À Micro-Ondes
Français 8. Fixez l’ensemble de ventilateur au four Plaque du ventilateur Arrière du four à micro-ondes en utilisant la vis à micro-ondes d’origine. Vis du moteur du ventilateur 9. Replacez la plaque du ventilateur au même endroit qu’avant avec la vis. Assurez-vous que la vis est bien serrée. - Page 46 Français B6. INSTALLATION DU FOUR À MICRO-ONDES Soulevez le four, penchez-le vers l’avant, et REMARQUE : Lors de l’installation du four à microondes, faites passer le accrochez les fentes situées sur le bord cordon d’alimentation à travers le trou situé dans le fond de l’armoire inférieur à...
-
Page 47: Recyclage
Français C. RECYCLAGE D’AIR (ÉVACUATION SANS CONDUIT) VUE D’ENSEMBLE DE L’INSTALLATION C1. Fixation de la plaque de montage au mur C2. Préparation de l’armoire supérieure C3. Vérification de l’plaque du ventilateur C4. Installation du four à micro-ondes C5. Installation ou changemeut du filtre à... -
Page 48: Pour La Préparation De L'armoire Supérieure
Français C2. UTILISATION DU GABARIT POUR ARMOIRE SUPÉRIEURE POUR LA PRÉPARATION DE L’ARMOIRE SUPÉRIEURE Vous devez percer des trous pour les vis de soutien supérieures, ainsi qu’un trou suffisamment grand pour y faire passer le cordon d’alimentation. Lisez les instructions sur le GABARIT POUR ARMOIRE SUPÉRIEURE. - Page 49 Français Soulevez le four, penchez-le vers l’avant, et REMARQUE : Lors de l’installation du four à microondes, faites passer le accrochez les fentes situées sur le bord cordon d’alimentation à travers le trou inférieur à l’arrière du four sur les quatre situé...
-
Page 50: Installation Ou Changemeut Du Filtre À Charbon
Français C5. INSTALLATION OU CHANGEMEUT DU FILTRE À CHARBON Le filtre à charbon est installé en usine sur les modèles à recyclage d’air. Suivez ces étapes pour remplacer un filtre ou pour installer un filtre après avoir transformé un modèle avec conduit en un modèle à recyclage d’air. Enlevez les vis sur le dessus de la grille le Filtre à... - Page 51 Español CONTENIDOS PAGE PRECAUCIONES DE SEGURIDAD ............. 2 Requisitos eléctricos ................3 Antes de utilizar su horno microondas ............4 Campana de salida de emanaciones ............5-6 Daños durante el envío o la instalación ............. 7 INSTRUCCIONES DE INSTALACIÓN DEL HORNO MICROONDAS SOBRE LA COCINA CON QUÉ...
-
Page 52: Precauciones De Seguridad
No corte, deforme ni quite ninguna de las puntas del cable eléctrico en ninguna circunstancia. No utilice cable de prolongación. Gracias por usar nuestro producto Número de modelo Haier. Este manual fácil de usar le guiará para obtener el mejor Número de serie rendimiento posible de su horno microondas Haier. -
Page 53: Requisitos Eléctricos
Español REQUISITOS ELÉCTRICOS La clasificación del producto es 120 voltios de CA, 60 Hertz y 1550 vatios. Este producto debe conectarse en un circuito de suministro con el voltaje y la frecuencia correctos. El tamaño del cable debe cumplir los requerimientos del Código Eléctrico nacional o el código local que prevalezca para esta clasificación de kilovatios. -
Page 54: Antes De Utilizar Su Horno Microondas
Español ANTES DE UTILIZAR SU HORNO MICROONDA IMPORTANTE: LEA ESTAS INSTRUCCIONES Y CONSÉRVELAS De esta manera: Llame a su vendedor cuando tenga preguntas o necesite reparaciones. Cuando llame, deberá tener los números de modelo y de serie del horno microondas. Éste es el símbolo de alerta de seguridad. -
Page 55: Campana De Salida De Emanaciones
Español CAMPANA DE SALIDA DE EMANACIONES NOTA: Lea estas páginas a continuación únicamente si planifica realizar la salida de emanaciones hacia el exterior. Si tiene pensado recircular el aire nuevamente en la habitación, siga en la página 7. SALIDA SUPERIOR DE EMANACIONES HACIA EL EXTERIOR (SOLO EJEMPLO) El siguiente cuadro describe un ejemplo de una instalación posible de conductos. - Page 56 Español NOTA: Si necesita instalar conductos, tenga en cuenta que el largo total del conducto rectangular de 31⁄4” x 10” (8,2 x 25,4 cm) o circular de 6” (15,2 cm) de diámetro no debe superar los 120 pies equivalentes (36,5 m). Para la ventilación exterior es necesario un CONDUCTO PARA LA CAMPANA DE SALIDA DE EMANACIONES.
-
Page 57: Daños Durante El Envío O La Instalación
Español DAÑOS DURANTE EL ENVÍO O LA INSTALACIÓN Si la unidad resulta dañada durante el envío, devuélvala a la tienda en la que la compró para que le realicen reparaciones o la reemplacen. Si la unidad fue dañada por el cliente, las reparaciones o el reemplazo son responsabilidad del cliente. -
Page 58: Espacio De Montaje
Español HERRAMIENTAS Y MATERIALES NECESARIOS Regla o cinta para medir y regla con canto recto Lápiz Escuadra de # 1 destornillador Phillips carpintero (opcional) Tijeras para cortar hojalata Tijeras (para cortar el regulador (para cortar las plantillas, Taladro eléctrico con brocas de Bloques de relleno o piezas de tiro, si es necesario) si es necesario) -
Page 59: Ubicación De La Placa De Montaje
Español 1. UBICACIÓN DE LA PLACA DE MONTAJE A. CÓMO QUITAR EL HORNO MICROONDAS DE LA CAJA/ CÓMO QUITAR LA PLACA DE MONTAJE 1. Retire las instrucciones de instalación, los Caja filtros, la bandeja de vidrio y la bolsa pequeña con piezas complementarias. No quite la espuma de poliestireno que protege el frente del horno. - Page 60 Español C. CÓMO DETERMINAR LA UBICACIÓN DE LA PLACA DE LA PARED DEBAJO DE SU GABINETE. Las lengüetas de la placa de Las lengüetas de la placa de mon montaje tocan la parte inferior tocan el marco posterior del gabinete 30"...
-
Page 61: Alineación De La Placa Para La Pared
Español Agujero A Agujero B Trace una línea vertical en la pared desde el Muescas centro del gabinete de la línea central superior Agujero D Agujero C Área E PRECAUCIÓN: Use guantes para evitar cortarse los dedos con los bordes filosos. D. -
Page 62: Tipos De Instalación
Español 2. TIPOS DE INSTALACIÓN (ELIJA A, B O C) Este horno microondas fue diseñado para que se adapte a los siguientes tres tipos de ventilación. Este microondas se embaló armado para la recirculación. Seleccione el tipo de ventilación que desea para su instalación y pase a la sección correspondiente. A. -
Page 63: Salida Superior De Emanaciones Hacia El Exterior
Español A. SALIDA SUPERIOR DE EMANACIONES HACIA EL EXTERIOR (CONDUCTO VERTICAL) DESCRIPCIÓN GENERAL DE LA INSTALACIÓN A1. Fije la placa de montaje a la pared A2. Prepare el gabinete superior A3. Adapte el ventilador del microondas para la salida superior de emanaciones hacia el exterior. - Page 64 Español A2. USE LA PLANTILLA DEL GABINETE SUPERIOR PARA LA PREPARACIÓN DEL GABINETE SUPERIOR Debe hacer agujeros para los tornillos de soporte superior, un agujero lo suficientemente grande para que pase el cable de energía y un corte lo suficientemente grande para el adaptador de la salida de emanaciones.
- Page 65 Español A3. CÓMO ADAPTAR EL VENTILADOR DEL MICROONDAS PARA LA SALIDA SUPERIOR DE EMANACIONES HACIA EL EXTERIOR DESPUÉS: Aberturas de la paleta del ventilador que miran hacia arriba Coloque la unidad del ventilador de nuevo en la abertura. Asegure la unidad del ventilador al microondas con el tornillo que quitó...
- Page 66 Español A5. MONTAJE DEL HORNO MICROONDAS Levante el microondas, inclínelo hacia delante NOTE: When mounting the microwave oven, thread power y enganche las ranuras que se encuentran en cord through hole in bottom el borde inferior trasero en las cuatro of top cabinet.
-
Page 67: Salida Trasera De Emanaciones Hacia El Exterior
Español A7. CONEXIÓN DE LOS CONDUCTOS House Duct Extienda el conducto del hogar hacia abajo para conectarlo al adaptador de la salida de emanaciones. Selle las juntas del conducto de salida de emanaciones con cinta aislante. B. SALIDA TRASERA DE EMANACIONES HACIA EL EXTERIOR (CONDUCTO HORIZONTAL) DESCRIPCIÓN GENERAL DE LA INSTALACIÓN... -
Page 68: Preparación Del Gabinete Superior
Español B3. FIJE LA PLACA DE MONTAJE A LA PARED Fije la placa a la pared con los pernos acodados. Debe utilizarse al menos un tornillo de madera para fijar la placa a un montante de la pared. Retire las aletas de los pernos. Introduzca los pernos en la placa de montaje a través de los agujeros designados para que vayan en la... - Page 69 Español B5. CÓMO ADAPTAR EL VENTILADOR DEL MICROONDAS PARA LA SALIDA TRASERA DE EMANACIONES HACIA EL EXTERIOR Motor del ventilador Retire y guarde el tornillo que sostiene Parte trasera del microondas el motor del ventilador con el microondas. Tornillo del motor il d Con cuidado, jale de la unidad del Antes: Aberturas de la...
- Page 70 Español Asegure la unidad del ventilador al Placa del ventilador microondas con el tornillo original. Parte trasera del Microondas Vuelva a colocar la placa del ventilador en la misma posición que antes con Tornillo del motor del ventilador el tornillo. Asegúrese de que el tornillo esté...
- Page 71 Español 4. Fije el horno microondas al gabinete superior. Frente del gabinete Estante inferior del gabinete Bloque de relleno Equivalente a la profundidad del entrante del gabinete Tornillo auto alineable Parte superior del horno microondas 5. Introduzca dos tornillos auto alineables a través de los agujeros exteriores del gabinete superior.
-
Page 72: Recirculación
Español C. CON RECIRCULACIÓN (SIN VENTILACIÓN, SIN CONDUCTO) DESCRIPCIÓN GENERAL DE LA INSTALACIÓN C1. Fije la placa de montaje a la pared C2. Prepare el gabinete superior C3. Controle la placa del ventilador C4. Acomode el horno microondas C5. Instale o cambie el filtro de carbón Asegúrese de que los tornillos del motor del ventilador y de la placa del ventilador estén firmemente asegurados cuando los reinstale. -
Page 73: Preparación Del Gabinete Superior
Español C2. USE LA PLANTILLA DEL GABINETE SUPERIOR PARA LA PREPARACIÓN DEL GABINETE SUPERIOR Debe realizar los agujeros para los tornillos de soporte superior, un agujero lo suficientemente grande para que pase el cable de energía. Lea las instrucciones de la PLANTILLA PARA EL GABINETE SUPERIOR. - Page 74 Español NOTA: Cuando acomode el horno Levante el microondas, inclínelo hacia delante microondas, pase el cable de energía y enganche las ranuras que se encuentran en por el agujero en la parte inferior del gabinete superior. Manténgalo firme el borde inferior trasero en las cuatro durante los pasos 1-3.
- Page 75 Español C5. INSTALACIÓN O CAMBIO DEL FILTRO DE CARBÓN El filtro de carbón fue instalado en fábrica. Siga estos pasos para reemplazar el filtro o para instalar un filtro después de convertir un modelo con ventilación a funcionamiento con recirculación. Filtro de carbón Retire los tornillos de la parte superior de la...
- Page 76 UNE PREUVE D’ACHAT DATEE EST REQUISE POUR BENEFICIER DE LA GARANTIE. Made in China Fabriqué en Chine Hecho en China Haier America New York, NY 10018 Printed in China Issued June 2010 Microwave Oven Installation © 2010 Haier America Trading, LLC. All Rights Reserved. 101019...