Table of Contents
Advertisement
Available languages
Available languages
Advertisement
Chapters
Table of Contents

Related Manuals for Gaggia GD


Summary of Contents for Gaggia GD
- Page 1 GE - GD...
- Page 3 Declara bajo nuestra responsabilidad que el producto: Máquina para café de uso profesional Modelli – Modèles GE – GD 2 – 3 – 4 gr Modelle – Models – Modelo al quale è riferita questa Dichiarazione , secondo quanto prescritto dalle direttive specifiche: à...
- Page 4 IMPORTANTE Egregio Cliente, La informiamo tutte le nostre macchine prodotte sono commercializzate in conformità alla Direttiva 97/23/CE, recepita con Decreto Legislativo n. 93 del 25 febbraio 2000. Le disposizioni del Decreto sopra menzionato si applicano alla progettazione, alla fabbricazione, alla valutazione di conformità della attrezzature a pressione degli insiemi sottoposti ad una pressione massima ammissibile PS superiore a 0,5 bar.
- Page 5 Gentile cliente, la ringraziamo per la fiducia accordataci con l’acquisto di un nostro prodotto. Se Lei avrà la costanza di seguire attentamente le indicazioni contenute nel presente manuale, siamo certi che potrà apprezzare nel tempo e con soddisfa- zione la qualità della nostra macchina. La preghiamo di leggere attentamente le indicazioni contenute nel manuale che riguardano l’uso corretto del nostro prodotto, in conformità...
- Page 6 Prima della messa in funzione, leggere attentamente il manuale di istruzioni Carefully read the following instruction booklet before starting up the machine. Lesen Sie vor der Inbetriebnahme aufmerksam die Bedienungsanleitung. Avant la mise en service, lire attentivement le manuel d’instructions. Antes de la puesta en funcionamiento, hay que leer atentamente el manual de instrucciones Attenzione! Togliere l’alimentazione elettrica prima di asportare le protezioni Carefully read the following instruction booklet before starting up the machine.
-
Page 7: Table Of Contents
INDICE ITALIANO 7 - 30 UTILIZZO E CONSERVAZIONE DEL ENGLISH 31 - 54 MANUALE D’ISTRUZIONI......8 DEUTSCH 55 - 78 USO PREVISTO DELLA MACCHINA..8 FRANÇAIS 79 - 102 AVVERTENZE DI SICUREZZA....9 ESPAÑOL 103 - 126 CARATTERISTICHE TECNICHE....10 INSTALLAZIONE......... -
Page 8: Utilizzo E Conservazione Del Manuale D'istruzioni
2 – USO PREVISTO DELLA MACCHINA 1 – UTILIZZO E CONSERVAZIONE DEL MANUALE D’ISTRUZIONI La macchina deve essere fatta funzionare da un solo operatore. Il presente manuale di istruzioni è indirizzato all’utente della mac- L’operatore addetto deve aver letto e ben compreso le istruzioni china, al proprietario al tecnico installatore e deve essere sempre contenute in questo fascicolo in modo da fare funzionare corretta- a disposizione per qualsiasi eventuale consultazione. -
Page 9: Avvertenze Di Sicurezza
3 – AVVERTENZE DI SICUREZZA L’utilizzatore non deve toccare la macchina a piedi umidi o bagna- ti, nonché utilizzarla a piedi nudi. Nonostante l’utilizzo di una mes- E’ consentito l’utilizzo solo a persone adulte che abbiano attenta- sa a terra della macchina, si consiglia l’uso di una pedana di legno mente letto e ben compreso questo manuale ed ogni indicazione e di un impianto salvavita conforme alle disposizioni delle leggi di sicurezza in esso contenuta. -
Page 10: Caratteristiche Tecniche
4 – CARATTERISTICHE TECNICHE... -
Page 11: Installazione
5 – INSTALLAZIONE A - RETE IDRICA B - CONDOTTO DI SCARICO C - CONDUTTURA GAS D - INTERRUTTORE DI PROTEZIONE E - DEPURATORE F - RUBINETTO ALIMENTAZIONE CALDAIA G - SCODELLINO DI SCARICO H - VALVOLA GAS I - CAVO DI ALIMENTAZIONE 5.2 ALLACCIAMENTO ELETTRICO Attenzione! Prima di procedere all’allacciamento elettrico, Prima di procedere all’installazione, è... -
Page 12: Messa In Servizio
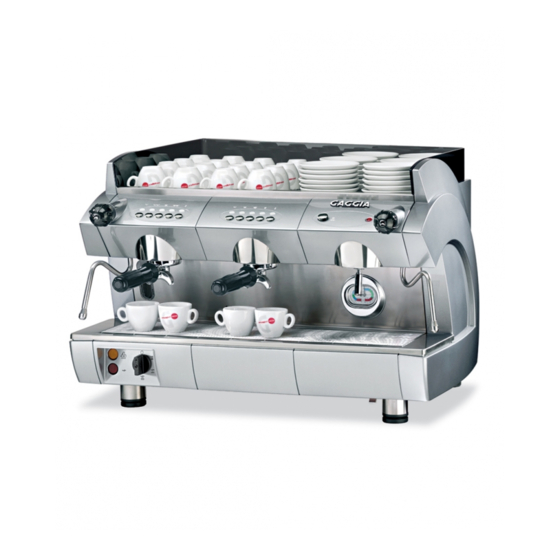
6 - MESSA IN SERVIZIO Rubinetto Pulsante prelievo acqua calda Interruttore prelievo acqua calda Spia macchina in tensione Valvola intercettazione gas Accensione piezoelettrica Interruttore generale Rubinetto vaporizzatore destro Rubinetto vaporizzatore sinistro Interruttore scaldatazze Manometro pressione caldaia/pompa Cappuccinatore optional Indicatore di livello caldaia Tubo vaporizzatore sinistro Tubo vaporizzatore destro Tubo prelievo acqua calda... -
Page 13: Regolazione Del Pressostato
Inserire nel gruppo il portafiltro riempito di caffè regolarmente ma- cinato, dosato e pressato.Azionare l’interruttore gruppo (GE) o la 20 mm tastiera comando gruppo (GD) (16) e leggere la pressione sul manometro pompa (10). N.B. La giusta pressione è di 8/9 atm. -
Page 14: Sostituzione Del Termostato Per Diminuire La Temperatura Del Gruppo Erogazione Caffe
SOSTITUZIONE DEL TERMOSTATO PER DIMINUIRE LA TEMPERATURA DEL GRUPPO EROGAZIONE CAFFE’ (OPTIONAL) Rimuovere la bacinella scaldatazze (1). Scollegare il termostato del gruppo (2) (Cod.DM1561 - T 103°C) e sostituirlo con il termo- stato di temperatura più bassa (Cod.DM 1736 - T 98°C), inserito nel corredo della macchina. -
Page 15: Funzionamento / Uso E
Simbologia della tastiera: 7 - FUNZIONAMENTO / USO E PROGRAMAZIONE Programmazione / Continuo Singolo caffè espresso INTRODUZIONE Attraverso il software di programmazione Cappuccino Doppio caffè espresso si ha la possibilità di effettuare il controllo delle seguenti operazioni: - gestione di 2 – 3 - 4 gruppi caffè Latte Singolo caffè... - Page 16 Entro 30 secondi (time out di programma- zione), premere il tasto corrispondente alla dose che si vuole programmare (ad esem- pio il tasto T1). Il LED relativo al tasto T5 rimane acceso in tutte le tastiere e inoltre si accende anche il LED (su tutte le tastiere) relativo alla dose che si sta programmando.
-
Page 17: Programmazione Dosi Tea (Acqua Calda)
7.2 PROGRAMMAZIONE DOSI DEL TEA (ACQUA CALDA) E’ possibile modificare le quantità temporizzate relative alle dosi tea, seguen- do la sequenza descritta: Premere il tasto T5 del gruppo caffè 1 e mantenerlo premuto per un tempo maggio- re di 5 secondi e verificare l’accensione di tutti i led delle tastiere. -
Page 18: Erogazione Caffe
7.3 EROGAZIONE CAFFE’ Premendo il tasto corrispondente, T1-T2- T3 O T4, vengono attivate l’elettrovalvole di erogazione corrispondenti per il tempo necessario al raggiungimento della quanti- tà di prodotto (controllo volumetrico) pro- grammata precedentemente. Il LED relativo al tasto della dose prescelta rimane acceso per tutta la durata dell’erogazione caffè. -
Page 19: Funzioni Speciali
PRE-INFUSIONE 7.5 FUNZIONI SPECIALI TEA (ACQUA CALDA) MISCELATO Il nostro software consente di configurare E’ possibile attivare o disattivare alcune funzioni speciali PRE_INFUSIONE, TEA la dosatura in modo tale che l’erogazione Se questa funzione è attiva si ha una relativa alle dosi CAFFE’ a controllo MISCELATO e ALLARME LAVAGGIO che miscelazione dell’acqua erogata con l’ac- volumetrico... -
Page 20: Erogazione Tea
ATTIVAZIONE / DISATTIVAZIONE Dare avvio alla macchina agendo sull’in- terruttore generale mantenendo premu- to il tasto T5 del gruppo 1 ed attendere l’accensione lampeggiante del Led rela- tivo al tastoT5. Agire sui tasti T1 – T2 e T3 ripettivamente per attivare o disattivare le funzioni di PRE_INFUSIONE, TEA MISCELATO e ALLARME LAVAGGIO. -
Page 21: Funziona Cappuccino E Latte
7.7 FUNZIONE CAPPUCCINO E LATTE E’ possibile impostare il funzionamento CAPPUCCINO e LATTE sui tasti T6 e T7 sul gruppo 2 , 3 o 4 . ATTIVAZIONE/DISATTIVAZIONE Per impostare la funzione per esempio sulla tastiera del gruppo 2, tenere premuto in ac- censione il tato T5, il led corrispondente lampeggia ed attendere fino a che il display visualizzeràla scritta “SERVICE: OFF”. -
Page 22: Programmazione Ed Erogazione Cappuccino
7.8 PROGRAMMAZIONE ED EROGAZIONE CAPPUCCINO Qualora la funzione sia attiva, il tasto T6 determina l’attivazione delle elettrovalvole e della pompa per il valore impostato in pro- grammazione. Per la programmazione della funzione Cap- puccino, procedere nel medesimo modo a quanto fatto per il caffè con la differenza che al termine dell’erogazione volumetrica di caffè, INIZIA SEPARATAMENTE l’erogazione a tempo del latte. -
Page 23: Ulteriore Funzioni Per
7.10 ULTERIORI FUNZIONI PER MACCHINA PROVVISTA DI DISPLAY SELEZIONE LINGUA Per selezionare la lingua di consultazione, al momento dell’accensione, premere e mantenere premuto il tasto T4. Premere poi più volte il tasto T1 fino a sele- zionare la lingua desiderata; premere nuo- vamente il tasto T4 per confermare la sele- zione. - Page 24 LETTURA CONSUMAZIONI E’ possibile seguendo le indicazioni di se- guito riportate, leggere le consumazioni relative alle dosi di caffè effettuate. Premere il tasto T5 (solo del 1° gruppo) e mantenerlo premuto per un tempo maggio- re di 10 secondi. Sul display vengono visualizzate le erogazioni effettuate;...
- Page 25 Dopo aver visualizzato i dati anche dell’ul- timo gruppo caffè premendo nuovamente il tasto T1 alla verifica delle erogazioni ef- fettuate di Tea. Se si vuole azzerare i totali delle erogazioni singole (ma non i dati “Cumulative total”) effettuate, premere contemporaneamente per 3 secondi i tasti T3 e T4 del gruppo 1 nello stato in cui viene visualizzato sul display “CUMULATIVE TOTAL”...
-
Page 26: Segnalazione Di Allarmi
7.11 SEGNALAZIONE DI ALLARME TIME OUT LIVELLO (RIEMPI- MENTO) CALDAIA Questo allarme viene segnalato qualora il livello di acqua in caldaia diventa troppo basso e la sonda di livello resta scoperta. In questo stato i led delle tastiere lampeggiano e sul display compare il mes- saggio di allarme. -
Page 27: Rigenerazione Del Depuratore
8 - RIGENERAZIONE DEPURATORE ENTRATA ACQUA USCITA ACQUA LEVETTA RUBINETTO ENTRATA LEVETTA RUBINETTO USCITA TUBETTO DEPRESSIONATORE TUBO RIGENERAZIONE POMOLO COPERCHIO IMPORTANTE: Rigenerare il depuratore alle scadenze pre- viste sotto indicate: depuratore è quello indicato sulle figure. Se non corrispon- - Mettere il recipiente vuoto dalla capienza di circa 2 litri sotto il de, procedere come indicato nelle istruzioni allegate al tubetto E depuratore stesso. -
Page 28: Regolazione Gas
9 - REGOLAZIONE GAS Valvola intercettazione gas Accensione piezoelettrica Regolatore gas Iniettore gas Ghiera Vite di regolazione minimo Vite di regolazione pressione La macchina è predisposta per l’alimentazione con gas metano Attendere che la caldaia raggiunga la pressione di esercizio (G20), cioè... -
Page 29: Manutenzione E Consigli Utili
10 - MANUTENZIONE E CONSIGLI UTILI Per avere doccette (B) pulite e prive di depositi di polveri di caffè calda meglio ancora lasciarli in acqua inizialmente calda per tutta che compromettono la resa, si consiglia prima di iniziare il lavoro la notte, in modo da sciogliere i grassi di caffè. -
Page 30: Risoluzione Inconvenienti
11 – RISOLUZIONE INCONVENIENTI 12 - SMANTELLAMENTO DELLA MACCHINA Per lo smantellamento si consiglia di disassemblare la macchina dividendone le parti secondo la loro natura (plastica, metallo ecc.). Affidare poi a ditte specializzate nel settore le parti così suddivise. - Page 31 INDEX ITALIANO 7 - 30 ENGLISH 31 - 54 1 INSTRUCTIONS BOOKLET DEUTSCH 55 - 78 CONSERVATION AND USE ......32 FRANÇAIS 79 - 102 2 ENVISAGED MACHINE USE ....... 32 ESPAÑOL 103 - 126 3 SAFETY ADVICE ........... 33 4 TECHNICAL FEATURES ......
-
Page 32: Envisaged Machine Use
2 - ENVISAGED MACHINE USE 1 - INSTRUCTIONS BOOKLET CONSERVATION AND USE The machine must be operated by a single operator only. The present instructions booklet has been prepared for the machine The authorized operator must have firstly read and fully understood user, the owner and the installation technician and must be always all the instructions contained in the present booklet to ensure correct available for reference purposes. -
Page 33: Safety Advice
3 - SAFETY ADVICE Do not touch the coffee spouts and the hot water and steam nozzles The machine is to be used solely by adults who have carefully with your hands or any other parts of the body as the liquids or read and fully understood this manual and all the safety advice steam issuing from them are very hot and may cause burns. - Page 34 4 - TECHNICAL FEATURES...
-
Page 35: Electrical Connection
5 - INSTALLATION A. MAINS SUPPLY B. DISCHARGE DUCTS C. GAS DUCTS D. PROTECTION SWITCH E. PURIFIER F. BOILER SUPPLY TAP G. DRIP BOWL H. GAS VALVE I. POWER CABLE Before proceeding with installation check that: ELECTRICAL CONNECTION - there are no bumps, signs of knocks or deformities. Important ! Before proceeding with electrical connection 1 there are no damp patches or marks which could lead one to it is necessary to check to ensure that the voltage rating... -
Page 36: Start Up
6 - START UP Hot water outlet button Hot water outlet switch Machine on indicator Gas on/off valve Main switch Right vaporiser tap Left vaporiser tap Cup-warmer switch Boiler/pump pressure gauge Optional cappuccino maker Boiler level indicator Left vaporiser tap Right vaporiser tap Hot water outlet pipe Unit D control keyboard... -
Page 37: Pressure Switch Adjustment
6.2 PRESSURE SWITCH ADJUSTMENT Warning !! When the machine is new the filter-holder sump may not be The pressure switch shown in the figure acts to keep the aligned (perpendicular to the machine itself) as shown in boiler pressure constant by engaging or de-activating the electrical the figure at the side, however this does not effect the heating resistance. -
Page 38: Replacement Of The Thermostat To
REPLACEMENT OF THE THERMOSTAT TO REDUCE THE COFFEE DISPENSING GROUP TEMPERATURE (OPTIONAL). Remove cup heating bowl (1). Disconnect group thermostat (2) (Code DM1561 – T 103°C) and replace it with the lower tempera- ture thermostat (Code DM1736 – T 98°C), included in the machine equipment. -
Page 39: Coffee Measure
Keyboard symbols: FUNCTION / USE AND PROGRAMMING Programming/continuos Single espresso coffee INTRODUCTION Cappuccino Double espresso coffee The programming software permits the Milk Single long coffee checking of the following operations: - handling of 2-3-4 coffee units - simultaneous function of both coffee Tea (hot water) Double long coffee and tea units... - Page 40 Press the key corresponding to the measure to be programmed (key T1 for example) within 30 seconds (programming time-out). The led relative to T5 will remain on, on all keyboards and the led relative to the measure being programmed will also come on (on all the keyboards).
-
Page 41: Hot Water
TEA MEASURE PROGRAMMING (HOT WATER) It is possible to modify the timed tea measures according to the following sequence: Press key T5 of coffee unit 1 and keep pressed down for over 5 seconds and check that all the keyboard led indicators come Press the T8 tea key within 30 seconds (programming time-out). -
Page 42: Coffee Delivery
COFFEE DELIVERY On pressing the corresponding key T1-T2- T3 or T4, the corresponding delivery solenoid valves are activated for the time necessary to obtain the required amount of product as previously programmed (volumetric check). The LED relative to the selected measure remains on for the entire coffee delivery time. -
Page 43: Special Functions
SPECIAL FUNCTIONS PRE-INFUSION MIXED TEA (HOT WATER) software permits measure It is possible to engage or deactivate certain On the engagement of this function the configuration so that the relative delivery of special functions such as PRE- INFUSION, water delivered is mixed with cold water on the COFFEE measures through volumetric MIXED TEA and WASHING ALARM which entry in the boiler thereby ensuring constant... -
Page 44: Tea Delivery
ENGAGEMENT/DEACTIVATION Start the machine by pressing the main switch keeping key T5 of unit 1 pressed and wait for the led relative to key T5 to begin flashing. Press keys T1-T2 and T3 in order to engage or deactivate the PRE-INFUSION, MIXED TEA and WASHING ALARM functions. -
Page 45: Cappuccino And Milk
CAPPUCCINO AND MILK FUNCTION It is possible to set the CAPPUCCINO and MILK function on keys T6 and T7 on group 2,3, or 4. IMPORTANT : The function can be set on only one keyboard at a time, on unit 2, 3 or 4. ENGAGEMENT/ DEACTIVATION In order to set the function on the keyboard of unit 2, for example, keep key T5 pressed... -
Page 46: Milk Programming
CAPPUCCINO DELIVERY AND PROGRAMMING When engaged key T6 will determine the activation of the solenoid valve and pump according to the value set during programming. To programme the cappuccino function, proceed in the same way as for coffee with the only difference being that at the end of the volumetric delivery of the coffee, the timed milk delivery BEGINS SEPARATELY. - Page 47 7.10 FURTHER FUNCTIONS ON MACHINES EQUIPPED WITH DISPLAY LANGAUGE SELECTION In order to select the consultation language, on switching on, press key T4 and keep pressed. Press key T1 several times to select the desired language, press T4 again to confirm selection.
- Page 48 CONSUMPTION READING It is possible to read the consumptions that have been made following the instructions indicated below. Press key T5 (of 1 unit only) and keep pressed for over 10 seconds. The display will show the dispensing operations undertaken : press key T5 again to escape from this condition.
- Page 49 After visualization of the data of the last coffee unit also, on pressing key T1 it is possible to obtain a reading of the number of TEA dispensing operations made. To cancel the totals of the individual consumptions (but not the “total cumulati- ve”...
-
Page 50: Alarm Condition
7.11 ALARM CONDITION BOILER (FILLING) LEVEL TIME This alarm condition occurs whenever the water level is too low or the level probe remains uncovered. In such a case the keyboard leds flash and an alarm message appears on the display. The filling stage is automatically engaged and to cancel the alarm conditions switch the machine off and then on again. -
Page 51: Purifier Regeneration
8 - PURIFIER REGENERATION WATER INLET WATER OUTPUT INLET TAP LEVER OUTPUT TAP LEVER DEPRESSURIZER PIPE REGENERATION TUBE COVER KNOB IMPORTANT : Regenerate the purifier at the intervals listed below: - place the empty 2 litre container under pipe E. NB: These regeneration instructions are valid only providing the purifier is as that indicated in the figures. -
Page 52: Gas Adjustment
9 - GAS ADJUSTMENT GAS- ON-OFF VALVE PIEZOELECTRIC IGNITION GAS REGULATOR GAS INJECTOR RING NUT MINIMUM ADJUSTMENT SCREW PRESSURE ADJUSTMENT SCREW The machine is set up for being supplied with methane gas (G20), Wait for the boiler to reach an operating pressure of 1.1÷ 1.3 atm this means that the gas injector (O) and the gas regulator (N) are and for the flame to be reduced to a minimum. -
Page 53: Maintenance And Useful Advice
10 - MAINTENANCE AND USEFUL ADVICE It is a good idea to rinse the filters (C) and filter holders (D) every In order to ensure that the spouts (B) are kept clean and free of day in hot water, or even better, place them in hot water and allow any coffee deposits which may jeopardize yield, we advise that to soak for the whole night in order to dissolve any greasy coffee before starting work in the morning that you put filter holder (D) in... -
Page 54: Trouble Shooting
11 - TROUBLE SHOOTING 12 - MACHINE DISMANTLING To dismantle the machine we recommend that it is dismantled and the parts separated according to the type of materials involved (plastic, metal, etc). The parts separated in this way are then to be sent to the relative specialized disposal companies. - Page 55 LEGENDA COMPONENTI - COMPONENTS LIST - LEGENDE BAUTEILE LEGENDE DES COMPOSANTS- LEYENDA COMPONENTES...
- Page 56 GE-GD 2-3-4 GR.
- Page 57 GE 2 GR.
- Page 58 GE 3 GR.
- Page 59 GE 4 GR.
- Page 60 GD 2 GR.
- Page 61 GD 3 GR.
- Page 62 GD 4 GR.
- Page 63 COLLEGAMENTO ELETTRICO - ELECTRICAL CONNECTION - RACCORDEMENT ELECTRIQUE - STROMANCHLUSS - CONEXIÓN ELÉCTRICA Prima d’effettuare l’allacciamento della machina alla rete elettrica, verificare il tipo di collegamento indicato sulla targhetta posta sul cavo alimentazione. Normalmente le macchine sono predisposte per un collegamento a stella con neutro. Before connecting the machine to the power point, make sure that the rating corresponds with the one indicated on the rating-plate of the power cord.
- Page 64 Collegamento monofase. V 240 - 230 ~ Per modificare il collegamento da stella a monofase, occorre intervenire sul cavo alimenta- zione, sulla morsettiera alimentazione (A) e sulla morsettiera di derivazione (B) ), modificando le connessioni indicate nello schema qui a fianco. Single-Phase Connection To change the connection from a star connection to a single-phase connection, modify the...
- Page 65 (Nome e ragione sociale della ditta) (Indirizzo, città e CAP) comunica la messa in servizio della seguente macchina per caffè espresso: Gaggia s.p.a. (marca) (tipo) (N° fabbrica) In fede (firma del legale rappresentante) ONLY FOR ITALY...
- Page 68 S.p.A.