Table of Contents
Advertisement
Advertisement
Table of Contents

Related Manuals for Zotac ZBOX nano AD10


Summary of Contents for Zotac ZBOX nano AD10
- Page 2 ZOTAC. Products and corporate names mentioned in this manual may not be reg- istered trademarks or copyrights of their respective companies, and are used for identification purposes only.
-
Page 3: Table Of Contents
Installing a hard disk -------------------------------------------------------------------------- 14 Setting up the ZOTAC ZBOX nano ---------------------------------------------------------- 16 Positioning the ZOTAC ZBOX nano --------------------------------------------------------- 18 Mounting the ZOTAC ZBOX nano to a LCD monitor ---------------------------------- 18 IR receiver --------------------------------------------------------------------------------------- 19 Remote control (optional) -------------------------------------------------------------------- 20... -
Page 4: Product Specifications
ZOTAC ZBOX nano Product specifications Chipset • AMD M1 Product Dimensions • 127mm x 127mm x 45mm Onboard CPU • AMD E-350/D (Dual-core, 1.6 GHz) Onboard graphics • AMD Radeon HD 6310, DirectX11 • Support DP (2560x1600 resolution) & HDMI (1920x1200 resolution) output •... -
Page 5: Safety Information
ZOTAC ZBOX nano Safety information Your ZOTAC ZBOX is designed and tested to meet the latest standards of safety for infor- mation technology equipment. However, to ensure your safety, it is important that you read the following safety instructions. Setting up your system Read and follow all instructions in the documentation before you operate your system. -
Page 6: Welcome
Welcome Congratulations on your purchase of the ZOTAC ZBOX nano mini-PC. The following illustration displays the package contents of your new ZOTAC ZBOX nano. Please contact your retailer If any of the below items are damaged or missed. Package contents •... -
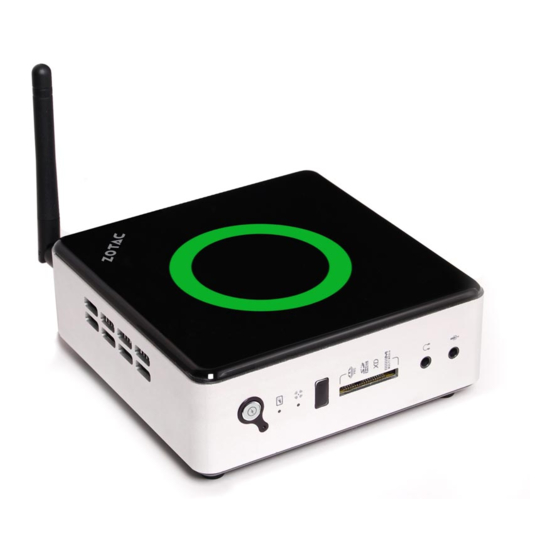
Page 7: Getting To Know Your Zotac Zbox Nano
ZOTAC ZBOX nano Getting to know your ZOTAC ZBOX nano Front view Refer to the diagram below to identify the components on this side of the system 1. Power switch The power switch turns the mini-PC ON and OFF. 2. HDD status indicator The HDD status indicator shows when the hard disk is transfering data. -
Page 8: Rear View
ZOTAC ZBOX nano Rear view Refer to the diagram below to identify the components on this side of the system. 1. Power input (DC19V) The supplied power adapter converts AC power to DC power for use with this jack. Power supplied through this jack supplies power to the mini-PC. To prevent damage to the mini-PC, always use the supplied power adapter. -
Page 9: Bios Settings Of Specific Functions
ZOTAC ZBOX nano BIOS settings of specific functions ZOTAC ZBOX nano has some specific functions which can be enabled or disabled in BIOS settings, such as LED indicator, USB2.0 charge and CIR controller. How to disable the ring LED indicator Turn on the ZBOX nano mini-PC, then press <Delete>... -
Page 10: How To Enable Usb2.0 Charge (For S3/S4 Status)
ZOTAC ZBOX nano Press <Enter> and select Disabled. Press F10 to save the configuration and exit. The PC will reboo How to enable USB2.0 charge (for S3/S4 status) In Chipset menu, select Onboard Device Config and press <Enter>. Use the arrow keys to enter the item Top/Bottom USB2.0 Charge, and... -
Page 11: How To Disable Cir Controller (For Internal Ir Receiver)
ZOTAC ZBOX nano How to disable CIR controller (for internal IR receiver) Use the arrow keys to navigate to the Advanced menu and select Super IO Configuration. Press <Enter> to display the Super IO Configuration and enter CIR Controller Configuration. - Page 12 ZOTAC ZBOX nano Enter CIR Controller and select Disabled. Enabled: enable the internal IR receiver (default) Disabled: disable the internal IR receiver...
-
Page 13: Customizing The Zotac Zbox Nano
ZOTAC ZBOX nano Customizing the ZOTAC ZBOX nano Please follow the instructions below to remove the cover of the ZOTAC ZBOX nano before customizing. 1. Remove the four screws securing the bottom cover into place. 2. Gently remove the cover from the side marked with words: Pull upward. -
Page 14: Installing A Memory Module
ZOTAC ZBOX nano Installing a memory module 1. Locate the SO-DIMM memory slot and insert a SO-DIMM memory module into the slot at a 45 degree angle. 2. Gently press down on the memory module until it locks into place by the arms... -
Page 15: Installing A Hard Disk
ZOTAC ZBOX nano Installing a hard disk 1. Locate the hard disk bracket, remove the 2 screws, and remove the hard disk bracket as shown in the image below. 2. Install the hard disk bracket to a 2.5-inch SATA hard disk with 2 screws. - Page 16 4. Reinstall the screws of the hard disk bracket. Note: 1. Due to the 9.5mm-height limit of the hard disk, 12.5mm height drives are not supported by the ZOTAC ZBOX nano. 2. The hard disk shipped with the product may be 7mm height, which is pasted with a rubber cushion as the image below.
-
Page 17: Setting Up The Zotac Zbox Nano
ZOTAC ZBOX nano Setting up the ZOTAC ZBOX nano Please connect the peripherals before using the ZOTAC ZBOX nano. 1. Connecting a DisplayPort display Connect the DisplayPort connector to the DP port. 2. Connecting USB 3.0 device Connect USB 3.0 devices such as external hard drives, SSDs and flash drives to the USB 3.0 port. - Page 18 9. Connecting an eSATA device Connect one end of an eSATA device to the eSATA port. Note: When your ZOTAC ZBOX nano is not in use, unplug the power adapter or switch off the AC outlet to conserve power.
-
Page 19: Positioning The Zotac Zbox Nano
ZOTAC ZBOX nano Positioning the ZOTAC ZBOX nano • Do not cover or block the ventilation holes on ZOTAC ZBOX nano. To ensure proper operation and reliability, leave aproximately 4 inches (10 cm) of spacing in front of the ventilation holes. -
Page 20: Ir Receiver
ZOTAC ZBOX nano Connect the ZOTAC ZBOX nano to your LCD monitor with an HDMI/DP cable. IR receiver Users can control the LCD monitor/TV by either IR receiver or external USB IR receiver. 1. IR receiver Note: Please refer to page 10-11 to enable CIR controller and install CIR driver from DVD before you use the IR receiver. -
Page 21: Remote Control (Optional)
ZOTAC ZBOX nano Remote control (optional) ZOTAC ZBOX nano is shipped with a remote control. Follow the instructions below to use the remote control. Function keys Navigation Buttons Playback Buttons RECORD PAUSE STOP START BACK INFORMATION ... -
Page 22: Lithium Cell Installation
ZOTAC ZBOX nano Lithium cell installation 1. Locate the arrow on the rear cover of the remote control, and push the cover as the arrow direction. 2. Remove the rear cover, and insert the CR2032 lithium cells into the battery jar at a 45 degree angle. -
Page 23: Installing Drivers And Software
Installing system drivers Before you can use the full features of the ZOTAC ZBOX nano, the system drivers must be installed. The following types of operating systems are supported by the ZOTAC ZBOX nano driver DVD: •... -
Page 24: Using Your Zotac Zbox Nano
• MassStorage driver • Azurewave WiFi driver • CIR Driver (optional) Note: Each driver must be installed individually to ensure proper operation of the ZOTAC ZBOX nano. Select the driver you want to install. The driver installer should launch. Follow the onscreen instructions for the selected driver to install. -
Page 25: Using A Dynamic Ip (Pppoe Connection)
Configuring audio output via an HDMI device Follow the steps below to enable audio output via HDMI when connecting the ZOTAC ZBOX nano to a TV or receiver via HDMI. Access the Sound settings via the system Control Panel. Under Playback devices, click “AMD HDMI Output”.