Britax B-READY User Manual
Hide thumbs
Also See for B-READY:
- User instructions (322 pages) ,
- Instruction manual (80 pages) ,
- User manual (43 pages)

Related Manuals for Britax B-READY


Summary of Contents for Britax B-READY
- Page 1 B-READY™ Stroller User Guide IMPORTANT: To ensure your child is as safe as possible, read all instructions thoroughly before using this stroller. Store this manual for future reference.
-
Page 3: Table Of Contents
B-READY™.Stroller.Configurations. . . . . . . . . . . . . . . . . . . . . -
Page 4: Warnings
• Assembly of this stroller must be performed only by an adult. • Do not hang or place items on the stroller handle or frame except for those approved by Britax. They may cause the stroller to become unstable. • Only use Britax approved child restraints or car seats with this... - Page 5 • Stroller is intended for walking speed only. Do not use while jogging, skating, etc. • Always set the parking brake when stroller is not moving. • Only use accessories and replacement parts approved by Britax Child Safety, Inc. • Do not lift the stroller by the arm bar of the seat.
-
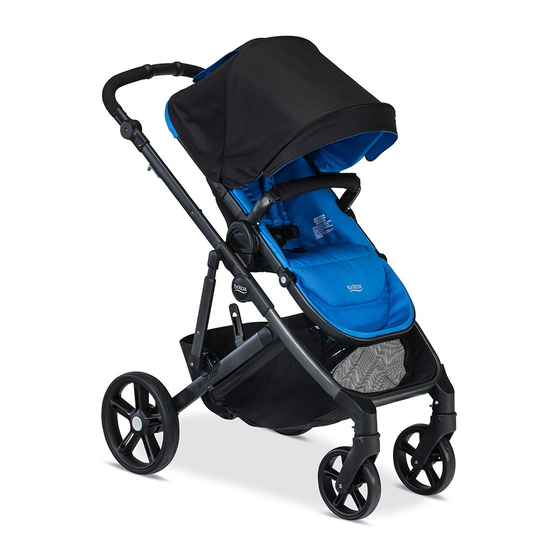
Page 6: Features
Features Canopy Handle. Arm.Bar Height. Adjuster Harness Frame. Release. Buckle Lever Chassis. Seat.Locking.Latch Lock Chassis.Socket On.right.side. of.frame Release.Lever Leg.Rest Storage.Pouch Front.Wheel. Release Swivel. Wheel. Mud.Guards Locks Rear.Wheels Under-Seat. Front.Wheels Storage. Rear.Wheel. Basket Release.Button • Actual product may vary from images. -
Page 7: In.the.box
In the Box Rear.Wheels.x2 Main.Seat Front.Wheels.x2 Arm.Bar Cup. Holder Mud.Guards.x2 Storage.Pouch Stroller.Frame Rain.Cover Britax.Infant.Car. seat.Adapters... -
Page 8: Assembly
• Lift handle until frame locks into upright position as shown Front Wheels • Slide mounting pins into the housing on the frame until they lock into place NOTE: The Britax logo imprinted on the wheel should be facing the outside of the stroller... -
Page 9: Rear Wheels
Assembly Mud Guards • Slide the mud guard onto the mounting bracket above each rear wheel housing until it locks into place Rear Wheel Housing Rear Wheels NOTE: Left and right wheels are marked with an L or R and are from the perspective of standing behind the stroller •... - Page 10 Assembly Storage Pouch • Slide the hook and loop fasteners on both sides of the pouch through the tabs above each back wheel • Attach hook and loop strip to the strip on the inside of the under seat basket Arm Bar •...
-
Page 11: Removing Front Wheels
Assembly Cup Holder • Line up the arrow with the pin just below the folding release lever and snap the cup holder mount onto the frame Removing Front Wheels • To remove, rotate the cap in the direction indicated by the arrows until wheel releases Removing Rear Wheels •... -
Page 12: Operating.instructions
Operating Instructions Parking Brake • Step on the brake pedal until the indicator window changes color Red indicates the brake is engaged and green indicates the brake is off Attaching the Seat • Insert the seat locking latches into both chassis sockets •... -
Page 13: Detaching The Seat
Operating Instructions • Pull up on the seat to ensure that it is locked into place correctly Detaching the Seat IMPORTANT: Always remove child before detaching the seat • Lift both release levers on each seat locking latch at the same time •... -
Page 14: Folding
Operating Instructions Folding Always apply brake and remove children before folding the stroller • Pull up both frame release levers located just below the stroller handle, and step back while guiding stroller downward • Continue folding until the chassis lock engages TIP: You may need to compress the frame to engage the chassis lock Swivel Wheels... -
Page 15: Leg Rest
Operating Instructions Leg Rest • Depress buttons on both sides of the leg rest hinge and hold while raising or lowering the leg rest to the desired position Recline • Lift and hold the recline lever on the back of the seat and hold while raising or lowering the seat back to the desired position... -
Page 16: Securing.your.child
Securing Your Child • Release the harness by depressing the button in the center of the buckle while pulling the two top tongues away from the buckle assembly • Sit child in seat and unzip the seat back to access the harness height adjuster TIP: You may need to loosen the harness to adjust the harness height. - Page 17 Securing Your Child • Buckle the harness by pressing the tongues on the harness straps into the buckle assembly NOTE: Ensure the straps are not twisted as they may become uncomfortable for the child • Tighten or loosen the harness straps by sliding the harness adjusters Buckle tongues separate for added safety.
-
Page 18: Infant.car.seat.mode
Infant Car seat Mode Attaching Britax Infant Car seat Adapters • Slide each of the adapters under the infant car seat handle and into the shell until they click into place There is a left and right adapter and orientation should be as shown •... -
Page 19: Attaching A Britax Infant Car Seat
Infant Car seat Mode Attaching a Britax Infant Car seat • Align the adapters and insert into both chassis sockets • Push down until a click is heard • Pull up on the seat to ensure that it is secure... -
Page 20: Removing A Britax Infant Car Seat
WARNING • The infant car seat adapters are ONLY compatible with Britax infant car seat and ONLY models from 2009 or newer • Attempting to fit them into another infant car seat can damage the car seat or cause the car seat to fall •... -
Page 21: Accessories
Accessories Rain Cover • Extend the canopy and lay the rain cover over the canopy until the recline lever lines up with the slot on the back of the rain cover • Slide the elastic strap under the foot rest to the bottom of the seat •... -
Page 22: Other.available.accessories
Other Available Accessories Second Seat Bassinet Turns the B-READY Stroller Turns the B-READY Stroller into a two seater and can be into a bassinet style stroller used with Infant Car seat Mode and can be used with the second seat... - Page 23 Other Available Accessories Universal Infant Car Lower Infant Car seat seat Adapter Adapter Makes the stroller compatible Allows an infant car seat to be with major manufacturer’s attached closer to the parent infant car seats and works with either a seat or an infant car seat in the upper position - Great for twins Boot Cover...
-
Page 24: B-Ready™.Stroller.configurations
B-READY™ Stroller Configurations • Shown with optional accessories (sold separately) - Page 25 B-READY™ Stroller Configurations Extension adapters MUST be used in this configuration...
- Page 26 B-READY™ Stroller Configurations • Shown with optional accessories (sold separately) Extension adapters MUST be used in this configuration...
-
Page 27: Care.and.maintenance
Care and Maintenance Parking.Brake. • Periodically check that the parking brake works properly and locks both wheels securely . • Clean out any dirt or debris that may prevent the brake from working . Frame. • Wipe the frame with a damp cloth and mild soap . Use clean, dry cloth or towel to wipe away excess water and soap . -
Page 28: Warranty
. The use of non-Britax Child Safety, Inc . accessories is not approved by Britax . The use of unapproved accessories could cause this product to become damaged or dangerous . Their use automatically voids the Britax warranty . - Page 29 Notes...
- Page 30 Notes...
- Page 32 Visit.our.website.at.www .Britax .com.for.more.information . Britax Child Safety, Inc. Tel. : 1-888-427-4829 13501 South Ridge Drive Charlotte, NC 28273 www.Britax.com A Britax Childcare Group Limited company...