Table of Contents
Advertisement
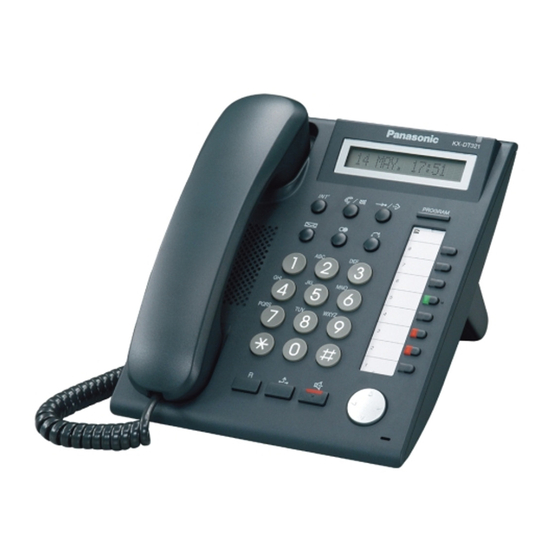
Thank you for purchasing a Digital Proprietary Telephone (DPT).
Please read this manual carefully before using this product and
save this manual for future use.
For more details, please refer to the manuals of the PBX.
Accessories (included)
Handset: 1
Screws for wall: 2
*1
For extra orders for the accessories, call toll-free: 1-800-332-5368.
Document Version 2009-03
Quick Reference Guide
Digital Proprietary Telephone
*1
Handset Cord: 1
Telephone Line
Cord: 1
KX-DT321
Model No.
Stand: 1
Advertisement
Table of Contents

Related Manuals for Panasonic KX-DT321-B - KX - Digital Phone


Summary of Contents for Panasonic KX-DT321-B - KX - Digital Phone
-
Page 1: Quick Reference Guide
Quick Reference Guide Digital Proprietary Telephone KX-DT321 Model No. Thank you for purchasing a Digital Proprietary Telephone (DPT). Please read this manual carefully before using this product and save this manual for future use. For more details, please refer to the manuals of the PBX. Accessories (included) Handset: 1 Handset Cord: 1... -
Page 2: Location Of Controls
Location of Controls Location of Controls Document Version 2009-03... - Page 3 Location of Controls A LCD (Liquid Crystal J HOLD: Used to place a call Display) with Backlight on hold. B AUTO DIAL/STORE: Used K SP-PHONE for System/Personal Speed (Speakerphone): Used for Dialing or storing program performing hands-free changes. operations. C AUTO ANS (Auto Answer)/ L Navigator Key: Used to MUTE: Used to receive an adjust the volume and the...
-
Page 4: Settings
Settings Settings Speaker volume While in a hands-free conversation Handset/Headset While using the handset or volume headset Press Up to increase or Down to Ringer volume While on-hook or receiving a decrease the call volume. LCD Contrast While on-hook AUTO DIAL AUTO DIAL PROGRAM PROGRAM... -
Page 5: Icon Meanings
Features List Features List Icon Meanings = Flexible button = Off-hook = On-hook (CO) = Feature number = Talk = Confirmation Tone C. Tone Making Calls Calling To an extension To an outside party outside phone no. extension no. (CO) Redial REDIAL Quick Dialing... -
Page 6: Personal/System Speed Dialing
Features List Personal Speed Dialing To store desired phone no.* personal speed (max. 32 digits) dial no. (2 digits) C. Tone * Enter CO line access number before outside phone number. To dial AUTO DIAL personal speed dial no. (2 digits) STORE System Speed Dialing To dial... -
Page 7: Multiple Party Conversation
Features List Useful Features Multiple Party Conversation To add other parties during a conversation (i.e., conference) assigned as a desired Conference phone no. Talk to the (Conference) C. Tone button new party. assigned as a Conference Talk with (Conference) C. Tone button multiple parties. -
Page 8: Call Forwarding
Features List Before Leaving Your Desk Call Forwarding Both Calls Outside Calls Intercom Calls All calls extension no. Busy No answer C. Tone outside CO line phone no. access no. Busy/ No answer Cancel Making Use of the Voice Mail Service Listening to a message From your own extension KX-TVA series... -
Page 9: Leaving Message
Features List Leaving a message VPS extension no. From your own extension Mailbox Password* From someone else’s extension Mailbox Password* mailbox no. * If you have no password, you can skip the last step. Leave Enter the desired mailbox number a message (KX-TVA series) (KX-TVS series) - Page 10 Connection Connection Note: In the illustration below, the telephone line cords are routed for wall mounting. When using the stand, refer to "Attaching the Stand" and "Cabling" on page 11 for telephone line cabling. <Back view> The telephone line cord (included) Connect to a PBX.
- Page 11 Stand Usage Stand Usage Attaching the Stand Place the catches ( ) of the stand into hooks located in the unit. Gently push the stand in the direction indicated until it locks into place. The stand will be mounted in the high position. Removing the Stand Hold the stand with both hands.
- Page 12 Stand Usage Adjusting from High to Low Position Hold the stand with both hands as shown and rotate the stand in the direction indicated until it locks into the low position ( Adjusting from Low to High Position Hold the stand with both hands as shown and rotate the stand in the direction indicated until it locks into the high position ( Document Version 2009-03...
-
Page 13: Wall Mounting
Wall Mounting Wall Mounting 1. Remove the stand if it is attached. For information on removing the stand, refer to page 11. 2. Drive the 2 screws (included) into the wall either 83 mm (3-1/4 in) or 100 mm (3-15/16 in) apart, and mount the unit on the wall. - Page 14 If the known working telephone operates properly, have the defective telephone repaired by an authorized Panasonic factory service center. If the known working telephone does not operate properly, check the PBX and the internal extension wiring.
-
Page 15: Important Notice
DO NOT send the product to the Executive or Regional Sales offices. They are NOT equipped to make repairs. Product service: Panasonic factory service centers for this product are listed in the service center directory. Consult your authorized Panasonic dealer for detailed instructions. -
Page 16: Important Safety Instructions
Important Information Important Safety Instructions When using this unit, basic safety precautions, including those below, should always be followed to reduce the risk of fire, electric shock and injury to persons. 1. Read and understand all instructions. 2. Follow all warnings and instructions marked on this unit. 3. -
Page 17: Fcc And Other Information
Important Information FCC and Other Information F.C.C. REQUIREMENTS AND RELEVANT INFORMATION This equipment has been tested and found to comply with the limits for a Class B digital device, pursuant to Part 15 of the FCC Rules. These limits are designed to provide reasonable protection against harmful interference in a residential installation. -
Page 18: Customer Information
If requested, this number must be provided to the telephone company. If trouble is experienced with this equipment KX-DT321, for repair or warranty information, please contact: Panasonic Service and Technology Company-BTS Center 415 Horizon Drive Bldg. 300 Ste. 350-B Suwanee, GA 30024-3186... -
Page 19: Wall Mounting Template
One screw here WALL MOUNTING TEMPLATE 1. Drive the screws into the wall as indicated. 2. Hook the unit onto the screw heads. Note: Make sure to set the print size to correspond with the size of this page. If the dimensions of the paper output still deviate slightly from the measurements indicated here, use the measurements... - Page 20 One Panasonic Way Secaucus, New Jersey 07094 http://www.panasonic.com/csd Copyright: This material is copyrighted by Panasonic Communications Co., Ltd., and may be reproduced for internal use only. All other reproduction, in whole or in part, is prohibited without the written consent of Panasonic Communications Co., Ltd.