Table of Contents
Advertisement
Available languages
Available languages
9763002A
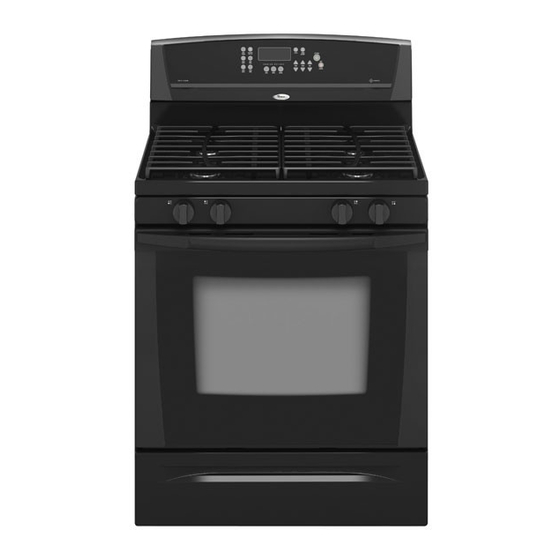
GAS RANGE
Use & Care Guide
For questions about features, operation/performance, parts,
accessories or service, call: 1-800-253-1301 or visit our website
at...www.whirlpool.com
In Canada, call for assistance, installation or service, call:
1-800-807-6777 or visit our website at...
www.whirlpool.ca
CUISINIÈRE À GAZ
Guide d'utilisation
et d'entretien
Au Canada, pour assistance, installation ou service, composez le
1-800-807-6777
ou visitez notre site web à
www.whirlpool.ca
Table of Contents/Table des matières .................. 2
To the installer: Please leave this
instruction book with the unit.
To the consumer: Please read and
keep this book for future reference.
Pour l'installateur : laisser ce manuel
d'instructions avec l'appareil.
Pour le consommateur : lire ce manuel et
le conserver pour consultation ultérieure.
®
Advertisement
Table of Contents

Related Manuals for Whirlpool 9763002


Summary of Contents for Whirlpool 9763002
- Page 1 GAS RANGE Use & Care Guide For questions about features, operation/performance, parts, accessories or service, call: 1-800-253-1301 or visit our website at...www.whirlpool.com In Canada, call for assistance, installation or service, call: 1-800-807-6777 or visit our website at... www.whirlpool.ca CUISINIÈRE À GAZ Guide d’utilisation...
-
Page 2: Table Of Contents
TABLE OF CONTENTS TABLE DES MATIÈRES RANGE SAFETY ................3 SÉCURITÉ DE LA CUISINIÈRE ...........21 The Anti-Tip Bracket ..............4 La bride antibasculement............22 PARTS AND FEATURES..............5 PIÈCES ET CARACTÉRISTIQUES ..........23 COOKTOP USE ................6 UTILISATION DE LA TABLE DE CUISSON ........24 Cooktop Controls.................6 Commandes de la table de cuisson ..........24 Cooktop Lockout .................6 Désactivation de la table de cuisson .........24... -
Page 3: Range Safety
RANGE SAFETY Your safety and the safety of others are very important. We have provided many important safety messages in this manual and on your appliance. Always read and obey all safety messages. This is the safety alert symbol. This symbol alerts you to potential hazards that can kill or hurt you and others. All safety messages will follow the safety alert symbol and either the word “DANGER”... -
Page 4: The Anti-Tip Bracket
The Anti-Tip Bracket The range will not tip during normal use. However, the range can tip if you apply too much force or weight to the open door without having the anti-tip bracket fastened down properly. WARNING Tip Over Hazard A child or adult can tip the range and be killed. -
Page 5: Parts And Features
PARTS AND FEATURES This manual covers several different models. The range you have purchased may have some or all of the parts and features listed. The locations and appearances of the features shown here may not match those of your model. Control Panel A. -
Page 6: Cooktop Use
COOKTOP USE To Clean: Cooktop Controls IMPORTANT: Before cleaning, make sure all controls are off and the oven and cooktop are cool. Do not use oven cleaners, bleach or rust removers. WARNING Power™ Burner (on some models) The left front burner is designed to give ultra-high power when it is fully on. -
Page 7: Home Canning
Burner cap: Always keep the burner cap in place when using a surface burner. A clean burner cap will help avoid poor ignition Home Canning and uneven flames. Always clean the burner cap after a spillover When canning for long periods, alternate the use of surface and routinely remove and clean the caps according to the burners between batches. -
Page 8: Electronic Oven Controls
ELECTRONIC OVEN CONTROLS Style 1 - Electronic Oven Controls (on some models) Start The Start pad begins any oven function. If the Start pad is not pressed within 5 seconds after pressing a function pad, the “START?” indicator light will flash as a reminder. On some models, “START?”... -
Page 9: Fahrenheit And Celsius
To Lock/Unlock Control: Before locking, make sure the oven and Timer are off. Press and hold START for 5 seconds. A single Fahrenheit and Celsius tone will sound, and “Loc” will appear on the display. The temperature is preset at Fahrenheit, but can be changed to Repeat to unlock. -
Page 10: Split Oven Rack (On Some Models)
To move a rack, pull it out to the stop position, raise the front 5. When finished cooking, slowly remove items. edge, then lift out. Use the following illustration and chart as a guide. FOOD RACK POSITION Frozen pies, large roasts, turkeys, 1 or 2 angel food cakes Bundt cakes, most quick breads, yeast... -
Page 11: Meat Thermometer
Preheating Meat Thermometer After the start pad is pressed, the oven will enter a timed preheat conditioning. “PrE” (on some models) and the countdown time On models without a temperature probe, use a meat will appear on the display. When the preheat conditioning time thermometer to determine doneness of meat, poultry and fish. -
Page 12: Hold Warm Feature (On Some Models)
BROILING CHART Style 1 - Electronic Oven Control For best results, place food 3" (7 cm) or more from the broil burner. Times are guidelines only and may need to be adjusted To Use: for individual tastes. Recommended rack positions are numbered 1. -
Page 13: Sequence Programming (On Some Models)
To Set a Delayed Timed Cook: Style 1 - Series Electronic Controls (see “Electronic Oven Before setting, make sure the clock is set to the correct time of Controls” section) day. See “Clock” section. 1. Press BAKE. To Set a Timed Cook: 2. -
Page 14: Range Care
To Program Next Steps (2 through 4) of the Sequence: 2. If fewer than 4 steps have been programmed, press REVIEW STEPS repeatedly until the last programmed step is 1. Press FIRST/NEXT STEP. displayed, then press FIRST/NEXT STEP if it is desired to “PROGRAM”... -
Page 15: General Cleaning
How the Cycle Works General Cleaning IMPORTANT: The heating and cooling of porcelain on steel in the oven may result in discoloring, loss of gloss, hairline cracks and IMPORTANT: Before cleaning, make sure all controls are off and popping sounds. the oven and cooktop are cool. - Page 16 CONTROL PANEL OVEN RACKS AND ROASTING RACKS Do not use abrasive cleaners, steel-wool pads, gritty washcloths Cleaning Method: or some paper towels. Damage may occur. Self-Cleaning cycle: Cleaning Method: See “Self-Cleaning Cycle” first. Remove racks or they will Glass cleaner and soft cloth or sponge: discolor and become harder to slide.
-
Page 17: Oven Light (On Some Models)
To Replace: Oven Light 1. Insert both hanger arms into the door. (on some models) The oven light is a standard 40-watt appliance bulb. It will come on when the oven door is open. It will not work during the Self- Cleaning cycle (on some models). -
Page 18: Troubleshooting
TROUBLESHOOTING Try the solutions suggested here first in order to avoid the cost of an unnecessary service call. Nothing will operate Oven will not operate Is the power supply cord unplugged? Is this the first time the oven has been used? Plug into a grounded 3 prong outlet. -
Page 19: Assistance Or Service
Center toll free at 1-800-442-9991 and follow the menu prompts. Or visit our website at www.whirlpool.com and click on “Buy When calling, please know the purchase date and the complete Accessories Online.”... -
Page 20: Warranty
If you need service, first see the “Troubleshooting” section of the Use & Care Guide. After checking “Troubleshooting,” additional help can be found by checking the “Assistance or Service” section or by calling Whirlpool. In the U.S.A., call 1-800-253-1301. In Canada, call 1-800-807-6777. -
Page 21: Sécurité De La Cuisinière
SÉCURITÉ DE LA CUISINIÈRE Votre sécurité et celle des autres est très importante. Nous donnons de nombreux messages de sécurité importants dans ce manuel et sur votre appareil ménager. Assurez-vous de toujours lire tous les messages de sécurité et de vous y conformer. Voici le symbole d’alerte de sécurité. -
Page 22: La Bride Antibasculement
La bride antibasculement Dans des conditions de service normales, la cuisinière ne bascule pas. Elle peut cependant basculer si une force ou un poids excessif est appliqué sur la porte ouverte alors que la bride antibasculement n’est pas convenablement fixée. AVERTISSEMENT Risque de basculement Un enfant ou une personne adulte peut faire basculer la cuisinière ce qui peut causer un décès. -
Page 23: Pièces Et Caractéristiques
PIÈCES ET CARACTÉRISTIQUES Ce manuel couvre plusieurs modèles différents. La cuisinière que vous avez achetée peut comporter quelques-unes ou toutes les pièces et caractéristiques énumérées. L’emplacement et l’apparence des caractéristiques illustrées peuvent être différents de ceux de votre modèle. Tableau de commande A. -
Page 24: Utilisation De La Table De Cuisson
UTILISATION DE LA TABLE DE CUISSON Commandes de la table de cuisson N’OUBLIEZ PAS : Quand l’appareil est utilisé ou (sur certains modèles) durant le programme d’autonettoyage, toute la surface de la table de cuisson peut devenir chaude. AVERTISSEMENT Nettoyage : IMPORTANT : Avant de procéder au nettoyage, s’assurer que toutes les commandes sont éteintes et que le four et la table de cuisson ont refroidi. -
Page 25: Brûleurs De Surface Scellés
3. Nettoyer les orifices de brûleur obstrués avec une épingle droite tel qu’indiqué. Ne pas agrandir ni déformer les orifices. Brûleurs de surface scellés Ne pas utiliser un cure-dent en bois. Si le brûleur a besoin IMPORTANT : Ne pas entraver le débit de gaz de combustion et d’être ajusté, faire venir un technicien d’entretien qualifié. -
Page 26: Commandes Électroniques Du Four
USTENSILE CARACTÉRISTIQUES COMMANDES ÉLECTRONIQUES Aluminium Chauffe rapidement et uniformément. DU FOUR Convient à tous les genres de cuisson. Commandes Style 1 - Commandes électroniques du four L’épaisseur moyenne ou forte (sur certains modèles) convient le mieux pour la plupart des tâches de cuisson. -
Page 27: Affichage
Signaux sonores de rappel : Les signaux sonores de rappel Affichage peuvent être éteints. Sur certains modèles, appuyer sur la touche STOP TIME (heure d'arrêt) pendant 5 secondes. “rEP OFF” ou Lors de la mise sous tension initiale de l'appareil, “PF” ou une “off”... -
Page 28: Verrouillage Des Commandes
Verrouillage des commandes UTILISATION DU FOUR Le verrouillage des commandes désactive les touches du tableau de commande pour empêcher l'utilisation non intentionnelle du Des odeurs et de la fumée sont normales lorsque le four est four. utilisé les premières fois, ou lorsqu'il est très sale. IMPORTANT : La santé... -
Page 29: Grille De Four En Deux Pièces (Sur Certains Modèles)
USTENSILES DE CUISSON 5. À la fin de la cuisson, retirer les aliments avec précaution. L’air chaud doit pouvoir circuler autour de l’aliment pour le cuire uniformément. Laisser 2" (5 cm) d'espace entre les ustensiles de cuisson et les parois du four. Se servir du tableau suivant comme guide. -
Page 30: Thermomètre À Viande
3. Appuyer sur START (mise en marche). La température peut être changée après cette étape. Il n'est pas nécessaire Thermomètre à viande d'appuyer de nouveau sur START. Sur les modèles sans sonde thermométrique, toujours se servir Si on effectue la cuisson au four ou le rôtissage pendant que d'un thermomètre à... -
Page 31: Caractéristique Hold Warm (Garder Au Chaud)
Cuisson au gril : Caractéristique Hold Warm (garder au chaud) 1. Appuyer sur BROIL (cuisson au gril). 2. Appuyer sur START (mise en marche). (sur certains modèles) 3. Appuyer sur OFF/CANCEL (arrêt/annulation) après avoir terminé. AVERTISSEMENT Cuisson personnalisée au gril : Risque d'empoisonnement alimentaire 1. -
Page 32: Cuisson Minutée (Sur Certains Modèles)
8. Appuyer sur OFF/CANCEL (arrêt/annulation) ou ouvrir la 5. Appuyer sur STOP TIME (heure d'arrêt) (facultatif). porte du four pour arrêter les signaux sonores de rappel et 6. Si on a appuyé sur STOP TIME (heure d'arrêt), appuyer sur effacer “End” de l'afficheur. L'affichage de l'heure est rétabli. les touches à... -
Page 33: Programmation De Séquences (Sur Certains Modèles)
Programmation de séquences (sur certains modèles) La programmation de séquences permet de programmer jusqu'à 6. Appuyer sur START pour commencer la séquence. quatre fonctions de cuisson en une seule fois, et elle est utilisable Si on appuie sur START (mise en marche), la programmation avec d'autres fonctions électroniques de commande du four de séquences débute. -
Page 34: Entretien De La Cuisinière
ENTRETIEN DE LA CUISINIÈRE Programme d’autonettoyage (sur certains modèles) Comment fonctionne le programme AVERTISSEMENT IMPORTANT : Le chauffage et le refroidissement de la porcelaine sur l’acier dans le four peuvent causer une décoloration, une perte de fini luisant, des fissures minuscules et des sons saccadés. -
Page 35: Nettoyage Général
Style 2 - Commande électrique du four Méthode de nettoyage : 1. Appuyer sur AUTO CLEAN (nettoyage automatique). Nettoyant et poli pour acier inoxydable - Pièce n° 31464B (non incluse) : 2. Appuyer sur START TIME (heure de mise en marche). Voir la section “Assistance ou service”... -
Page 36: Lampe Du Four (Sur Certains Modèles)
Méthode de nettoyage : Nettoyant pour four : Tampon à récurer en plastique non abrasif et nettoyant Suivre le mode d’emploi sur l’étiquette du produit. liquide doux légèrement abrasif : Émail vitrifié seulement, non le chrome Nettoyer dès que la table de cuisson, les grilles et les Lave-vaisselle chapeaux sont refroidis. -
Page 37: Porte Du Four
Porte du four Tiroir de remisage Il n’est pas recommandé d’enlever la porte du four pour une Le tiroir de remisage peut être enlevé. Avant de l’enlever, utilisation normale. Toutefois, s’il est nécessaire de l’enlever, s’assurer que le tiroir est froid et vide. s’assurer que le four est éteint et froid. -
Page 38: Dépannage
DÉPANNAGE Essayer les solutions suggérées ici d’abord afin d’éviter le coût d’une visite de service non nécessaire. Rien ne fonctionne Les résultats de cuisson ne sont pas ceux espérés Le cordon d’alimentation est-il débranché? Un ustensile de cuisson approprié a-il été employé? Brancher dans une prise à... -
Page 39: Assistance Ou Service
“Dépannage”. Ce guide peut vous faire économiser le Si vous avez besoin de plus d’assistance, vous pouvez coût d’une visite de service. Si vous avez encore besoin d’aide, soumettre par écrit toute question ou préoccupation à Whirlpool suivre les instructions ci-dessous. Canada LP à l’adresse suivante : Lors d’un appel, veuillez connaître la date d’achat, le numéro de... -
Page 40: Garantie
CONFÈRE DES DROITS JURIDIQUES SPÉCIFIQUES ET VOUS POUVEZ ÉGALEMENT JOUIR D'AUTRES DROITS QUI PEUVENT VARIER D'UNE JURIDICTION À UNE AUTRE. À l'extérieur du Canada et des 50 États des États-Unis, cette garantie ne s'applique pas. Contacter votre marchand Whirlpool autorisé pour déterminer si une autre garantie s'applique.