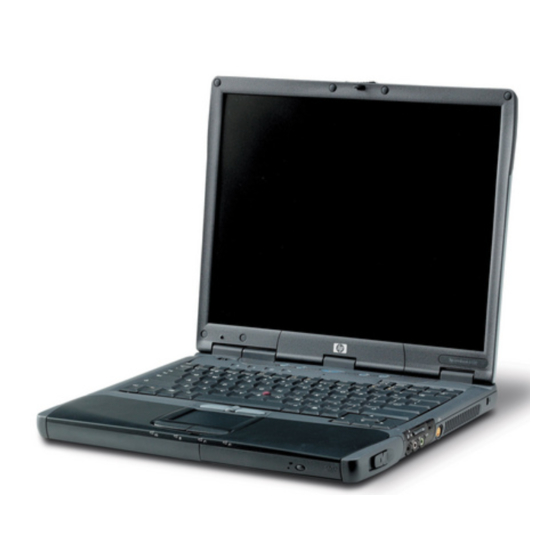
HP OmniBook 900 User Manual
Omnibook docking system
Hide thumbs
Also See for OmniBook 900:
- Evaluation manual (134 pages) ,
- User handbook manual (114 pages) ,
- Service manual (98 pages)
Table of Contents
Advertisement
Quick Links
Advertisement
Table of Contents
Troubleshooting

Related Manuals for HP OmniBook 900


Summary of Contents for HP OmniBook 900
- Page 1 HP OmniBook Docking System User’s Guide...
- Page 2 Notice This manual and any examples contained herein are provided “as is” and are subject to change without notice. Hewlett-Packard Company makes no warranty of any kind with regard to this manual, including, but not limited to, the implied warranties of merchantability and fitness for a particular purpose. Hewlett-Packard Co.
- Page 3 CD-ROM: (i) The product recovery CD-ROM and/or support utility software may only be used for restoring the hard disk drive of the HP computer with which the product recovery CD-ROM was originally provided. (ii) The use of any operating system...
- Page 4 software by Microsoft contained in any such product recovery CD-ROM shall be governed by the Microsoft End User License Agreement (EULA). Customer may transfer rights in the software to a third party only as part of the transfer of all rights and only if Customer obtains the prior agreement of the third party to be bound by the terms of this License Agreement.
-
Page 5: Table Of Contents
Contents Using the Dock ........1-7 Docking System Features ....... 1-9 Understanding the Basics.......1-11 To set up the dock .........1-12 To dock the OmniBook ......1-14 To undock the OmniBook ......1-16 To manually undock the OmniBook .....1-18 To set a docking password ......1-19 To turn the OmniBook on and off .......1-20 To attach a security cable ......1-21 To create a docked hardware profile in Windows NT ..1-23... - Page 6 3 Troubleshooting ........1-63 Solving Problems ........1-65 Specifications and Regulatory Information ....1-69 Specifications........1-71 Regulatory Information ........1-72 U.S.A...........1-72 Canada .........1-73 Japan ..........1-73 Europe .........1-74...
-
Page 7: Using The Dock
Using the Dock... - Page 8 Using the Dock Congratulations! With the OmniBook docking system (referred to as dock in this manual), you can significantly increase the convenience of your OmniBook for desktop use. By making one connection—plugging your OmniBook into the dock— you can get easy access to these types of devices: Printer, external floppy drive, or other parallel device.
-
Page 9: Docking System Features
Using the Dock Docking System Features Dock rear-view 1. Two type II or type III PC card slots (CardBus enabled) 2. PC card security lock 3. Mouse port 4. Keyboard port 5. Two universal serial bus (USB) ports 6. PCI board slots 7. - Page 10 Using the Dock Dock front-view 17. Tray release latch 18. PC device bay 19. Undock button 20. Plug-in module bay 21. Docked light 22. Wait light 23. Undocked light 24. AC power light 25. Release lever 26. PCI board door 27.
-
Page 11: Understanding The Basics
Using the Dock Understanding the Basics Docking the OmniBook to the dock is just like simultaneously adding several devices to the OmniBook. Docking causes Windows 95 or Windows 98 to create a new hardware profile. The default hardware profile shipped with the OmniBook is an undocked profile. -
Page 12: To Set Up The Dock
Using the Dock To set up the dock 1. Plug the power cord into the dock, then plug the power cord into the ac outlet. 2. Select the appropriate dock tray for your OmniBook. Match the letter on the tray with the letter for your OmniBook listed on the dock label next to the tray release latch. - Page 13 Using the Dock 3. Attach the security post to the tray (optional). The security post preventss removal of the OmniBook PC cards. The security post on your tray may be in a different location from that shown below. 4. Insert the tabs on the back of the tray into the slots in the dock and press down on the front edge of the tray to lock it in place.
-
Page 14: To Dock The Omnibook
Using the Dock To remove a tray To remove a tray, slide the tray release latch forward until the tray pops up. Tray release latch To dock the OmniBook 1. Place the dock on a flat surface. 2. Slide the OmniBook’s docking door to the left. Some OmniBook models, including the OmniBook 4100 have a rear port door that opens automatically when you install it in the dock. - Page 15 Using the Dock 3. Place the OmniBook on the dock tray, with the back of the computer facing the dock’s connector. 4. Position your fingers on the platform grips as shown below. Use your thumbs to push the computer firmly toward the dock until the OmniBook slides into place. You should hear a click, indicating that the OmniBook is locked to the dock.
-
Page 16: To Undock The Omnibook
Using the Dock To undock the OmniBook Note If you have installed the tray security post, make sure that no objects (such as a phone jack or network connector) are protruding from the OmniBook PC card slots,. 1. If there is no ac power connected to the dock, turn on the OmniBook to provide power for undocking. - Page 17 Using the Dock 5. When you hear two beeps and the undock light flashes, pull the release lever on the right side of the dock toward the front to eject the OmniBook. You have 30 seconds to pull the release lever. After 30 seconds, the dock relocks the OmniBook.
-
Page 18: To Manually Undock The Omnibook
Using the Dock To manually undock the OmniBook If you cannot undock the OmniBook using the undock button (for example, you have no ac power or battery power), you can manually undock the OmniBook. Manual undocking overrides password protection. 1. Save your work and turn off your OmniBook. Be sure to use the shut down option from the Start menu. -
Page 19: To Set A Docking Password
1. Close all applications, then shut down Windows and restart the OmniBook. 2. When you see the HP logo, press F2 to enter the BIOS Setup utility. 3. Use the right or left arrow keys select the Security menu, then use the up or down arrow key to select Undock password. -
Page 20: To Turn The Omnibook On And Off
Using the Dock To turn the OmniBook on and off To turn on the OmniBook: Press the power button on the left side of the dock. To turn off the OmniBook without undocking. 1. Save your work and close open applications . 2. -
Page 21: To Attach A Security Cable
Using the Dock To attach a security cable Your dock has a built-in security port that allows you to secure the dock with a cable. A Kensington MicroSaver lock system or compatible lock system works with this port and is available at many computer stores. Your dock must be secured with a Kensington lock system for the other physical security features of your docking system, such as the PC Card lock, to work. - Page 22 Using the Dock 3. Reinstall the PCI board door and align the hole in the PCI board lock with the dock’s Kensington lock slot. 4. Wrap the cable around a secure stationary object, such as a table leg, so that it cannot be removed when locked.
-
Page 23: To Create A Docked Hardware Profile In Windows Nt
Using the Dock To create a docked hardware profile in Windows NT When Windows NT 4.0 was installed on your system, a hardware profile was created. If you do not already have a docked profile, you can copy this original profile and customize it for your docked hardware profile. -
Page 24: Making Connections
Using the Dock Making Connections When making connections, notice that the orientation of the ports on the dock are the reverse of the OmniBook. Turn the connector cables over when switching from the OmniBook to the dock. This section describes how to connect devices to the dock, including the following: External keyboard. -
Page 25: To Connect An External Keyboard
1. Close all applications, then shut down Windows and reboot the OmniBook. If necessary, you can press CTRL+ALT+DEL to reboot. 2. When you see the HP OmniBook logo displayed, 3. Use the right arrow key to highlight the System Devices menu. -
Page 26: To Connect A Ps/2 Mouse
Using the Dock To connect a PS/2 mouse The OmniBook has a PS/2 mouse driver installed. When you dock, the OmniBook automatically detects and sets up the mouse 1. Attach the mouse cable to the mouse port. 2. Dock the OmniBook in the dock. Mouse Port To connect a serial mouse 1. -
Page 27: To Connect A Serial Device
Using the Dock To connect a serial device Use standard serial cables and adapters available at computer dealers and electronic supply stores to connect serial devices. 1. Attach the serial cable to the serial port. 2. Dock the OmniBook in the dock. 3. - Page 28 Using the Dock Before connecting a SCSI device Before connecting a SCSI device to your dock, assign an unused SCSI address to the device. The dock supports 8-bit (narrow) SCSI addresses from 0 to 6. SCSI address 7 is reserved for the integrated SCSI controller. Both the SCSI port on the rear of the dock and the PC device bay SCSI cable are on a single SCSI bus.
-
Page 29: To Connect A Universal Serial Bus (Usb) Device
Using the Dock To connect a universal serial bus (USB) device Note Windows NT 4.0 does not support universal serial bus (USB) devices. Universal serial bus (USB) provides a bidirectional serial interface for adding peripheral devices such as game controllers, serial and parallel ports, and scanners on a single bus. -
Page 30: To Connect An External Monitor
Using the Dock To connect an external monitor Use this procedure to connect a standard VGA, SVGA, XGA, or (for some OmniBooks) SXGA external monitor to your OmniBook. 1. Attach the display cable to the display port. 2. Dock the OmniBook in the dock. The built-in display normally turns off. If you want to run the built-in display and an external display simultaneously, see “To enable the built-in and external displays”... -
Page 31: To Use The Monitor Stand With An External Display
1. For a permanent change, close all applications, then shut down Windows and reboot the OmniBook. 2. When you see the HP OmniBook logo displayed, press <F2> to enter Setup. 3. From the Main menu, use the down arrow to highlight Video Display Device. -
Page 32: To Connect A Parallel Device
Using the Dock To connect a parallel device Use standard parallel cables and adapters available at computer dealers and electronic supply stores to connect parallel devices. Hint The floppy drive provided with some OmniBook models can be connected externally through the parallel port using an optional floppy/parallel cable. 1. -
Page 33: To Insert A Pc Card
Using the Dock To insert a PC card The OmniBook automatically detects and sets up a PC Card when you insert it in a PC Card slot. See the card’s instructions for additional information. 1. Hold the card with its face up and its connector holes toward the card slot. 2. -
Page 34: To Remove A Pc Card
Using the Dock To remove a PC Card 1. If you are using Windows 95, click the PC Card indicator in the taskbar, then click Stop. If you are using Window NT, shut down your OmniBook. This protects your data and avoids unexpected problems. 2. - Page 35 Using the Dock 3. Press the ejector button once to pop it out, then press it again to eject the PC card. Then pull out the card. 1-35...
-
Page 36: To Connect Your Audio Equipment
Using the Dock To connect your audio equipment Note If you connect external speakers, the internal OmniBook speakers are automatically turned off. If you connect an external microphone, The internal microphone is automatically turned off. If you connect external speakers or microphone to the OmniBook, any speakers or microphone attached to the dock are automatically turned off. -
Page 37: Installing Accessories
Installing Accessories 1-37... - Page 38 Install SCSI and IDE devices in the 5.25-inch PC expansion device bay. Format hard disk drives installed in the PC expansion bay. Hewlett-Packard offers a wide selection of accessories for OmniBooks and the docking system. For information on accessories, see the HP OmniBook website at www.hp.com/omnibook. 1-38...
-
Page 39: Using The Module Bay Adapter
To use the plug-in modules for your OmniBook, install the module adapter for that OmniBook. For information on module bay adapters, see your reseller or the HP OmniBook website at www.hp.com/omnibook. For more information on plug-in modules, refer to the manual that accompanied the plug-in modules, the OmniBook Reference Guide, or the HP OmniBook website. -
Page 40: To Install The Module Bay Adapter
Installing Accessories To install the module bay adapter You will need a medium-sized Phillips screwdriver to install your module adapter. 1. Undock the OmniBook. 2. Disconnect all cables connected to the rear of the dock. 3. Disconnect the power cord from the dock. 4. - Page 41 Installing Accessories 7. Slide the top cover toward the back of the dock about 1 cm (1/2 inch). 8. Fold the top cover back until it lies flat on the work surface. Be careful not to pull any cable connectors loose. 1-41...
- Page 42 Installing Accessories 9. Remove the cover plate from the module bay slot by pressing down on the two tabs and pushing it out.. 10. Remove and save the locking screw from the module bay housing. 11. Insert the module adapter for your OmniBook plug-in modules into the module bay until it locks in place.
- Page 43 Installing Accessories 13. Connect IDE cable 2, audio cable 2, and power cable 2 to the connectors protruding from the back of the module bay housing. 14. Carefully place the top cover of the dock onto the base of the dock about 1 cm (1/2 inch) back from the front of the base and slide the top cover forward until the five screw holes are properly aligned.
-
Page 44: To Replace A Plug-In Module
Installing Accessories 15. Reinstall the five screws you removed previously. You have completed installation of the module adapter. To replace a plug-in module Install only IDE devices such as a CD-ROM drive, LS-120 drive, or DVD drive in the module bay. The module bay does not support non-IDE devices such as floppy disk drives or batteries. - Page 45 Installing Accessories 2. If the plug-in module is secured, remove the PCI board door and slide the module security latch to the unlocked position, then reinstall the PCI board door. 3. Press the eject button and remove the plug-in module from the dock. To install a plug-in module 1.
- Page 46 Installing Accessories 2. Slide the plug-in module into the module bay until it clicks into place. 3. To secure the plug-in module (optional), remove the PCI board door and slide the module security latch to the locked position, then reinstall the PCI board door.
-
Page 47: Installing Pci Boards
Installing Accessories Installing PCI Boards The dock has two PCI half-length slots for adding PCI half-length accessory boards to your dock. You may install any supported PCI half-length board in either of the two PCI slots in the dock. ISA and E-ISA boards are not supported by the dock. To install a PCI accessory board Refer to the installation instructions that came with your PCI accessory board for any board-specific instructions for configuring the board. - Page 48 Installing Accessories 4. Locate the accessory board slot you want to use. 5. Unscrew and remove the slot cover for the slot you are using. 6. Hold the board horizontally with the connector towards the socket and align the board’s connector with the slot’s socket. 7.
- Page 49 Installing Accessories 10. Connect any necessary external cables to the PCI board. 11. Reboot your Omnibook. You have completed installation of a PCI board. Using the alternate installation procedure If you have difficulty accessing the PCI board slots through the PCI access door, you can remove the top cover of the dock for easier access (optional).
- Page 50 Installing Accessories 6. Replace the top cover of the dock following steps 14 and 15 of “To install the module bay adapter” on page 1-40. 7. Replace the PCI access door. 8. Connect any necessary external cables to the PCI board. 9.
-
Page 51: Installing Pc Devices
Installing Accessories Installing PC Devices You can install either a 5 ¼ inch PC device or a 3 ½ inch device such as a hard disk drive in the PC device bay. The bay supports both IDE and SCSI-2 devices. Refer to the instructions that came with your PC device for any device-specific installation instructions. -
Page 52: To Install The Pc Device
Installing Accessories To install the PC device You will need a medium-sized Phillips screwdriver to install your device. 1. Undock the OmniBook. 2. Disconnect all cables connected to the rear of the dock. 3. Disconnect the power cord from the dock. 4. - Page 53 Installing Accessories 7. Slide the top toward the back of the dock about 1 cm (1/2 inch). : Lifting the top cover without sliding it back will damage the dock. 8. Fold the top back until it lies flat on the work surface. Be careful not to pull any cable connectors loose.
- Page 54 Installing Accessories 9. Remove the cover plate from the expansion module bay. 10. Remove the two screws securing the expansion module housing and remove the housing from the dock. 1-54...
- Page 55 Installing Accessories 11. Remove the 3 ½ inch device mounting kit from the housing. 12. To install the device in the housing: For a 5 ¼ inch device, install the device in the bay and secure the expansion device in the housing using the four screws included with the device. –...
- Page 56 Installing Accessories b. Attach the device in the bay to the mounting kit. The four mounting screws may be on either the sides or bottom, depending on the device you are installing. c. Install the mounted device in the housing. 1-56...
- Page 57 Installing Accessories 13. Connect power cable 1 to the device, then connect either IDE cable 1 or the SCSI cable, depending on the type of module. The cables are labeled for easy identification. Connect audio cable 1 to the module (if needed). Both the power cable and audio and power cables have two connectors.
- Page 58 Installing Accessories 15. Secure the housing with the two screws you previously removed. 16. Carefully place the top of the dock onto the base of the unit about 1 cm (1/2 inch) back and slide the top forward until the five screw holes are properly aligned.
- Page 59 Installing Accessories 17. Install the five screws you removed previously. You have completed installation of the PC expansion device. 1-59...
-
Page 60: Formatting A Hard Disk In The Pc Device Bay
Installing Accessories Formatting a hard disk in the PC device bay After installing a new hard disk in the PC device bay, you will need to format the disk. Follow the instructions below for your operating system. . Formatting a hard disk in Windows 95 and Windows 98 Note The following procedure describes how to format a hard disk drive with a single primary DOS partition. - Page 61 Installing Accessories 16. Under Create DOS partition or Logical DOS Drive, select 1 (Create Primary DOS Partition) and press Enter. 17. At the prompt “Do you wish to use the maximum available size for a primary DOS partition”, enter Y. 18.
-
Page 63: Troubleshooting
Troubleshooting 1-63... -
Page 64: Troubleshooting
Look at the online Help for Windows and other applications. Find technical information about the OmniBook on the Internet—visit the Support website at http://www.hp.com/omnibook. See other books about Windows, MS-DOS, and other applications. Check your local library or bookstore. -
Page 65: Solving Problems
Troubleshooting Solving Problems Solving Problems If you have a problem using the dock, find the symptom that matches your situation. Try the suggestions one at a time. If the amber Wait light remains on after you dock the OmniBook and the OmniBook does not recognize devices connected to the dock You may have an older BIOS installed in your OmniBook. - Page 66 Troubleshooting Solving Problems If a connection does not work Try connecting the device to the corresponding port on the OmniBook. This can tell you if the problem is with the dock. Make sure the OmniBook is fully inserted in the dock. The connection should be snug.
- Page 67 Troubleshooting Solving Problems If a PCI accessory board is not recognized by the Omnibook Make sure the drivers for the PCI accessory board are installed. See the instructions provided with your PCI board. If the SCSI device in the PC device bay is not working properly Check that the SCSI, power 1, and audio 1 (if required) cables are securely connected to the device.
-
Page 69: Specifications And Regulatory Information
Specifications and Regulatory Information 1-69... -
Page 70: Specifications And Regulatory Information
Specifications and Regulatory Information Your OmniBook dock is designed to provide trouble-free operation. The following suggestions can help you while working with your OmniBook: If you have problems, see the problem-solving suggestions and references listed in chapter 3. Observe the temperature limits and other specifications listed in the next section. -
Page 71: Specifications
Specifications and Regulatory Information Specifications 240-pin docking connector. Parallel DB25 (EPP/ECP and floppy drive). Serial DB9 (115,200-bps). VGA port, D-sub 15-pin female connector – DDC compliant. 6-pin external keyboard connector. 6-pin external PS/2 mouse connector. Compact SCSI-2 connector. Three audio jacks for Speaker-out, Line-in, and Microphone-in. AC power connector. -
Page 72: Regulatory Information
Specifications and Regulatory Information Regulatory Information This section presents information that shows how the dock complies with regulations in certain regions. Any modifications to the dock not expressly approved by Hewlett-Packard could void the authority to operate the dock in these regions. -
Page 73: Canada
(415) 857-1501 declares that the product(s) Hewlett-Packard Company HP F1477A Docking System Complies with Part 15 of the FCC Rules. Operation is subject to the following two conditions: 1. This device may not cause harmful interference, and 2. This device must accept any interference received, including interference that may cause undesired operation. -
Page 74: Europe
Hewlett-Packard Company Mobile Computing Division 19310 Pruneridge Ave. Cupertino, CA 95014 declares that the following product Product name: HP F1477A Docking System Options: conforms to the following product specifications Safety: IEC 950:1991+A1,A2, A3 / EN 60950 (1992)+A1,A2,A3 EMC: CISPR 22:1993 / EN 55022 (1994): Class B [1]... - Page 75 Index contacting HP, 1-70 creating hardware profile, ac power, 1-12 1-23 Fn key accesories + F5, 1-31 installing, 1-38 external, 1-25 Declaration of Conformity, accessories formatting hard disk, 1-60 1-74 plug-in, 1-45, 1-46 device audio display, 1-30 hard disk troubleshooting, 1-66...
- Page 76 SVGA, 1-30 display, 1-30 system off button, 1-20 keyboard, 1-25 manual undocking, 1-18 MicroSaver lock, 1-21 mouse, 1-26 modem, 1-27 printer, 1-32 technical specifications, module bay adapter SCSI device, 1-27 1-71 installing, 1-40 serial device, 1-27 temperature, 1-71 using, 1-39 USB, 1-29 troubleshooting monitor.