Table of Contents
Advertisement
Advertisement
Table of Contents

Related Manuals for GE 30542EE1


Summary of Contents for GE 30542EE1
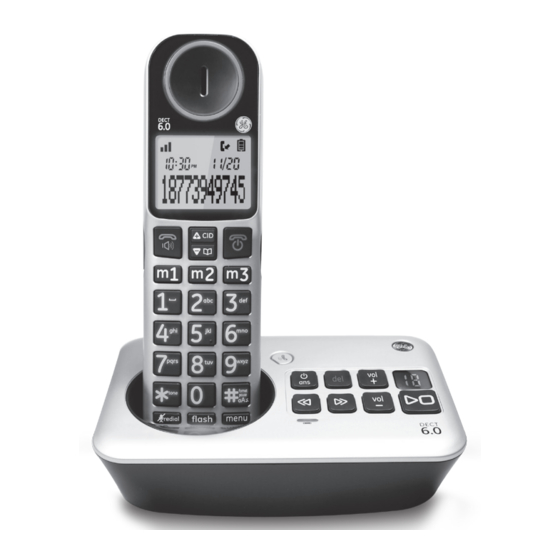
- Page 1 DECT 6.0 CORDED CORDLESS TELEPHONE Model number: 30542...
- Page 2 Thank you for choosing GE! Register your product Please take a moment to register your product online. Just go to www.gephones.com and click “register here” from the home page. Provide your email address and receive product updates, special offers, or discounts on future purchases.
-
Page 3: Table Of Contents
Table of contents Getting started Auto Talk ................15 Parts checklist ..............1 Clock and alarm Telephone base and charger installation ...2 Date and time ...............16 Telephone jack requirements ........2 Alarm .................16 Battery installation............3 Phonebook Overview Add a phonebook record .........17 Telephone base layout ..........4 Memory location ............17 Handset layout ..............5 Character table ............18... - Page 4 Advanced settings Registering a handset ..........27 Deregistering a handset ...........27 Appendix Troubleshooting guide ..........28 General Product Care ..........29 Important Safety Instructions .......30 FCC Parts 15, 68 and ACTA ........33 One Year Limited Warranty ........36 Index ..................38 Technical specification ..........40 Remote access operation card ......41...
-
Page 5: Getting Started
Getting started Parts checklist Your telephone contains the following items. Save your sales receipt and original packaging in the event warranty service is necessary. digital answering system Power adapter for telephone base Telephone base Handset (1 for 30542XE1 2 for 30542XE2 3 for 30542XE3 4 for 30542XE4) Charger with adapter attached... -
Page 6: Telephone Base And Charger Installation
Getting started Telephone base and charger installation 1. Plug the smaller end of the power adapter into the power jack at the bottom of the telephone base, route the cord through the tabbed slot on the right. 2. Plug one end of the telephone line into the jack at the bottom of the telephone base, route the cord through the tabbed slot on the left. -
Page 7: Battery Installation
Getting started Battery installation CAUTION: 1. Use only the supplied rechargeable battery or equivalent replacement battery. See battery specifications on the Technical specification page or visit our website at www.gephones.com to find out how to order a replacement battery if necessary. 2. -
Page 8: Overview
Overview Telephone base layout Press to page all Press to turn the answering system on system handsets. or off. Press to delete the message during playback. Press and hold to delete all old messages when the digital answering system telephone is idle. Press to increase the volume during message playback or... -
Page 9: Handset Layout
Overview Handset layout • Press to review the • Press to review the call phonebook when the log when the telephone telephone is not in use. is not in use. • During a call, press • While in menu, press to to increase the incoming scroll down. -
Page 10: Battery Charging
Overview Battery charging The following table summarizes the battery charge indicators and what actions need to be taken. Battery indicators Battery status Action Battery icon is scrolling. Battery is charging. Keep the handset in the telephone base or charger when not in use. Battery icon is on Battery is completely The handset is ready for use. -
Page 11: Handset Screen Display Icon
Overview Handset screen display icon Item Meaning • Displays when the telephone base is within reception range. • Scrolls to indicate battery charging when handset is in the telephone base or charger. • Flashes and empty when battery level is low. •... -
Page 12: Initial Setting
Initial setting Dialing mode The default dialing mode is TONE for touch tone dialing. If you have pulse or rotary service, you can change this setting to accommodate your telephone line service. 10:30 11/20 Dialing Mode 1. Press Reset VMWI 2. -
Page 13: Telephone Operation
Telephone operation Make a call 1. Press 2. Dial the phone number. Predial a call 1. Dial the phone number using the dial pad keys. If you make an error while dialing, you can press to erase the last digit entered. redial 2. -
Page 14: Equalizer
Telephone operation Equalizer This feature allows you to change the balance of the audio of the handset to best suit your hearing. Press the EQ button on the right side of the handset to switch between Natural, Bass or Treble during a call. Make a call using the redial memory The last five telephone numbers previously dialed are stored in the redial list (up to 24 digits each). -
Page 15: Call Waiting Or Call Waiting With Caller Id Service
Telephone operation Call waiting or call waiting with caller ID service To use call waiting, you must subscribe to call waiting service from your telephone service provider. This feature allows you to receive calls while you are already talking on the phone. You will hear a call waiting alert tone when there is a second incoming call. -
Page 16: Intercom
Telephone operation Intercom The system allows an intercom call between two handsets registered to the same telephone base. 1. Press 2. Press to select Intercom and then press 3. Press to select the desired handset, and then press 4. Press to answer the intercom call on the other handset. -
Page 17: Handset Settings
Handset settings Ringer volume You can set the handset ringer volume from level 1 to level 5 or turn the ringer off. 1. Press 10:30 11/20 2. Press to select Handset Tones and then press Ringer Volume Ringer Tones 3. Press again to select Ringer Volume. -
Page 18: Equalizer
Handset settings Equalizer This feature allows you to change the balance of the audio of the handset to best sit your hearing. 10:30 11/20 1. Press Equalizer 2. Press to select Handset Setup and then press Handset Name 3. Press to select Equalizer and then press 11/20 10:30... -
Page 19: Auto Talk
Handset settings Auto Talk When this feature is activated, you can answer a call by lifting the handset from the telephone base or charger without pressing any keys. The default is set to off. To turn this feature on or off: 10:30 11/20 1. -
Page 20: Clock And Alarm
Clock and alarm Date and time You can set the date and time of the telephone system as follows. 10:30 11/20 1. Press Set Date & Time 2. Press to select Handset Setup and then press Equalizer 3. Press to select Set Date & Time and then press 4. -
Page 21: Phonebook
Phonebook Add a phonebook record 1. Press on the handset. NOTE: You can also access the phonebook by pressing and selecting Phonebook. 2. Press once if your phonebook is empty, or press twice if your phonebook has stored entries to select New Entry. 3. -
Page 22: Character Table
Phonebook Character table Use the dial pad and the chart below to enter a name (up to 16 characters). Each press of a particular key displays the character in the following order: Dial pad Character by number of key presses space ‘... -
Page 23: Edit A Phonebook Entry
Phonebook Edit a phonebook entry 1. Press when the handset is not in use. 2. Press to locate the desired entry and then press 3. Press to select Edit and then press 10:30 11/20 Edit 4. Edit the name by using the key to erase and backspace, then redial Delete... -
Page 24: Caller Id
Caller ID Using Caller ID service IMPORTANT: You must subscribe to Caller-ID services from your service provider to use the Caller ID capabilities of this telephone system. Check with your telephone service provider for details. Caller ID records are stored in the order that they are received. Your telephone stores caller ID memory for the 40 most recent calls. -
Page 25: Delete Caller Id Record
Caller ID Delete caller ID record 1. Press 2. Press to locate the desired record. 3. Press to delete the selected record. redial -OR- Press and hold and then press to delete all records. redial Call log display screen messages Display When Unavailable... -
Page 26: Answering System
Answering system Turning the answering system on or off Using a handset 10:30 11/20 1. Press Answer On/Off 2. Press to select Answer System and then press Message Alert 3. Press again to select Answer On/Off. 10:30 11/20 4. Press to select Answer On or Answer Off, and then Answer On press... -
Page 27: Outgoing Announcement (Oga)
Answering system Outgoing Announcement (OGA) When the answering system answers a call, the pre-recorded outgoing announcement is played to the caller unless you have recorded your own outgoing announcement. Play the current outgoing announcement The following steps allow you to listen to the outgoing announcement you are currently using. -
Page 28: Number Of Rings Before The System Answers
Answering system Number of rings before the system answers You can select the number of rings before the answering system answers a call. 1. Press 10:30 11/20 2. Press to select Answer System and then press Number of Rings Announcement 3. -
Page 29: Call Intercept
Answering system Call intercept If you want to speak to the caller when the answering system is recording a message, press on a handset. The answering system will automatically stop recording when you do so. Message playback using the handset To listen to messages on a handset: 1. -
Page 30: Remote Code For Remote Access
Answering system Remote code for remote access Your answering system allows you to program a 3-digit remote code to get access to the system through any touch-tone telephone. The default remote code is 123. To change the remote code: 1. Press 10:30 11/20 2. -
Page 31: Advanced Settings
Advanced settings Registering a handset The telephone system can support up to a total of 5 handsets. Handsets that were included with your main base are pre-registered. To add or re-register a handset using a handset: 1. Press when the handset screen shows To Register Press Menu. 10:30 11/20 2. -
Page 32: Appendix
Appendix Troubleshooting guide If your telephone system is not operating properly, first try this general reset procedures: 1. Unplug all power adapters from the power outlets. 2. Disconnect the telephone line cord from the base or modular jack. 3. Remove the battery compartment covers and unplug all handset battery packs. 4. -
Page 33: General Product Care
Appendix Caller ID Problem Cause/solution Caller-ID • You must subscribe to Caller ID service from your telephone information is service provider. not displayed. • Make sure the base unit is plugged directly into a telephone modular jack. If you are using a line with DSL service, make sure you have properly installed the DSL filters supplied by your service provider. -
Page 34: Important Safety Instructions
Appendix Important Safety Instructions Some of the following information may not apply to your particular product; however, when using telephone equipment, basic safety precautions should always be followed to reduce the risk of fire, electric shock and injury to persons, including the following: 1. - Page 35 Appendix B. The product has been exposed to rain or water. C. The product does not operate normally by following the operating instructions. D. The product’s cabinet has been damaged. E. The product exhibits a distinct change in performance. 20. Avoid using a telephone during an electrical-storm. There may be a remote risk of electric shock from lightning.
-
Page 36: Save These Instructions
Appendix 14. Do not store this product, or the battery(ies) provided with or identified for use with this product, in high-temperature areas. Batteries that are stored in a freezer or refrigerator for the purpose of extending shelf life should be protected from condensation during storage and defrosting. -
Page 37: Fcc Parts 15, 68 And Acta
Appendix FCC Parts 15, 68 and ACTA This equipment is in compliance with parts 15 and 68, FCC Rules and Regulations and the Technical Requirements for Telephone Terminal Equipment published by ACTA. On the bottom of this equipment is a label indicating, among other information, the US number and Ringer Equivalence Number (REN) for the equipment. -
Page 38: The Equipment
Appendix If this equipment does cause harmful interference to radio or television reception, which can be determined by turning the equipment off and on, the user is encouraged to try to correct the interference by one or more of the following measures: •... - Page 39 Appendix This product meets ENERGY STAR program requirements for energy conservation. Selecting ENERGY STAR products is a responsible way to save energy and money while protecting our environment. ENERGY STAR is a U.S. registered mark. The RBRC seal on the battery used in your product indicates that CCT is participating in the Rechargeable Battery Recycling Corporation (RBRC) program to collect and recycle rechargeable batteries.
-
Page 40: One Year Limited Warranty
Appendix One Year Limited Warranty CCT Tech USA Inc. (CCT), the licensed manufacturer of this GE® branded product, warrants this product to the original retail purchaser to be free of material and/or workmanship defects for a period of one year after the date of original retail purchase. Proof of the original purchase is required to obtain a remedy under this limited warranty and the product must be returned to CCT at your expense. - Page 41 Appendix How To Obtain Warranty Service Call our customer service center at 1-877-394-9775. Our customer service specialist will assist you in obtaining warranty service. Please have a paper and pencil handy to write down the warranty service return instructions. -OR- You may visit our web site at www.gephones.com for troubleshooting, FAQs, and information on warranty service.
-
Page 42: Index
Appendix Index Alarm 16 Important safety instructions 30 Answer a call 9 Initiate an intercom during a call 12 Area code 8 Intercom 12 Audio boost 9 Auto Talk 15 Language 14 Battery charging 6 Battery installation 3 Make a call 9 Message Alert 24 Message capacity 22 Caller ID 20... - Page 43 Appendix Ringer melody 13 Ringer volume 13 Speakerphone 9 Telephone base installation 2 Telephone base layout 4 Troubleshooting guide 28 Volume control 9 Warranty 36...
-
Page 44: Technical Specification
Appendix Technical specification Radio frequency band DECT 6.0 (1910MHz to 1920MHz) Telephone base input voltage and current 6VDC 500mA Charger input voltage and current 6VAC 300mA Battery specifications 2.4V 550mAh... -
Page 45: Remote Access Operation Card
Appendix Remote access operation card The remote access card below lists the commands needed to operate your answering system remotely from any touch-tone telephone. Cut along dotted line Remote access operation card 1. Call your telephone number from a touch-tone telephone. 2. - Page 46 visit our website: www.gephones.com is a trademark of General Electric Company and is under license by CCT Tech USA Inc., Irving, TX 75039 ©2011 CCT Tech USA Inc. Model 30542 P/N: 480-01450-000002 Distributed in the U.S.A. by Version 1 02/2011 CCT Tech USA Inc.